Fabric Bunting Pattern (5 different styles to choose from!)
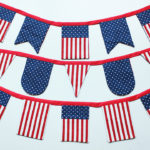
Sew a fabric bunting with this easy pattern and tutorial, which gives you options for creating bunting pieces in five different styles: rectangle, notched rectangle, triangle, scalloped, and color-block.
Yield: 1 bunting
Cost: 15
Equipment
- Sewing Machine
- Sewing Shears
- Iron
- Seam gauge
- Washable marking pen
- Corner turning
- Hair clips or sewing clips
Materials
- Fabric bunting pattern
- Fabric (2 different designs)
- Medium weight sew-in interfacing
- Extra wide double fold bias tape
- Coordinating thread
Instructions
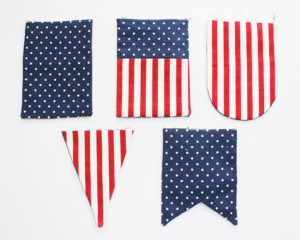
- Print and cut out the pattern templates for the bunting style(s) you want to use. For the triangle, rectangle, notched rectangle and scallop bunting, you will need to cut the following for each flag on your banner: 2 fabric body pieces, 1 interfacing piece.For the color-blocked version, you will need to cut the following pieces for each flag on your banner: 1 top front fabric piece, 1 bottom front fabric piece, 1 back piece, and 1 interfacing piece.
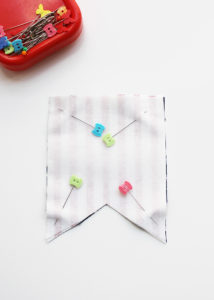
- For all but the color-blocked fabric bunting, you'll assemble the sections for your banner as detailed below.Lay one of the fabric body pieces face up on your work surface. Place the second fabric body piece face down on top of the first fabric piece, right sides facing, so that all of the edges are precisely aligned. Align the interfacing piece in the same manner on top of the fabric layers. Pin all of the layers together.
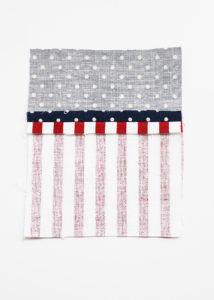
- The steps for the color-blocked fabric bunting version are identical to the steps outlined above, but before you stack and pin the three layers together, assemble the front piece. Align the bottom edge of the top (smaller) section with the top edge of the bottom (larger) section and pin. Use a 1/4" seam to stitch the sections together and then press the seam open, as shown below. Once the piece is assembled, you will follow the steps outlined above to stack and pin the layers.
- Using a 1/4" seam, stitch along the left, bottom and right sides of the piece, leaving the top edge open for turning. Trim the seam to 1/8". Turn the piece right side out through the top opening, using a point/seam turning tool to make the corners and edges as crisp as possible. Press the piece flat. Repeat the steps above until you have the desired number of finished pieces to add to your banner.
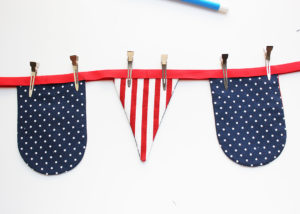
- Cut a piece of bias tape long enough for your finished number of bunting pieces. A fabric bunting with 5 pieces requires about 42" of bias tape. (For each additional bunting piece you wish to add, add 5" of length to that measurement.) Fold the length of bias tape in half, and mark the center with the marking pen. Place your first bunting piece so its center is aligned with the center of the bias tape. Encase the raw edge of the bunting piece inside the folded bias tape, and use clips to secure. (I have found that hair clips work great for this, and they are super inexpensive!) Use the seam gauge and marking pen to measure and mark 1.5" from the edges of the first bunting section.
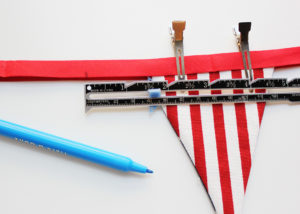
- Open up the bias tape, and place the next bunting piece so that its edge lines up with the mark you just made. Fold the bias tape down to encase the raw edge of the bunting section, and then use clips to secure. Continue adding the bunting sections in this manner until they are all clipped in place.
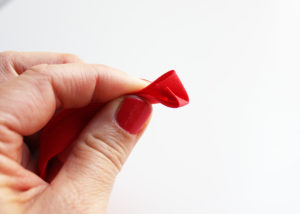
- To prevent the ends of the bias tape from fraying, open up each end and fold the edge down by about 1/2" and then close the bias tape back up. Pin.
- Starting at one end and working all the way to the other end, carefully stitch just inside the open edge of the bias tape, securing the bunting sections as you sew.
