Hocus Pocus Oreos
Make yummy Halloween Oreos that look like the Sanderson sisters from Hocus Pocus!
Equipment
- Paring knife
- Round piping tips (recommended sizes 1, 2, 8, and 10)
- Piping tip couplers
- Small microwave-safe bowls for melting the candy wafers
- Parchment paper
Ingredients
- Double Stuf Golden Oreos see my note in the original post
- Jumbo marshmallows
- Candy coating wafers: orange yellow, and purple (or a mixture of red and blue to create a purple color)
- Ready-made frosting tubes: red black, and pink (make sure to purchase the tubes that fit a regular-sized piping tip)
- White jimmies sprinkles
Instructions
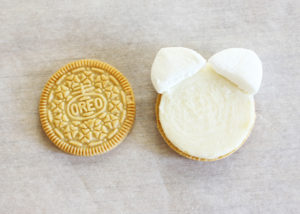
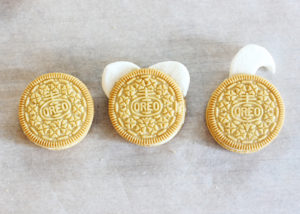
- Winifred Cookies: Use a paring knife to trim 1/4" off of one end of a marshmallow. Cut that piece in half, and pinch the tips a bit to give them a slightly pointed shape. Carefully twist an Oreo to separate the cookie sides. Firmly press the shapes into the cream filling to create the shape of Winifred's hair.
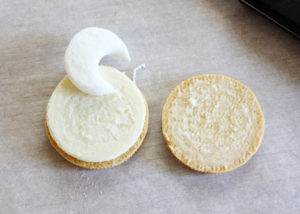
- Mary Cookies: Trim a 1/4" section from the end of one of the marshmallows. Using the large end of one of your piping tips, trim away a portion of the marshmallow from the right side of the circle piece to create a crescent shape, as seen below. Open one of the Oreos, and press the marshmallow shapes into the cream filling at the top center of the cookie.
- Sarah Cookies: Just use the Oreos as-is. Easy peasy!
- Now, press the cookie tops on the Winifred and Mary cookies back into place, making sure to press firmly but gently, as the cookies can break easily. The key here is to ensure the marshmallow pieces are anchored firmly in the cream between the cookie layers.
- Melt the orange, yellow, and purple (or a combo of red and blue) candy wafers in separate small microwave-safe bowls according to the instructions on the product packaging.
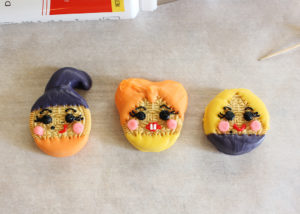
- For the Winifred cookies, dip the top portion of the cookie at an angle in the orange candy coating to coat each of the marshmallow pieces, as seen below. Use a spoon to spread out a small bit of the coating to create a little point for a widow's peak, just like Bette Midler's character. Allow the orange coating to dry completely. Dip the bottom edge of the cookie in yellow candy coating for Winifred's dress. Set aside to dry completely.
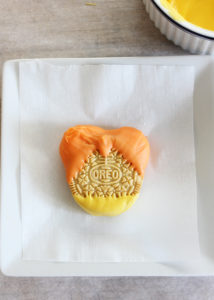
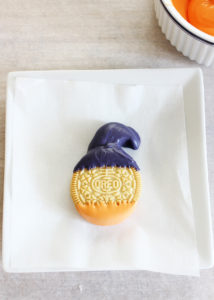
- For the Mary cookies, dip the top of the cookie, including the marshmallow crescent shape, in the purple coating so the coating extends about a quarter of the way down the cookie. It can be tricky to get the coating to cover the curve of the marshmallow shape, but using a small spoon or knife to spread the coating into the tight spaces works well. Allow the purple coating to dry until it is firm to the touch, and then dip the lower portion of the cookie in the orange candy coating to create Mary's dress. Allow the coating to set completely.
- For the Sarah cookies, dip the left and right edges into the yellow candy coating to form a "V" shape, as seen below. When the yellow coating is firm to the touch, dip the bottom portion of the cookie into the purple coating for her dress. Allow the candy coating to dry completely before moving on to the next step.

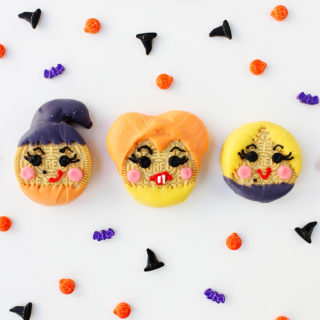
- Use the size 8 round tip to create eyes with black frosting.
- Use the size 2 round tip to create mouths with red frosting. For Mary, draw the mouth a little bit crooked to reflect her quirky attitude. For Winifred, draw the mouth in a typical lip shape (like the logo for the Rolling Stones), and then press on two white jimmies for her trademark teeth. For Sarah, draw a simple curved smile.
- Use the size 10 round tip to create cheeks with pink frosting.
- Use the size 1 round tip to create lashes and brows with black frosting, and small moles on Mary and Sarah.