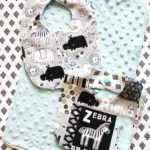
Easy Baby Bib Pattern
Sew a baby bib for a little one in your life with this easy pattern and tutorial.
Equipment
- Sewing Machine
- Iron
- Sewing Shears
- Fabric marking pen (I prefer Pilot Frixion markers, since the marks disappear when exposed to the heat of an iron)
- Seam creaser tool
- Snap setting tool
Materials
- PDF Baby Bib Pattern free download available in original post
- Flannel jersey knit, minky or other fabric, approximately 1/3 yard (Use contrasting fabrics for a reversible bib)
- 1 complete snap set I prefer to use plastic snaps for baby garments
- Coordinating thread
Instructions
- Use the pattern piece to cut out two bib body pieces. (Note that the bib collar flaps are not symmetrical, so you will need to make sure the pieces are cut as a mirror image of each other to ensure they fit together properly.)
- Place the pieces together, right sides facing, aligning all outer edges. Pin. Use the marking pen to make two marks approximately 3 inches apart along the bottom edge of the pinned pieces. This will designate where to stop and start sewing to leave an opening for turning.Starting at one of the marks and ending at the other, stitch using a 1/4" seam allowance around the perimeter of the bib. Make notches along the bottom curved edges and each of the collar flaps, and snips around the curve of the collar, as shown. For a great explanation of when to notch and snip, check out this handy guide.
- Turn the project right-side out through the bottom opening, using the seam creasing tool to thoroughly turn all of the seams, paying special attention to the bottom curves and the collar flaps. Press the piece flat.
- Pin the bottom opening shut. Edgestitch 1/8" around the entire perimeter of the bib, closing the bottom opening as you go.
- Use the marking pen to create marks 1/2" from the top edge of the bib collar flaps. Set a female snap piece on one of the collar flaps and a male snap piece on the opposite flap, using the marks as a placement guide.