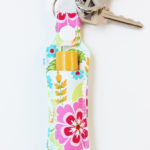
Chapstick Holder Keychain
Learn how to sew a chapstick holder keychain with this free pattern and tutorial. A great sewing project for beginners!
Equipment
- Sewing Machine
- Basic sewing supplies
- Tube turning tool
- Washable marking pen
- Snap setting pliers
Materials
- Chapstick Holder Keychain Pattern linked in original post
- Fabric scraps
- Fusible fleece
- Coordinating thread
- 1” split ring
- 1 size 15 plastic snap set
Instructions
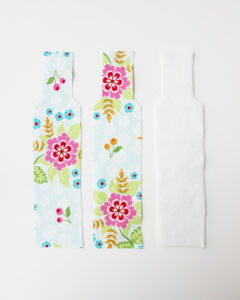
- To begin, print out the pattern (available in the original post) and use it to cut 2 fabric pieces and 1 fusible fleece piece.
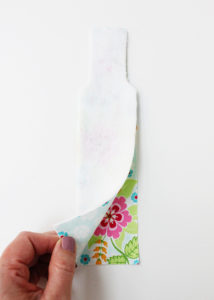
- Place the fused fleece/fabric piece face down on the other fabric piece, so the right sides are facing and all edges are aligned. Pin/clip to secure. Using a 1/4” seam allowance, stitch around the pieces, leaving the bottom edge unstitched. Trim the seam to 1/8”.
- Use the tube turning tool to turn the piece right side out through the bottom opening. (You can complete this step without the tool, but it makes things much easier if you have it!) Make sure to completely turn out the corners and seams of the piece before pressing everything nice and flat.
- Fold in the open bottom edges by 1/4”; press. Topstitch along this edge to close the opening.
- Fold the stitched edge up by 2.5” toward the top of the piece; press. Clip the folded pocket into place.
- Starting on the bottom left corner of the piece and working your way around the top flap and back around to the bottom right corner, topstitch to anchor the pocket into place. Increase your stitch length to make sewing through all of the layers easier.
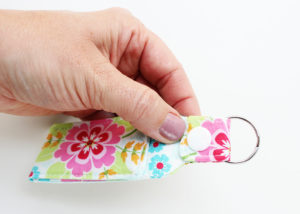
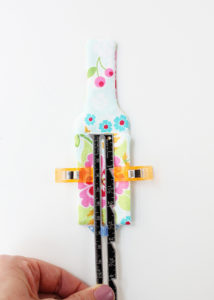
- On the top flap, measure down from the top center edge and make 2 marks with the marking pen: 1 mark 3/8” down from the edge and 1 mark 1 3/4” down from the edge.
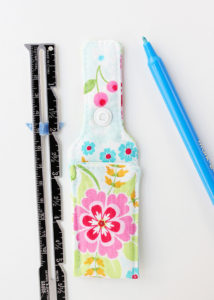
- Set the snap stud at the 3/8” mark with the stud of the snap on the front side and the cap on the back side. Set the snap socket at the 1 3/4” mark with the socket of the snap on the front side and the cap on the back side.
- Slip the jump ring over the top flap, and use the snap to secure it into place.