There are bloggers who continually inspire me with their amazing scope of talent, and my guest today is certainly one of those. Brittany does it all, friends. She wields a jigsaw just as well as a paper trimmer. I aspire to be as handy and creative as she is! Her blog, Pretty Handy Girl, is a gem brimming with DIY goodness, and I am so happy she could stop by Positively Splendid to share a brand-new project with us!
***
Thanks for inviting me to guest post on your blog today, Amy! Hello Positively Splendid readers! I know you know this already, but Amy is as sweet in person as she appears on her blog. We met briefly (way too briefly) at Blissdom and I really hope she attends next year so I can talk to her more.
Today I have a brand new project just for you. I created a tutorial for building a display shelf using a shipping pallet and a vintage bread crate. My cost was zero because I had all the materials and tools. But, even if you have to buy some of the materials, it should be a relatively inexpensive project. And the best part about this project is that I didn’t use any nails or screws to create it!

But, before we get to the tutorial, I think some introductions are in order. Hi, everyone, my name is Brittany (aka Pretty Handy Girl).

I write a blog, called what else, Pretty Handy Girl! My blog is filled with DIY tutorials for building things (like my son’s closet turned into a reading nook,)

or sewing things (like this bistro table cover-up,)

or fixing things (like replacing an old almond colored outlet)

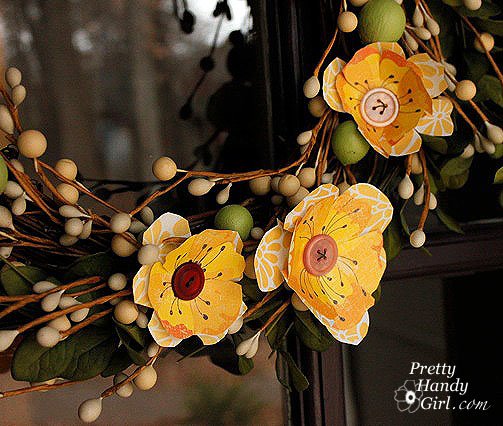
and crafting things like adding button and paper flowers to my ever changing seasonal wreath.
Recently, I found a vintage bread crate on the side of the road. Seriously, I’m not making this up, someone was actually throwing it away. I wanted to use the crate as a shelf in our bathroom. The crate was so beautifully weathered, that using new wood in it would have looked terribly wrong. Luckily I had some old shipping pallets in storage and decided to use the wood from the pallet for my shelf. By the way, Funky Junk Donna just wrote a fabulous post on how to determine if your shipping pallet wood is safe to use. I encourage you to read it before bringing home a wood pallet.

Materials & Tools:
- Crate or wooden box
- Shipping pallet or 1″ x 4″ boards
- Hammer
- Pry bar
- Gloves
- Saw (jigsaw, scroll saw, coping saw or any hand saw you have on hand)
- Sandpaper
- Power or hand sander
- Ruler
- Pencil
- Drill and a medium sized drill bit
Instructions:
Begin by prying 2-3 boards off the pallet using a pry bar and a hammer. (After much toil, sweat and a few swear words, I prevailed and removed two boards!)

Next, measure the inside dimensions of your crate and cut the palette boards down to size.

For nine cubbies, I used four boards…

…two for the vertical and two for the horizontal aupports.

Dry fit the boards to make sure they will fit in your crate and then sand down the rough edges.

To create the shelving grid, we will be using a slot-to-slot interlocking design to connect the boards and form the cubbies. Mark the center location where each vertical board will cross a horizontal one. Then mark the thickness of each board around the center marks.

Draw the slot so it stops halfway through the board (as shown above).
To cut the notches out of the wood, drill two holes at the interior corners of the slots.

Then use a saw (scroll saw shown) to cut out the notches.

Fitting the boards together is as easy as connecting puzzle pieces. The notches should slide easily into one another. If not, try widening the notches slightly.

Gently hammered the cross shelves into the crate.

If you measured properly, the shelves should fit snugly into the bread crate. If they are loose, you will need to use some wood glue and a few finish nails to secure the grid of cubbies.
I’m sharing a tutorial on how to hang this bread crate cubby on my blog today. Once it is securely hung, you can fill it with some fun objects!

Believe it or not, I loved the cubby shelves so much, it became the motivator that pushed me to repaint the entire bathroom! Pretty Handsome Guy calls it the “Trickle Down Effect”. It happens a lot in our home.

If you would like to learn how to paint a room like the pros, you can view my tutorial series starting HERE.

Thanks for having me Amy and I hope I have empowered your readers to try their own project. Hope to see y’all soon at Pretty Handy Girl.
***
Love this project, Brittany! You know the heart I have for repurposing castaway objects! Thanks so much for sharing it with us!

Having grown up in a home brimming with sewing notions and paintbrushes, Amy has a deep love for all things creative. On any given day, you’ll find her knee-deep in her latest creative endeavor, with projects ranging from sewing and crafts to home decor and kid-friendly ideas. Amy believes that everyone, regardless of skill level or experience, possesses the ability to create something beautiful, and Positively Splendid was born of her passion for helping others harness their innate creative potential.
That is an awesome shelf! I love the details of the bread box and I also love that there was no nails or glue:)
great job. i love it.
That is so cute! I love it
Thanks for your sweet comments ladies. And thanks for having me over for the guest post, Amy!
Brittany (aka Pretty Handy Girl)
Oooh, great technique with the inside grid. Love the shelf. I’m waiting for the day that I stumble upon a vintage crate…still waiting…
Lovely!