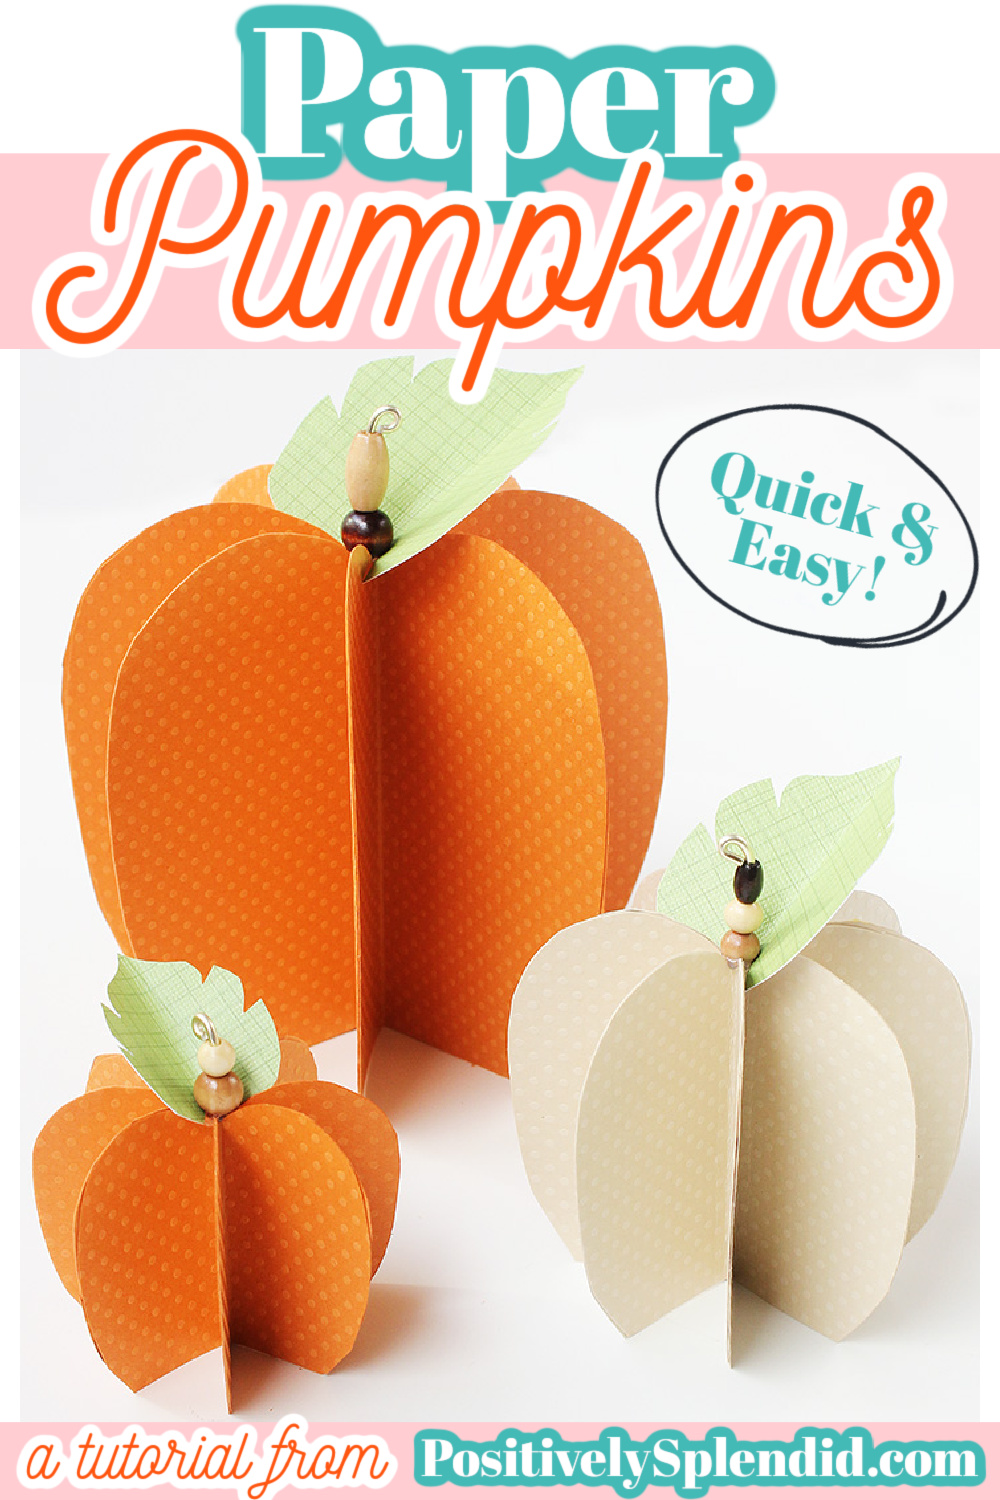
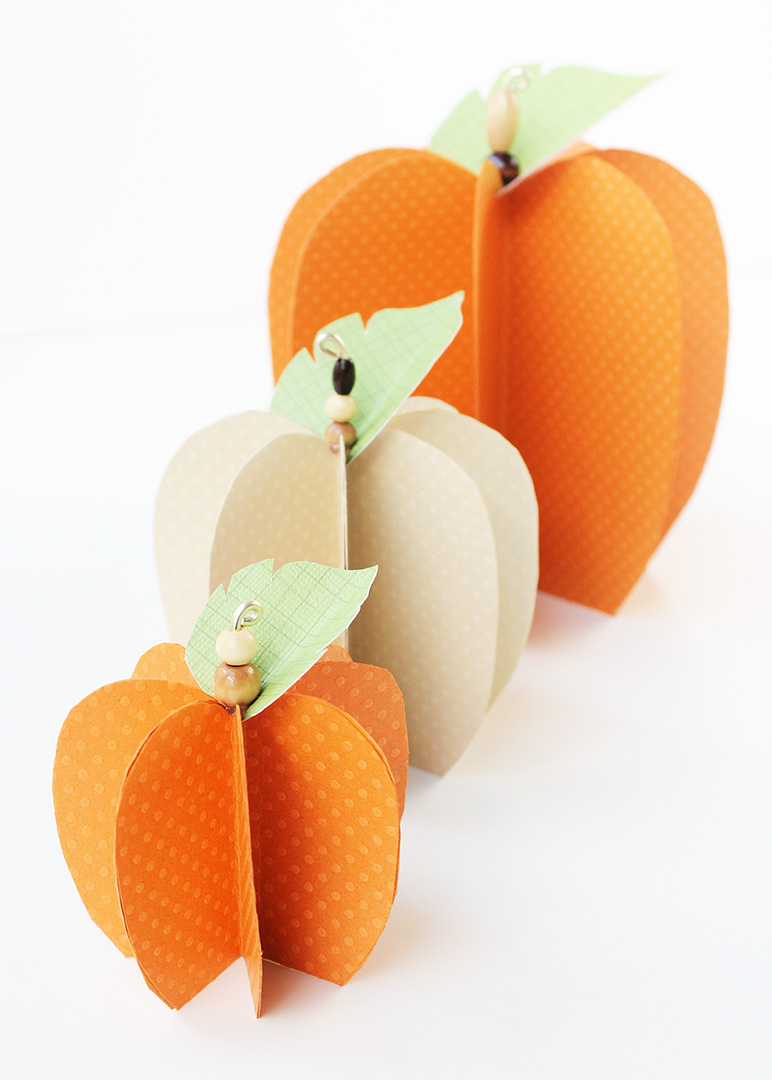
It is so satisfying to turn simple sheets of paper into a fun craft project! These easy paper pumpkins are a snap to make, and they are absolutely perfect for fall decorating. This guide for how to make paper pumpkins includes easy-to-follow steps and free templates for making pumpkins of three sizes. This is a great fall craft project for everyone from beginners to crafting veterans, and these DIY pumpkins are a great project to make with kids, too!

This post contains affiliate links.
More DIY pumpkins to make!
How to Make Paper Pumpkins
A PDF of these instructions is available below.
Supplies:
- Paper Pumpkin Tracing Templates (available for download below)
- Cardstock/scrapbooking paper (see my note below for recommended materials)
- Glue sticks
- 12-gauge aluminum wire (see note below)
- Wood beads (see note below)
- Hot glue
Tools:
- Paper trimmer
- Scoring blade (optional, but recommended)
- Pencil
- Scissors
- Needle-nosed pliers
- Hot glue gun
Check out my handy list of must-have craft tools for all of your projects!
Project Tips
- What type of paper is best for this project? I recommend 12×12” sheets of cardstock (or scrapbooking paper of comparable thickness), which gives the pumpkins the weight they need to keep their shape.
- How many sheets of paper will I need for each size of pumpkin? From one 12×12 piece, you can make two small pumpkins or one medium pumpkin. One large pumpkin requires two sheets of paper.
- How can I make sure my folds are crisp and even? A paper trimmer outfitted with a scoring blade like the one in the tool list above makes it a snap to ensure the squares are folded in half precisely.
- I don’t have any wire. What else can I use for the stems? Pipe cleaners are a nice alternative that will still enable you to thread on and secure the beads. Or, if you would rather not incorporate beads into your pumpkins, you can create a stem with a small rolled-up section of brown paper secured with hot glue.
- What type of beads do you recommend for this project? I like the look of wood beads for these paper pumpkins to give things a natural feel, but feel free to use any beads you like! Just make sure the center of your beads is wide enough to fit over the wire.
Let’s get started!
Paper Pumpkin Instructions
Cut Paper Squares
Use a paper trimmer to cut squares from the cardstock/paper. For each pumpkin, you will need 8 squares cut to the measurements below:
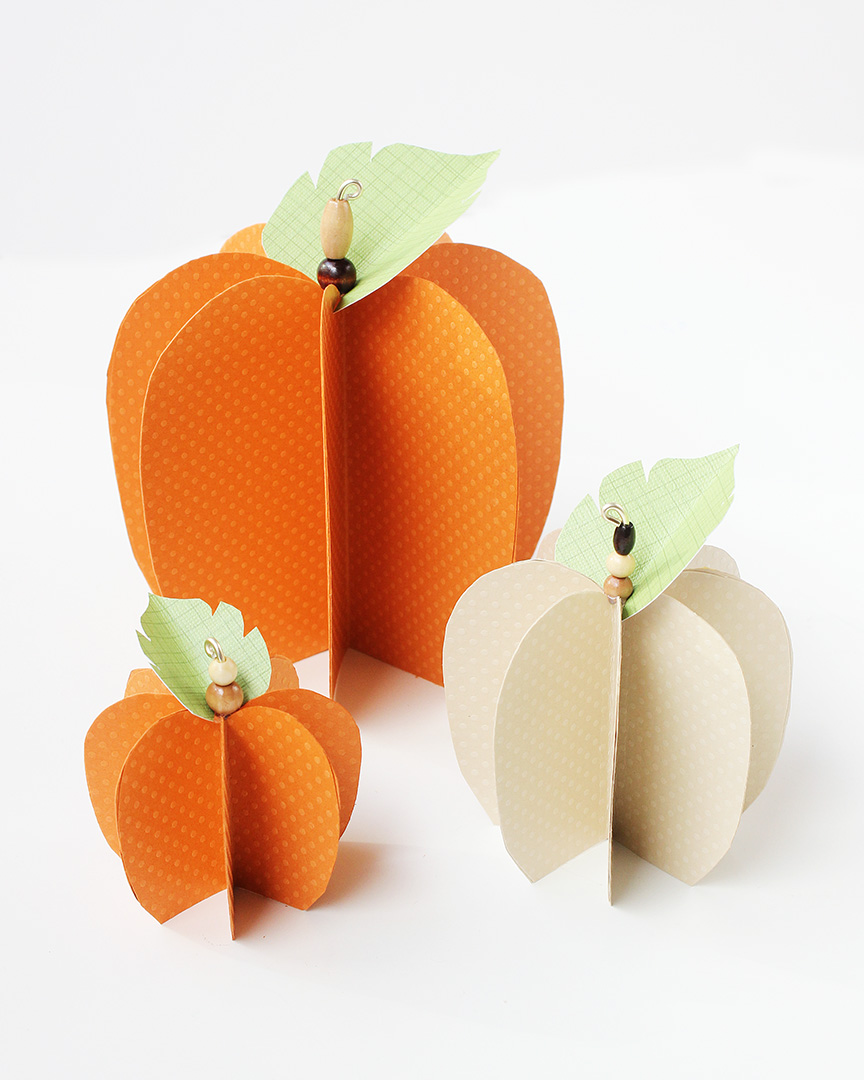
- Small pumpkins: 3” squares
- Medium pumpkins: 4” squares
- Large pumpkins: 6” squares
Fold each square in half, and set aside. (Using a paper scoring tool helps achieve even, crisp folds.) When working with paper that has a right/wrong side, make sure to fold the squares so the right side is on the inside of the folded pieces.
Trace, Glue, and Trim
Print and cut out the paper pumpkin tracing templates (available below).
Working with one of the folded squares, use the glue stick to evenly coat the front of the piece.
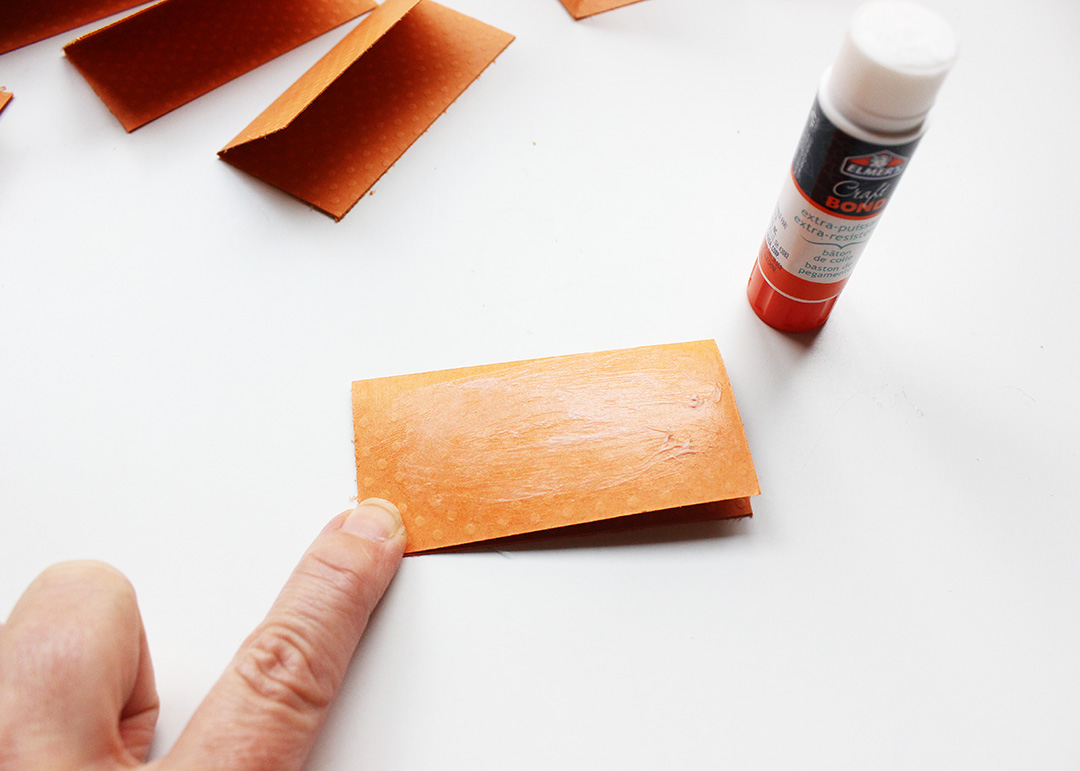
Glue a second folded square on top of the first one so that the folded edges meet and all outer edges and corners are precisely aligned. The glued pieces will look like the pages of a book.
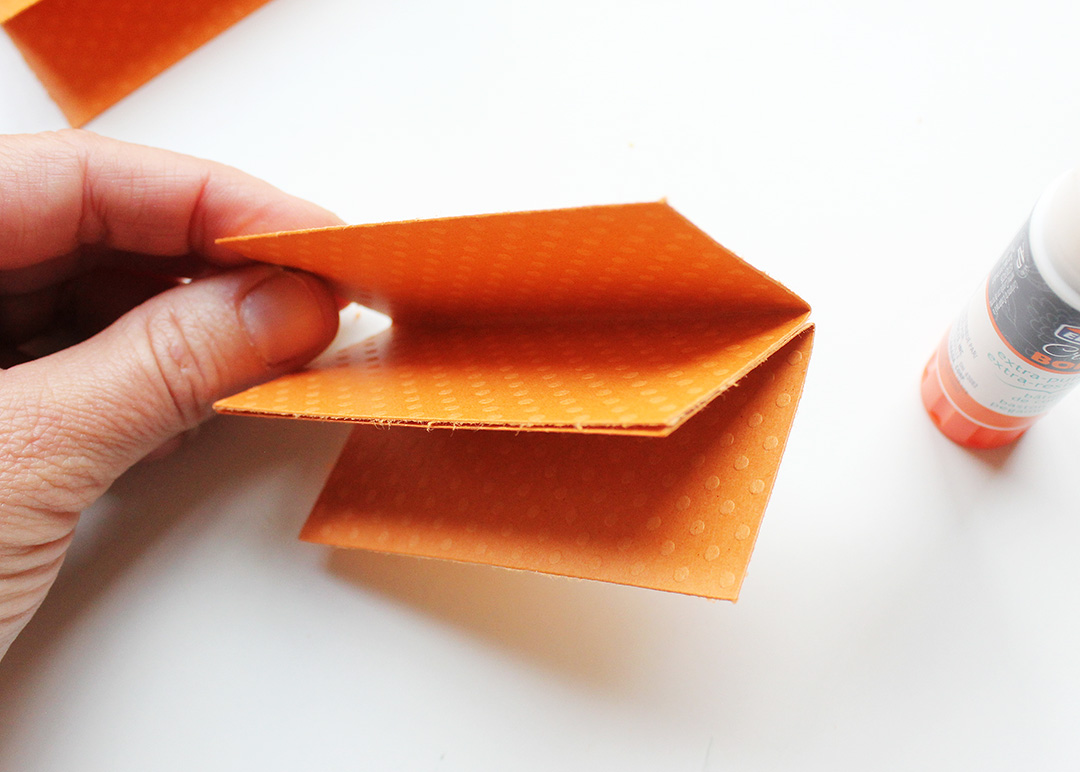
Use a pencil to trace the pumpkin template onto the adhered pieces, making sure to place the template on the folded edge as indicated. Trim around the traced line.

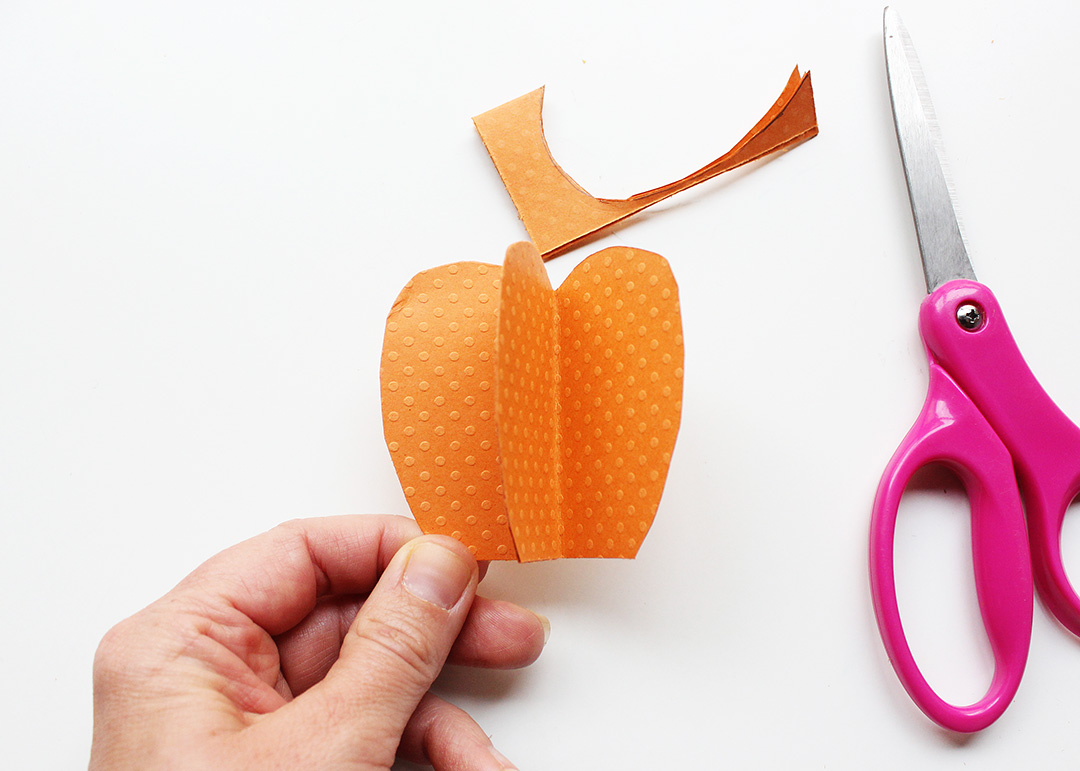
Repeat this process with the three remaining pairs of paper squares.
Assemble the Pumpkin
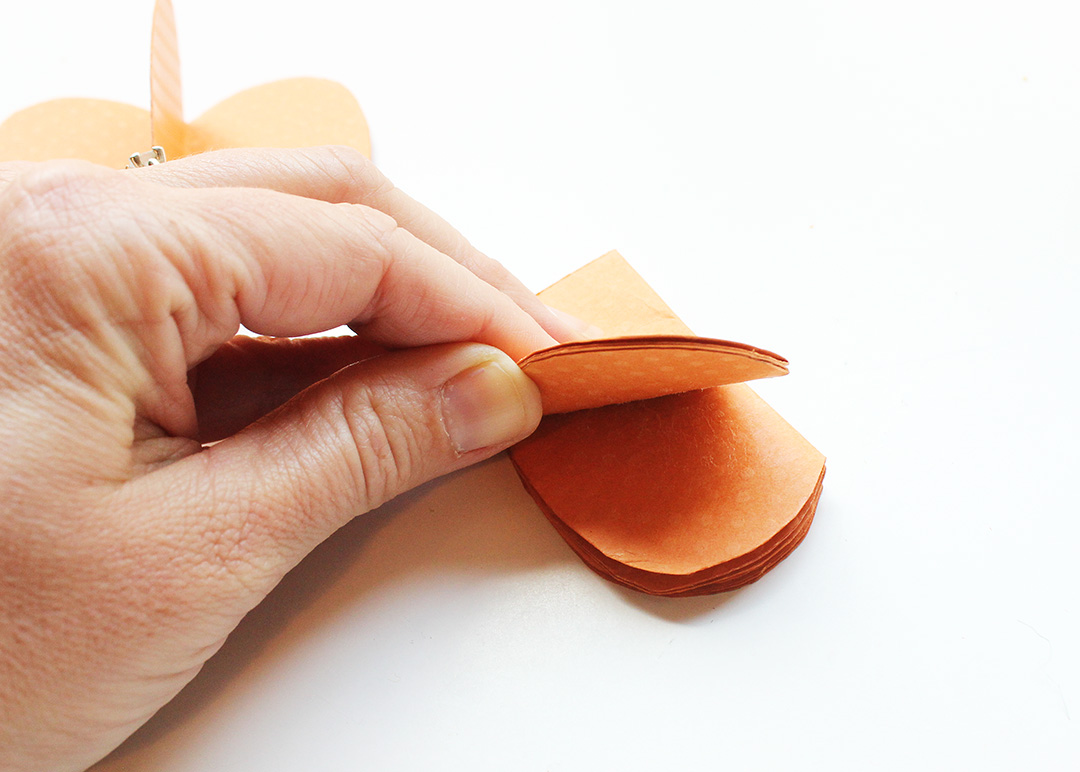
Fold one of the glued sections flat, and evenly apply glue with the glue stick to the front side. Place a second folded section on top of the first so that the folded edges match up and the curved edges are aligned. Repeat these steps to attach each of the remaining two sections. When you are done with this step, all of the 8 sections of the pumpkin should be glued together in a stack.
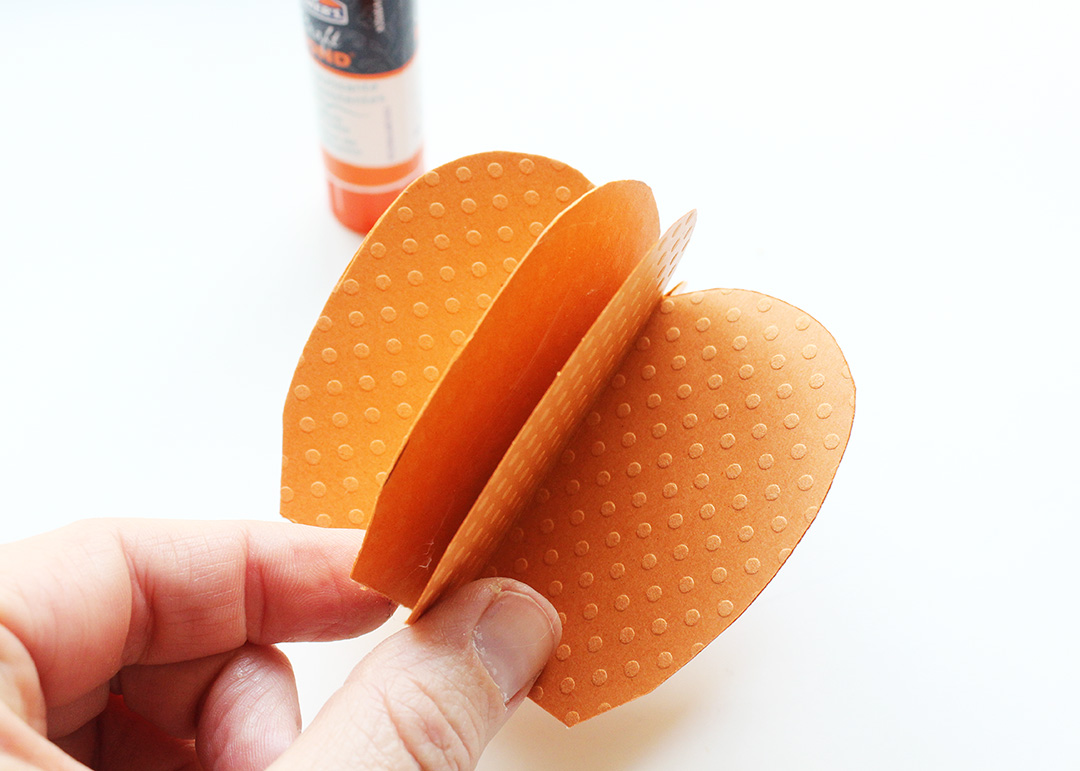
With the stack folded nice and flat, use the glue stick to apply an even layer of glue to the topmost flap. Bring the opposite end around and secure both ends to form a circle.
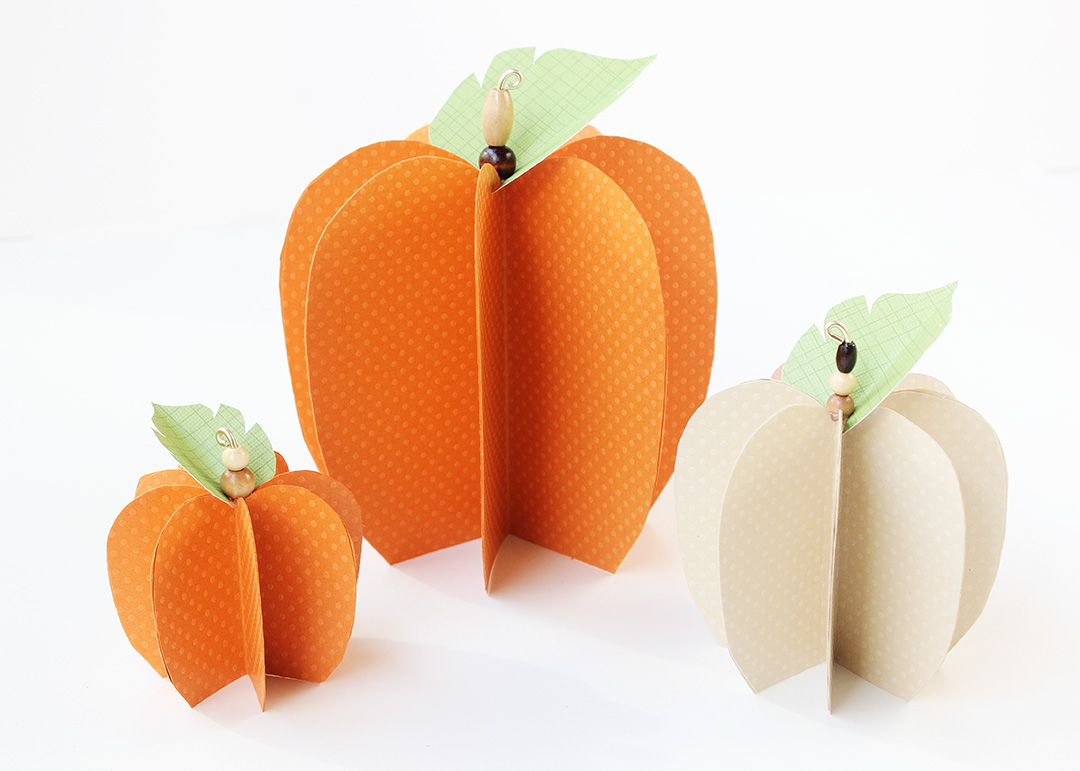
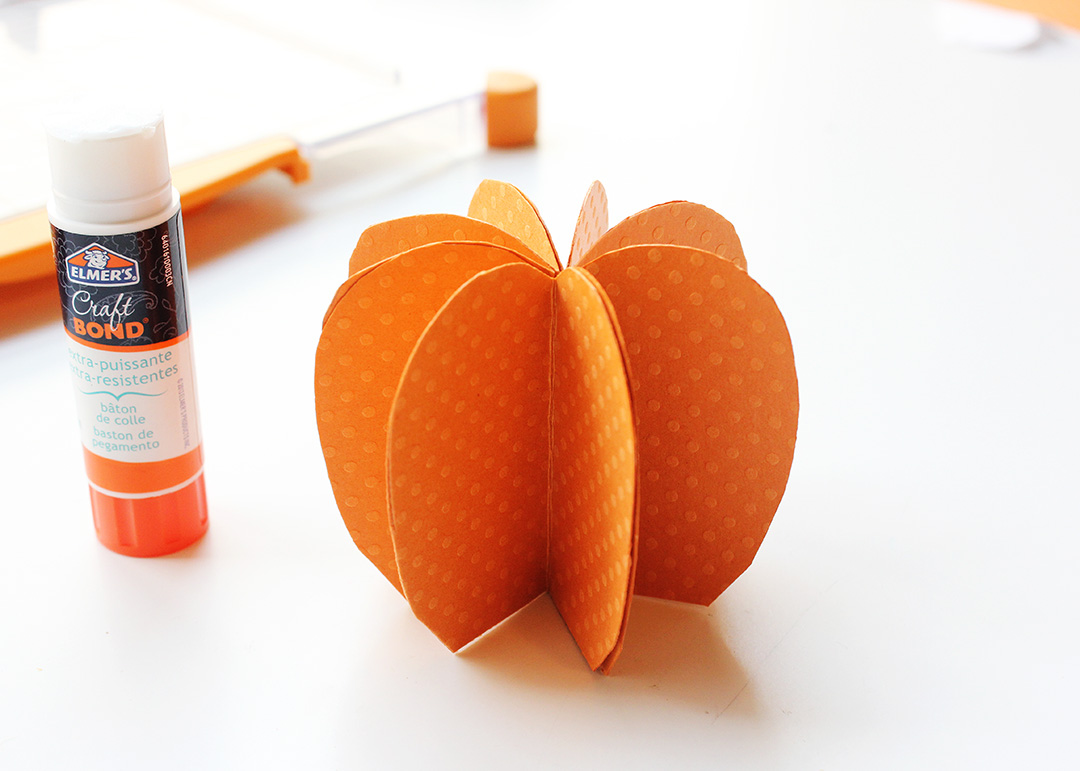
Houston, we’ve got a pumpkin! 😉
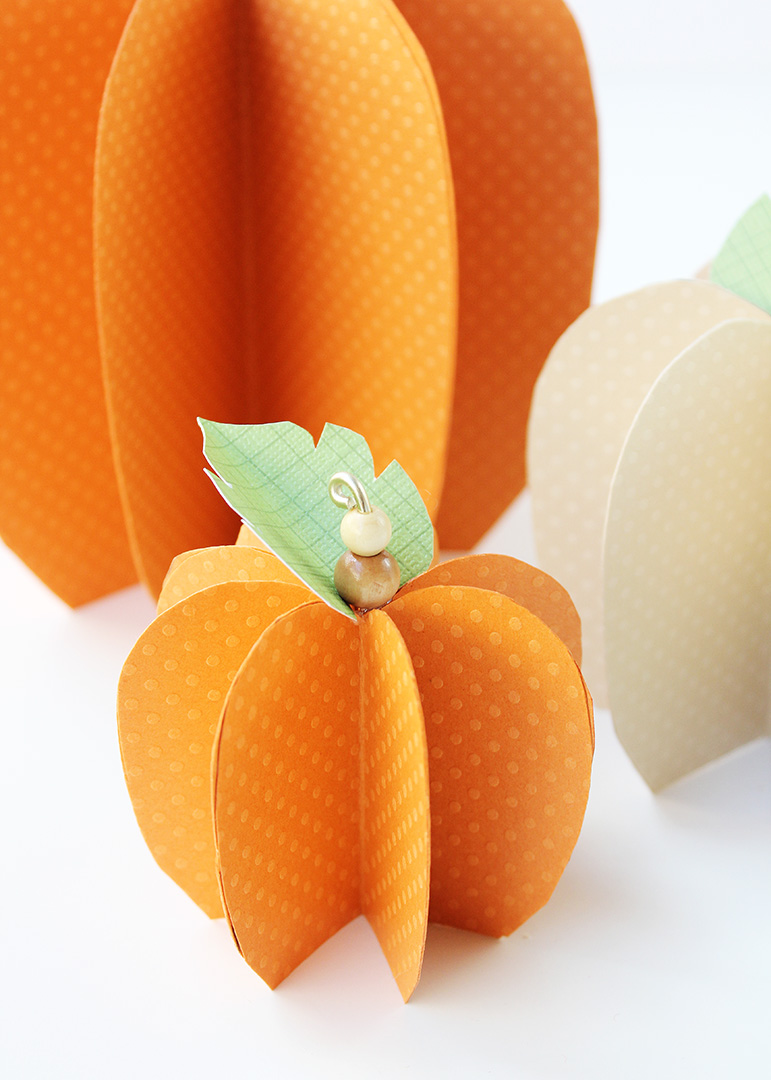
Attach a Stem and Leaf
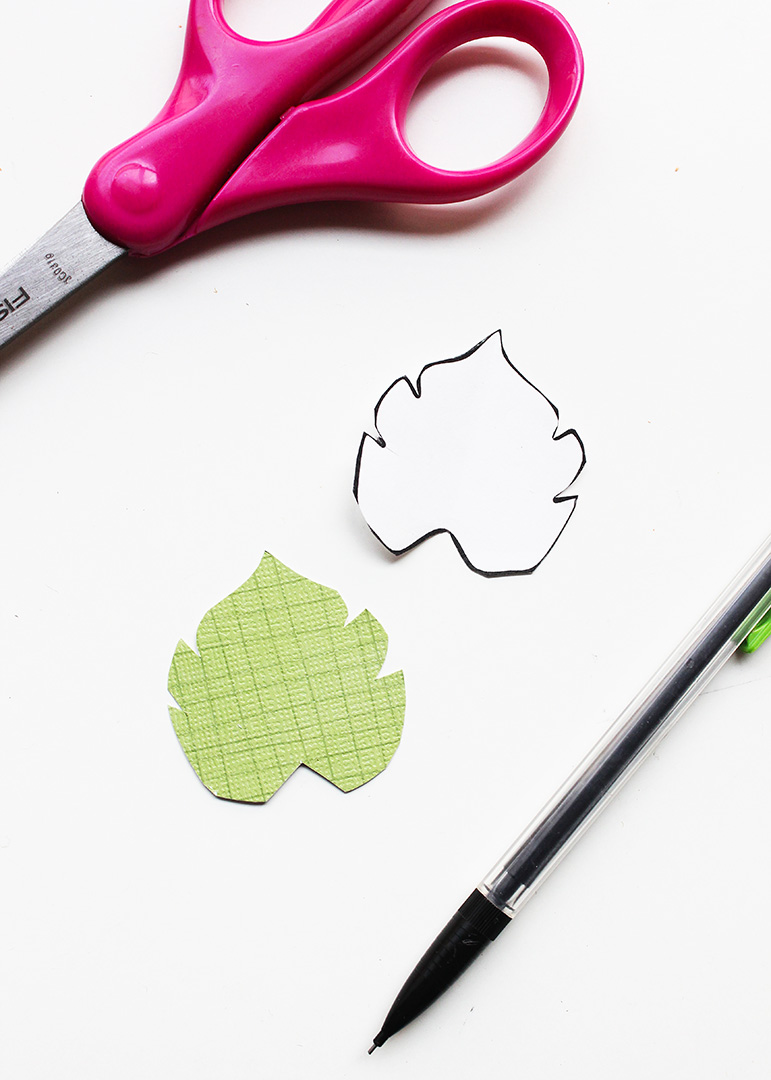
Trace the leaf template with a pencil onto green paper. Cut out and set aside.
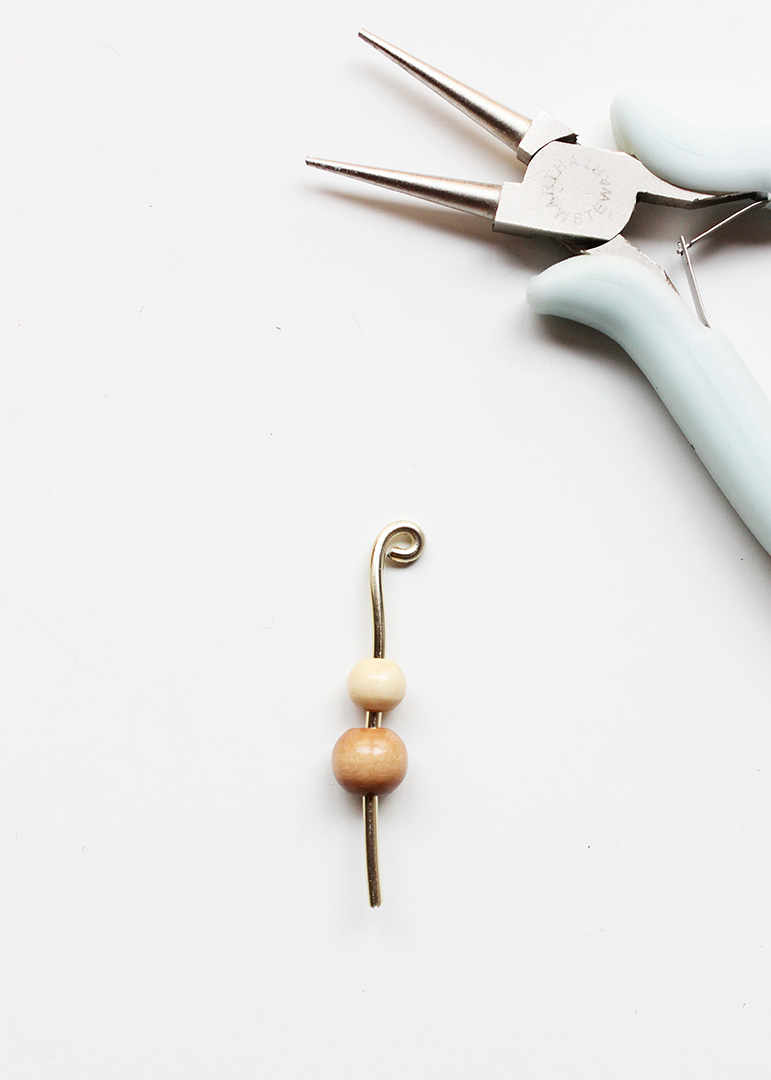
Trim a 2” section of wire, and use needle-nosed pliers to form a small loop at the end. Thread wooden beads as desired onto the wire.
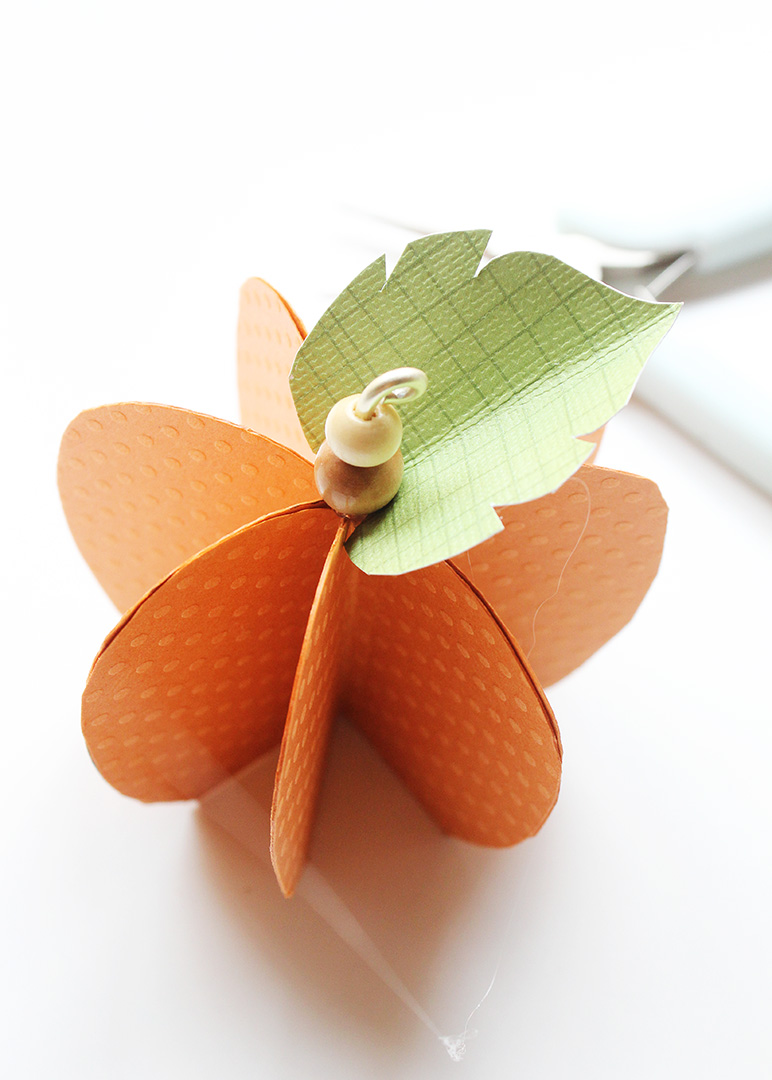
Apply a dab of hot glue to the top center opening of the pumpkin where all of the pumpkin sections meet.

Fold the leaf shape gently down the center. Place the notched end of the leaf at the top center of the pumpkin. Poke the straight end of the beaded wire down through the bead of hot glue into the small space at the center of all of the pumpkin sections. Apply a bit of pressure so the hot glue anchors the stem and leaf in place.
All finished!
These paper pumpkins are such a snap to make–perfect for beginners and experienced crafters alike!
These would be a great craft for a make-and-take with friends.
Ways to Display Paper Pumpkins
- String twine through the loop in the wire to form the pumpkin into a garland
- Display on a mantel or anywhere in your home that needs a touch of fall
- Incorporate the small paper pumpkins into a fall wreath or sign
- Use as a table centerpiece, or as cute place card holders
Click here to download the Paper Pumpkin Tracing Templates.
If you love paper crafts like this one, be sure to check out my Easy Paper Pinwheels and my Paper Bag Stars!
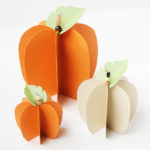
Easy Paper Pumpkins
Equipment
- Paper trimmer
- Scoring tool (optional, but recommended)
- Pencil
- Scissors
- Needle nosed pliers
- Hot Glue Gun
Materials
- Paper Pumpkin Tracing Templates available for download in the original post
- Cardstock/scrapbooking paper see my note in the original for recommended materials
- Glue stick
- Wire
- Wood beads
- Hot glue
Instructions
- Use a paper trimmer to cut squares from the cardstock/paper. For each pumpkin, you will need 8 squares cut to the following measurements: Small pumpkins: 3”; Medium pumpkins: 4”; Large pumpkins: 6”.
- Fold each square in half, and set aside. (Using a paper scoring tool helps achieve nice, crisp folds.)
- Print and cut out the paper pumpkin tracing templates.
- Working with one of the folded squares, use the glue stick to evenly coat the front of the piece. Glue a second folded square on top of the first one so that the folded edges meet and all outer edges and corners are precisely aligned.
- Use a pencil to trace the pumpkin template onto the adhered pieces, making sure to place the template on the folded edge as indicated. Trim around the traced line. Repeat this process with the three remaining pairs of paper squares.
- Fold one of the glued sections flat, and evenly apply glue with the glue stick to the front side. Place a second folded section on top of the first so that the folded edges match up and the curved edges are aligned. Repeat these steps to attach each of the remaining two sections to form a continuous piece.
- With the stack folded nice and flat, use the glue stick to apply an even layer of glue to the topmost flap. Bring the opposite end around and secure it to form a loop.
- Trace the leaf template with a pencil onto green paper. Cut out and set aside.
- Trim a 2” section of wire, and use needle-nosed pliers to form a small loop at the end. Thread wooden beads as desired onto the wire.
- Apply a dab of hot glue to the top center of the pumpkin where all of the folds meet. Fold the leaf shape gently down the center. Place the notched edge of the leaf around the top center of the pumpkin and then poke the straight end of the beaded wire down through the opening at the center of the pumpkin where all of the sections meet. Press firmly do the hot glue anchors the stem and leaf in place.
Having grown up in a home brimming with sewing notions and paintbrushes, Amy has a deep love for all things creative. On any given day, you’ll find her knee-deep in her latest creative endeavor, with projects ranging from sewing and crafts to home decor and kid-friendly ideas. Amy believes that everyone, regardless of skill level or experience, possesses the ability to create something beautiful, and Positively Splendid was born of her passion for helping others harness their innate creative potential.