Without a doubt, one of my favorite trims to work with when sewing is bias tape. I love that it can add such a professional flair to a project with a minimal investment of time and effort! Today, I am going to share some of my favorite bias tape tips and tricks, including my fool-proof bias tape sewing method that ensures you achieve the best possible results every time.
To begin, let’s talk a bit about bias tape. Bias tape is made by cutting strips of fabric on the bias (at a 45-degree angle) and then folding and pressing them in such a way that they can be wrapped around any raw edge of fabric and stitched in place to encase and finish the edge. It is possible to make your own bias tape, but today, we’ll keep everything super simple and use the ready-made version. There are a few different sizes and widths of ready-made bias tape, with the narrow single-fold tapes to the very wide blanket bindings, but today we are going to be using the most common form: extra-wide double-fold bias tape.
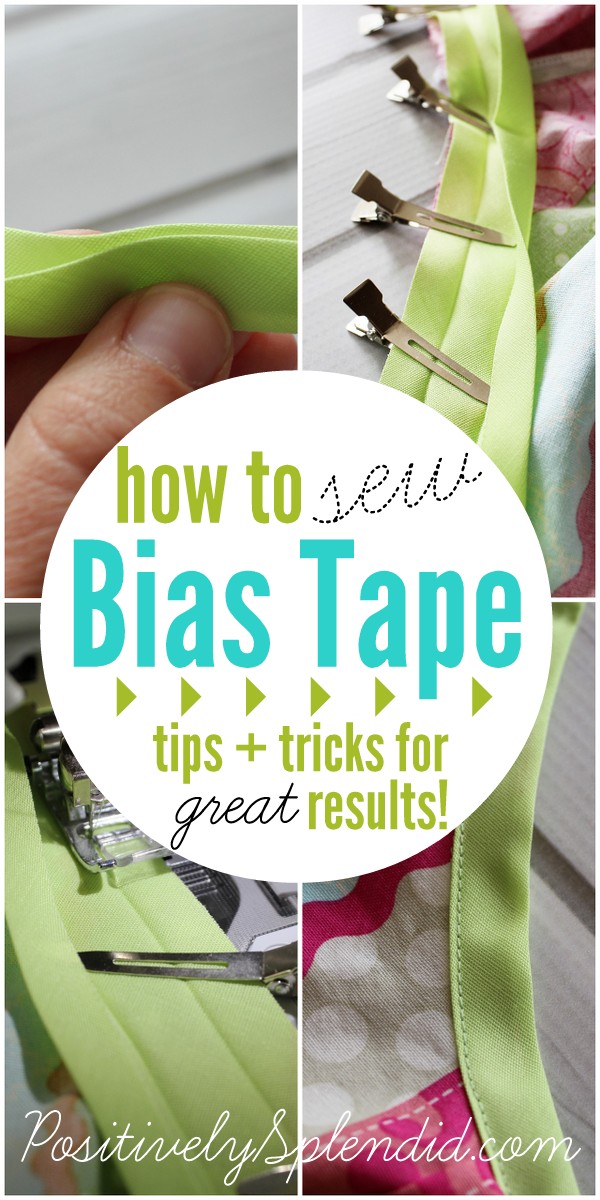
With any bias tape, the back side of the tape is slightly wider than the front, as you can see below. (This ensures that when you stitch the tape on from the front, it will be easier to catch the wider edge on the back side of the project as you go.)
In theory, it is entirely possible to simply wrap bias tape around any raw edge and stitch it on without doing any basting at all, which is how I used to do it. The bad part about that method for me was that oftentimes I would fail to catch the back side of the tape as I stitched from the front, meaning I would have to rip out stitches and try numerous times to get it just right. By adding just one simple step to my process and basting the tape to the fabric beforehand, I was able to eliminate the frustration of those missed back edges once and for all! Let me show you how, for both simple straight-edge applications, and applications that require overlapping the ends of the tape along an adjoining edge.
Method 1: Bias tape with open edges
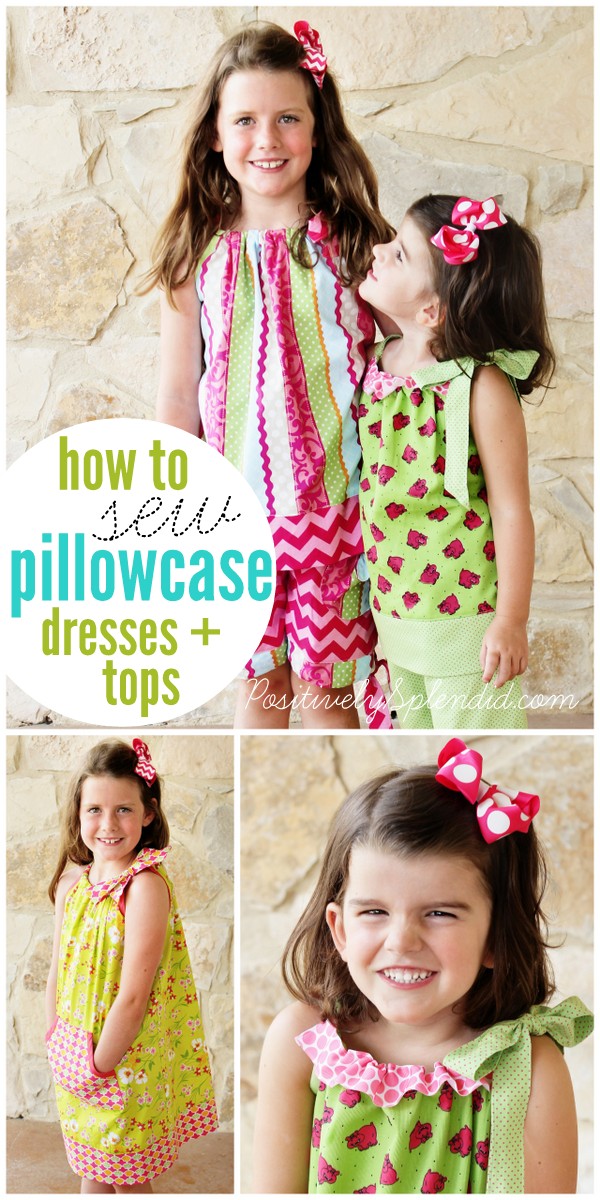
The easiest situations to sew bias tape are when you simply need to encase a single raw edge, without having to worry about joining the ends of the tape. A great example of this is when sewing the bias tape onto the armholes in my Pillowcase Dress and Top Tutorial.
Here are the steps to follow when applying bias tape along an open raw edge:
Step 1: Place the project on a work surface so the wrong side is facing up. Trim a piece of tape that is the same length as the edge to be encased.
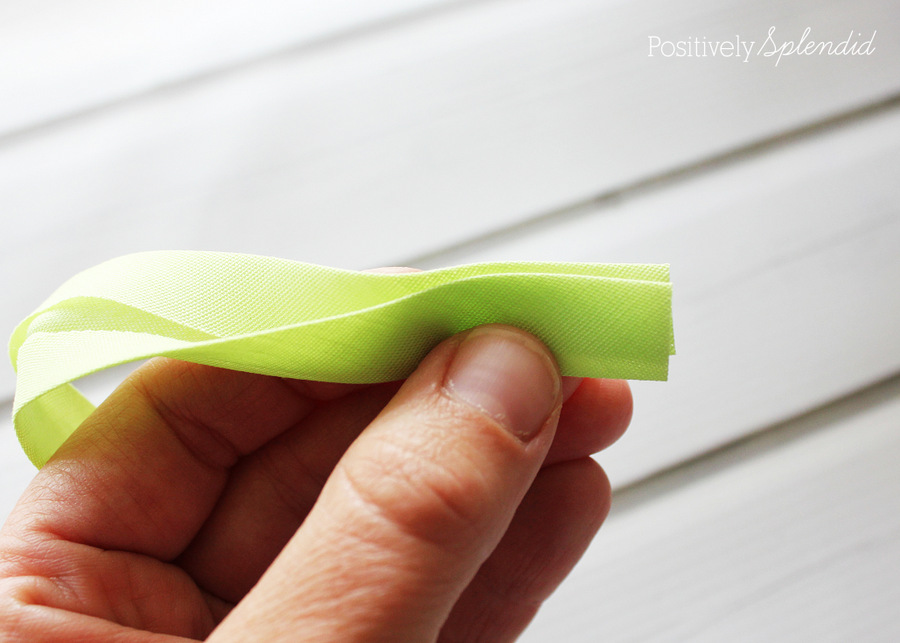
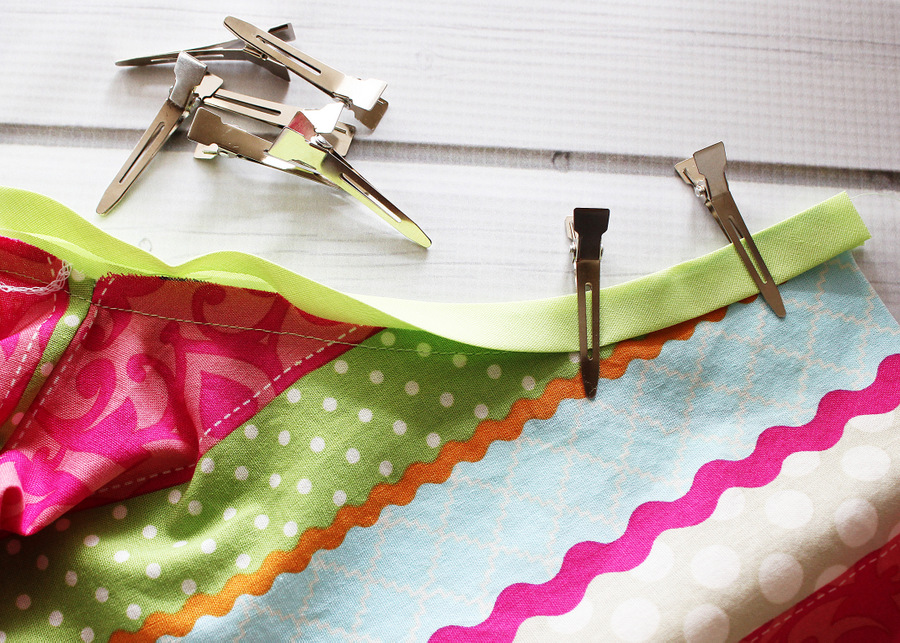
Step 2: Unwrap the bias tape, and find the wider side of the tape. With the tape open, affix the wide side of the tape to the back side of the project, aligning the raw edges, as shown. Instead of using standard sewing pins, I use flat hair clips for this purpose. (You can read more about why I love to use them here.)
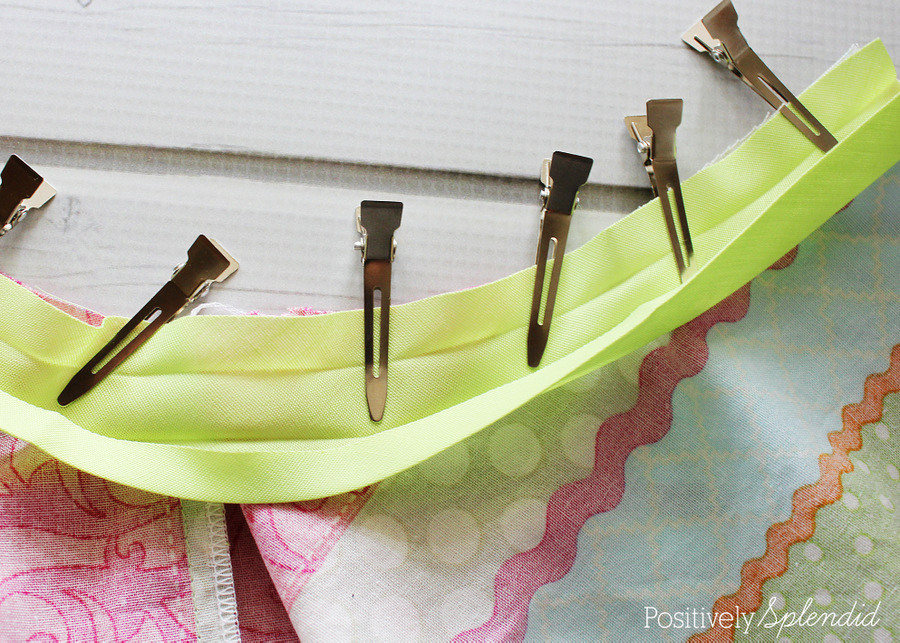
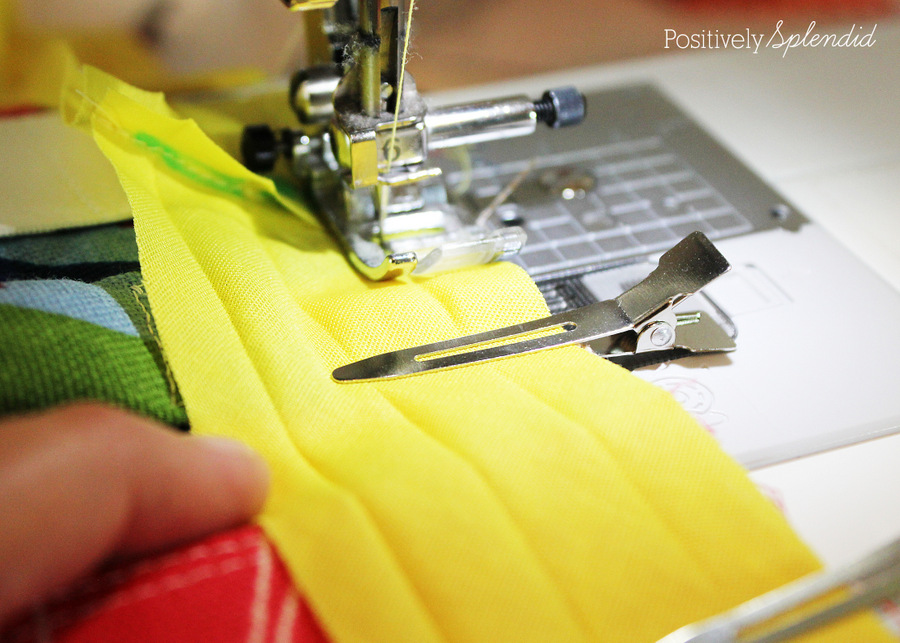
Step 3: Take the project over to your machine, and stitch along the folded crease of the tape, removing the clips as you go along. Be sure to backtack at the beginning and end of the stitching. Helpful hint: Use a bobbin thread that blends well with your main fabric for this step, even if it doesn’t necessarily match the bias tape itself.
Step 4: Place the project face up on the work surface. Wrap the bias tape up and over the raw edge of the fabric, and secure with clips. The edge of the bias tape should just cover the line of stitching from the previous step. Helpful Hint: Don’t pull too hard on the tape as you fold, as this will cause the tape to pucker once stitched. The goal here is to have the tape lie as flat and straight as possible.
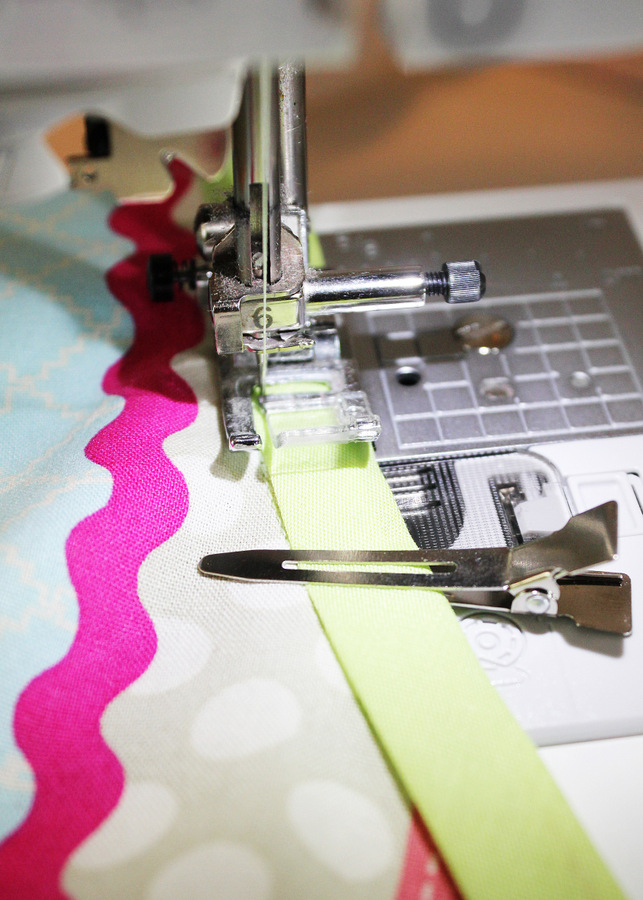
Step 5: Swap out the bobbin thread for something that matches the bias tape. Now, stitch as closely as possible to the front edge of the bias tape, removing the clips as you stitch, backtacking at the beginning and end of the stitching. As you stitch, you should catch the back side of the bias tape, too.
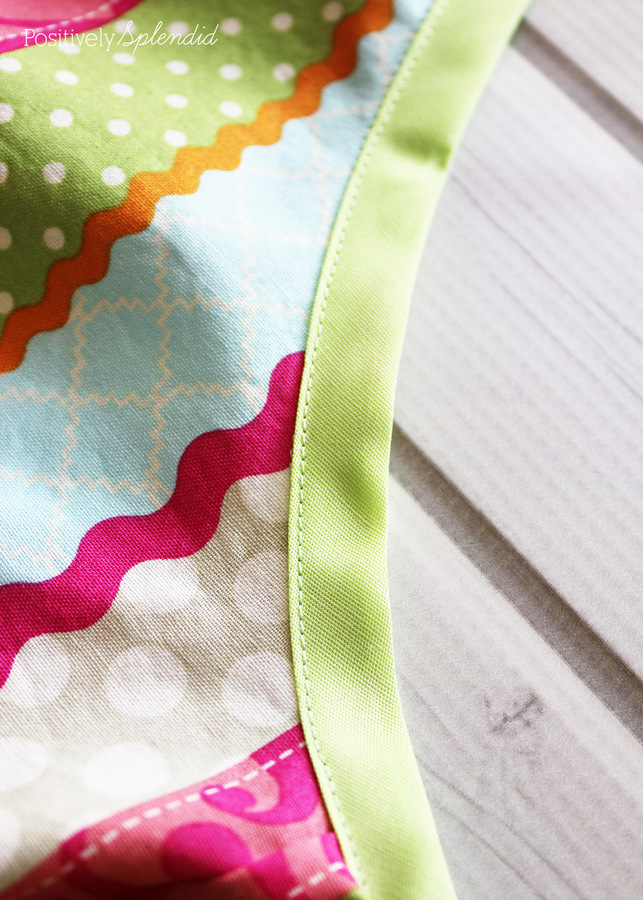
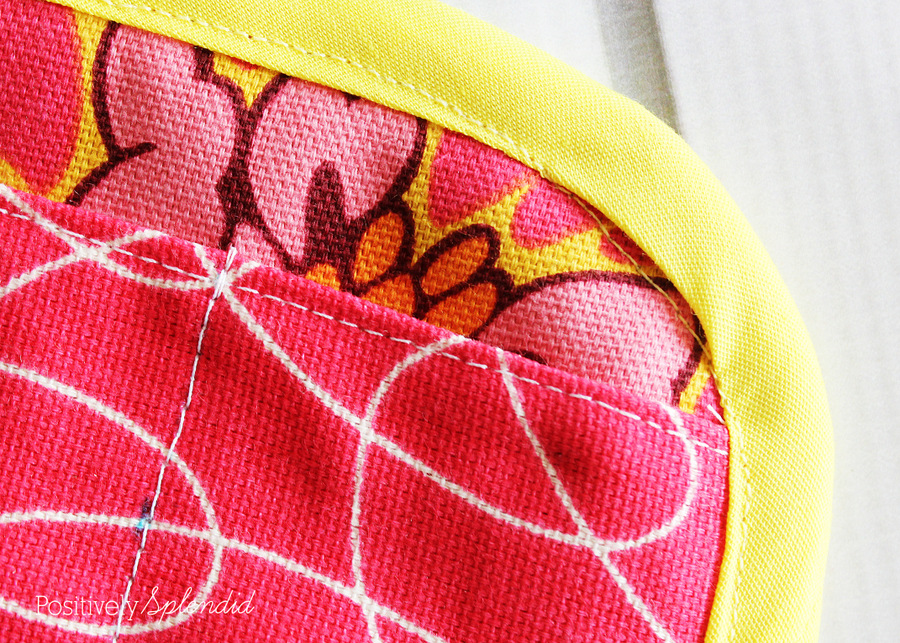
That’s all there is to it! Doesn’t that trimmed edge look crisp and professional?
Method 2: Bias tape with adjoining edges
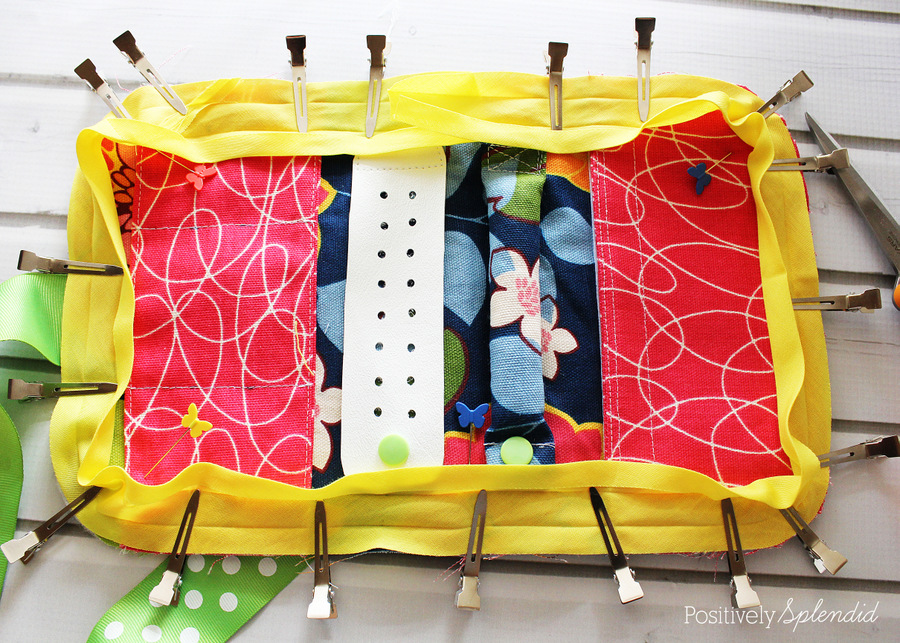
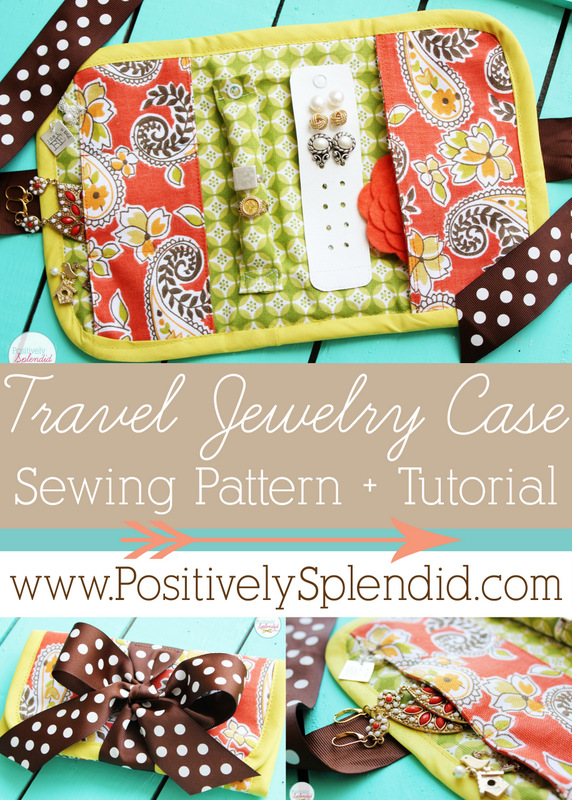
So what about the times when you need to apply tape to a project that requires the ends of the tape to meet, as with my Travel Jewelry Organizer? There is a great method for that, too, that eliminates bulky overlap and results in a tidy, inconspicuous seam.
Here are the steps to follow when applying bias tape along an adjoining edge:
Step 1: Use clips to affix the wide edge of the bias tape to the back side of the project, just like you did for the straight-edge application. Make sure to leave at least 3″ of overlap at the point where the two ends of the tape meet.
Step 2: Pinch the overlapped ends together, as seen below, in such a way that the joined tape is precisely the length of the raw edge of the project. Mark the joining points of the edges of the tape with a water soluble marker and pin.
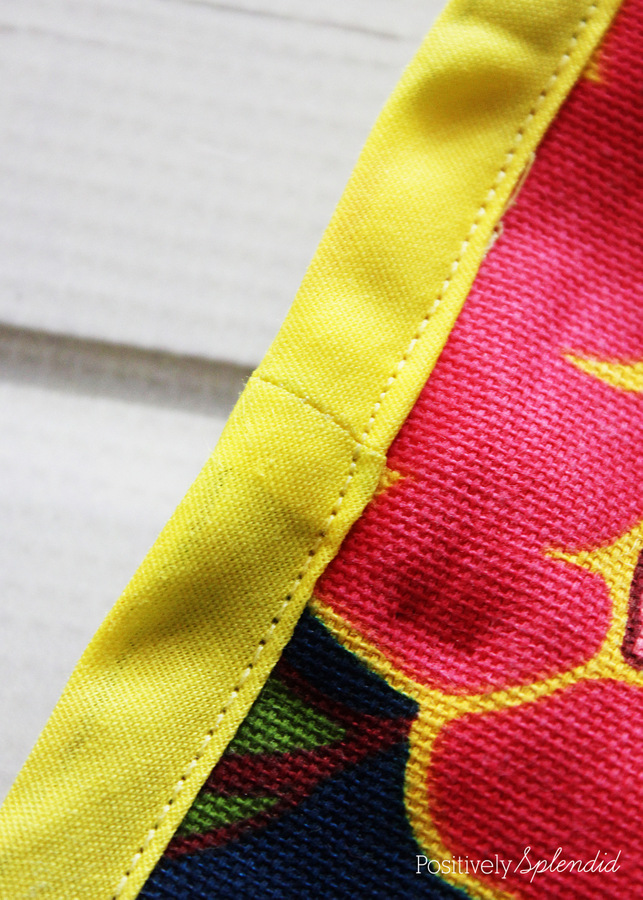
Step 3: Using thread that matches the bias tape, stitch along the line. Trim the seam to 1/4″ and press it open. Use clips to secure the joined bias tape to the raw edge of the project.
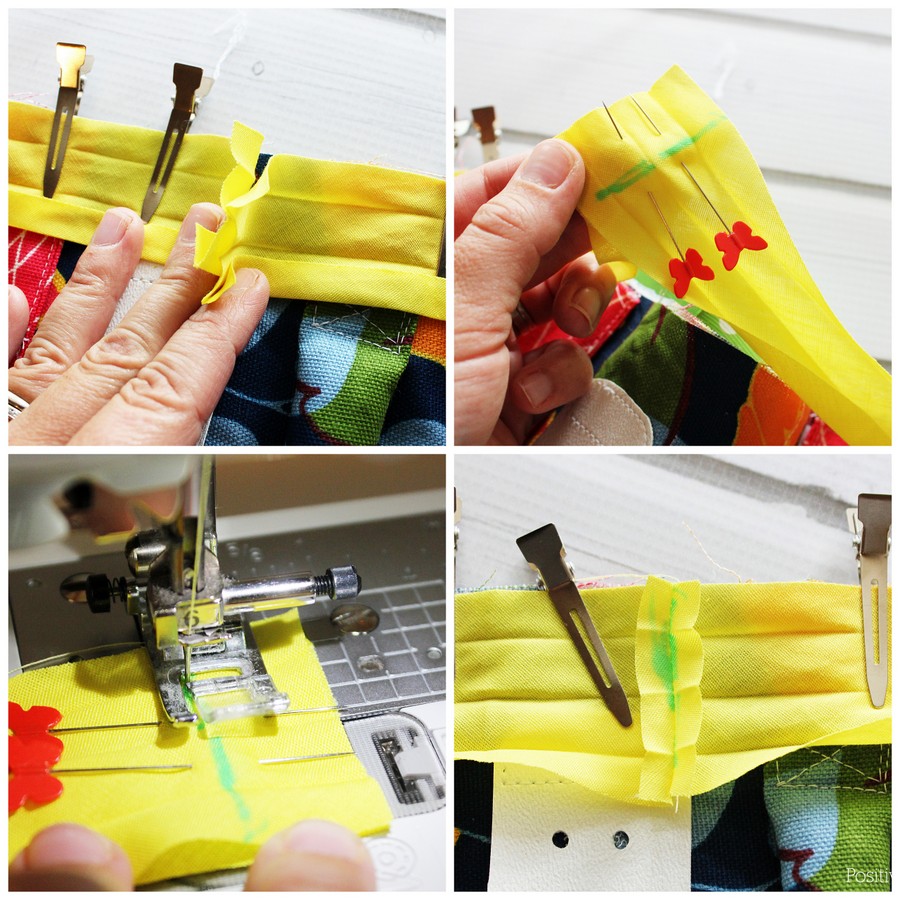
Step 4: Now, simply stitch the tape to the project just as you did in the straight-edge application, first by stitching in the crease on the back side of the tape, and then folding the tape over the raw edge and stitching closely to the front edge.
When you have stitched all the way around the project, the end result will be a lovely, inconspicuous seam where the two ends of the bias tape meet!
Stitching bias tape along a curved edge can be tricky, but the beauty of basting the tape to the back edge of the project before stitching the tape onto the front of the project is that even if you miss a portion of the back edge of the piece as you topstitch (which I did along the curved corner below), the back side of the tape will be invisibly anchored to the project with the stitching on the inside crease of the tape. No need to rip out the stitching and try again!
I hope you’re inspired to see how easy it is to achieve professional results when sewing bias tape when you take them time to add a step to the process!
Inspired now to take some bias tape out for a spin? Check out these fun project ideas from the PS archives, all of which include bias tape!
Pillowcase Tops and Dresses
Travel Jewelry Case
Toddler Bib and Smock

Portable Manicure and Pedicure Kit

Having grown up in a home brimming with sewing notions and paintbrushes, Amy has a deep love for all things creative. On any given day, you’ll find her knee-deep in her latest creative endeavor, with projects ranging from sewing and crafts to home decor and kid-friendly ideas. Amy believes that everyone, regardless of skill level or experience, possesses the ability to create something beautiful, and Positively Splendid was born of her passion for helping others harness their innate creative potential.