
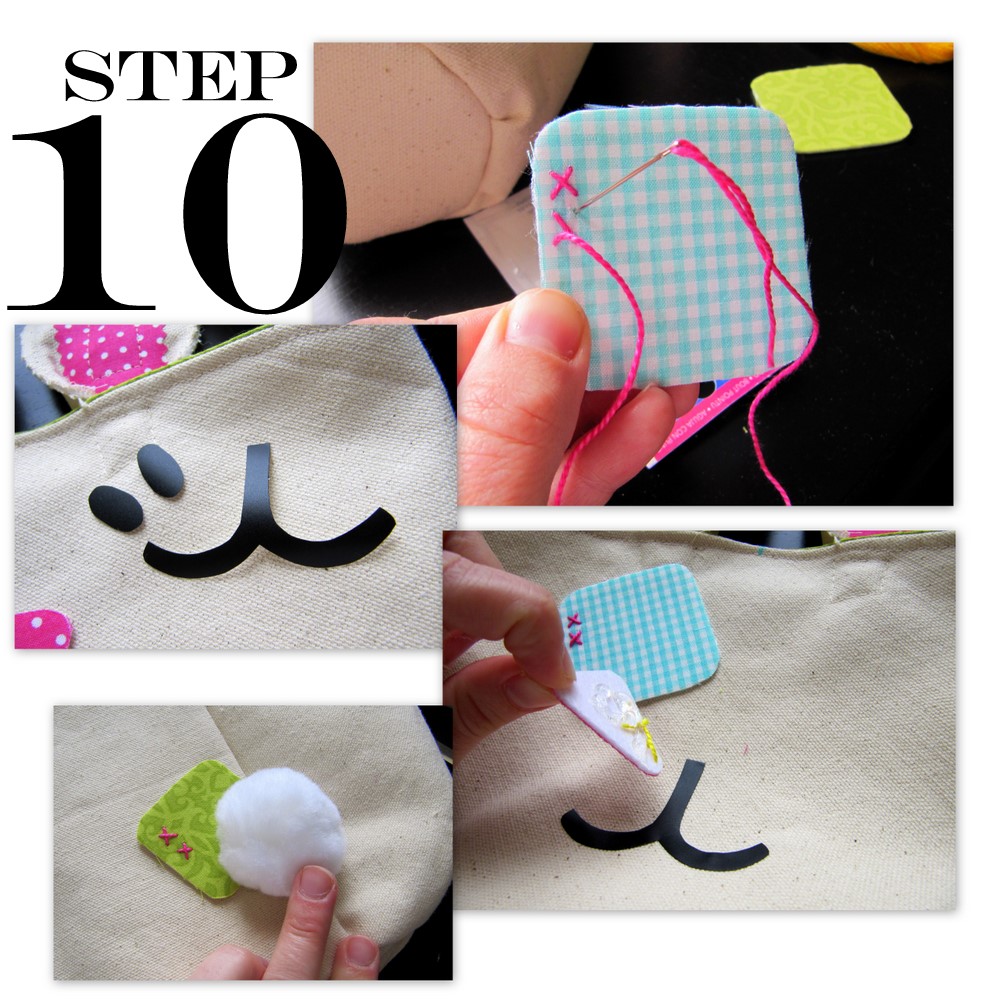
With ears that can be bent and shaped, rick-rack “whiskers” and fluffy little tails, these buckets are sure to be a hit with even the Easter bunny himself!
This project is one I completed a few weeks back over at SYTYC for the Just Scraps challenge. With the exception of two small supplies, each and every element I used to create these little guys was something I had used in the competition’s previous challenges! In case you missed it, here is part of my writeup about them from that week’s post…
Pattern Pieces
Large Bucket
Small Bucket
Canvas Fabric
Fusible Fleece
Quilting Cotton Fabric (for lining)
Washable Ink Pen
Assorted Fabric Scraps
Fusible Web
Fusible Peltex
White Pom-Poms
Craft Wire
Iron-On Vinyl (Black)
Rick-Rack
Embroidery Needle and Floss (optional)
Coordinating Thread
Basic Sewing Supplies: Machine, Shears, etc.
Prep Work:
Cut out all of your pattern pieces, and connect the different sections of your main bucket pattern according to the instructions on the PDFs. Once your patterns are prepared, cut out the pieces for you bucket:
1 canvas main bucket piece
1 canvas bucket bottom piece
1 fusible fleece main bucket piece
1 lining fabric main bucket piece
1 lining fabric bucket bottom piece
4 canvas outer ears
2 fusible fleece outer ears
2 patterned fabric inner ears (fuse this fabric to your fusible web before cutting your pieces out)
1 strap piece – Large Bucket: — x — inches; Small Bucket: — x — inches
Note: All seam allowances are 1/4″, unless otherwise specified.
step 1 / Fold your strap piece in half lengthwise; press. Fold each of the long edges up to your pressed center line so they meet in the middle as shown; press. Fold your piece in half again; press.

step 2 / Edgestitch along each of the long edges of your pressed strap piece. If desired, stitch a series of lines in the center of your piece for a decorative touch. On your large strap piece, you will stitch 4 additional lines that are each 1/4″ apart. On your small strap piece, you will stitch 3 additional lines that are each 1/4″ apart. Set your finished strap piece aside.

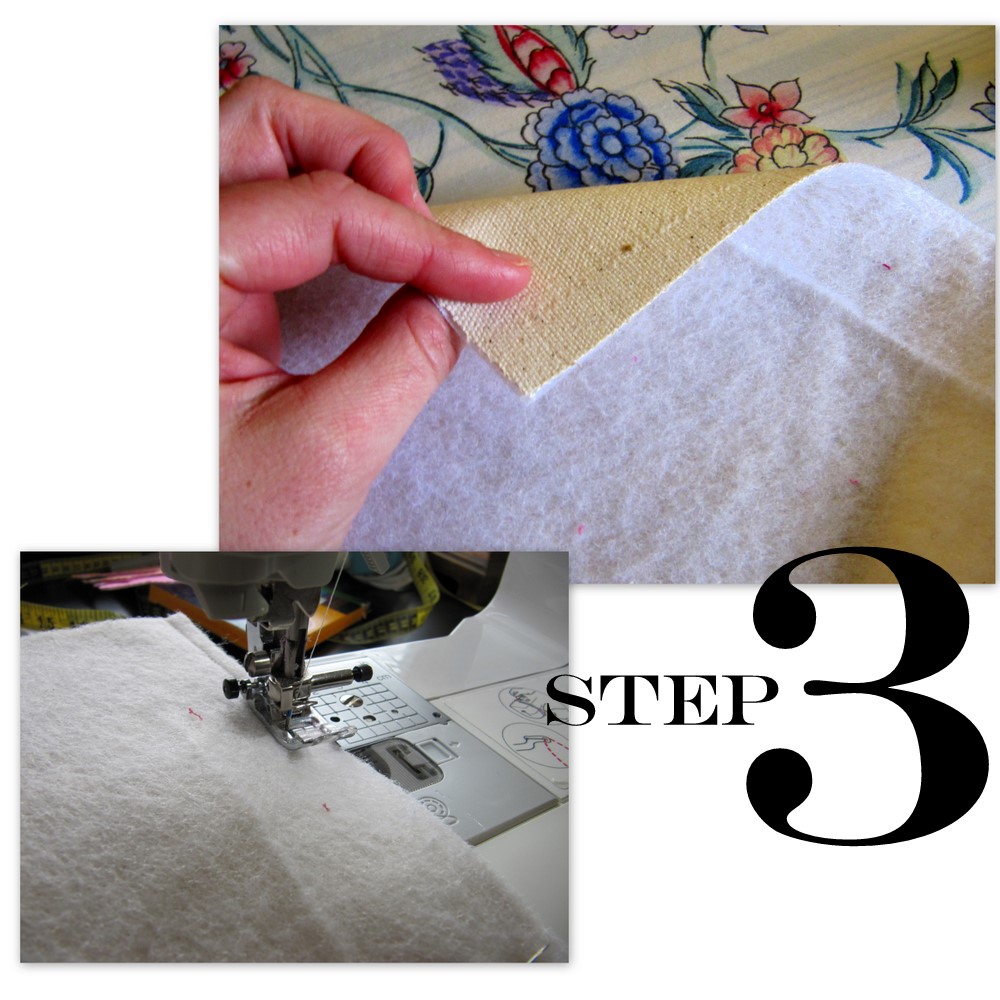
step 3 / Iron the fusible fleece to your main bucket canvas piece and your bucket bottom piece according to the product directions. Fold your assembled piece in half, right sides facing, so that the short edges are aligned. Stitch along this short edge. Stitch your lining fabric piece in the same manner.
step 4 / Pin your bucket bottom piece to the narrower opening of your stitched main bucket piece, with the fleece side of your bottom and main bucket pieces facing out, as shown. Carefully stitch these pieces together. Repeat with your lining bottom piece and your stitched lining main bucket piece.

step 5 / Turn your bucket right-side out, and pinch the outside edges so that the back seam is exactly centered with the front of your bucket. Make marks with your washable ink marker at each of these outer side creases, as well as at the point directly opposite the back seam. Center one end of your strap piece over each of the side marks you just created, looping the strap down and around the bottom of your bucket.

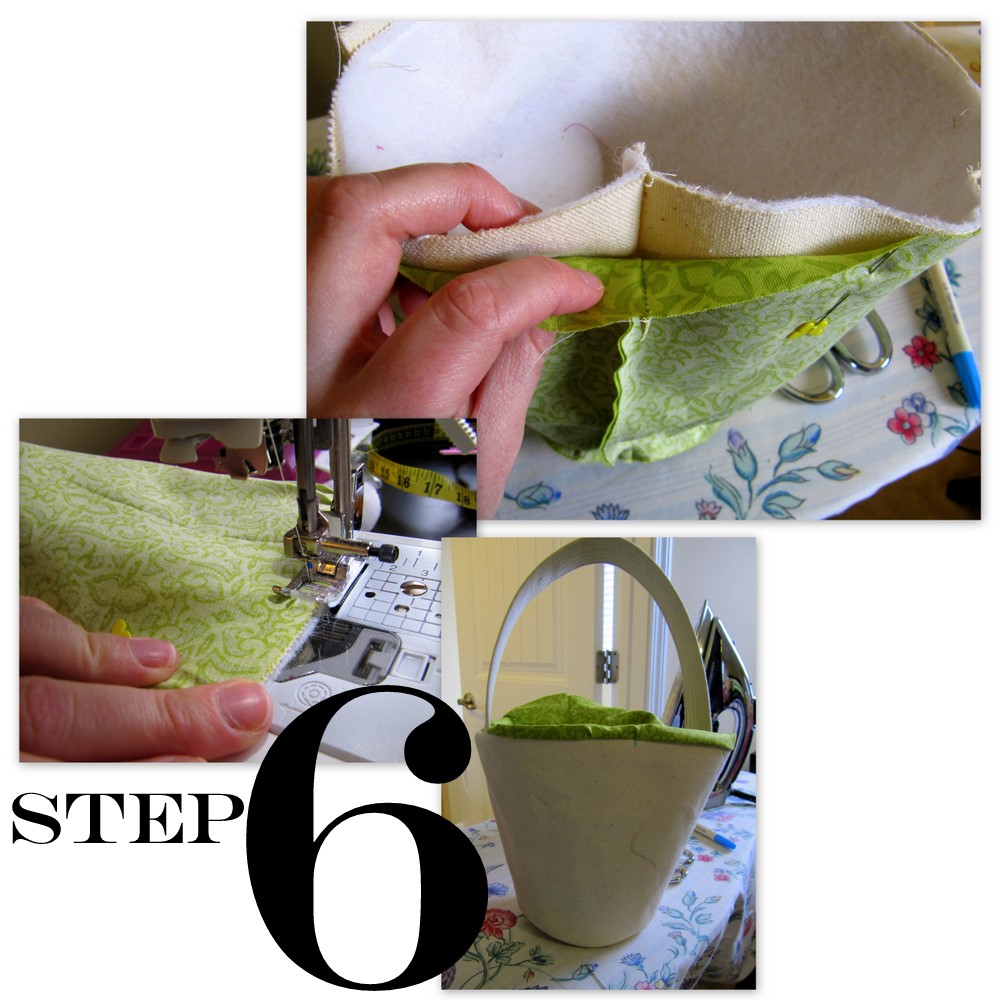
step 6 / With your canvas main bucket piece right-side out and your lining piece wrong-side out, slide your canvas piece inside your lining piece, as shown. Pin these pieces together along their aligned upper edges. Stitch together, leaving a 3-inch opening for turning. Turn your bucket right-side out through this opening.
step 7 / Carefully press the joining seam you just stitched, and pin the opening closed. Edgestitch along the upper edge of your bucket, closing the opening as you go.

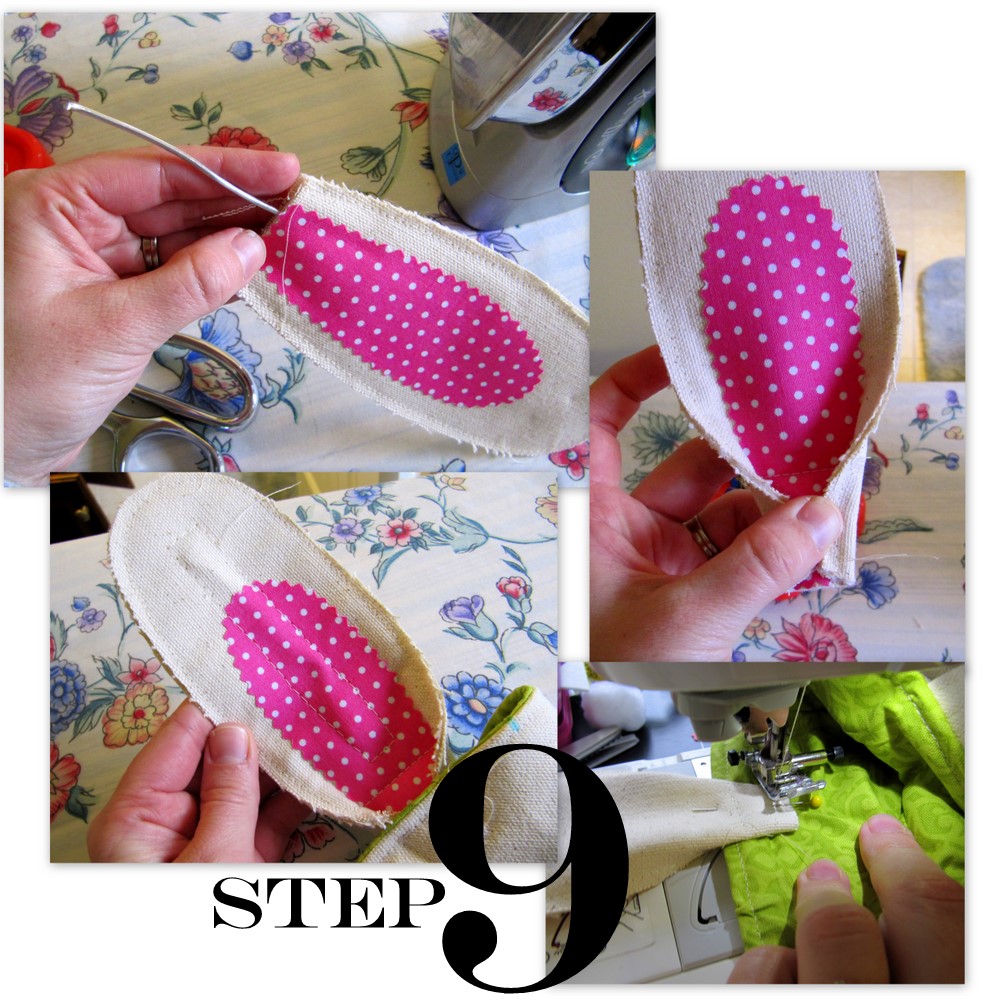
step 8 / Iron your fusible fleece outer ears to the back of two of your canvas outer ear pieces. Fuse your inner ear piece on top of this piece, as shown. Stack this assembled piece on top of another of your plain canvas outer ear pieces, and pin together. Edgestitch along the outer edge of these stacked pieces to attach them to one another, leaving the bottom edge open.

step 9 / Tuck a piece of craft wire (–” for the large bucket, –” for the small bucket) up through the bottom opening of one of your ear pieces, so the end of the wire piece is about 1.5 inches from the bottom


Having grown up in a home brimming with sewing notions and paintbrushes, Amy has a deep love for all things creative. On any given day, you’ll find her knee-deep in her latest creative endeavor, with projects ranging from sewing and crafts to home decor and kid-friendly ideas. Amy believes that everyone, regardless of skill level or experience, possesses the ability to create something beautiful, and Positively Splendid was born of her passion for helping others harness their innate creative potential.