
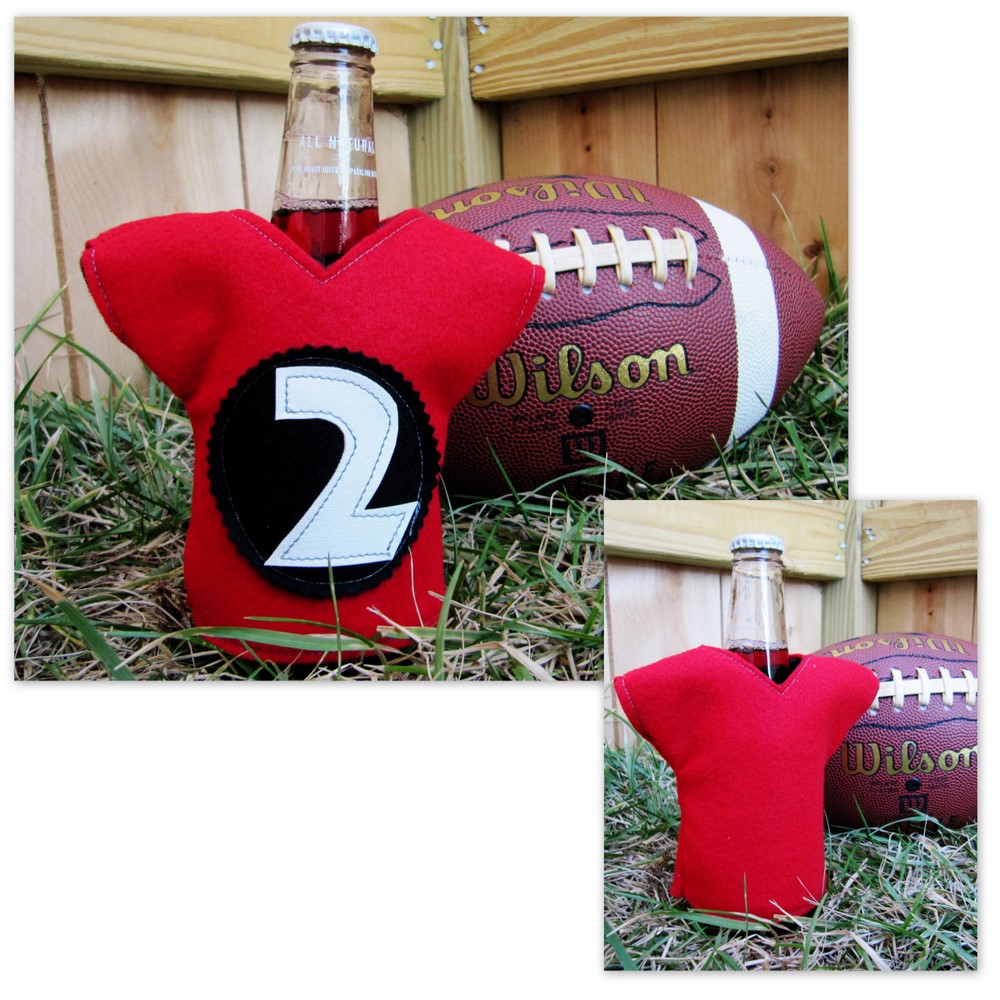
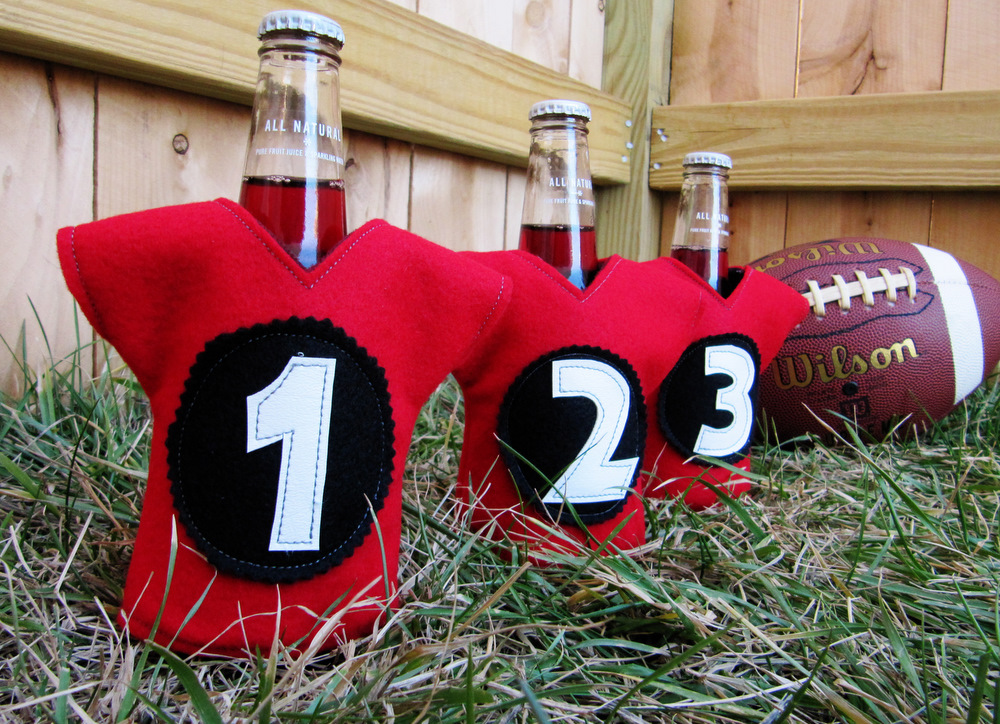
My son has his first spring soccer game this weekend, so I thought it would be fitting to share these sports-themed drink holders with y’all today. I originally created these for the Game Day challenge at So You Think You’re Crafty, which happened to coincide with the Super Bowl. Although these little guys are pictured here with footballs, I think they would be perfect for just about any sport!
I created these with 12-ounce beverage cans or bottles in mind (I posed these with a bottle of Izze to show the fit), but they also perfectly accommodate water bottles – or even sippy cups! Wouldn’t your little one be thrilled for you to make some of these for his or her teammates before their next big game?
For this project, you will need…
Foam insulating material (the same that mouse pads are made out of), found in the utility fabric section of some sewing stores
Felt (2 different colors)
Pinking shears
Marine vinyl
Wash Away Wonder Tape
Leather sewing machine needle
Tissue paper
Coordinating thread
Basic sewing supplies: machine, shears, etc.
Prep Work
Cut out all of your pieces. For each holder, you will need:
2 felt body pieces
2 foam pieces
1 circle patch from contrasting felt, cut out with pinking shears
1 2.5-inch number (use your word processing software to create a template using a font you like), cut from marine vinyl
Note: All seam allowances are 1/4″.
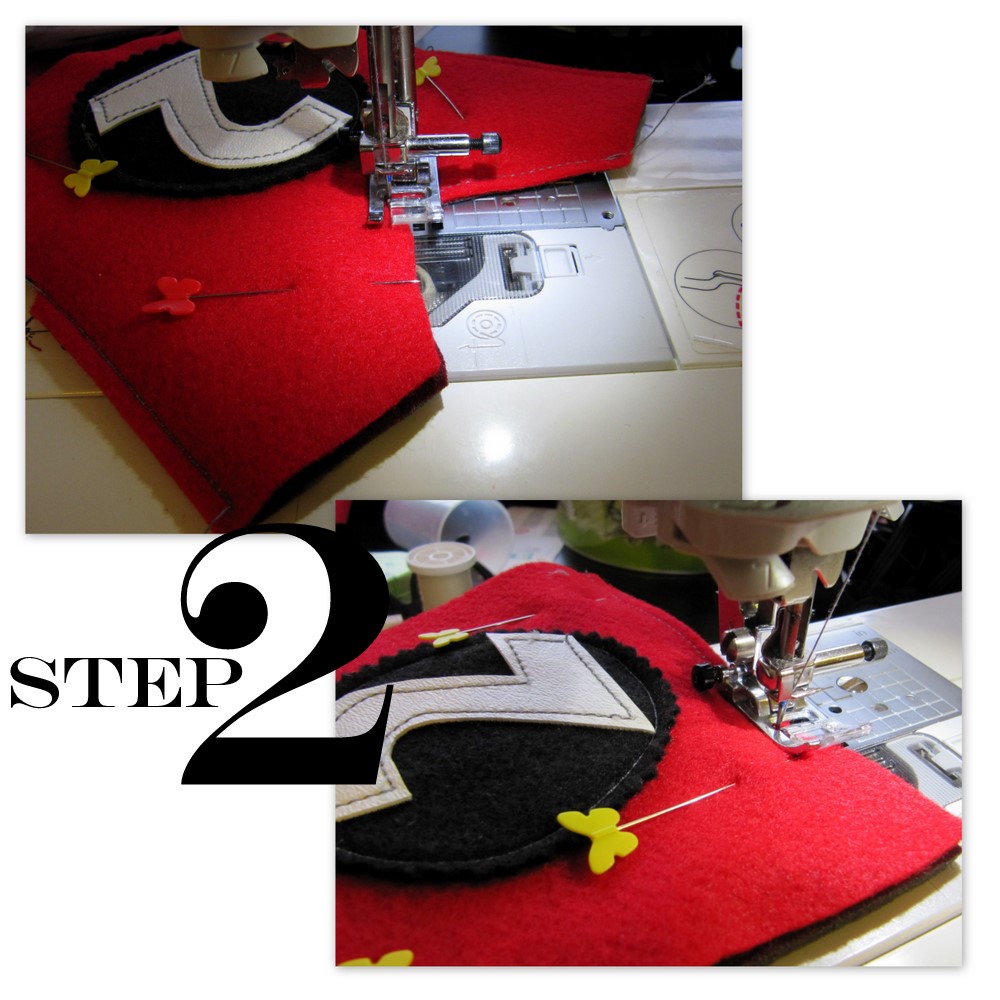
step 1 / Center your vinyl number piece on top of your circle patch and secure it with Wash Away Wonder Tape. Outfit you machine with your leather needle. Place a small piece of tissue on top of your number (this will prevent your foot from sticking to the vinyl as you sew), and carefully stitch all the way around the outer edge of your your number. Tear away the tissue, using tweezers to remove any tiny pieces of tissue that remain. Center your patch piece on one of your felt body pieces, and pin it into place. Edgestitch around the outer edge of your patch to affix it to you body piece.

step 2 / Place a foam body piece behind your felt body piece, so that the wrong side of your felt piece is touching the foam and all sides are lined up. Edgestitch along the V of the neck opening, and then along each sleeve. Edgestitch along the bottom edge, as well. Repeat with your other foam and felt body pieces.
step 3 / Place your stitched felt/foam pieces together, right (felt) sides facing, so that all edges are precisely aligned. Now, stitch through all layers at the shoulders and along the side seams. (See the photo below.) Turn your jersey right-side out.

You are finished!

I hope everyone’s week is off to a great start!
Having grown up in a home brimming with sewing notions and paintbrushes, Amy has a deep love for all things creative. On any given day, you’ll find her knee-deep in her latest creative endeavor, with projects ranging from sewing and crafts to home decor and kid-friendly ideas. Amy believes that everyone, regardless of skill level or experience, possesses the ability to create something beautiful, and Positively Splendid was born of her passion for helping others harness their innate creative potential.