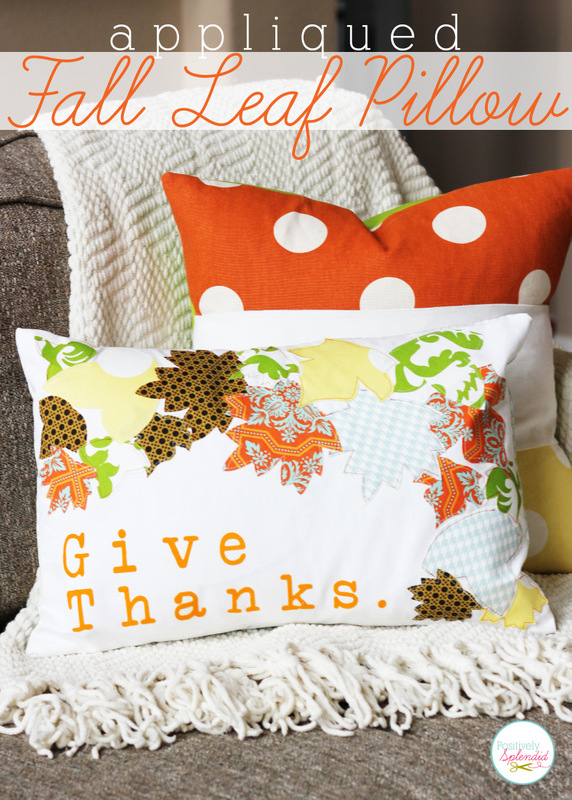
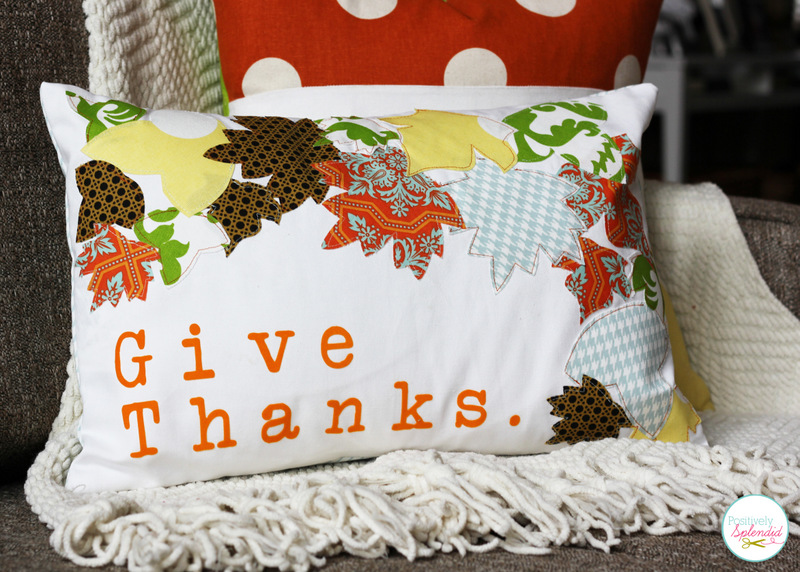
Bring a touch of fall into your home with an appliqued fall leaf pillow. Created simply with fabric scraps and a few basic supplies, this is an afternoon sewing project that can be tailored to any color scheme. Let me show you how easily it comes together.
For this project, you will need…
-
Large Fall Leaf Templates << Click link to download
-
Small Fall Leaf Templates << Click link to download
- (1) 20×14″ rectangular pillow form (I used a travel pillow purchased at Walmart)
- (1) 20×14″ rectangle of white fabric for the pillow front panel
- (2) 14×13″ rectangles of fabric for the pillow back panels
- Fabric scraps in an assortment of fall colors for the fall leaves
- Coordinating thread
- Fusible web (I used Wonder Under)
- Pencil
- Shears
- Iron
- Iron-on letters, or a letter stencil and fabric paint
- Sewing machine
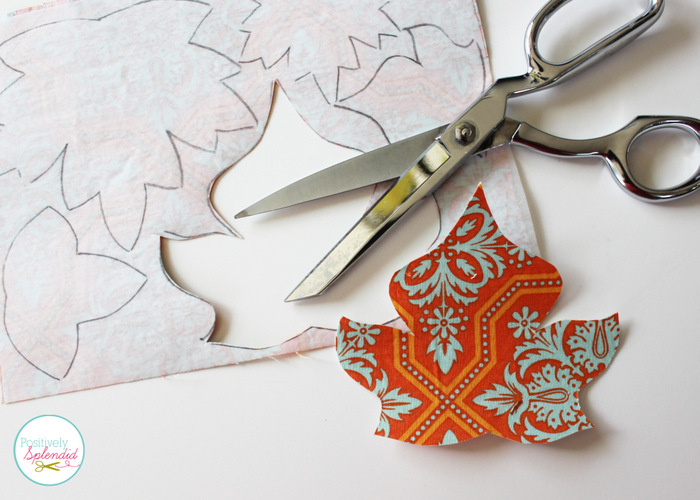
To begin, print off and cut out each of the leaf templates (linked above). Set the templates aside.
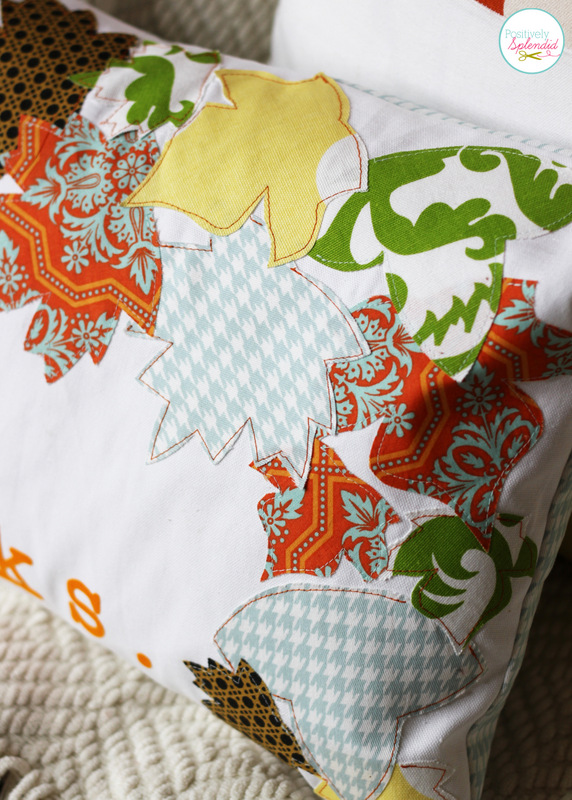
Iron a section of fusible web to the back of each of the leaf fabric pieces according the the product instructions. Arrange the templates on the paper backing side of the fused pieces and trace with a pencil. Cut each leaf out with shears. Repeat until you have the desired number of leaf shapes. (For my pillow I needed about 18 leaves.)
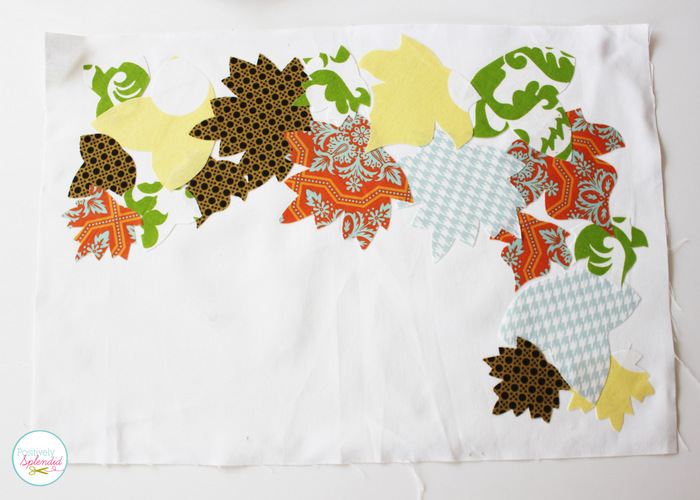
Peel the paper backing away from each leaf, and arrange the leaf shapes on the pillow front piece. Be sure to leave a border around the entire edge of the rectangle to accommodate seam allowances later on. If desired, leave an open space (as I did at the bottom left-hand corner below) to add wording to the pillow.
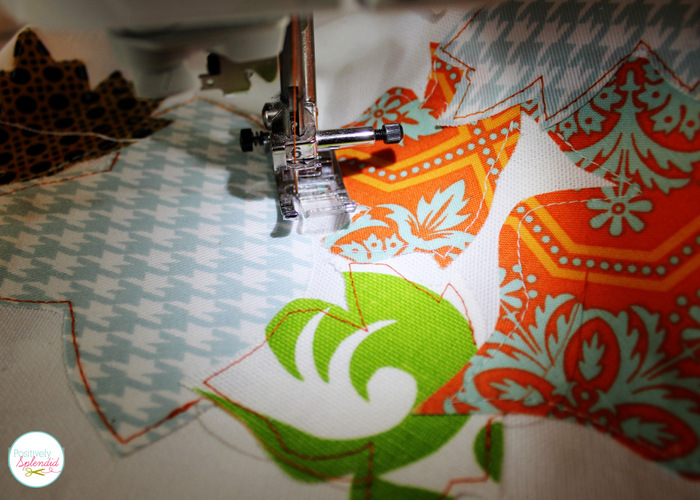
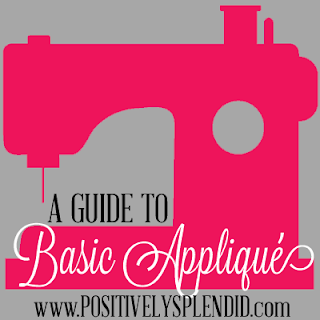
When the leaves are configured in a way you like, it’s time to start stitching! Stitch around the perimeter of each leaf shape to affix it to the pillow front. At the spots where two or more leaves overlap, you only need to stitch through the top-most leaf, as doing so will anchor the leaves underneath, as well. I like the shabby-chic look of using a simple straight stitch or applique like this, but a zig-zag or satin stitch would be nice, too. For more great applique tips, be sure to check out my complete guide to applique, which is linked below!
If you are adding lettering to your pillow, do so once the leaves are all stitched. I created my lettering with my Silhouette CAMEO and their flocked heat transfer material, but you can buy pre-made iron-on letters similar to these at craft stores. Another great option would be to use stencils and fabric paint for the lettering.
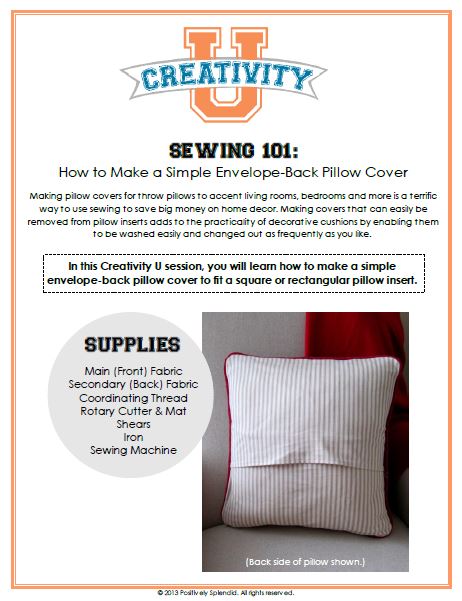
When the lettering is complete, all that is left to do is assemble the pillow. Narrow hem on of the 13″ edges of each of the back panel pieces. (To do so, fold the edge under 1/4″ and press. Fold under an additional 1/4″, press, and then stitch to secure.) Lay the completed pillow front panel face up on a work surface. Place one of the hemmed back panel pieces face down on the pillow front piece, lining up the left-most corners and the raw edges of the pieces, so that the seamed edge of the back panel piece runs up and down through the center of the front panel piece. Pin. Repeat on the right side of the pillow with the remaining back panel piece. Using a 1/2″ seam allowance, stitch around the entire perimeter of the pillow. Clip the corners, finish the seams, and turn the cover right-side out before slipping the cover onto the pillow form.
For a complete PDF guide for making envelope-back pillow covers like this one, be sure to check out my Envelope-Back Pillow Cover How-To (linked below).
Your fall leaf pillow is complete!
I love how the leaves on the pillow add such a vibrant touch of fall color to our family room.
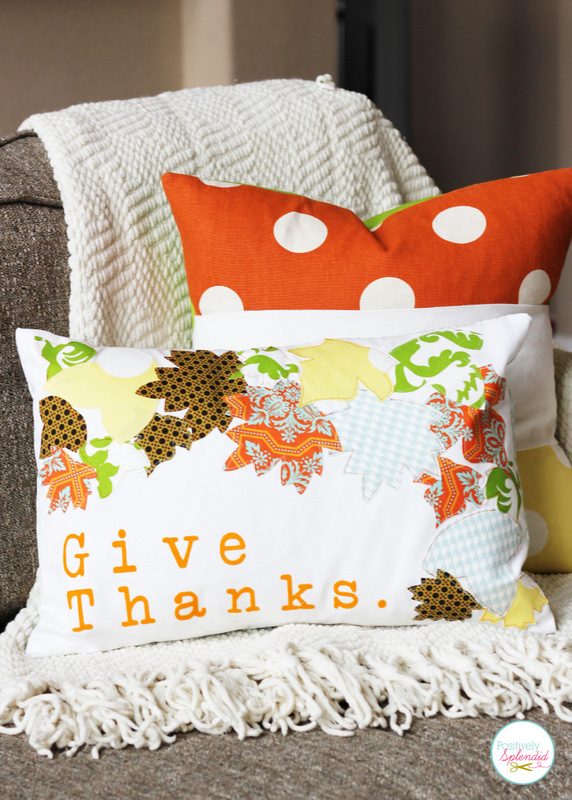
Although I chose a Thanksgiving-inspired sentiment for my pillow, a simple monogram would be lovely, too!
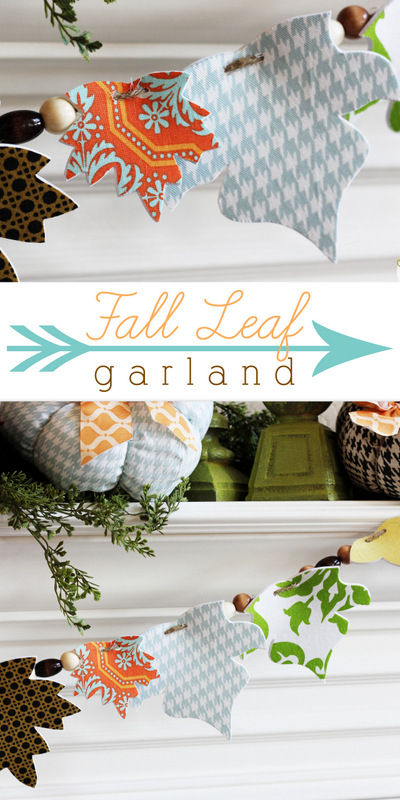
This project coordinates beautifully with my fall leaf garland…
…and my color block candy corn pillow.
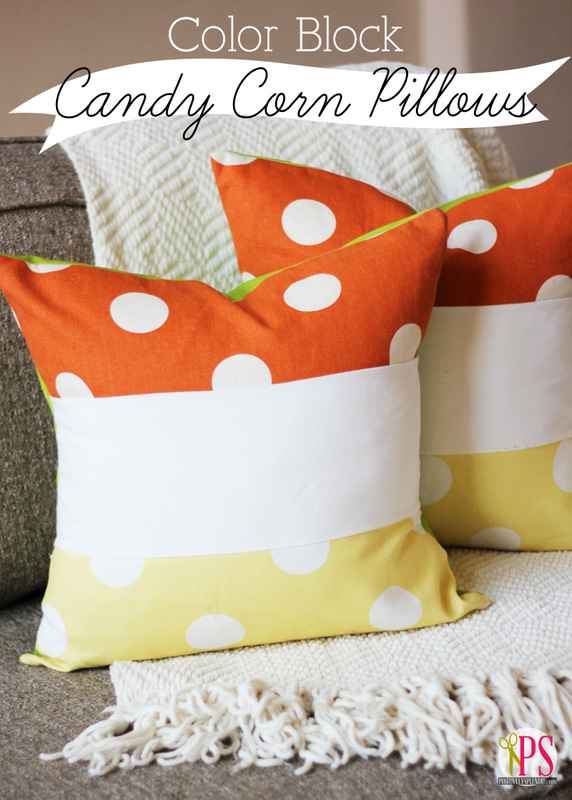
Be sure to check out both projects so you can get the complete look for your home!
Helpful Resources
Needing an even more detailed how-to for assembling envelope-back pillow covers like this one? Be sure to check out and download my complete PDF guide for doing so!
If you’re on the lookout for applique tips, my Guide to Basic Applique is brimming with great information.
Thanks so much for making PS a part of your day. Happy stitching!
Having grown up in a home brimming with sewing notions and paintbrushes, Amy has a deep love for all things creative. On any given day, you’ll find her knee-deep in her latest creative endeavor, with projects ranging from sewing and crafts to home decor and kid-friendly ideas. Amy believes that everyone, regardless of skill level or experience, possesses the ability to create something beautiful, and Positively Splendid was born of her passion for helping others harness their innate creative potential.
Love both pillows!!! The leaves one is so pretty and fun!! I love the patterned material you used. Love, love, love it!!