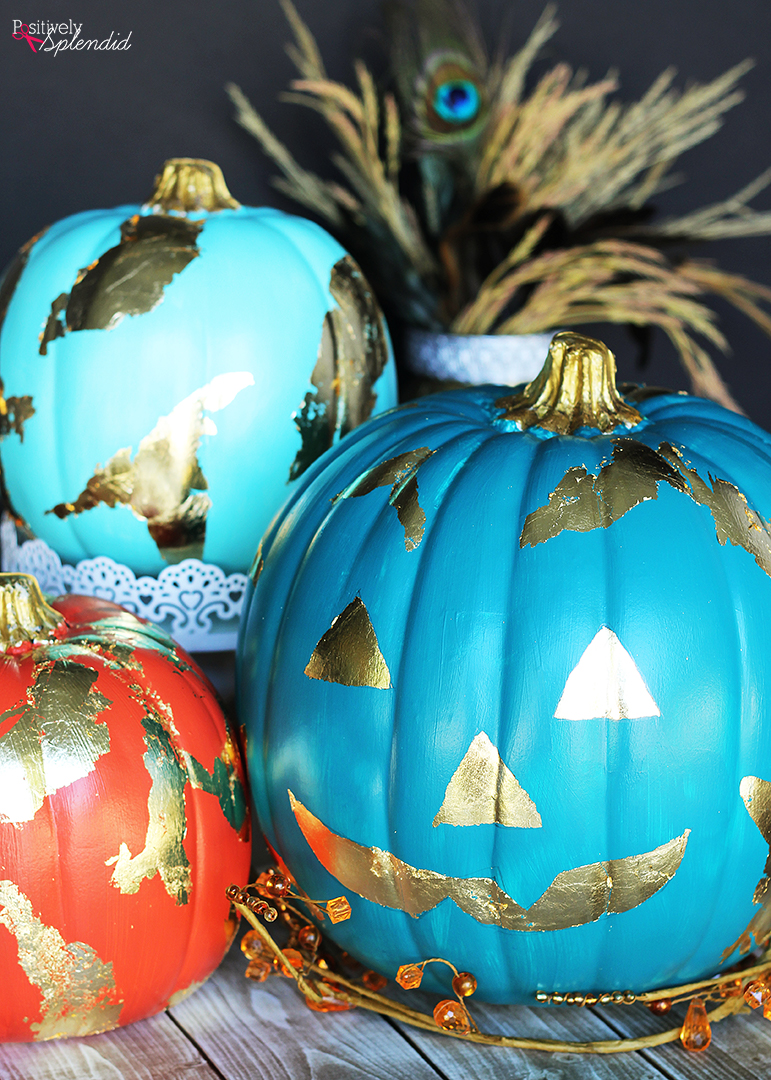
Every year when September arrives, I get the itch to get my home all dressed up for fall! These pretty DIY gold foil pumpkins are incredibly easy to make, and their glamorous shine will make them the perfect eye-catching accent to spruce up your home for autumn. Continue reading for all of the details for how this project comes together.
Today’s post is brought to you by Michaels in conjunction with the Michaels Makers team. All opinions are entirely my own.
To make these DIY Gold Foil Pumpkins, you will need…
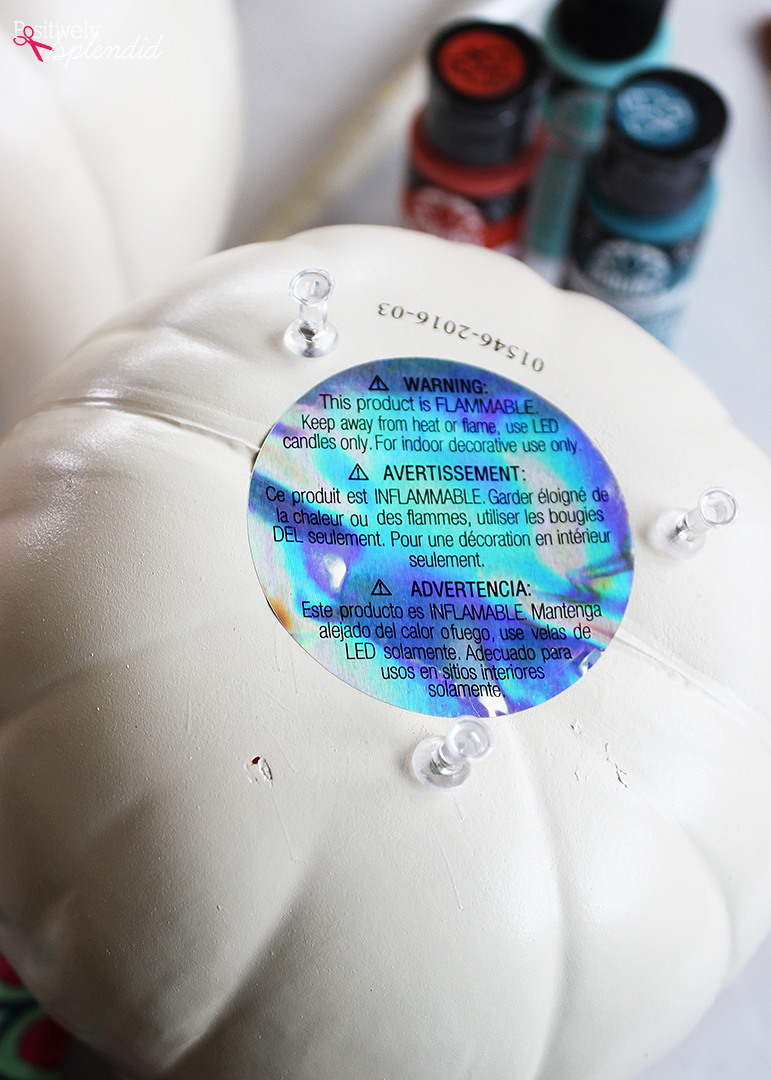
- White artificial pumpkins
- Push pins
- FolkArt Multi-Surface Satin Acrylic Paint (colors used here: Patina, Teal and Autumn Leaves)
- FolkArt Metallic Acrylic Paint (color used here: Pure Gold)
- Martha Stewart Crafts Gold Gilding Sheets
- Martha Stewart Crafts Gilding Adhesive
- Assorted paint brushes
- Clear acrylic sealing spray (optional)

Before you begin, I highly recommend affixing 3 or 4 push pins into the bottom of each pumpkin. This will serve as a “stand” that will keep the wet paint on the underside of each from sticking to your work surface.
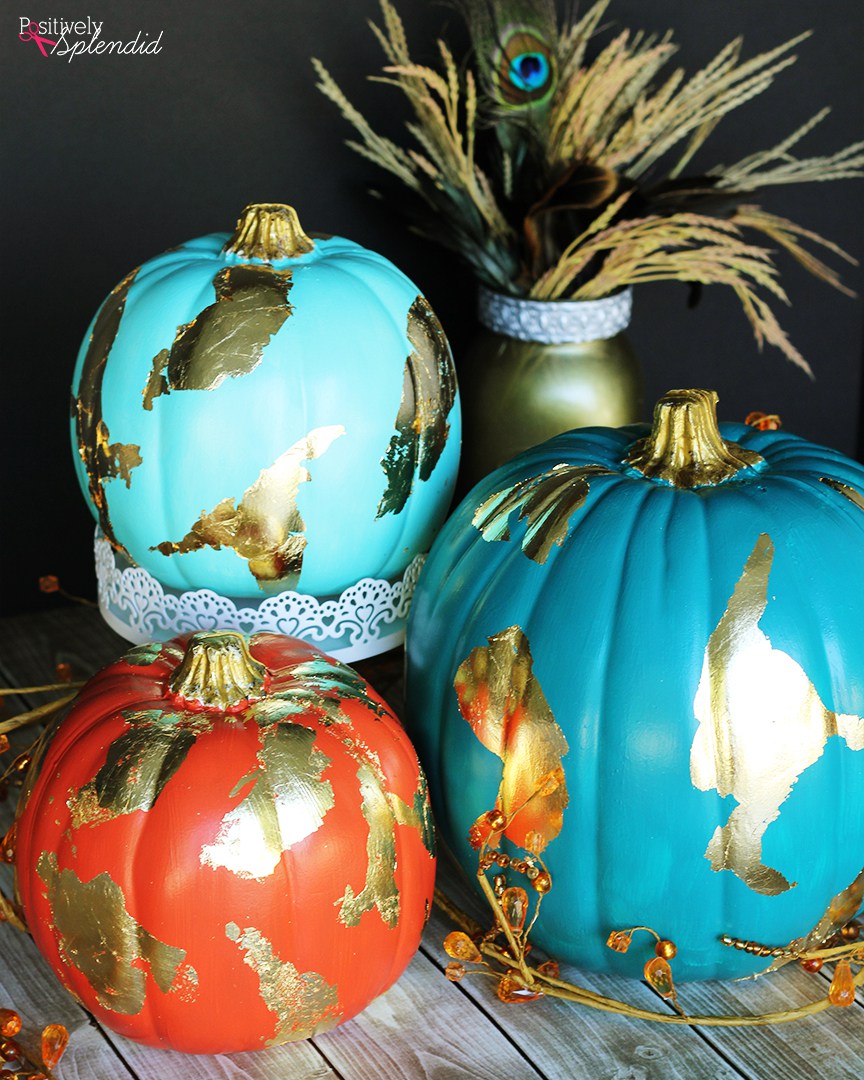
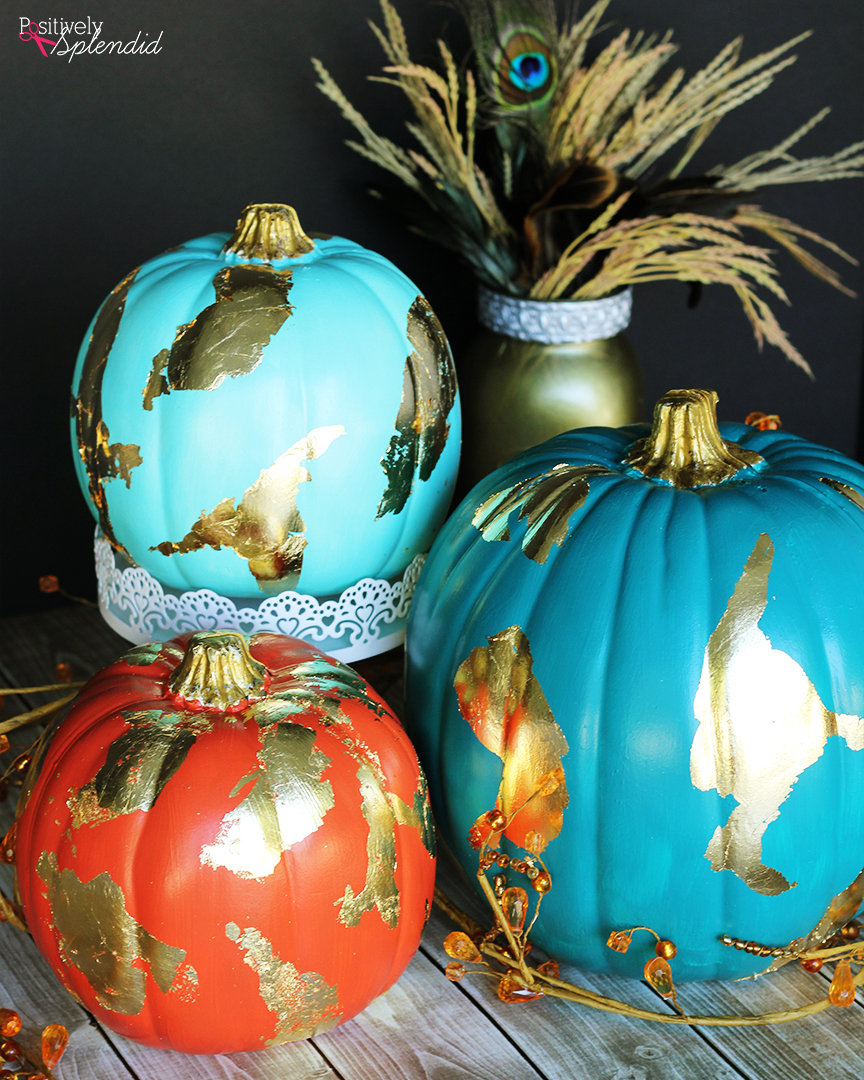
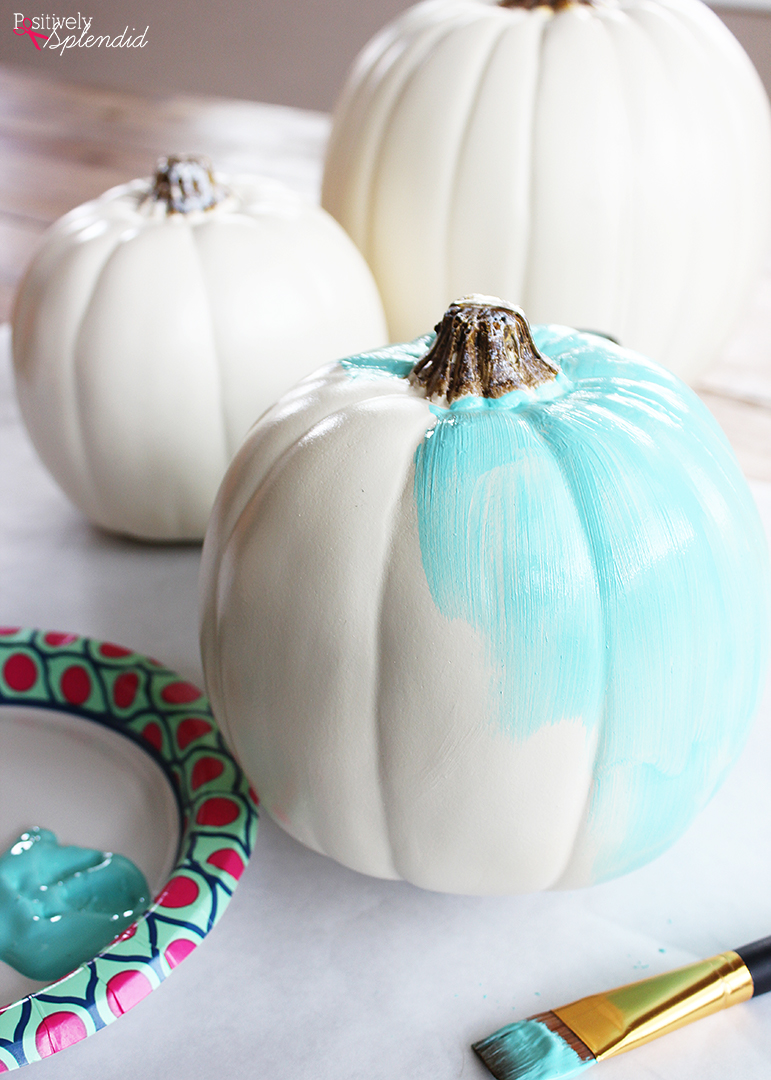
Use a brush to paint each pumpkin with the satin acrylic paint, applying 2-3 coats for even coverage. Allow paint to dry about 15 minutes between coats. If desired, use a brush to apply the gold paint to the stems of each pumpkin. Once all coats are applied, set the pumpkins aside to dry for at least 2 hours, or until the surface is no longer at all tacky.
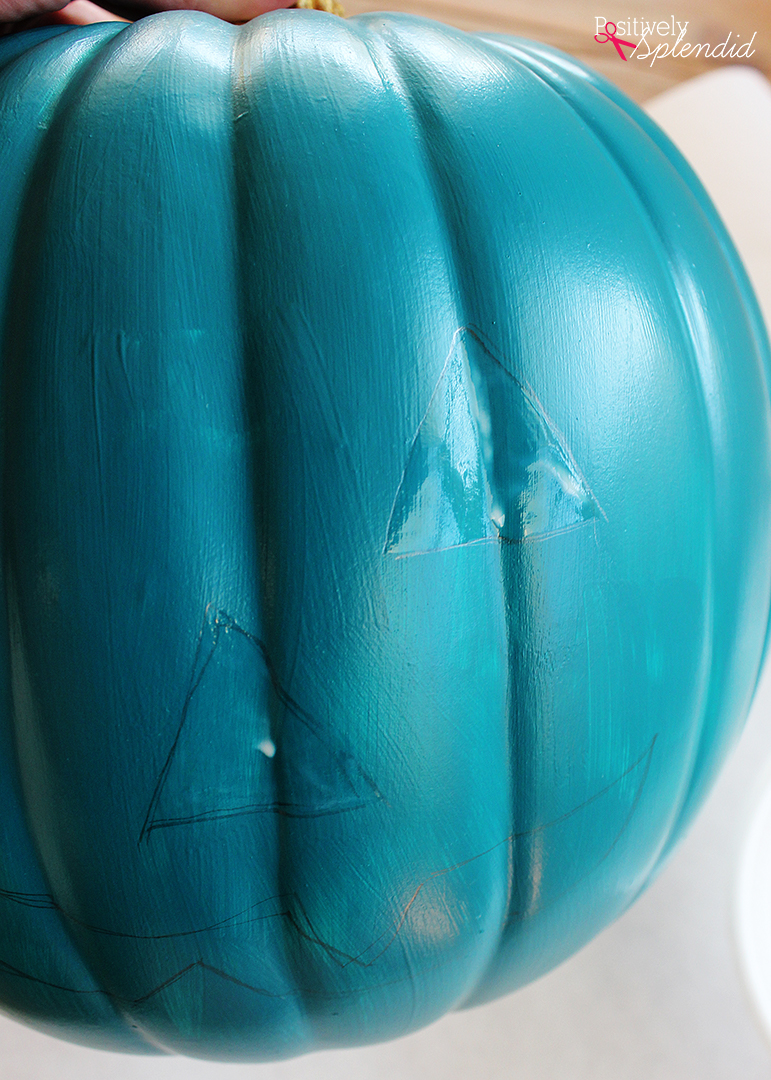
Once the paint is completely dry, use a brush to apply the gilding adhesive to the pumpkins in your desired design. You can create detailed designs like my jack-o-lantern face here, which I sketched out beforehand onto the surface of the pumpkin. If you prefer, you can also simply do random swirls and shapes, or you can even use stencils to create lettering and other designs. You will notice that the adhesive goes on white, but once it has dried for about 2-3 minutes, it turns clear. When it has dried to its clear state, it’s time to apply the gold foil.
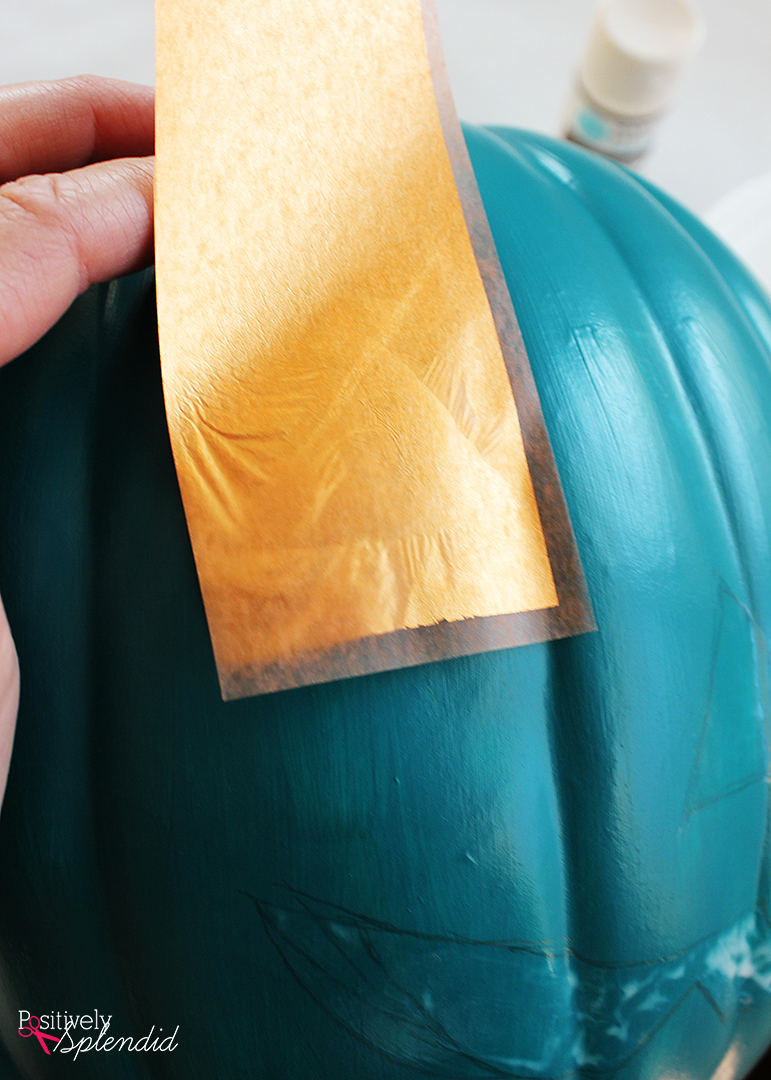
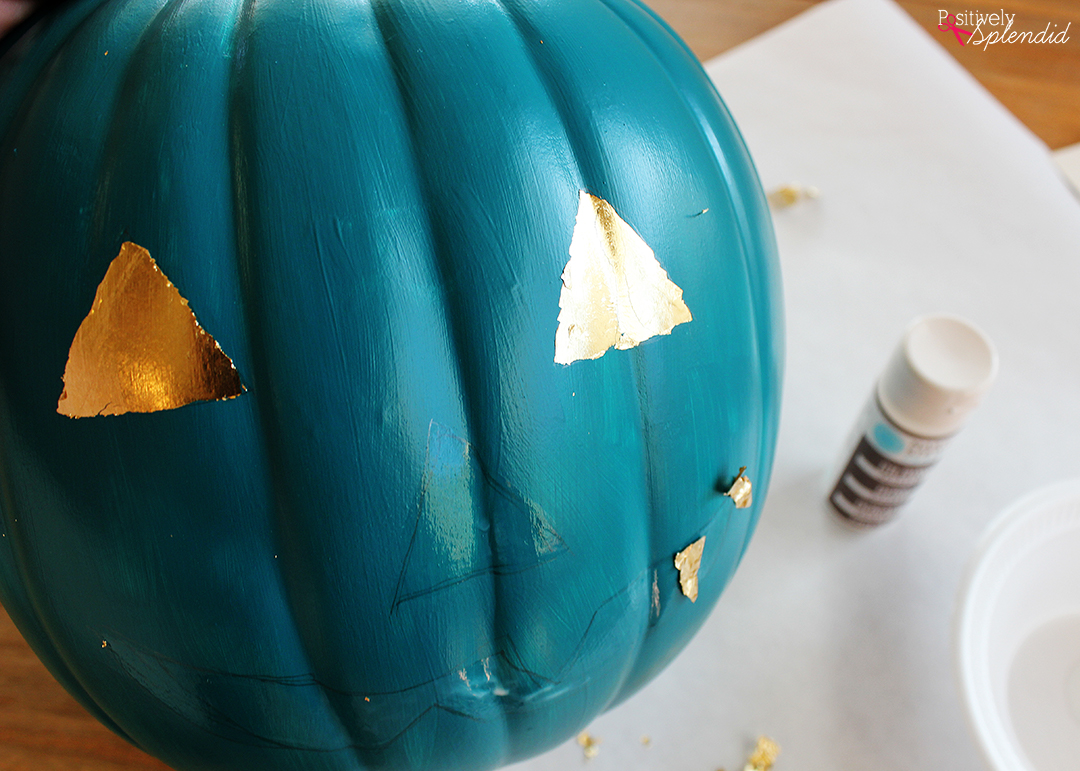
Cut a section of one of the gilding sheets that is large enough to cover the entire surface of the adhesive-covered design. Place the piece onto the design with the tissue paper side up, and rub the surface of the sheet with your finger to make sure the foil adheres to the surface. Gently peel away the sheet. At this point, there will likely be a great deal of excess foil that extends beyond the design left on the surface of the pumpkin. That’s okay! Use a paint brush to brush away any extra foil so that no excess foil remains.
You can see here how the foil looks after some of the excess foil has been removed with a brush. I recommend working on those edges even more by gently brushing until the outlines are nice and crisp.
This same process of applying adhesive/applying the gilding/brushing away the excess works for any design, regardless of whether you choose to do random shapes like I did in my pumpkins below, a hand drawn-design like my jack-o-lantern above, or even a stenciled or more intricate design.
If desired, when the gilding process is complete, spray the pumpkins with acrylic spray sealer for added durability.
Your gold foil pumpkins are complete!

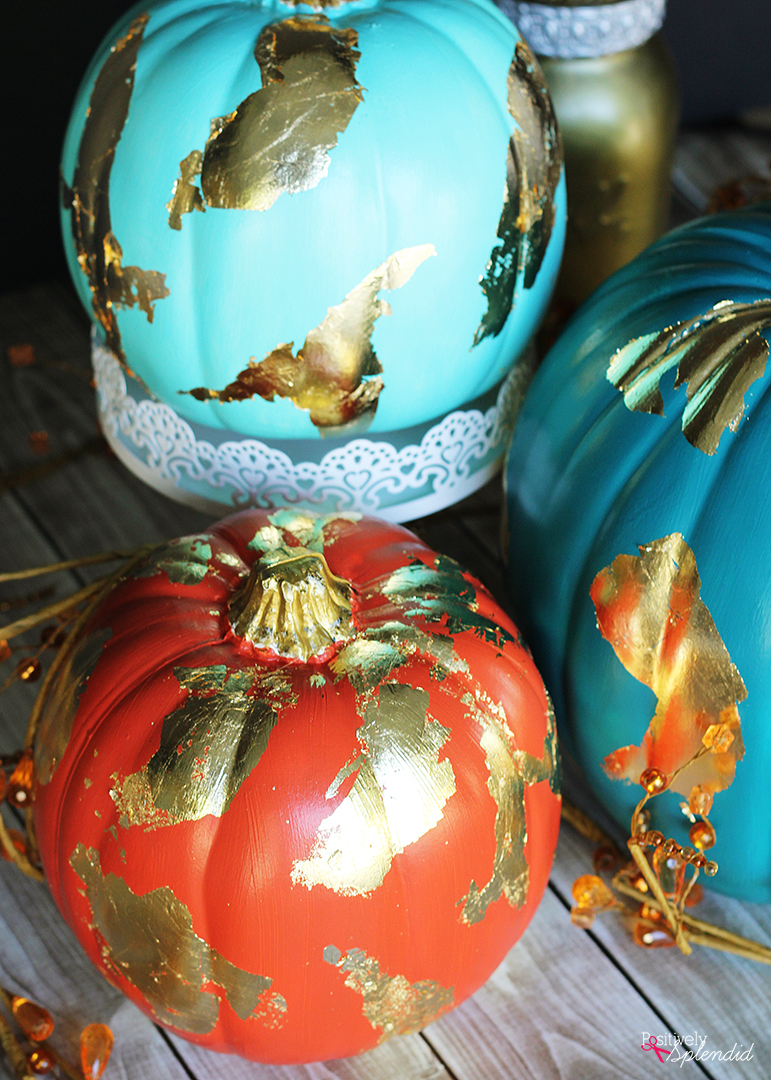
I created a jack-o-lantern face on one side of my largest pumpkin and then finished the other side with the same random design I used on the other pumpkins. This way I can display this set of pumpkins all fall long, even after Halloween has come and gone!

To kick off fall in your own home, visit Michaels.com and check out the variety of craft pumpkins available – there is every color, shape and size you could ever want! There are tons of ways to DIY your own craft pumpkin for your home, a party or even as a gift.
My fellow Michaels Makers and I were all challenged to come up with some fun pumpkin projects to kick off the fall crafting season. Be sure to check out all of the other Michaels Makers pumpkin ideas on the Michaels blog!
[inlinkz_linkup id=630338 noentry=1 mode=1]
Having grown up in a home brimming with sewing notions and paintbrushes, Amy has a deep love for all things creative. On any given day, you’ll find her knee-deep in her latest creative endeavor, with projects ranging from sewing and crafts to home decor and kid-friendly ideas. Amy believes that everyone, regardless of skill level or experience, possesses the ability to create something beautiful, and Positively Splendid was born of her passion for helping others harness their innate creative potential.