Earlier this week, I shared my Traditional Christmas Mantel, the focal point of which is a large cross-stitch sampler featuring wording from one my favorite Christmas carols: Joy to the World. You might be surprised to discover that creating oversized cross-stitch artwork like this really isn’t at all difficult. Today I am going to show you how to create a large-scale cross-stitch project of your own for any holiday or occasion.
For this project, you will need…
- A large frame
- A piece of white foam core board, trimmed to snugly fit in the frame
- Acrylic paint and foam brush (optional)
- Freezer paper
- Clear ruler
- Pencil
- Cross-stitch alphabet templates (I used this ornate uppercase alphabet and this more streamlined upper- and lowercase alphabet)
- Black Sharpie
- Masking tape
- Thumb tack
- Yarn
- Darning needle
- Scissors
Directions:
- To begin, if you want the background for your art to be a color other than pure white, paint the surface of the foam core board with the acrylic paint and foam brush. Allow to dry completely.
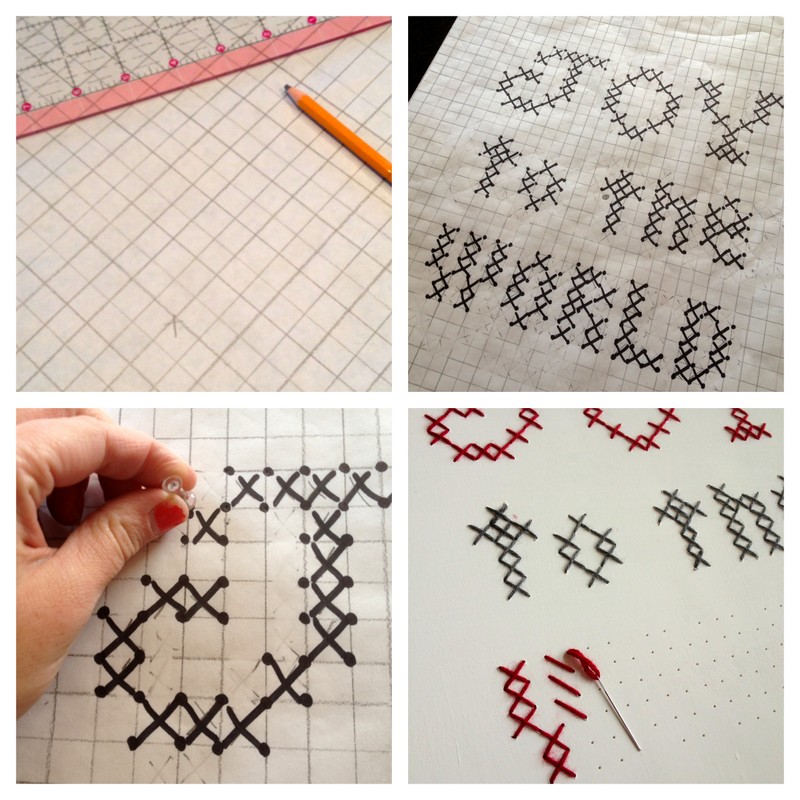
- Cut a piece of freezer paper that is exactly the size of the foam core board. Use the clear ruler and pencil to draw evenly-spaced marks to form a grid on the paper. The spacing of the lines will depend upon the size of the frame you are using, but for my 18×24″ frame, I spaced my lines 1/2″ apart. Note: There are some large grid papers available at many crafts stores that could be used as a substitute, but I opted to create my own so I didn’t have to drag all of my kids to the store. 🙂
- Using the alphabet templates as a guide, create a design with your preferred lettering on the paper. Important: Be sure to use a pencil for this step, because it is likely you will need to make a number of adjustments for spacing, wording, etc.!
- When you are happy with the design, trace over the pencil marks with the Sharpie, also drawing a dot at each of the corners of the boxes that contain an “X”, as shown.
- Use the masking tape to affix the prepared freezer paper design onto the foam board, making sure the design is centered and positioned exactly where you want it. Use the thumb tack to punch through each of the black dots you made in the previous step. Remove the freezer paper from the board.
- Now, the fun part: stitching time! Thread the darning needle with yarn, and, using a basic cross-stitch, stitch the design, using the holes created with the thumb tack to guide you as you work.
 You are finished!
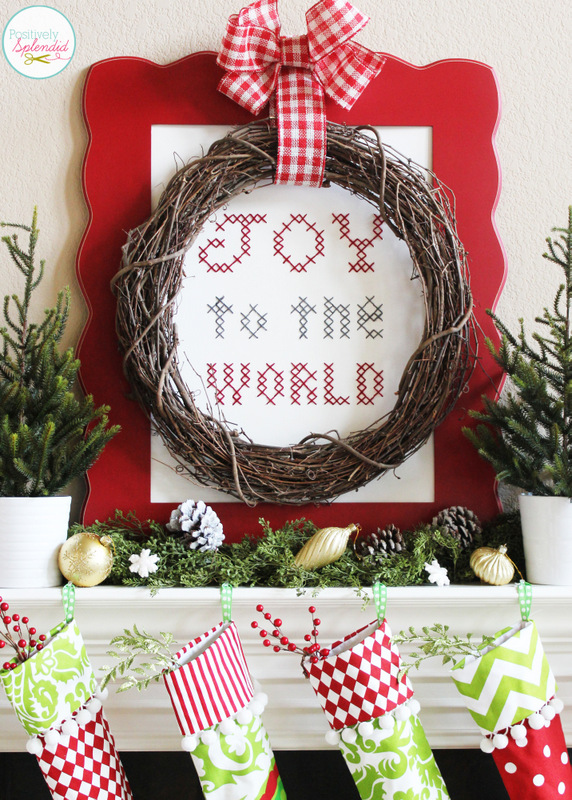
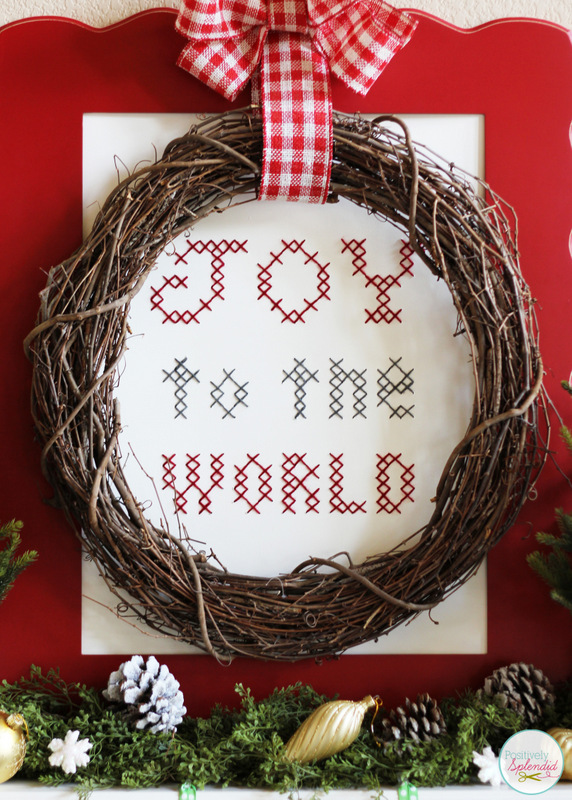
Slip the finished design into your frame, and display it anywhere you want to impart a homespun, cozy feel!
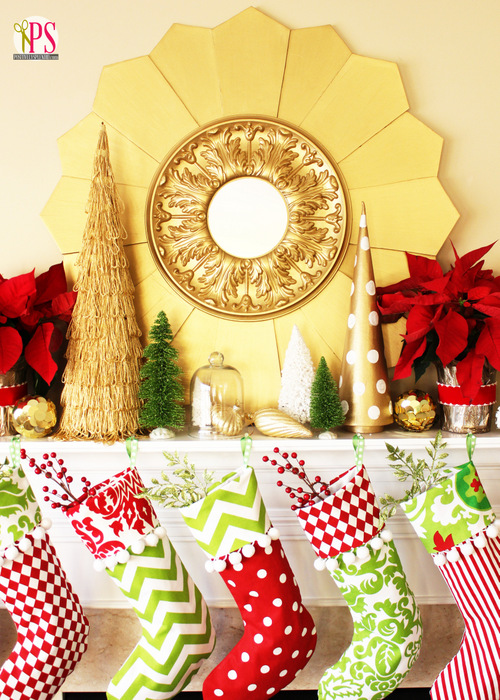
I love how my finished sampler looks above my Christmas mantel this year!
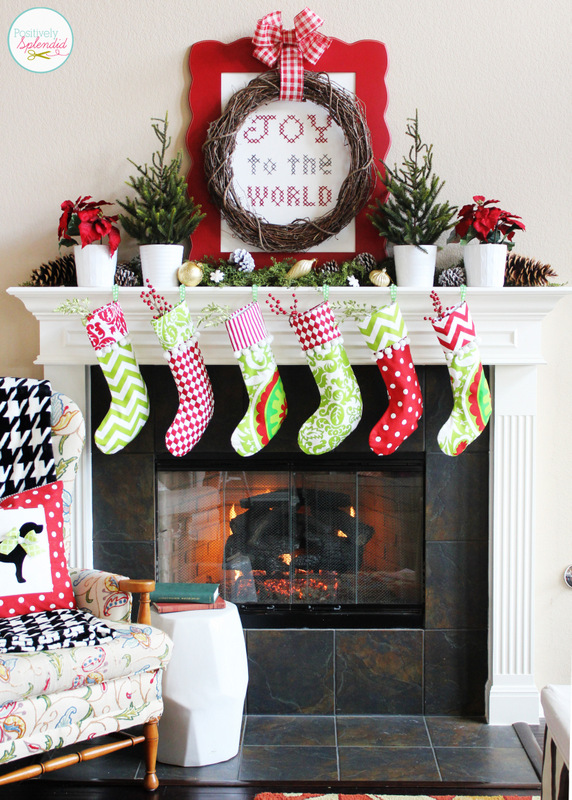
I opted to use a simple grapevine wreath to frame the wording for added dimension.
Imagine how fun this same technique would be to create a sampler for a baby’s nursery or playroom!
On the lookout for another fun DIY wall art option? Don’t miss my DIY Sunburst Mirror.
And for even more Christmas inspiration, don’t miss these other ideas from the PS archives:
Classic Cuffed Christmas Stocking Pattern and Tutorial


Having grown up in a home brimming with sewing notions and paintbrushes, Amy has a deep love for all things creative. On any given day, you’ll find her knee-deep in her latest creative endeavor, with projects ranging from sewing and crafts to home decor and kid-friendly ideas. Amy believes that everyone, regardless of skill level or experience, possesses the ability to create something beautiful, and Positively Splendid was born of her passion for helping others harness their innate creative potential.
Hi! This is lovely!! I also would love to know where you got your fabulous frame from!
Hi, Meagan! Thanks so much for the compliments. I found the frame at Hobby Lobby.
I love your mantel!!! The stockings are so pretty!! Love the pattern!!
Thank you so much for linking back to my alphabet, I have hearty recommended my readers to come and view this project for themselves. 🙂
I am very inspired by your Christmas display, all those stockings are so colourful and cute. The stitching behind the wreath also makes a unique twist on a traditional decoration.