
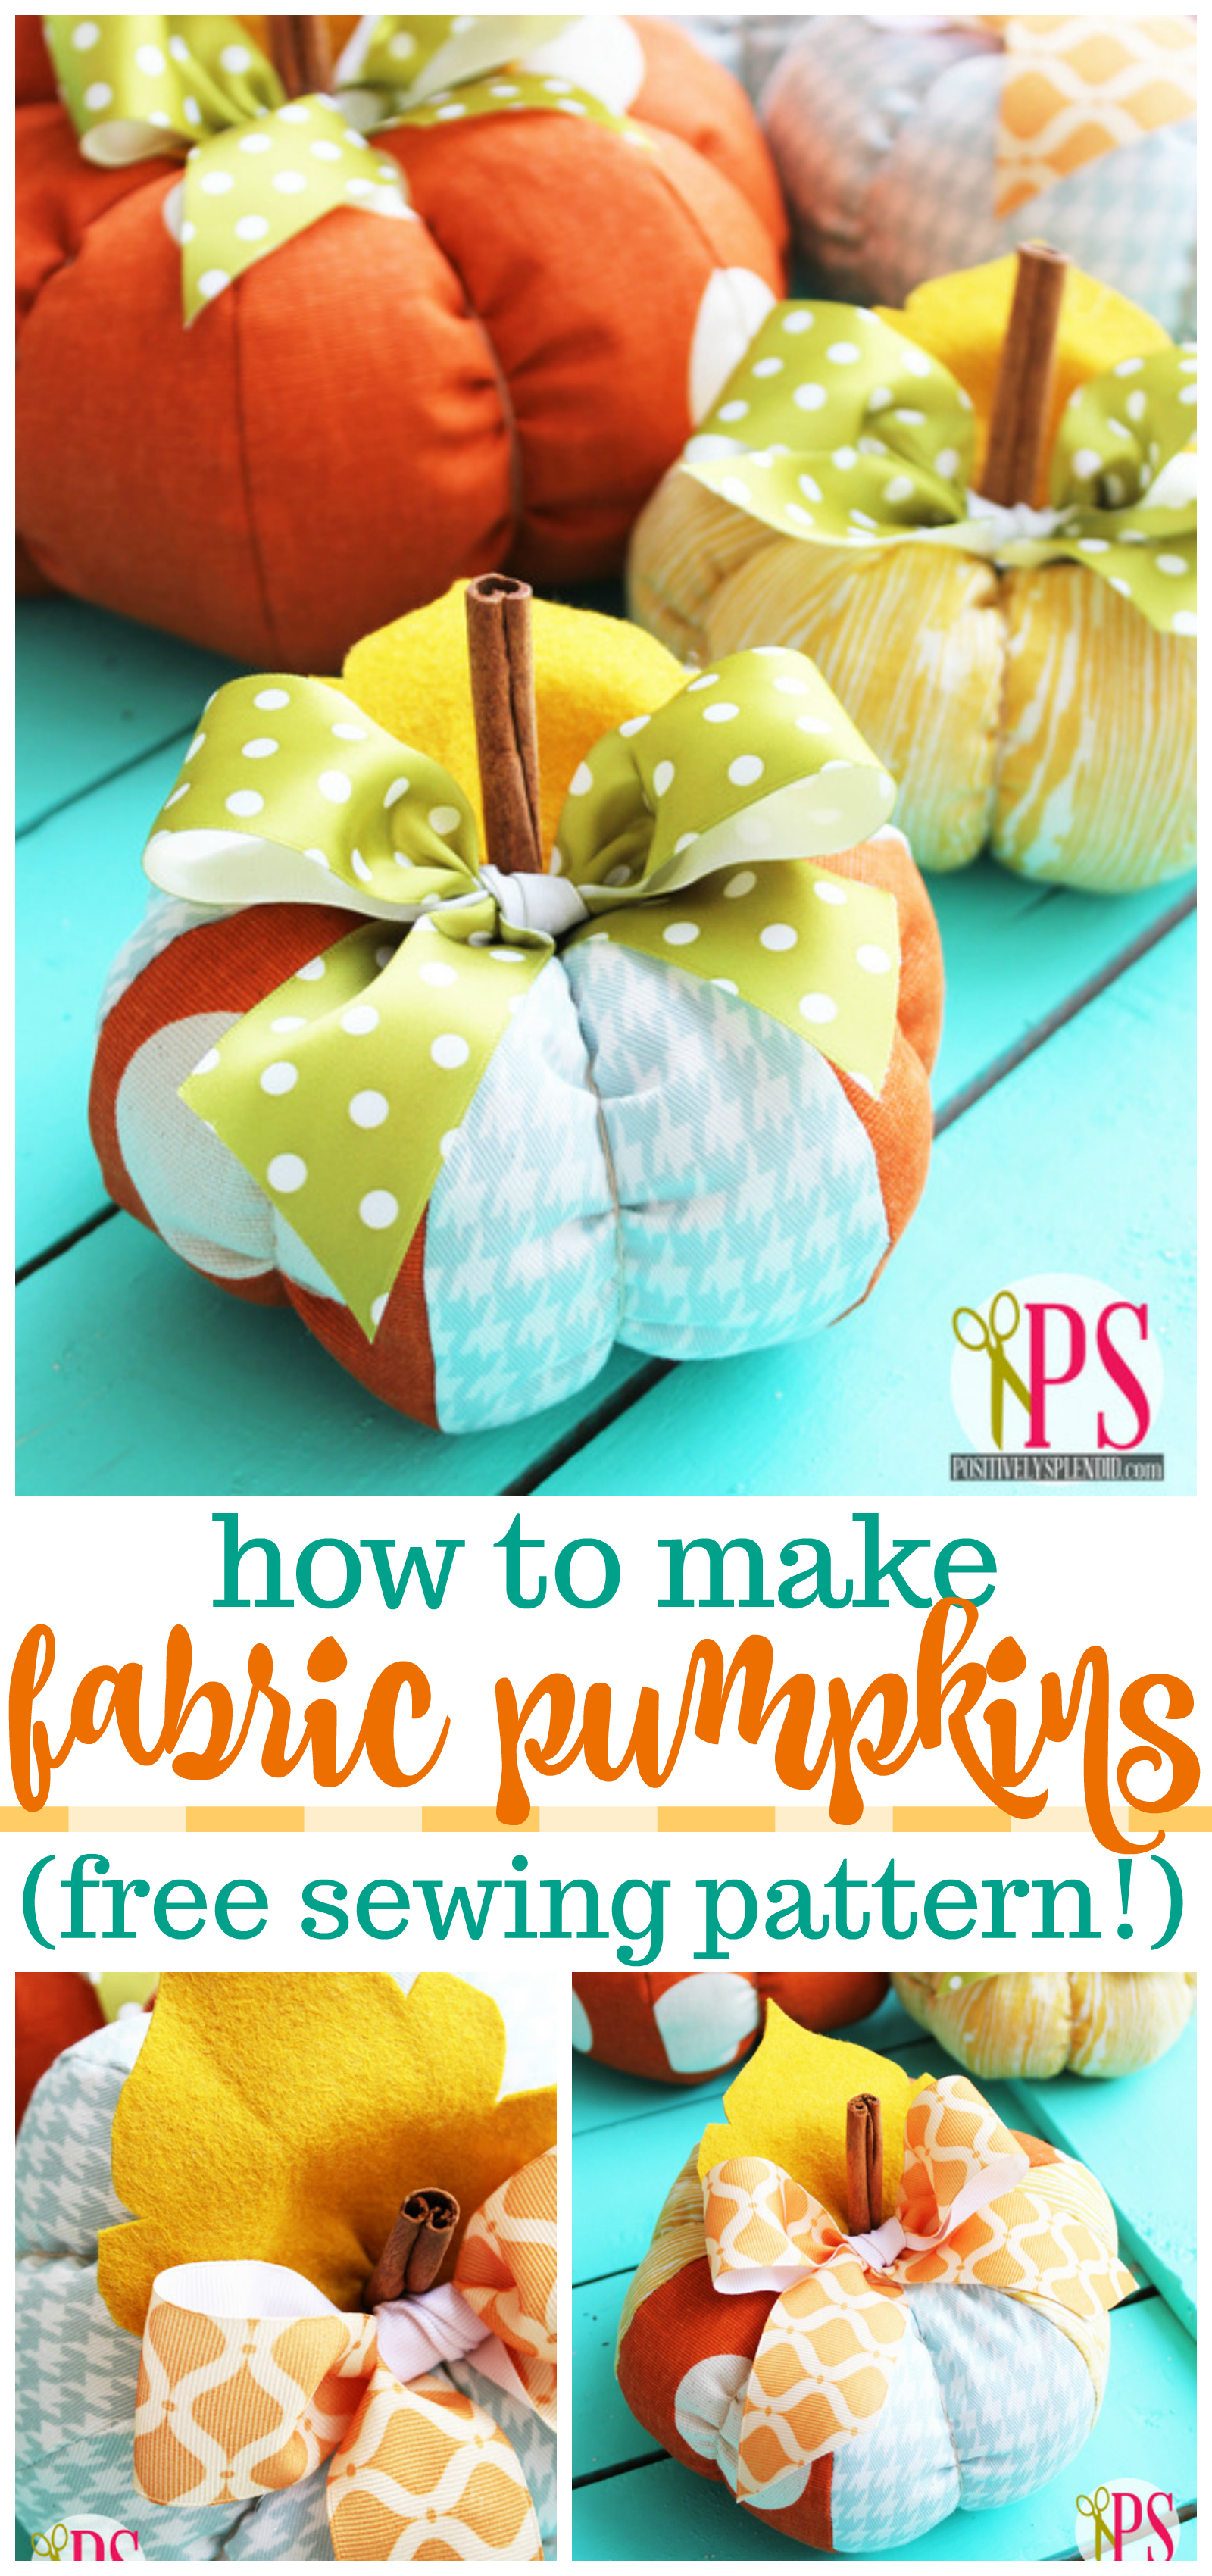
Grab some favorite fall fabrics and make a patch of adorable plush fabric pumpkins to accent your fall decor this year! Today, I’m sharing the free pattern for making an entire collection of these fun fabric pumpkins, which are an easy sewing project (even for beginners) and an excellent way to use fabric scraps you might already have on hand. The beauty of this fabric pumpkin pattern is that it can be assembled using scraps you already have on hand, and it comes in 3 versatile sizes: small (5.5″ across), medium (7″ across) and large (8.5″ across). The sewing portion of this project is lightning-quick, and before you know it, you’ll have an entire patch of these beauties whipped up. Let me show you how to do it!
Fabric Pumpkin Supplies:
- Plush Patchwork Pumpkin Templates (available as a free download below)
- Fabric in assorted patterns (scraps work great here)
- Coordinating thread
- Sewing shears
- Fiber fill
- Hand sewing needle
- Embroidery floss or yarn
- Large embroidery needle
- Felt
- Ribbon
- Cinnamon sticks
- Hot glue
(List above contains affiliate links.)
Click the links below to download the DIY fabric pumpkin pattern pieces:
Large Pumpkin Templates
Medium Pumpkin Templates
Small Pumpkin Templates
Pumpkin Leaf Templates

Using a 1/4″ seam allowance, stitch these pieces together.

Pin another of your fabric pieces to this assembled piece, right sides facing, and stitch together in a similar fashion. You will now have a somewhat circular piece composed of three separate fabric pieces. Set this piece aside for now.


Stitch around the entire perimeter of the pinned pieces (you will be stitching in a circle), making sure to leave about 1.5″ inches open between the beginning and end of your stitching. Using a chopstick or turning tool, turn the piece right side out.

Stuff your pumpkin with a generous amount of fiber fill. You want the pumpkin to be firm when squeezed, but not overstuffed. Using a needle and thread, handstitch the opening shut.
Thread a long length of embroidery floss or yarn through your embroidery needle. (Depending upon the size of your pumpkin, you will probably need somewhere between 1 1/2 and 2 yards.)
Poke the threaded needle down through the bottom of your pumpkin, close to the center, as shown. Poke the needle back down through the pumpkin…

…and tie the two tails of thread that now are hanging from the bottom center of your pumpkin in a nice, tight knot. (This will give your pumpkin a tufted appearance.) Do not trim your thread yet!

Bring your threaded needle up and around the side of your pumpkin, moving from the bottom to the top, poking the needle down directly through the center of your pumpkin, as shown. Pull tightly to further tuft your pumpkin. Repeat this step for each of the six sections of your pumpkin.

When each section has been tufted, secure the threads with a knot on the bottom of the pumpkin. Trim.
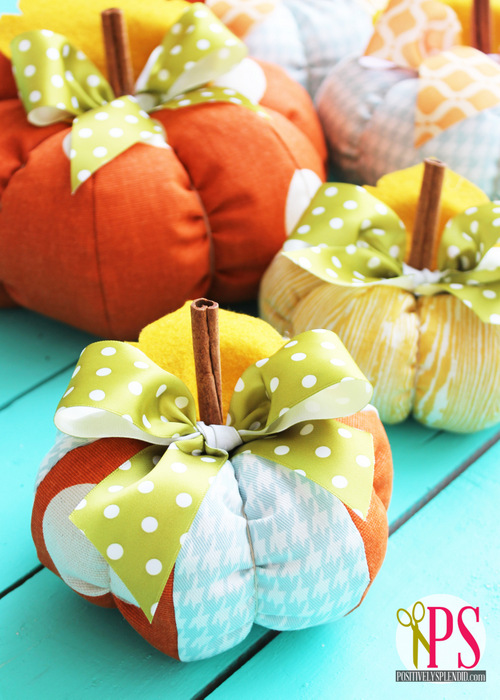
Using the template provided, cut a leaf shape from felt, and affix it to the top of the pumpkin with hot glue.

Embellish further with a cinnamon stick stem and a pretty bow.


Thanks for stopping in!
Having grown up in a home brimming with sewing notions and paintbrushes, Amy has a deep love for all things creative. On any given day, you’ll find her knee-deep in her latest creative endeavor, with projects ranging from sewing and crafts to home decor and kid-friendly ideas. Amy believes that everyone, regardless of skill level or experience, possesses the ability to create something beautiful, and Positively Splendid was born of her passion for helping others harness their innate creative potential.
Amy, these are fabulous! Of course, I’m a sucker for anything patchwork!
I can’t wait to make a few of these for fall!
What a fun mix of colors and patterns. 🙂 These are just adorable, Amy!
These are adorable!! Love them Amy!
You are amazing! These are just what I need for fall decor.
I absolutely love the look of this, with the patchwork (love all things patchwork for some reason)! You really are so talented! Thanks for sharing. 🙂
Trinity
These really are the cutest pumpkins ever Amy! I love the fabrics you chose!
These are really awesome! I especially love how you can customize with fabric & the cinnamon stick is perfect 🙂
These are so cute. I love the different fabrics.
Oh wow. Those are amazingly CUTE! Love the aqua zing you slipped in there 😉 Just darling!
Thanks so much for the tutorial. Totally random search just now brought me here. Love them!
They are beautiful! Thanks for sharing.
They are beautiful! Great work! I found them at TT&J. 🙂 Megan
Loving these! Not sure if I could do it, but they sure are so pretty 🙂 Love the cinnamon stick!
I am having an error message when I try to download the pattern. Is anyone else having an issue?
Torrie, are you by chance using Firefox as your browser? I have heard of a few other Firefox users experiencing that issue.
These are so cute.. I love them ! Thanks so much for the patterns and tutorial !
You are so very welcome, Terry!
wowhoo fantastic tutorial, how i can dowload the pdf patterns? Thanks you
elena
Amy How beautiful. I love these pumpkins. I am unable to download the pattern though. Any suggestions.
Elizabeth
Thanks so much, Elizabeth! I am so sorry you’re experiencing issues. Are you by chance using Firefox as your browser? I have heard from a few readers having issues trying to grab the downloads with Firefox. I am more than happy to email them to you if you prefer! Just send me an email amy (at) positivelysplendid (dot) com. I’ll send them your way. 🙂
Amy, your work is so fun and amazing. I hope you don’t mind that I shared your tutorial and referred to your blog on my blog. Hope you stop by and check it out! http://www.fiberluscious.blogspot.com.
Thanks for sharing your creativity with us!
Jill
Que lindos.
Obrigada
Beijinhos
Locas…..
Likely asking a silly question, but how does the cinnamon stick get applied if the top and bottom of the pumpkin are closed? :/
The leaf, cinnamon stick and bow are all applied with hot glue.
Made two last night using plain old felt. Made the stems with crochet, then used the yarn tail to “tuft”. I also sewed the leaf to attach, instead of using hot glue. I also elongated the medium pattern by about an inch to create a taller/rounder pumpkin. Leaf templates align nicely if you place the point/tip in the corner of your felt piece – this helps minimize waste. Very easy, fast design. They are very cute.
So glad you enjoyed this project, Connie! I would love to see your creations.
Very intersting Tutorial! Well described and with very beautiful photos! I cited it in my Italian Blog: http://www.lunadeicreativi.com!
Thank you for sharing your project!
Lory
These are so cute! I whipped up 3 today and, while I am no master crafter, they were pretty easy and turned out well! My only difficulty was with the tufting, I have never tufted anything before and I found it really hard to tuft the small one, and impossible to tuft the medium and large ones without my husband squishing them down enough to get the needle through. What am I doing wrong?
Hi, Alyssa! It might be that you are over-filling the pumpkins. I would recommend a bit less batting, and then using a heavy-weight thread for the tufting process. I hope this helps!