
After Jack received the most adorable (and ingenious!) thank you note from a good friend a few weeks back, I set out to make something similar for him to send to the friends who attended his birthday party. It really is a terrific concept: make notes with fillable fields to allow the child to truly participate in showing his gratitude as he fills each one out. Jack loved being able to showcase his writing skills as he meticulously filled out his name and the name of his friends on each one. It was also quite cute to hear just exactly why he liked each particular gift he received!
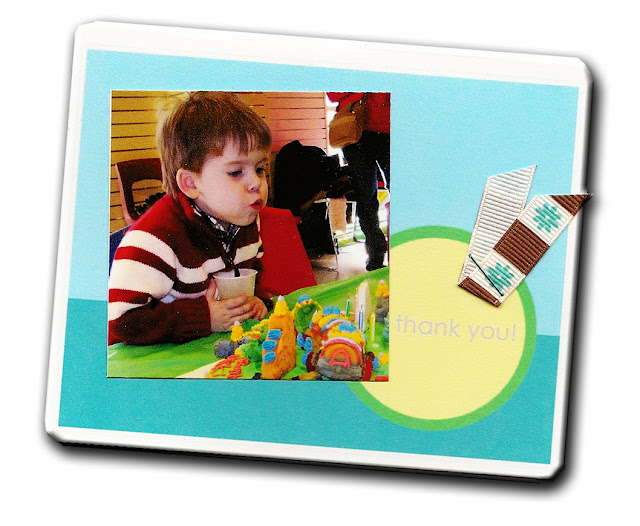
I always like to be able to put a photo of the birthday boy or girl on thank you’s when possible (I think it’s a fun way to help remember a terrific day, and it always makes my kiddos feel special), so I left a space on the front of the design for a 2.5″ square photo to be attached. (Another cute option would be to make it a point to take pictures of the birthday boy or girl with each guest for this purpose.) After I attached the pictures to the note, I simply embellished with a small piece of ribbon and a staple and then used a punch to round the corners. Easy as pie!
 I created two versions of this note, with one for boys and one for girls. I know these will come in handy again when the girls’ birthdays roll around this summer! For those interested, I am posting the files for both complete thank you’s here. I would love for them to be put to good use!
Boy Fillable Thank You (Inside)
Boy Fillable Thank You (Outside)
Girl Fillable Thank You (Inside)
Girl Fillable Thank You (Outside)
I would love to see your creations with this little template. Have fun!

Having grown up in a home brimming with sewing notions and paintbrushes, Amy has a deep love for all things creative. On any given day, you’ll find her knee-deep in her latest creative endeavor, with projects ranging from sewing and crafts to home decor and kid-friendly ideas. Amy believes that everyone, regardless of skill level or experience, possesses the ability to create something beautiful, and Positively Splendid was born of her passion for helping others harness their innate creative potential.
Wow Amy! Thanks for sharing!