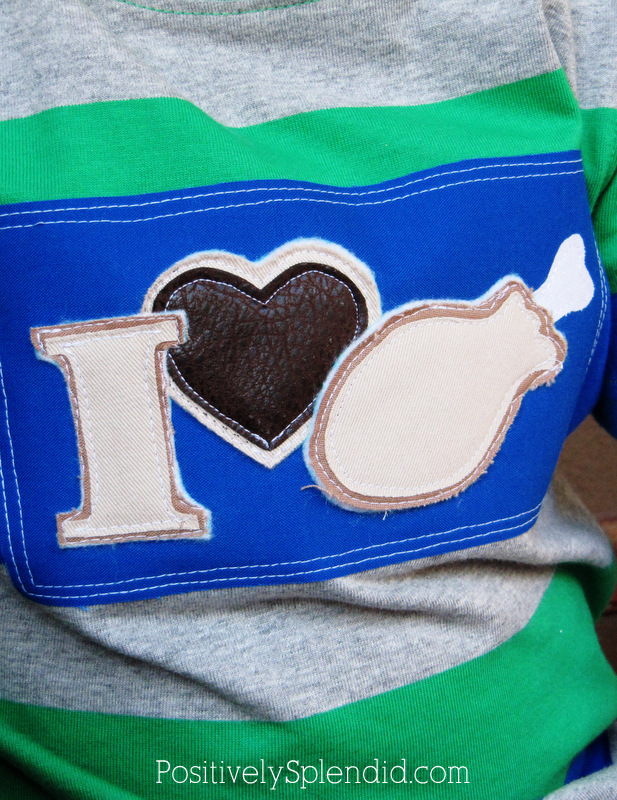
With Thanksgiving around the corner, sew up a fun t-shirt for a little boy in your life to wear on the big day. This Thanksgiving I (heart) turkey t-shirt idea is so simple to make with my free templates!


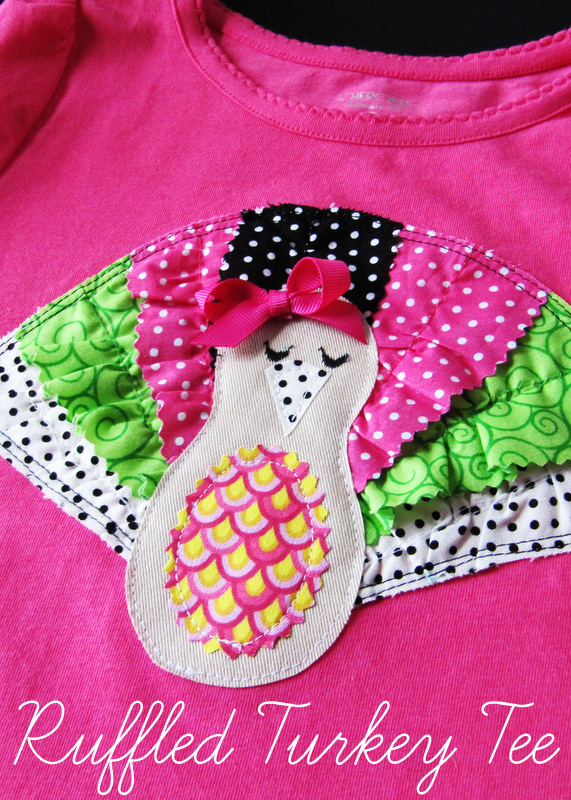
P.S. Looking for a t-shirt idea for the little girls in your life? Don’t miss my Ruffled Turkey Tee!
Having grown up in a home brimming with sewing notions and paintbrushes, Amy has a deep love for all things creative. On any given day, you’ll find her knee-deep in her latest creative endeavor, with projects ranging from sewing and crafts to home decor and kid-friendly ideas. Amy believes that everyone, regardless of skill level or experience, possesses the ability to create something beautiful, and Positively Splendid was born of her passion for helping others harness their innate creative potential.
Oh my leather heart from heaven! This is so stinkin’ cute, AMY! And it has a lot to do with how seriously he’s rockin’ that shirt. He’s completely handsome and awesome!
I actually need to make this for my husband. It’s true for him. Do you think he’d wear it? Hmmmm……
I GREAT BIG LEATHER HEART THIS!!
This is so stinkin cute!!! I MUST make one today!
This is so dang cute!!! LOVE it!
Super cute and perfect for boys- which is so hard to find!
So cute! Yay for boys! Your little guy is too adorable.
I would love the PDF file for these appliques! Could you please post it (or just send it to me) please? Using the leather for the heart was inspired!
I love that this is for ‘real’ little boys. So often I see patterns that are supposed to be for boys but are waaaaay too cutesy. This is really going to get used.
This is absolutely awesome! LOVE THAT SHIRT! Any time I see fabulous boy projects, I get giddy!!! Genius! I am featuring this at somedaycrafts.blogspot.com today. Grab my “feaTured” button.
Adorable! I must make two of them this weekend! All the boys holiday shirts are so stinking lame! I would love the PDF (plannedimprovisation at gmail dot com)
Thanks!
Love it! You did an awesome job. I hope you don’t mind but I featured you on my blog! werethejoneses.blogspot.com
Talk soon!
So stinkin’ cute! Love it!
This makes me giddy. I love a good boy craft and I agree with Debra about this being a REAL boys shirt. The leather heart totally makes the shirt.
http://boyohboyohboycrafts.blogspot.com
I would love the tempalte for the turkey leg.
[email protected]
This is soooo adorable. I lov your blog too. I am now following you on twitter and google:) You can find me at http://www.bouffeebambini.bogspot.com
I just last night stumbled upon your blog and just think it is adorable!!! I have 4 boys and would LOVE the PDF for the I Heart Turkey legs…my email is [email protected] that is super sweet of you to offer!!!
I’m gonna follow you!
This is so stinkin cute! I love the colors and materials that you used, precious! I MUST make these for my boys to wear to Thanksgiving dinner!!!
Hey Amy, I just saw this over at Someday Crafts and had to stop over to say something. I LOVE IT!!! First of all, it’s absolutely hilarious. Secondly, it’s so well done. Thirdly, he looks so cute in it. I could go on, but I’ll stop now. Great work, Amy!
Cheri
This is so adorable! I would love the PDF if you would be willing to send it to me? Thanks so much,
Melissa
[email protected]
I came back to look at your tutorial again and realized I never left a comment the first time! This shirt is adorable. I just finished making shirts for my two younger boys, and now I’m going to attempt a version of your shirt for my oldest. I will link over to you when I post about it.
I featured this cute idea on my blog today!
kimboscrafts.blogspot.com
I featured this on my blog today!
seemesew.blogspot.com
I made one for my grandson’s upcoming trip to Disney World. My husband is a huge fan of their turkey legs, and we both thought this made a perfect shirt for his trip. Thanks for the idea! Your pattern pieces and photos made this project a breeze.
Could you please e-mail me this PDF? I love these shirts!!! So adorable. [email protected] Thanks!!
So adorable! I was able to use your pattern to make a felt version for my son this year. It turned out so cute. Thank you for sharing.