• Skip to primary navigation
  • Skip to main content
  • Skip to primary sidebar

Positively Splendid {Crafts, Sewing, Recipes and Home Decor}

Handcrafted. Splendidly.

  • Home
  • Blog
  • + Handmade
    • Crafts
      • Craft Gift Ideas
      • Holiday Crafts
      • Home Decor Crafts
      • Kids’ Crafts
      • Paper Crafts
      • Quick and Easy Crafts
      • Wearable Crafts
      • Wreaths
    • Gift Ideas
      • Budget-Friendly Gifts
      • Gift Wrapping
      • Gifts for Dads and Grandpas
      • Gifts for Kids
      • Gifts for Men
      • Gifts for Moms and Grandmas
      • Gifts for Neighbors
      • Gifts for Sports Fans
      • Gifts for Teachers
      • Gifts for Women
      • Quick and Easy Gifts
    • Kid-Friendly Projects
    • Sewing
      • Sewing for Children
      • Sewing for Men
      • Sewing for the Home
      • Sewing for Women
      • Sewing Techniques
      • Sewn Accessories
      • Sewn Gifts
  • + Home & Garden
    • DIY Home Decor Projects
    • Helpful Tips
    • Home Decor Crafts
    • DIY
    • Home Tour
    • Mantels and Tablescapes
    • Organization
    • Outdoor and Garden
  • + Holidays & Seasons
    • Spring
    • St. Patrick’s Day
    • Summer
    • Teacher Appreciation
    • Thanksgiving
    • Valentine’s Day
    • Winter
    • Back to School
    • Christmas
    • Easter
    • Fall
    • Fathers’ Day
    • Graduation
    • Halloween
    • Independence Day
    • Mothers’ Day
    • New Year’s
  • + Printables
  • + Recipes
    • Soups and Stews
    • Appetizers and Salads
    • Breads
    • Desserts
    • Food Crafts
    • Main Dish

Ceiling Pendant Tutorial by H is for Handmade

July 20, 2011 By Amy @ Positively Splendid

FacebookTweetPinYummlyPrint
Today Amy from H is for Handmade is sharing a dynamic paper project with us to outfit your home with style. Love this idea!
***
Hello to all the fine friends of Positively Splendid! I have been looking forward to appearing on Amy’s blog for quite some time now and am so thrilled that it is finally here! Today I am going to show you how to make your very own ceiling pendant using just a few supplies and a lot of creativity! It’s a simple and low budget project, but it sure adds a lot to a room and the outcome is priceless!

Let’s get started!

Materials that you will need:
-1 large roll postal/craft paper from your home improvement store. Any heavy weight paper will do!
-ruler and/or sturdy straight edge
-pencil
-scissors (exacto knife or rotary blade work great too!)
-double stick tape (I prefer the above pictured tape found at any home improvement store. It’s extremely sticky and has a very strong hold!)

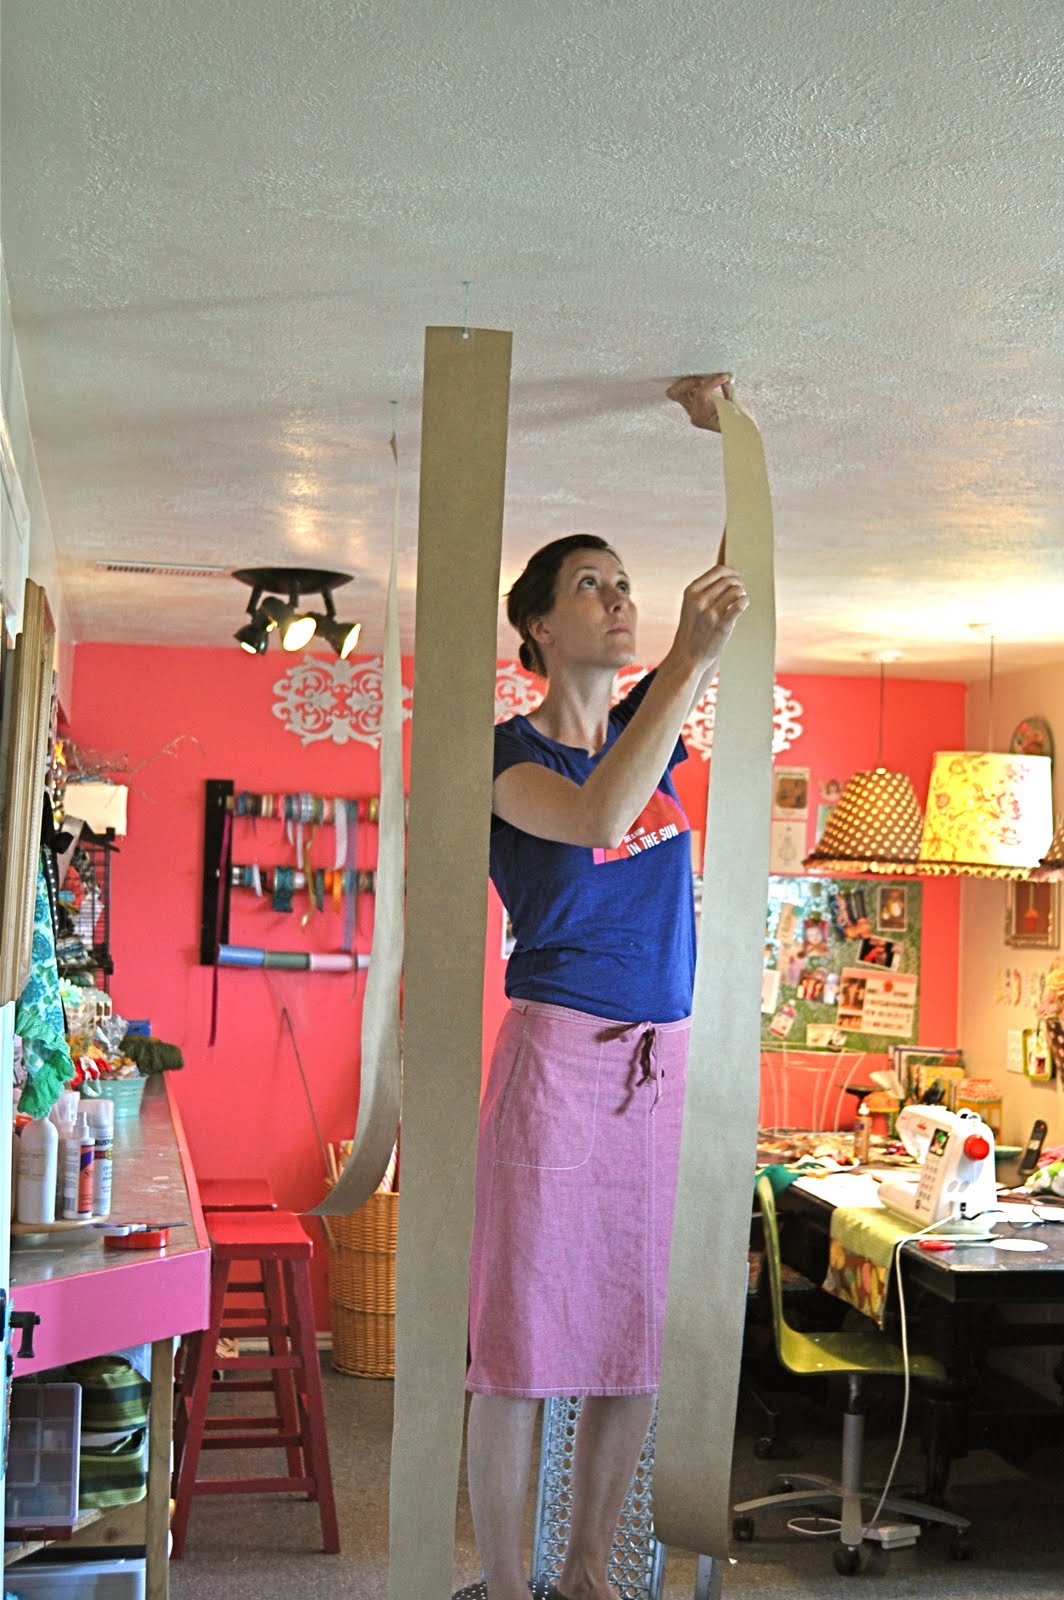
 First, you will want to unroll your paper and lay it out on a flat surface. Using your ruler, mark your paper every 4″ all the way across your paper. Move your ruler up and keep marking as you go. I marked up to 6′ on the roll. Once your measurements have been marked, go back and connect the marks with lines. These will be your guides for cutting.

Using your scissors or knife, cut your paper on the lines to create several single strips of paper. Be sure to place something under your paper if you are using a knife or rotary blade so that you do not cut up your floors!
Now take 1 of your strips and fold a piece of tape over the top of it. Punch a hole in the middle and attach a piece of string to it. The tape will secure the hole and keep it from ripping through. Use a pin to hang your strip of paper.
Hang your strip of paper to the ceiling and measure how long you need it and trim accordingly.

Tip: Take your double stick tape and cut several pieces off and set them aside for easy access! This will speed up the process and make things run a lot smoother!
Now it’s time for the fun stuff! Use your remaining strips of paper and some serious brain cells to create shapes and designs to attach to your strip. Use a series of folds, creases, bends and curls to come up with some fun shapes! There is no wrong way to do it! Make sure you have some small shapes and some large ones to give it dimension.

Use your pieces of double stick tape to hold down your designed shapes as you go. (the tape is not really pink! It’s just the release liner!)

Once you have come up with a good shape, cut it from the rest of the roll.
Here are some examples that I did that you can use! These were made with one single piece of paper using a series of folds and loops and a little tape to hold them in place.
You can begin to add your pieces to the hanging strip of paper. Use your tape to attach them to not only to the strip of paper, but to each other. Work from either the bottom up or from the top, down.

Keep adding pieces on top of each other, taping as you go.
Add more and if you need to fill in some gaps, just go for it!

 Add as many as you want and make it as full as you want until you get to the end of your strip and finish it off.

It may take a few hours, a few breaks and a few chocolate treats to get you by, but the end result is worth all your hard work!
So how did you do?

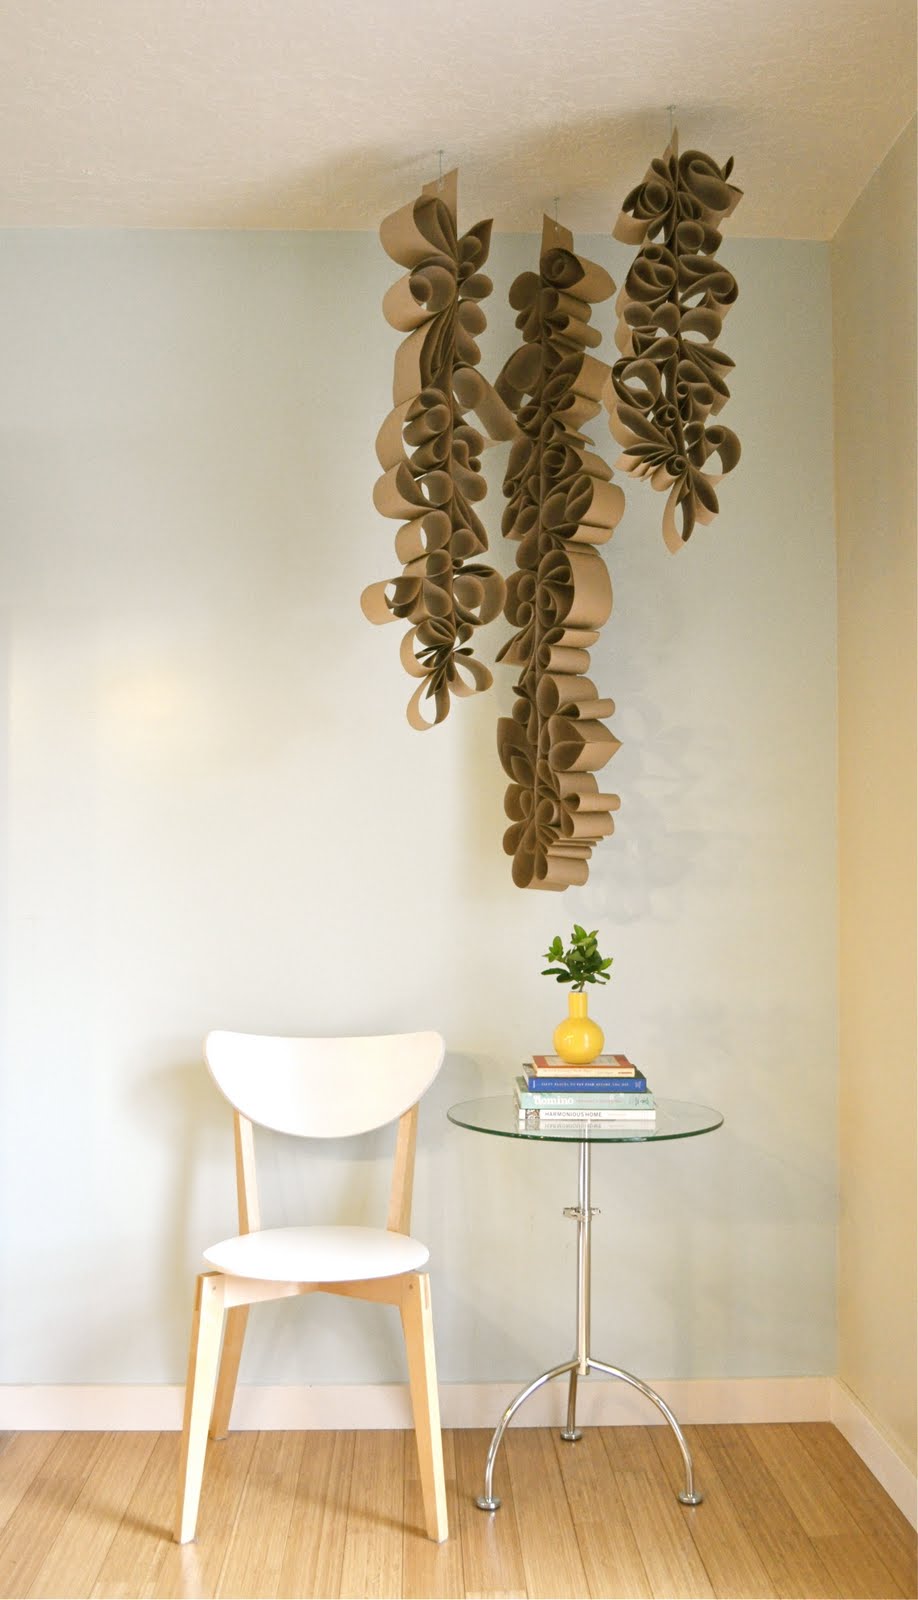
 Now hang them in your favorite room and sit back and enjoy! It fun to watch them spin around in the breeze because they are so dang pretty from each angle! 

Thank you so much Amy of Positively Splendid for the opportunity to be a part of this amazing blog and letting me share some creativity with your fans! It has been a true pleasure and an honor! 

-Amy H.

Photobucket

***
What a fun, unique project! Thanks, Amy, for stopping by to share it with us!
Also…
I am guesting over at Sew Dang Cute today, and I’d love for y’all to stop by to say hello! I am sharing a simple and inexpensive little gift idea for a new mom in your life. Here’s a sneak peek to pique your interest! 🙂

Photobucket

Amy @ Positively Splendid

Having grown up in a home brimming with sewing notions and paintbrushes, Amy has a deep love for all things creative. On any given day, you’ll find her knee-deep in her latest creative endeavor, with projects ranging from sewing and crafts to home decor and kid-friendly ideas. Amy believes that everyone, regardless of skill level or experience, possesses the ability to create something beautiful, and Positively Splendid was born of her passion for helping others harness their innate creative potential.

EVEN MORE GREAT IDEAS JUST FOR YOU!

FacebookTweetPinYummlyPrint

Filed Under: Tutorials Tagged With: Guest Posts

Previous Post: « Peach Dumpling Recipe
Next Post: Pate-Meadows Designs Giveaway! »

Reader Interactions

Comments

  1. Zoe says

    July 20, 2011 at 9:38 pm

    Wow- I like this- very pretty. I am sure that I wouldn’t be able to make it look like that though : )

  2. Finding Charm says

    July 21, 2011 at 12:18 am

    Very cool. I can see these being used a Christmas.

  3. elsabags says

    July 27, 2011 at 11:00 pm

    Love it!

  4. katepurcell says

    August 27, 2011 at 6:44 pm

    I was inspired by this! I created a couple of these out of the pages of old books and used them in a store window display in Baltimore: http://www.wonderingtheworld.com/2011/08/store-window/

  5. K. Castellano says

    November 2, 2011 at 10:09 pm

    I love this! Thank you for sharing! Planning making these for Christmas!

  6. Camille Short says

    August 2, 2012 at 3:37 pm

    I love this!

Primary Sidebar

PS Search

Search this website

Seasonal Inspiration

Hocus Pocus Wreath
Ghost Plushies
Paper Pumpkins
Fabric Yo-Yo Pumpkins

Copyright © 2025 · Positively Splendid · All Rights Reserved. · Privacy Policy

Privacy & Cookies: This site uses cookies and other tracking technologies to assist with navigation and your ability to provide feedback, analyse your use of our products and services, assist with our promotional and marketing efforts, and provide content from third parties. To find out more, as well as how to remove or block these, see here: Our Cookie/Privacy Policy