• Skip to primary navigation
  • Skip to main content
  • Skip to primary sidebar

Positively Splendid {Crafts, Sewing, Recipes and Home Decor}

Handcrafted. Splendidly.

  • Home
  • Blog
  • + Handmade
    • Crafts
      • Craft Gift Ideas
      • Holiday Crafts
      • Home Decor Crafts
      • Kids’ Crafts
      • Paper Crafts
      • Quick and Easy Crafts
      • Wearable Crafts
      • Wreaths
    • Gift Ideas
      • Budget-Friendly Gifts
      • Gift Wrapping
      • Gifts for Dads and Grandpas
      • Gifts for Kids
      • Gifts for Men
      • Gifts for Moms and Grandmas
      • Gifts for Neighbors
      • Gifts for Sports Fans
      • Gifts for Teachers
      • Gifts for Women
      • Quick and Easy Gifts
    • Kid-Friendly Projects
    • Sewing
      • Sewing for Children
      • Sewing for Men
      • Sewing for the Home
      • Sewing for Women
      • Sewing Techniques
      • Sewn Accessories
      • Sewn Gifts
  • + Home & Garden
    • DIY Home Decor Projects
    • Helpful Tips
    • Home Decor Crafts
    • DIY
    • Home Tour
    • Mantels and Tablescapes
    • Organization
    • Outdoor and Garden
  • + Holidays & Seasons
    • Spring
    • St. Patrick’s Day
    • Summer
    • Teacher Appreciation
    • Thanksgiving
    • Valentine’s Day
    • Winter
    • Back to School
    • Christmas
    • Easter
    • Fall
    • Fathers’ Day
    • Graduation
    • Halloween
    • Independence Day
    • Mothers’ Day
    • New Year’s
  • + Printables
  • + Recipes
    • Soups and Stews
    • Appetizers and Salads
    • Breads
    • Desserts
    • Food Crafts
    • Main Dish

Stenciled Silhouette Tote

April 17, 2012 By Amy @ Positively Splendid

FacebookTweetPinYummlyPrint

I’ll be heading to SNAP! later this week, and although I am incredibly excited, the mama in me always finds it hard to be away from my kiddos. So, to remind me of them while I’m away, I decided to make a little early Mother’s Day gift for myself to carry during the conference: a tote showcasing all of their sweet little silhouettes!

I was recently the incredibly lucky recipient of a box brimming with these fabulous goodies from Martha Stewart Crafts. I don’t think I’ve ever seen so much creative potential all in one place!

The moment I opened the box and saw this heat tool and the rolls of stencil material, I knew I wanted to use those products to make customized silhouette stencils of my kiddos.

I outfitted the heat tool with the angled point and allowed it to heat up for 10 minutes or so.

I had already created the silhouette images for my Christmas mantelscape using my tutorial for creating silhouettes with Photoshop Elements, so to start, I printed those files out onto regular paper at wallet size. If you don’t happen to have that software, my friend Traci at Beneath My Heart has a terrific tutorial for simply creating silhouettes by hand.
The heat tool requires the use of a glass surface, so I decided to use one of my pie plates for the job. I used the stencil tape to adhere the silhouette image to the inside of the plate…

…and then I inverted the pie plate and taped a square of stencil material on top of the silhouette image, as shown.

I held my pie plate up to a window (my cheater’s version of a light box), and used a pencil to trace all the way around the silhouette image.

And now, the fun part: cutting out the silhouette with my heat tool! Doing so really is as simple as tracing all the way around the image with the tool, holding it just like you would a pen or a pencil. The tool will melt away the stencil material so that once you’re done, you can remove the center part like this:

Cool!!

Once each child’s silhouette stencil was complete, I adhered each one to the front of a ready-made canvas tote using the stencil tape. (You can see from the paint around the girls’ silhouettes that I did a bit of experimenting with the stencils beforehand. 🙂

I mixed the satin paint in surf with some of the fabric medium…

…and grabbed my brushes to start stenciling! The key to stenciling detailed images like these: work with very small amounts of paint at a time, and blot the brush up and down instead of brushing it from side to side.

Once the stenciled images were dry, I added a few ruffled strips to the front of my tote (in polka dots, of course!) and a sweet little accent bow on the handle. 
Isn’t she cute?

Silhouettes are such a sweet addition to projects, and they are especially perfect for Mother’s Day, when sentimental, meaningful gifts are just about always the ticket. Now that I have the custom silhouette stencils made of my children, I can use them over and over again to embellish any number of Mother’s Day gifts for our moms this year. Because the paints by Martha Stewart Crafts can be used on just about any surface under the sun, the sky is the limit for the variety of possible gift projects: a stenciled silhouette canvas, another tote, or maybe even a decorative plate!

Be sure to connect with Plaid on Facebook, Twitter and Pinterest to see even more inspirational ways to use these products!

***

Are you heading to SNAP! this week? If so, I would love to connect with you! You’ll know me by the two accessories I’ll be sporting throughout the weekend: my bag above, and this sweet little one:


(I might be partial, but I think my second accessory is the cutest thing going this season. 🙂

Thanks for stopping by, everyone!

Photobucket

This post has been sponsored by Plaid and Blueprint Social. Rest assured that all opinions stated here are expressly my own, and I am dedicated to only sharing products that I feel my readers will benefit from and enjoy.

Amy @ Positively Splendid

Having grown up in a home brimming with sewing notions and paintbrushes, Amy has a deep love for all things creative. On any given day, you’ll find her knee-deep in her latest creative endeavor, with projects ranging from sewing and crafts to home decor and kid-friendly ideas. Amy believes that everyone, regardless of skill level or experience, possesses the ability to create something beautiful, and Positively Splendid was born of her passion for helping others harness their innate creative potential.

EVEN MORE GREAT IDEAS JUST FOR YOU!

FacebookTweetPinYummlyPrint

Filed Under: Crafts, Gift Ideas, Gifts for Women, Tutorials, Wearable Crafts Tagged With: Mothers' Day, Painting, Sewn Accessories

Previous Post: « White and Gold Mantel
Next Post: Win $3000 for Your Messy Living Space from ForRent.com! »

Reader Interactions

Comments

  1. Amanda says

    April 17, 2012 at 1:01 pm

    The tote is so cute, but not as cute as your second accessory!
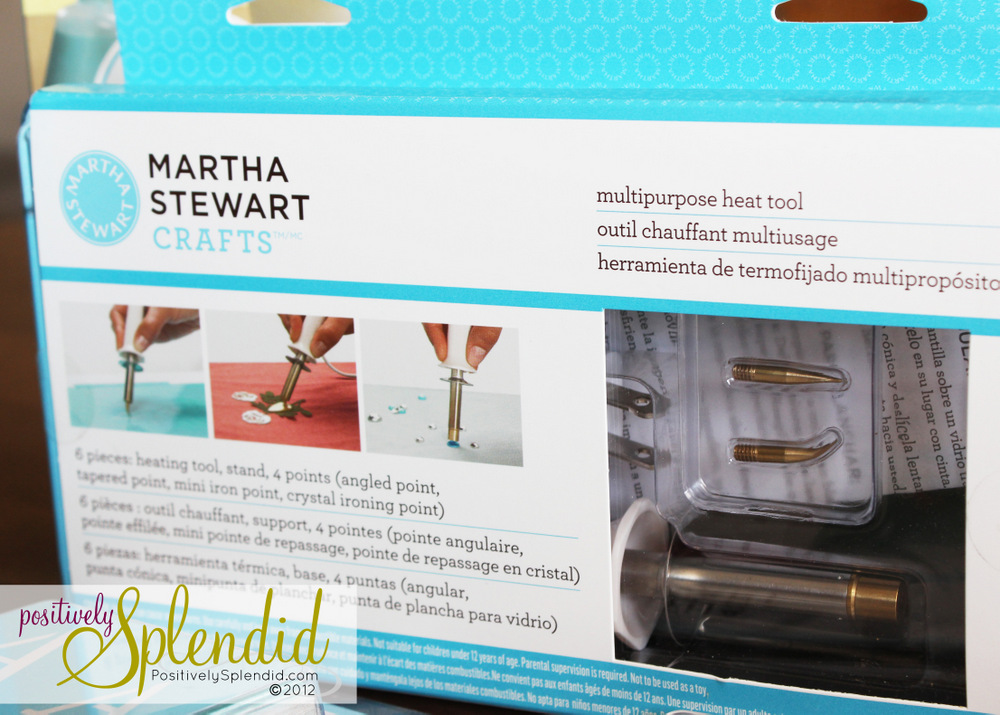
    I can’t believe that a heat tool was able to cut out the stencil so well, the nose and mouth detail is great, you did such an awesome job!
    Have a great time at SNAP1

  2. Lori says

    April 17, 2012 at 1:03 pm

    Oh wow! So cute!!!

  3. Kara says

    April 17, 2012 at 2:32 pm

    Adorable as always Amy! Can’t wait to meet you (and little George) this weekend!

  4. Kellie says

    April 17, 2012 at 3:39 pm

    So cute and clever! Thanks for sharing 🙂

  5. Shannon says

    April 17, 2012 at 6:07 pm

    What a great bag!!! I love how well the heat tool cut out the stencil!
    Shannon
    (www.akadesign.ca)

  6. Jess says

    April 17, 2012 at 7:04 pm

    love the teal an red color combo you choose! And polka dot ruffles 😀

  7. Amanda @ Serenity Now says

    April 17, 2012 at 7:09 pm

    J’dore!!! Amy, this is just precious. I am so glad you shared how to use the heat tool. It’s a little intimidating to me. 😉 Great project!

  8. Heidi @ Honeybear Lane says

    April 18, 2012 at 2:48 am

    I’m so happy you used the heat tool–I was curious to know how to work it and wasn’t feeling up to the challenge just yet. Turned out great!! PS I am bringing a super cute accessory too–my baby girl!

  9. Michele {The Scrap Shoppe} says

    April 18, 2012 at 4:05 am

    Oh, Amy, this is just adorable! I love that you used the heat tool. 🙂 I can’t wait to see this cute tote, you, and that adorable little man in a couple of days!

  10. Richella says

    April 18, 2012 at 6:50 pm

    Amy, I had the pleasure of meeting you briefly at BlissDom back in January 2011. I found your blog, loved it (of course), but somehow never signed up as a Follower. And then I lost it. I’m bad about losing sunglasses and pens and tubes of lipstick, too–I think I need some organizational help! But I’ve found you again, and I’m so glad to be here. This time I DID successfully sign up to be a follower, so I look forward to getting to know you better.

    Hope you’re having a great day! 🙂

  11. Amy Anderson says

    April 25, 2012 at 1:18 am

    Amy this is seriously cute! Maybe even more cute than that yellow dress you had on at SNAP? ;p

Primary Sidebar

PS Search

Search this website

Seasonal Inspiration

Hocus Pocus Wreath
Ghost Plushies
Paper Pumpkins
Fabric Yo-Yo Pumpkins

Copyright © 2025 · Positively Splendid · All Rights Reserved. · Privacy Policy

Privacy & Cookies: This site uses cookies and other tracking technologies to assist with navigation and your ability to provide feedback, analyse your use of our products and services, assist with our promotional and marketing efforts, and provide content from third parties. To find out more, as well as how to remove or block these, see here: Our Cookie/Privacy Policy