• Skip to primary navigation
  • Skip to main content
  • Skip to primary sidebar

Positively Splendid {Crafts, Sewing, Recipes and Home Decor}

Handcrafted. Splendidly.

  • Home
  • Blog
  • + Handmade
    • Crafts
      • Craft Gift Ideas
      • Holiday Crafts
      • Home Decor Crafts
      • Kids’ Crafts
      • Paper Crafts
      • Quick and Easy Crafts
      • Wearable Crafts
      • Wreaths
    • Gift Ideas
      • Budget-Friendly Gifts
      • Gift Wrapping
      • Gifts for Dads and Grandpas
      • Gifts for Kids
      • Gifts for Men
      • Gifts for Moms and Grandmas
      • Gifts for Neighbors
      • Gifts for Sports Fans
      • Gifts for Teachers
      • Gifts for Women
      • Quick and Easy Gifts
    • Kid-Friendly Projects
    • Sewing
      • Sewing for Children
      • Sewing for Men
      • Sewing for the Home
      • Sewing for Women
      • Sewing Techniques
      • Sewn Accessories
      • Sewn Gifts
  • + Home & Garden
    • DIY Home Decor Projects
    • Helpful Tips
    • Home Decor Crafts
    • DIY
    • Home Tour
    • Mantels and Tablescapes
    • Organization
    • Outdoor and Garden
  • + Holidays & Seasons
    • Spring
    • St. Patrick’s Day
    • Summer
    • Teacher Appreciation
    • Thanksgiving
    • Valentine’s Day
    • Winter
    • Back to School
    • Christmas
    • Easter
    • Fall
    • Fathers’ Day
    • Graduation
    • Halloween
    • Independence Day
    • Mothers’ Day
    • New Year’s
  • + Printables
  • + Recipes
    • Soups and Stews
    • Appetizers and Salads
    • Breads
    • Desserts
    • Food Crafts
    • Main Dish

Summer Blossom Wreath

July 4, 2012 By Amy @ Positively Splendid

FacebookTweetPinYummlyPrint
Happy Independence Day, everyone! Thanks so much for making PS a part of your day!


Today’s project is another gorgeous creation from PS Contributors Bonnie and Trish of Uncommon. Y’all know I love wreaths, and this one is fantastic!


***


Hi Positively Splendid readers! We are Trish and Bonnie from Uncommon, and we are happy to be here again this month with a little project for you! Today I {Bonnie} will be showing you how to make this adorable…

Summer Blossom Wreath! 


Supplies Needed for Summer Blossom Wreath…

1 premade grapevine wreath 
4 different fabrics of choice {use outdoor fabric or canvas if possible}
brown floral stem tape
floral wire stems {2 different sizes}
pinking shears
thread {to match fabrics}
sewing machine


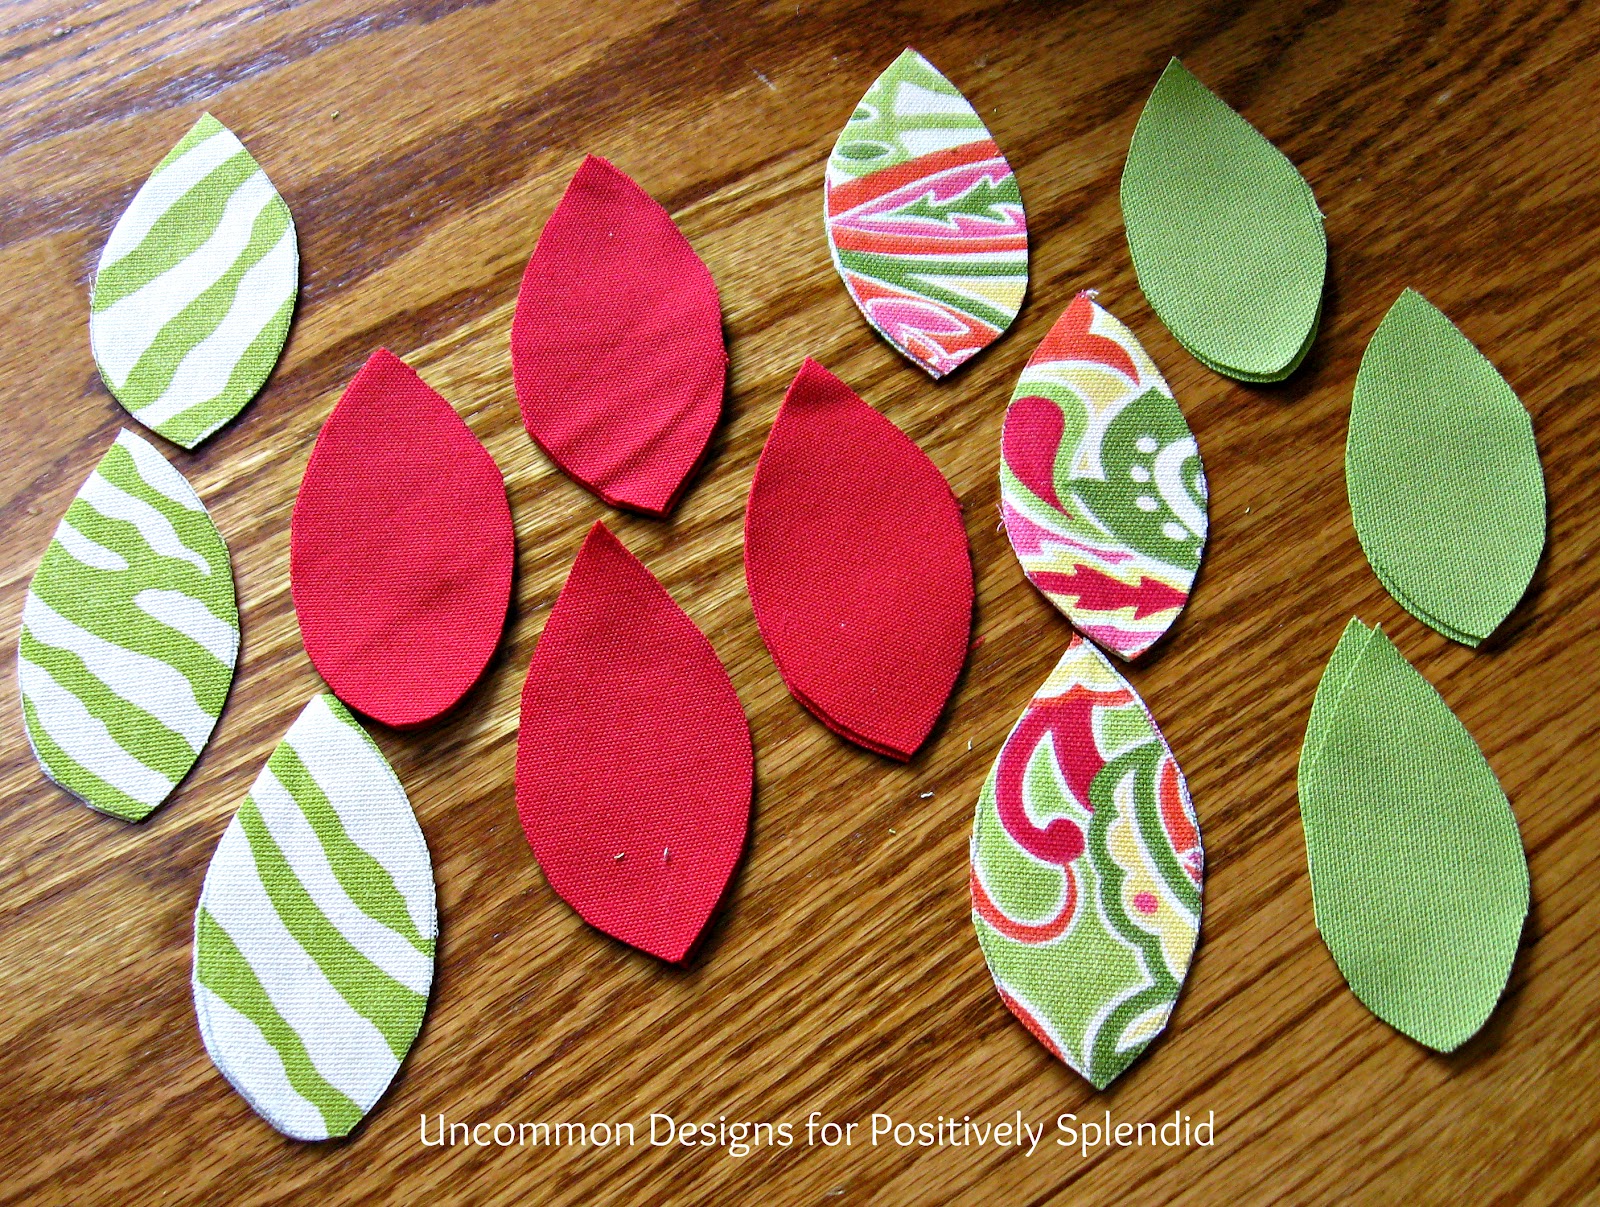
Step 1: Trace leaf shapes onto your fabrics and cut out each one. Each individual leaf will require 2 pieces of fabric {one for front and one for back of leaf }. I used 2 different styles of green fabric for my leaves. One is a lime green solid and the other is a funky, lime green zebra print!


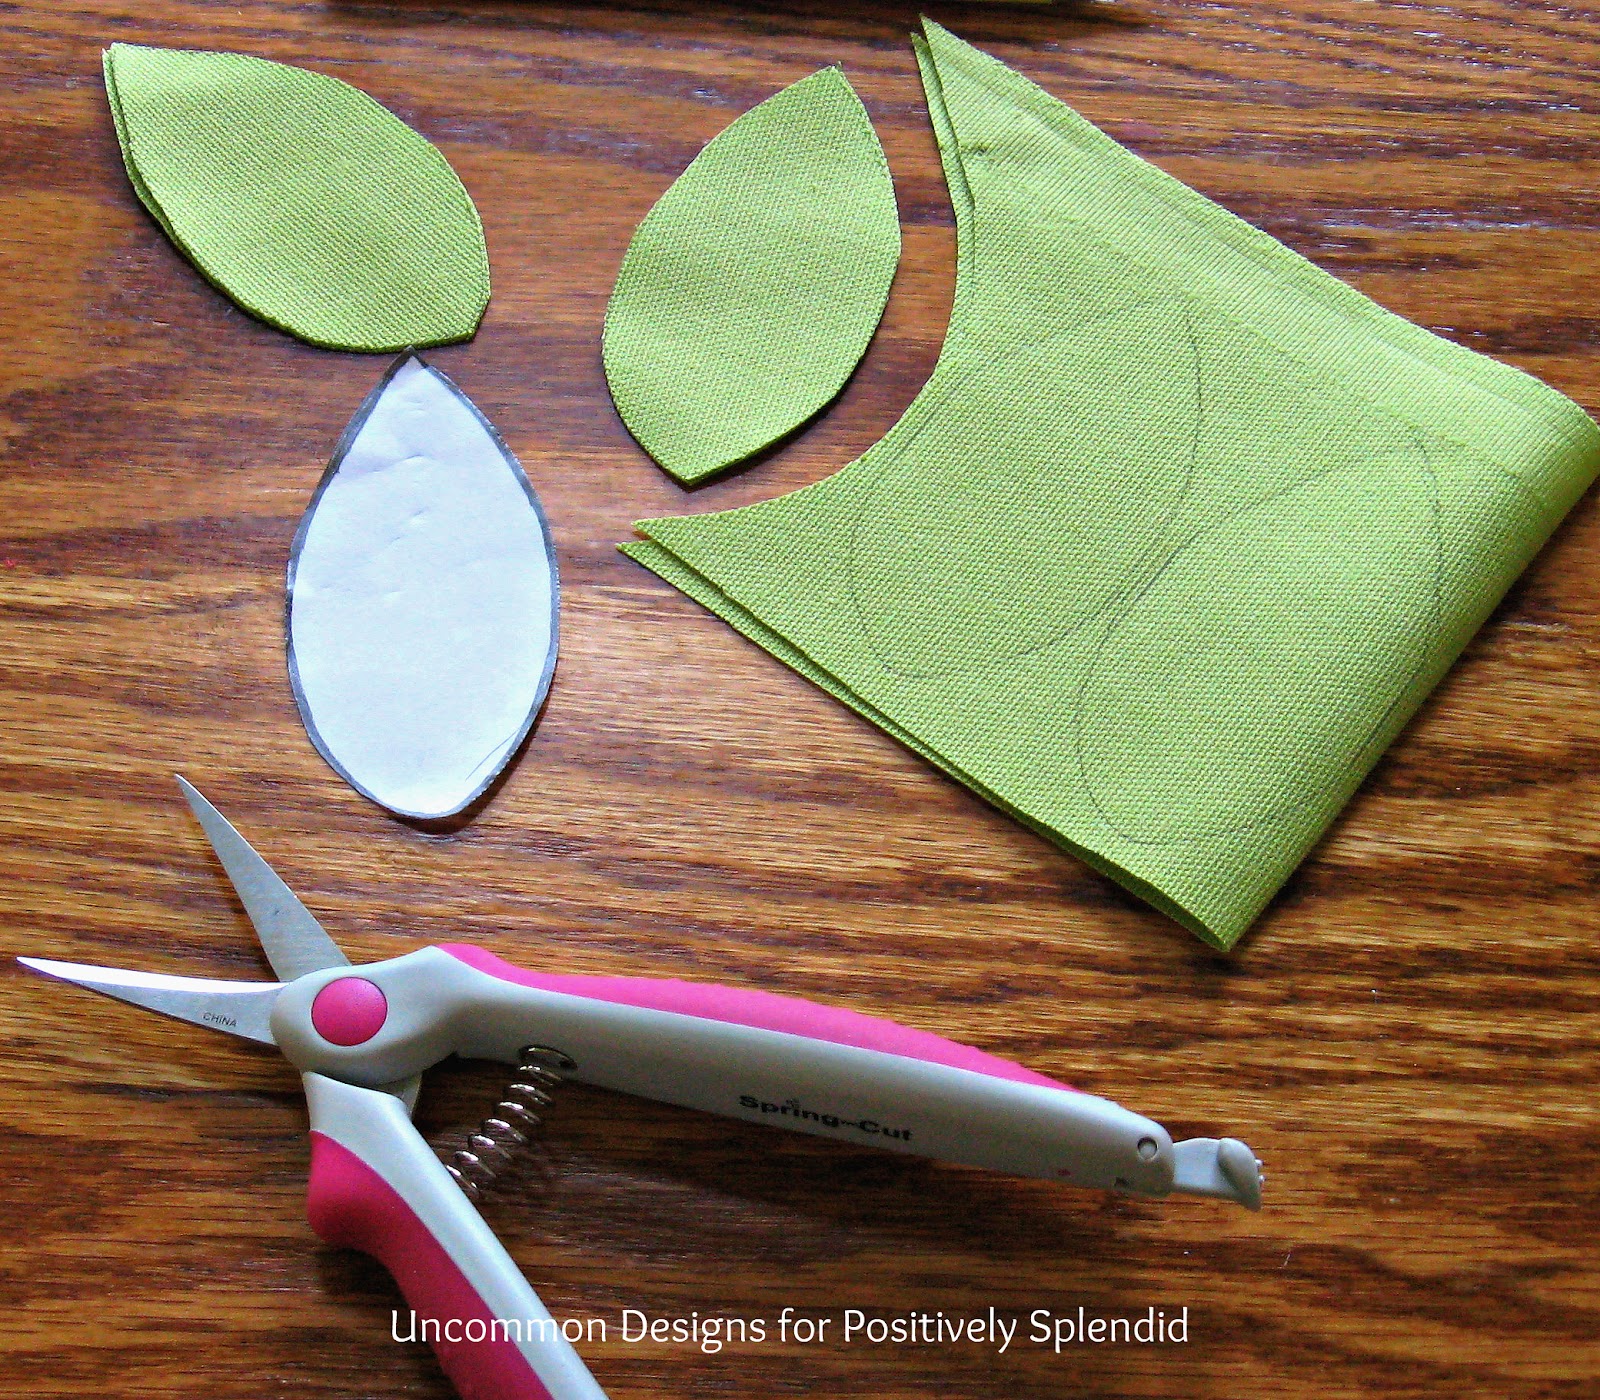
Step 2: Trace the same leaf shape onto your other two fabrics that you will use to make the flower. Remember that each leaf requires a front and a back!


Step 3: Stitch each set of leaves together with a simple zig-zag stitch, using a thread color that blends with your fabric. Allow enough room to go back around each leaf with your pinking shears!


Step 4: Wrap each of your thicker green wire stems with the brown floral tape. Stitch a stem onto the center of each leaf with a zig-zag stitch to catch the stem.


Step 5: Stitch the leaves for the flower together with a zig-zag stitch with matching thread and attach to the thinner green floral stems with a zig-zag stitch to catch the stem. You will not cover these floral stems in the brown floral tape.


Step 6: You will now make your branches with the leaves! Take your individual leaf stems and decide where you would like each one to be on the branch. I used 7 individual leaf stems on each branch. Starting at the top, begin wrapping the stems together with the brown floral tape. Adding in stems as you move down the branch. When you have added all your stems you will have an individual branch for your wreath. I made 2 branches for my wreath. Therefore I had already made 14 individual stems. 


Step 7: Finally you will make your little blossom flower! Simply gather your flower leaves into a bunch. I used 5 patterned leaves and 10 solid leaves. Twist them together with the floral stems. You can adjust how they are overlapping once you have placed it in your wreath! 


Place your branches and little blossom flower in your grapevine wreath and secure with a little bit of the floral stems! I prefer to place mine a little offset to one side, the choice is yours!


I just love the way this turned out, and by using the fabrics, I can easily coordinate pillows for my porch to go with the wreath! This wreath is so versatile, simply pop out the summer colors and replace with your favorite fall ones! 

Thanks so much Amy for having us here again this month! We hope you all are having a great summer! Please stop by and visit us at Uncommon!


***


Bonnie and Trish are sisters-in-law from South Carolina that share a love of sewing, decorating, entertaining, and all things crafty.  On their blog, Uncommon,  you will find a great mix of projects including tutorials on crafting, diy home projects, and party styling. Their passion for crafting involves creating the extraordinary out of simple everyday and otherwise ordinary things. You can also find Bonnie at Trish on facebook, twitter, and pinterest!

Amy @ Positively Splendid

Having grown up in a home brimming with sewing notions and paintbrushes, Amy has a deep love for all things creative. On any given day, you’ll find her knee-deep in her latest creative endeavor, with projects ranging from sewing and crafts to home decor and kid-friendly ideas. Amy believes that everyone, regardless of skill level or experience, possesses the ability to create something beautiful, and Positively Splendid was born of her passion for helping others harness their innate creative potential.

EVEN MORE GREAT IDEAS JUST FOR YOU!

FacebookTweetPinYummlyPrint

Filed Under: Crafts, DIY, Home Decor Crafts, Positively Home & Garden, Positively Seasons, Summer, Tutorials, Wreaths Tagged With: Outdoor decor, Summer, Wreaths

Previous Post: « Lemon-Mascarpone Mini Tarts with Summer Berries
Next Post: Vellum Tea Light Lanterns (Silhouette Promo Time!) »

Reader Interactions

Comments

  1. Molly says

    July 4, 2012 at 2:55 pm

    This is adorable! I love it!

  2. Bonnie and Trish @ Uncommon says

    July 4, 2012 at 3:14 pm

    Thanks for having us Amy! Happy 4th!! 🙂

  3. Finding Home says

    July 4, 2012 at 4:13 pm

    Super cute! Simple bit colorful!

  4. Kathy Moody says

    July 4, 2012 at 4:39 pm

    The wreath is adorable!! Happy Fourth! 🙂

  5. Shannon at Fox Hollow Cottage says

    July 4, 2012 at 6:40 pm

    That is so pretty. It’s fresh and simple but with an updated fabric. It’s perfection 😉 Great idea to be able to do pillows too!!

    Happy 4th all =)

  6. Mel the Crafty Scientist says

    July 5, 2012 at 12:45 am

    I LOOOOOOVE this! Bonnie and Trish are amazing and this is just such a fun, summer-y take on wreaths… and so different from so many other wreaths out there! I definitely want to make one like this because I just LOVE it! : )

    -Mel the Crafty Scientist

  7. Cassidy says

    July 7, 2012 at 8:22 pm

    LOVE this!

  8. Crafty Mischief says

    July 26, 2012 at 5:55 pm

    Darling!

Primary Sidebar

PS Search

Search this website

Seasonal Inspiration

Hocus Pocus Wreath
Ghost Plushies
Paper Pumpkins
Fabric Yo-Yo Pumpkins

Copyright © 2025 · Positively Splendid · All Rights Reserved. · Privacy Policy

Privacy & Cookies: This site uses cookies and other tracking technologies to assist with navigation and your ability to provide feedback, analyse your use of our products and services, assist with our promotional and marketing efforts, and provide content from third parties. To find out more, as well as how to remove or block these, see here: Our Cookie/Privacy Policy