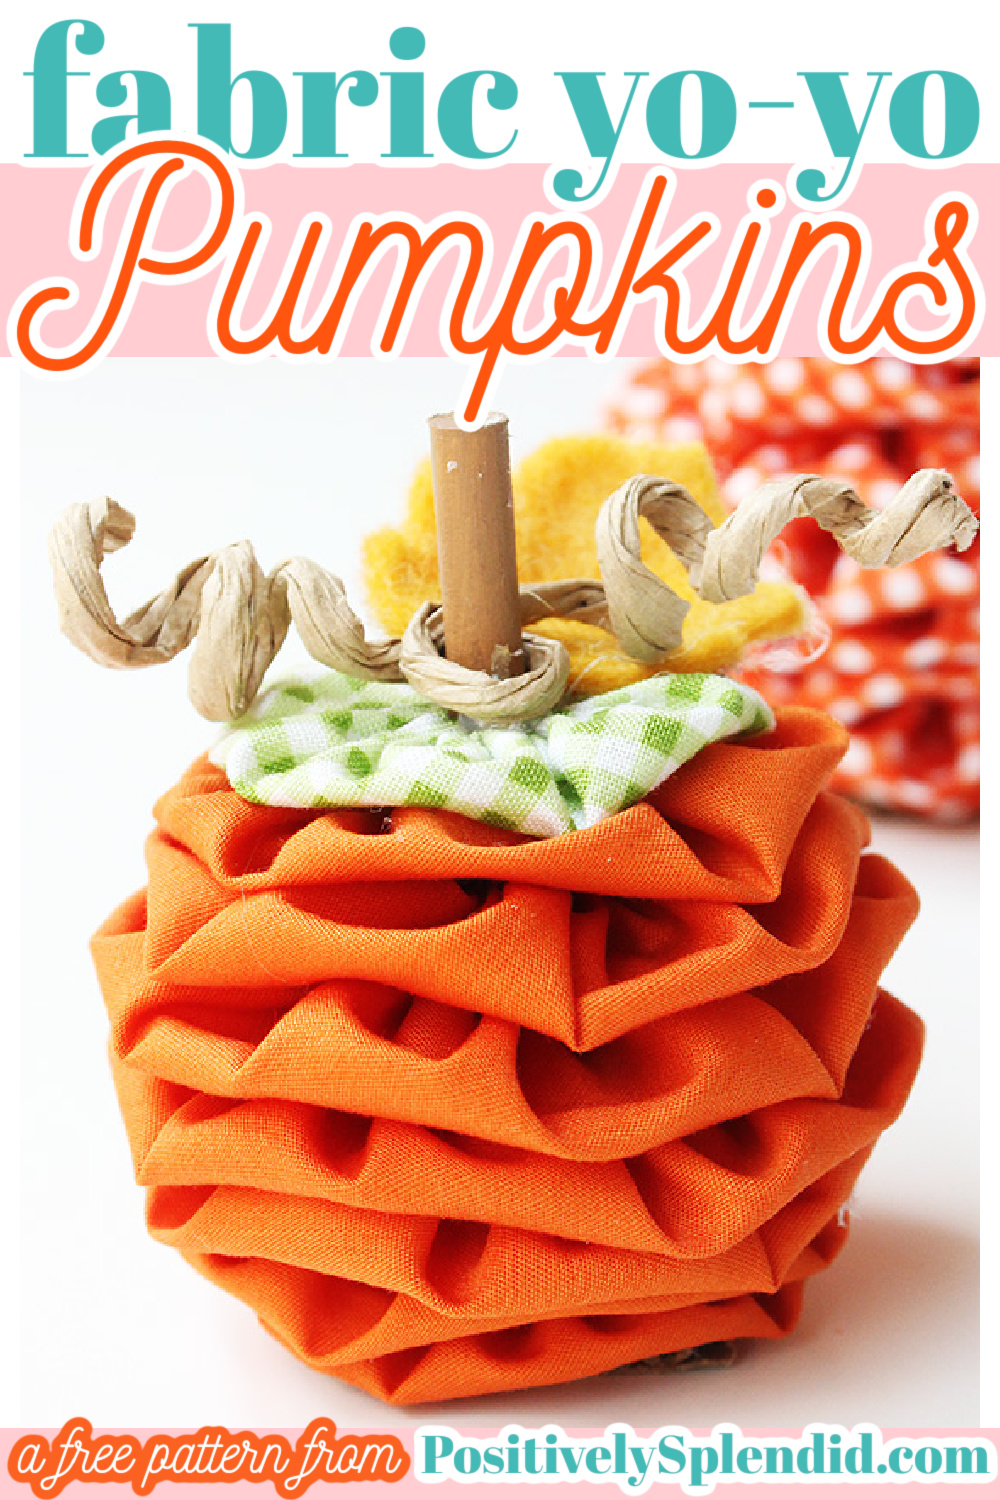
Turn small amounts of fabric into adorable fabric pumpkins with my easy tutorial for Fabric Yo-Yo Pumpkins! This how-to guide includes everything you need to create these yo-yo pumpkins, including free templates for pumpkins of two different sizes, and step-by-step photos to guide you through all of the steps. This is a fall craft project you’ll definitely want to add to your to-do list!
This post contains affiliate links.
Project Tips
- How can I make sure the templates are printed correctly? Make sure to adjust your printer settings to print at 100% scale.
- What type of fabric is best for making fabric yo-yos? This is a great project to use up scraps of quilting cotton or fat quarters. Avoid using heavier materials like home decor fabrics or canvas, as the thicker weight makes gathering the yo-yos difficult.
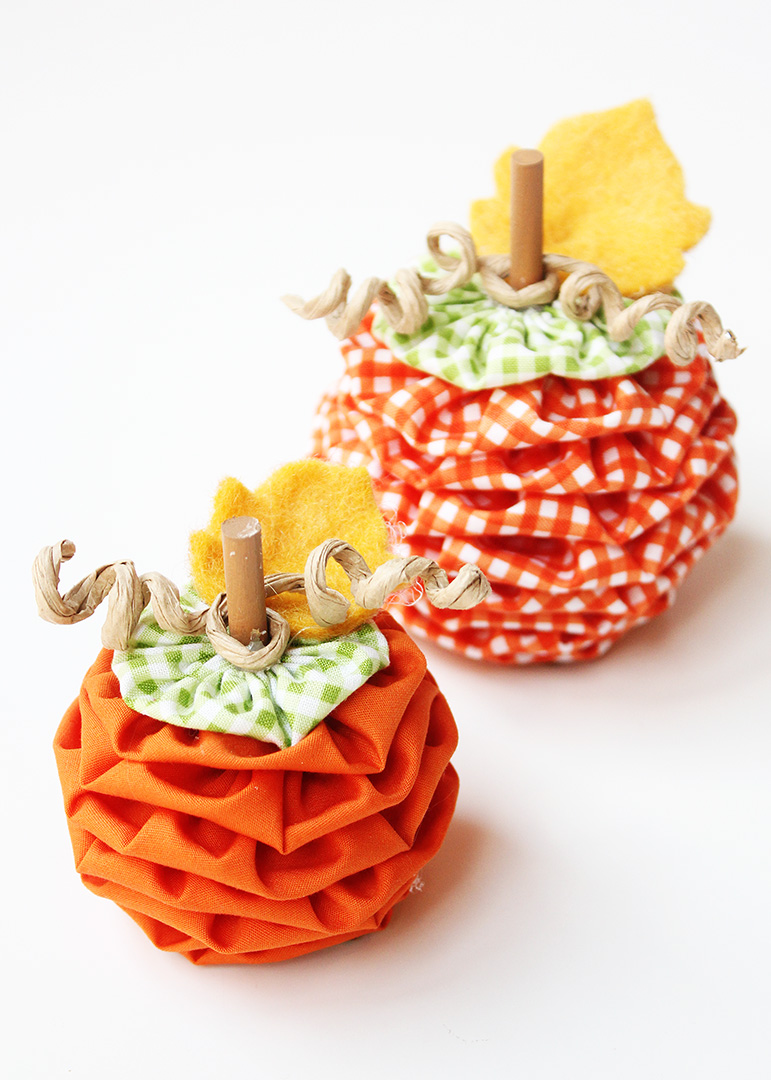
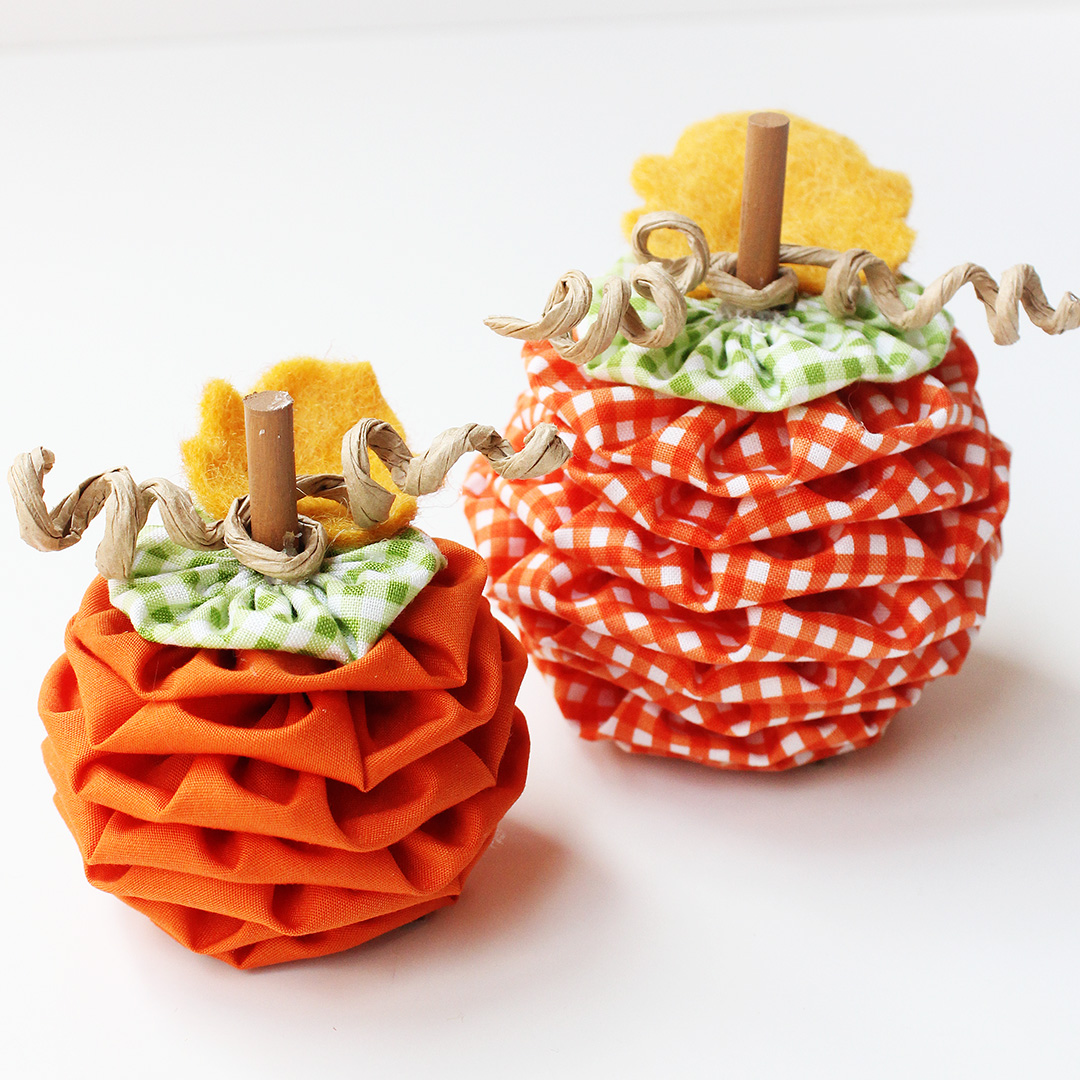
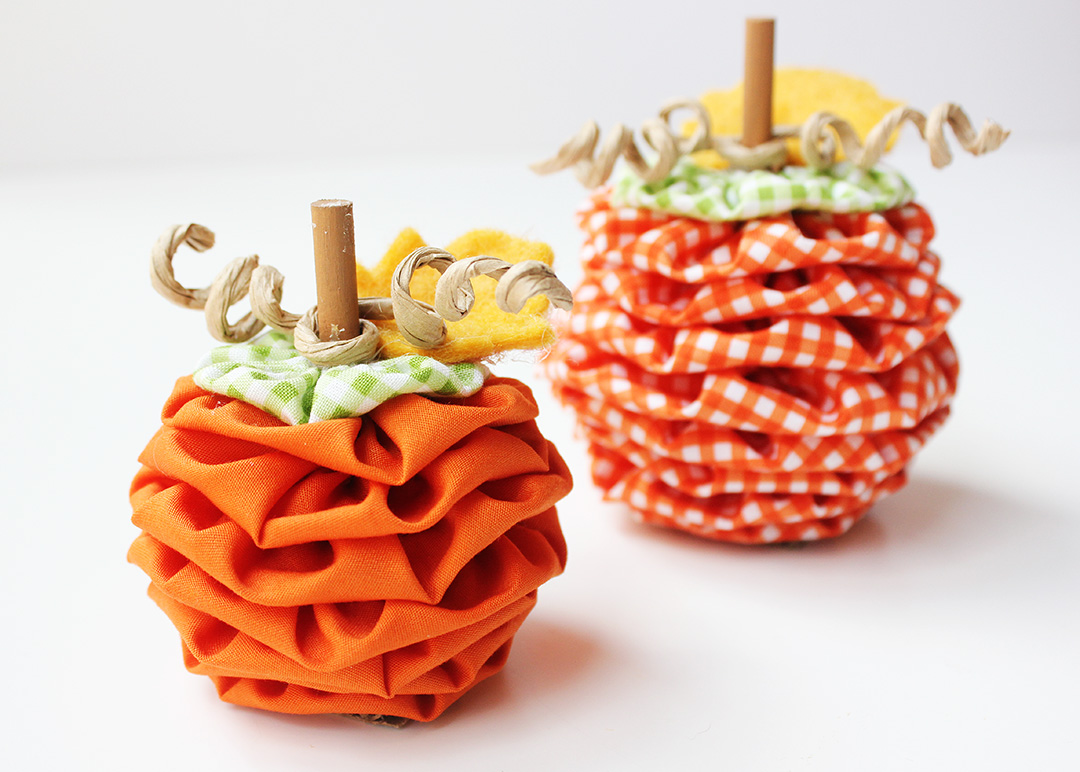
- What are the measurements of the different pumpkins? The small pumpkins measure 3 inches tall and 3 inches wide and the large pumpkins measure 4 inches tall and 4inches wide.
Even more fabric yo-yo ideas!
Before You Begin
This project incorporates fabric yo-yos, which are made by cutting circles of fabric that are then stitched around the edge and gathered to form a medallion shape. My Fabric Yo-Yo Tutorial provides step-by-step instructions for making yo-yos. I recommend reading that post carefully before beginning this project.
Fabric Yo-Yo Pumpkin Instructions
A PDF of these instructions is available below.
Supplies:
- Fabric Yo-Yo Pumpkin Templates (Scroll down for the download links)
- Orange and green fabric (see my note above for recommended materials)
- Felt in your desired leaf color
- Coordinating thread
- 1/4” wooden dowel
- Cardboard
- Brown acrylic paint
- Hot glue
- Natural grapevine wire
Tools:
- Hand sewing needle
- Washable marking pen
- Sewing shears
- Sharpie
- Craft knife
- Hot glue gun
- Paintbrush
- Scissors
- Needle-nosed pliers
Let’s get started!
How to Make Fabric Yo-Yo Pumpkins
Make Your Cuts and Stitch the Yo-Yo’s
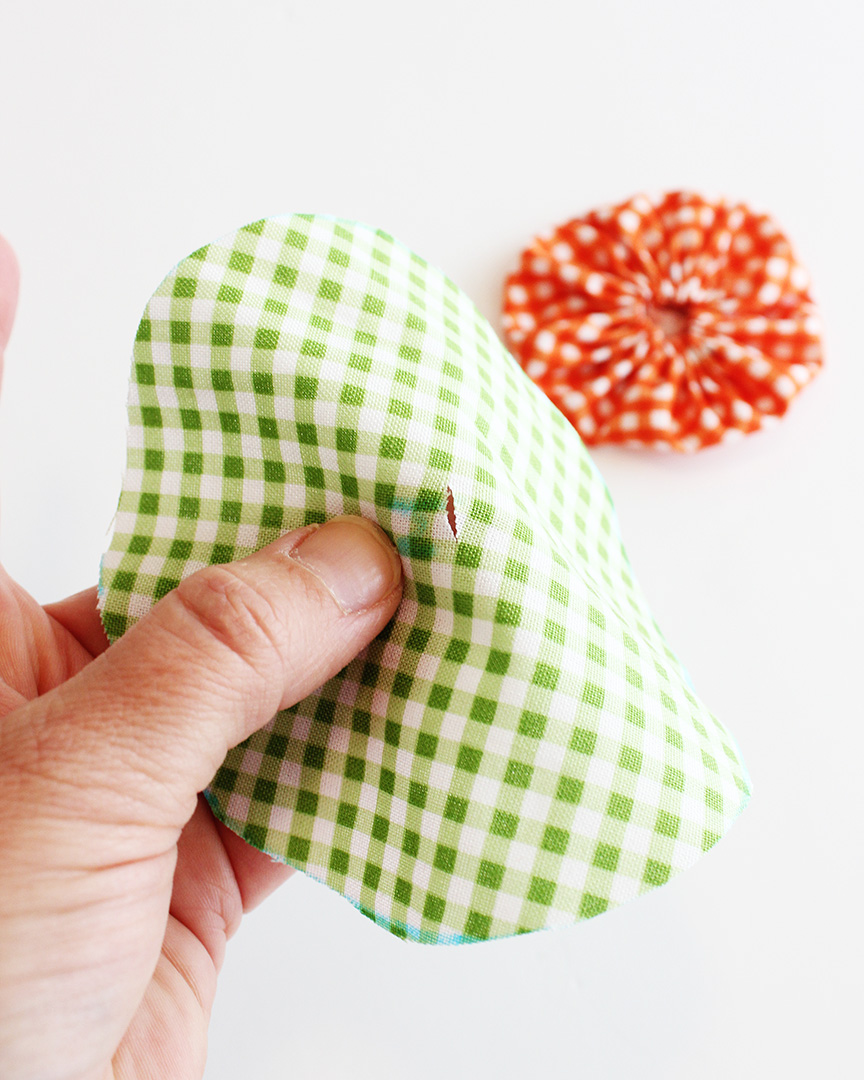
To begin, print out the templates (available for download below). Trace the circle templates with the marking pen onto the color of fabric indicated on the pattern piece, and cut each one out. Number the circles as indicated on the pattern pieces, writing the numbers on the front center of each circle with the washable marking pen.
Make a 1/4” snip at the center of each circle, as shown. (Details for this step can be found in my Fabric Yo-Yo Christmas Tree tutorial.)
Trace the leaf template onto the felt with a Sharpie; cut out and set aside.
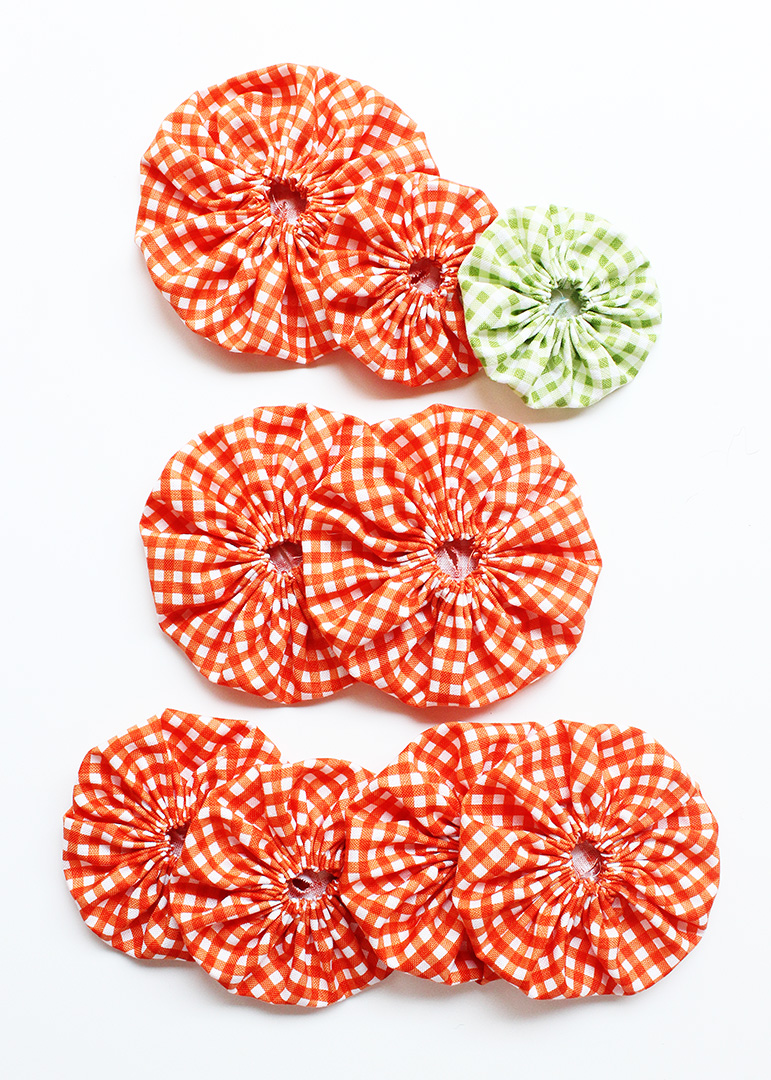
Create yo-yos with each of the fabric circles as detailed in my fabric yo-yo tutorial.
Make the Stand
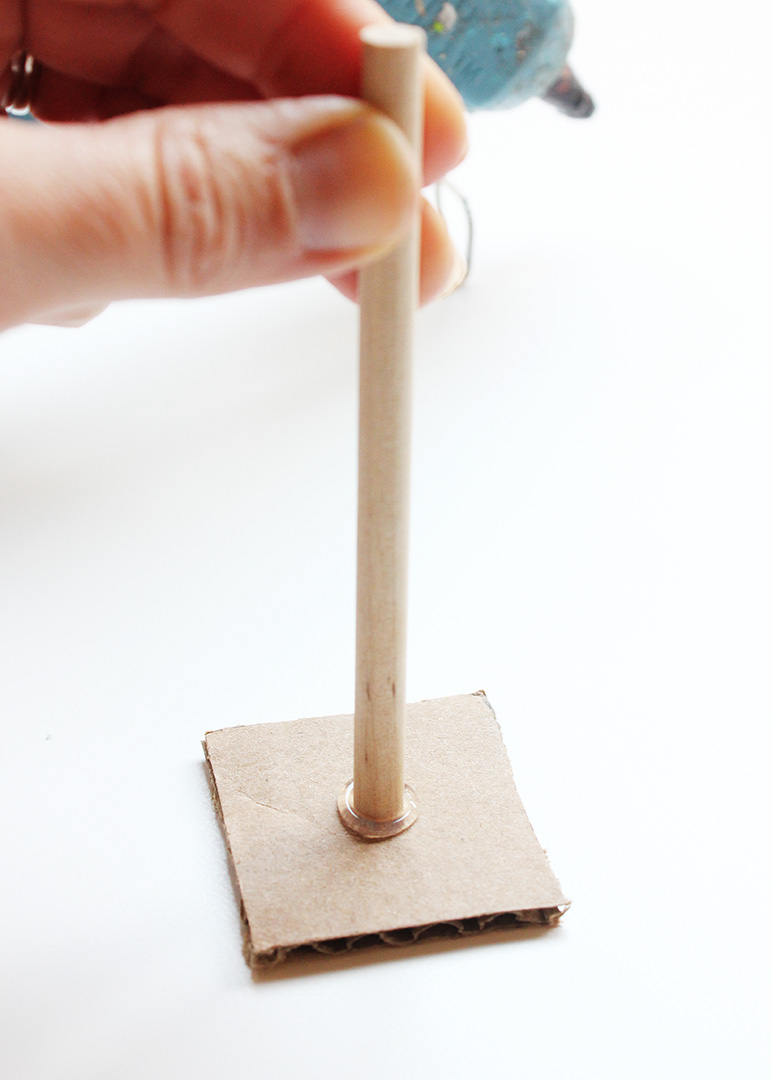
Trim the dowel according to the dimensions below:
- Small Pumpkin: 3”
- Large Pumpkin: 4”
Helpful tip: A miniature mitre set used for dollhouse projects is perfect for this step.
Trace the base template onto the cardboard, and cut the square out with the craft knife. Use hot glue to affix the dowel to the center of the cardboard base.
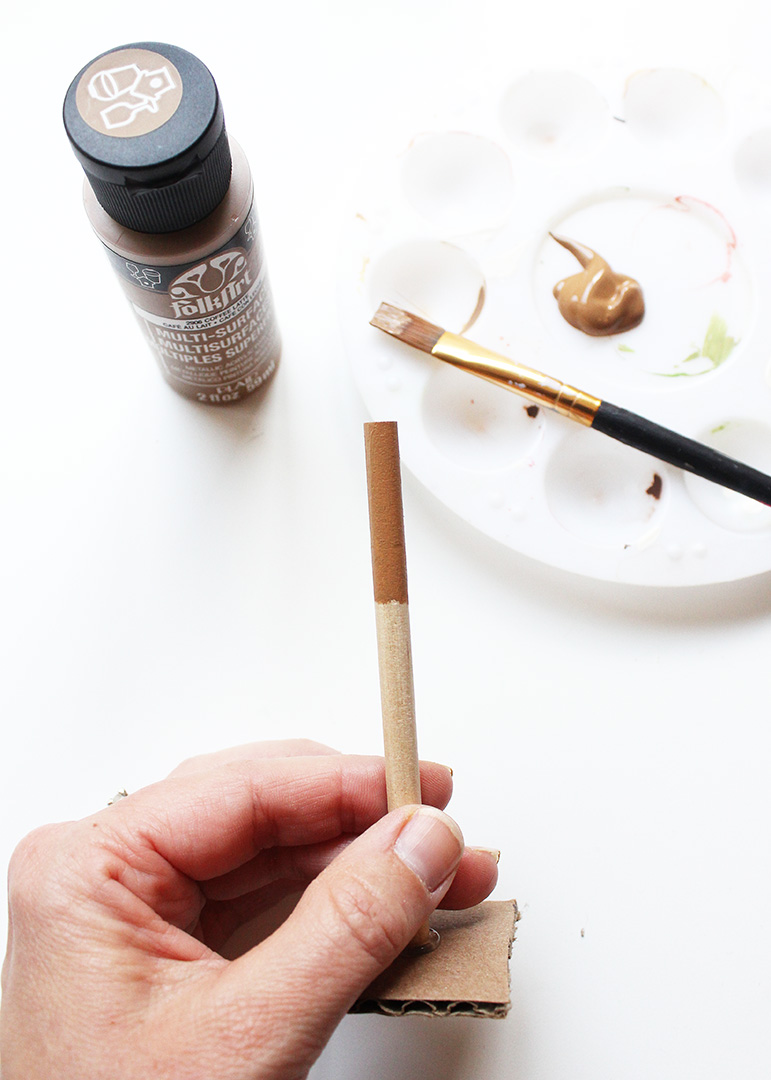
Paint the top third of the dowel with the brown paint, and set the base aside to dry completely.
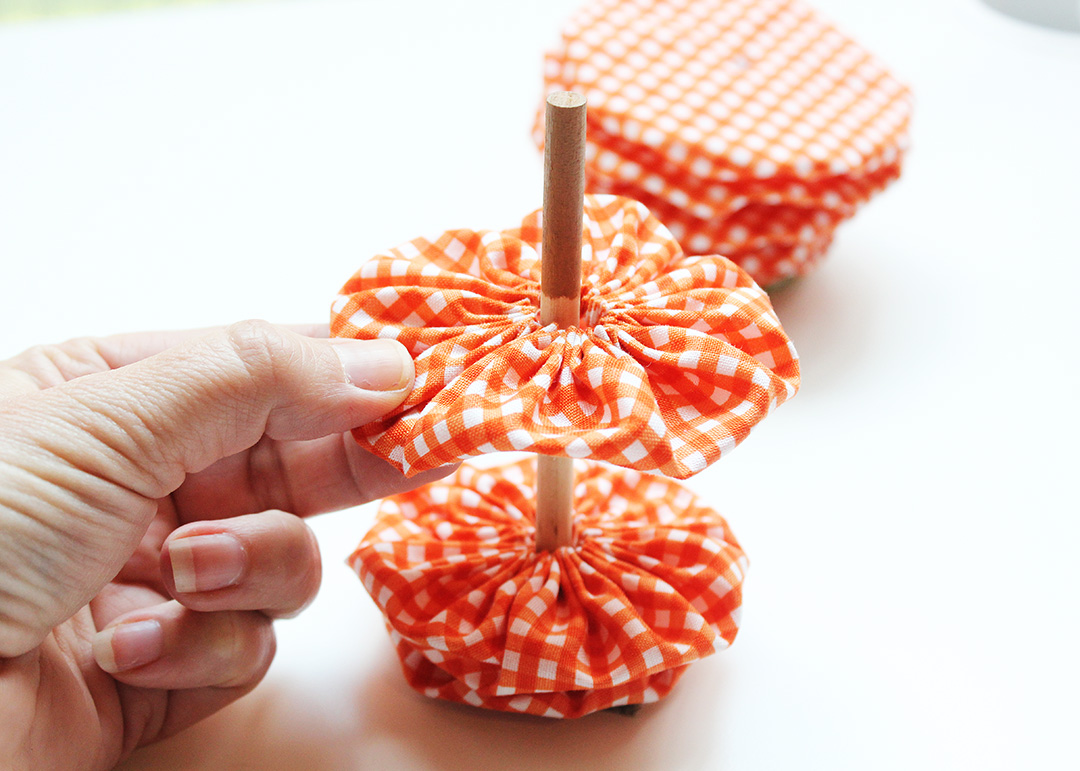
Assemble the Fabric Yo-Yo Pumpkin
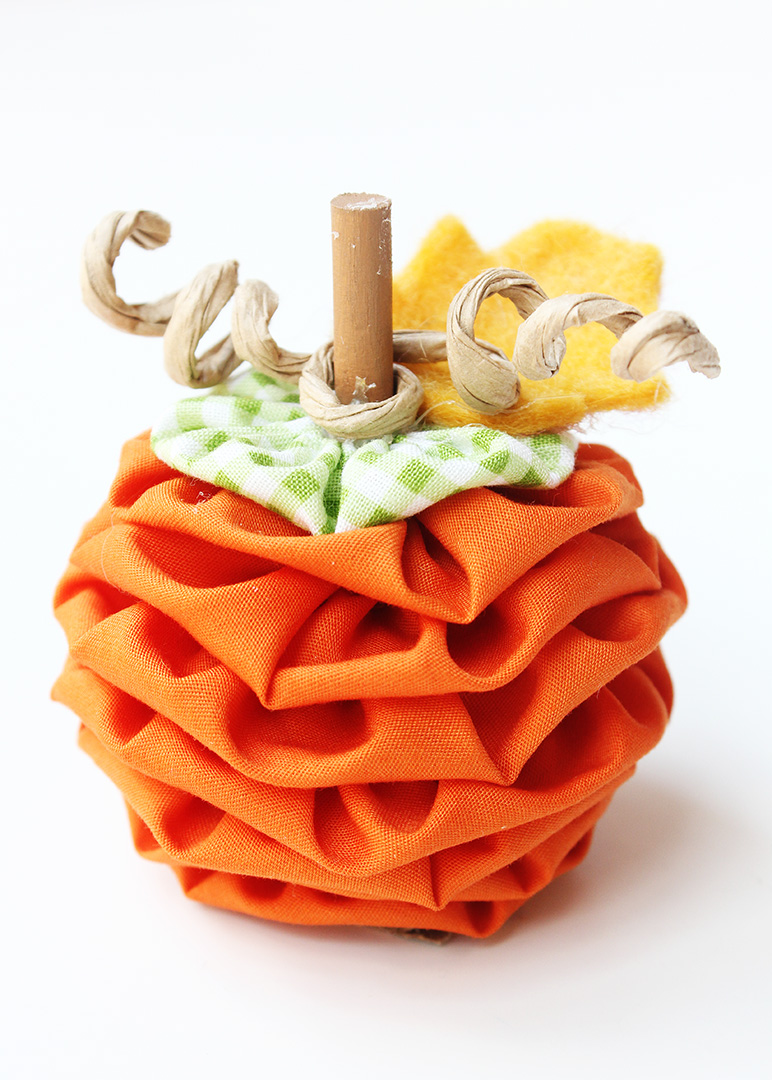
Stack the finished yo-yos onto the stand by threading them in numerical order onto the dowel through the center hole, starting with number 1 on the bottom, and finishing with the highest number on the top. For added stability, add a dab of hot glue between each layer.
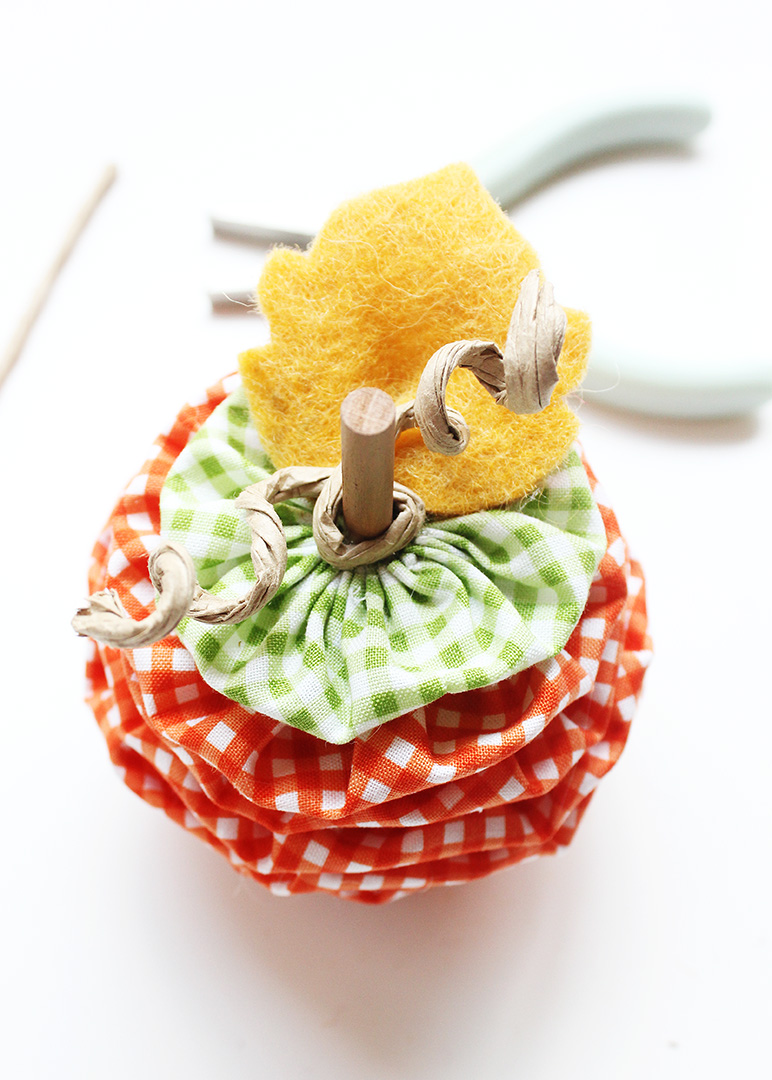
Use hot glue to affix the leaf to the top of the pumpkin.
To create a pumpkin vine, cut a section of the grapevine wire with scissors, and form a loop at the center and two curled ends with the needle-nosed pliers. Slip the center loop over the dowel, and secure the vine to the pumpkin with hot glue.
All finished!
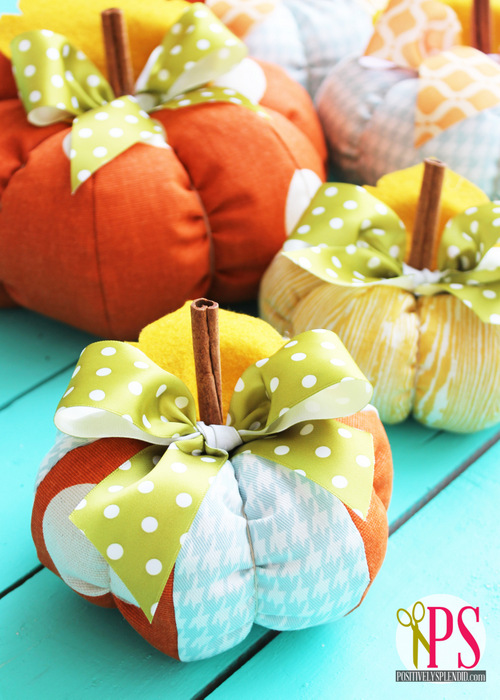
Once you’ve finished one of these cuties, you’ll want to make an entire patch of Fabric Yo-Yo Pumpkins!
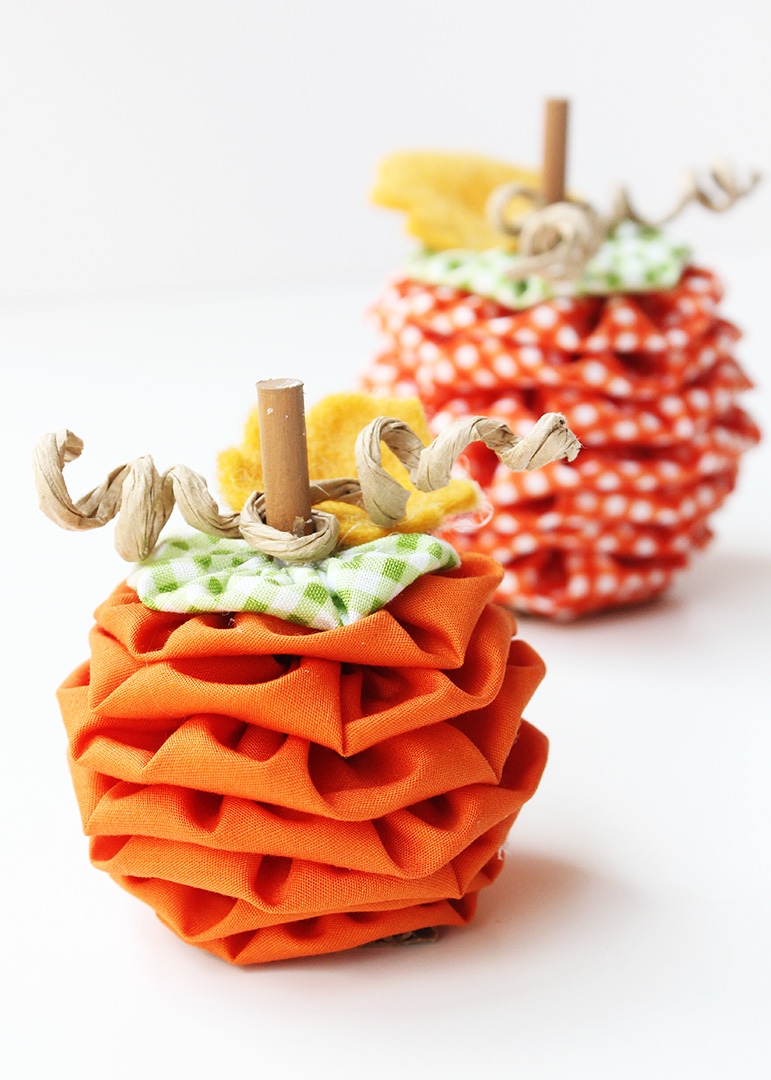
I love how you can mix and match different fabrics for these pumpkins. You could also create an all-white pumpkin for a neutral look.
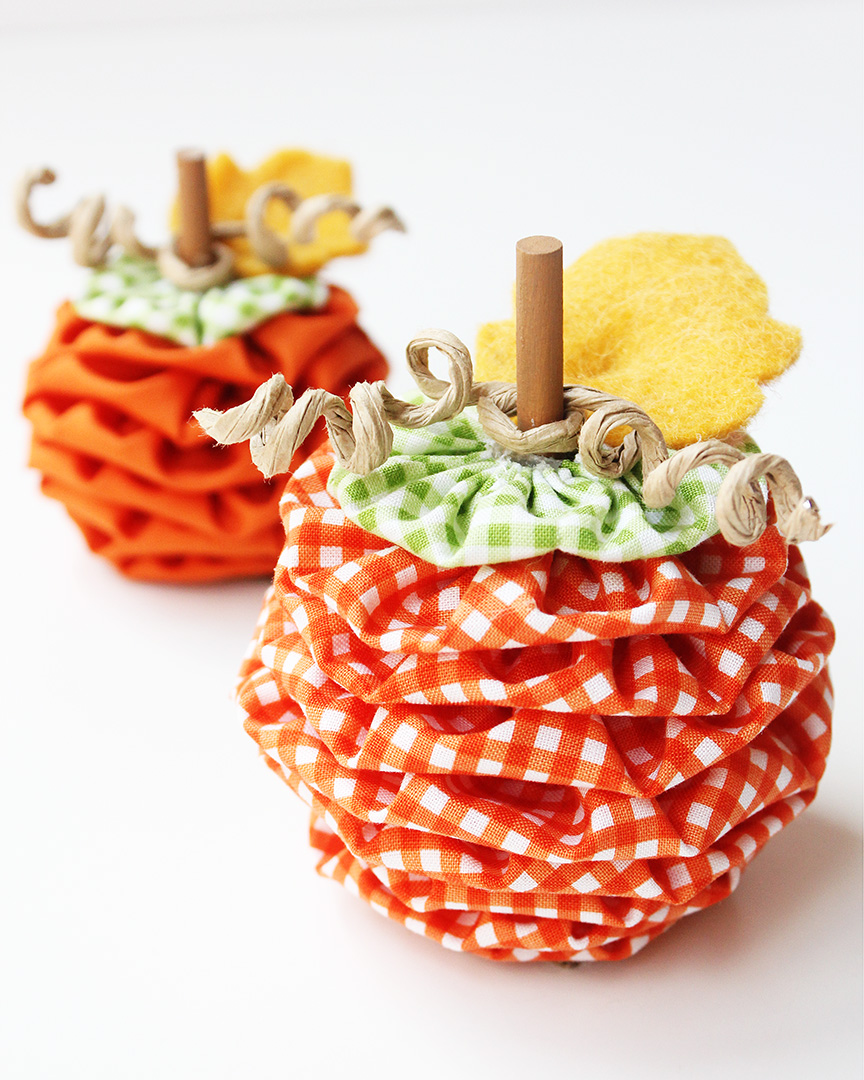
Ways to Display Yo-Yo Pumpkins
- Place a collection of pumpkins on a mantel
- Attach a nametag to the stem for personalized Thanksgiving place settings
- Connect the pumpkins with a strand of twine to create a fabric pumpkin garland
- Attach the pumpkins to a wreath
To download the fabric yo-yo pumpkin templates, click the links below:
If you love these pumpkins, be sure to check out my Patchwork Fabric Pumpkin Pattern, too!
Fabric Yo-Yo Pumpkins
Equipment
- Hand Sewing Needle
- Washable marking pen
- Sewing Shears
- Sharpie
- Craft knife
- Hot Glue Gun
- Paintbrush
- Scissors
- Needle nosed pliers
Materials
- Fabric Yo-Yo Pumpkin Templates see original post for free downloads
- Orange and green fabric see my note in the original post for recommended materials
- Coordinating thread
- 1/4” wooden dowel
- Cardboard
- Brown acrylic paint
- Hot glue
- Felt
- Natural grapevine wire
Instructions
- To begin, print out the templates (available for download in the original post). Trace the circle templates with the marking pen onto the color of fabric indicated on the pattern piece, and cut each one out. Number the circles as indicated on the pattern pieces, writing the numbers on the front center of each circle with the washable marking pen.
- Trace the leaf template onto the felt with a Sharpie; cut out and set aside.
- Make a 1/4” snip at the center of each circle.
- Create yo-yos with each of the fabric circles as detailed in my fabric yo-yo tutorial (linked in original post).
- Trim the dowel according to the following dimensions--Small Pumpkin: 3” and Large Pumpkin: 4”
- Trace the base template onto the cardboard, and cut the square out with the craft knife. Use hot glue to affix the dowel to the center of the cardboard base.
- Paint the top third of the dowel with the brown paint, and set the base aside to dry completely.
- Stack the finished yo-yos onto the stand by threading them in numerical order onto the dowel through the center hole, starting with number 1 on the bottom, and finishing with the highest number on the top. For added stability, add a dab of hot glue between each layer.
- Use hot glue to affix the leaf to the top of the pumpkin.
- To create a pumpkin vine, cut a section of the grapevine wire with scissors, and form a loop at the center and two curled ends with the needle nosed pliers. Slip the center loop over the dowel, and secure the vine to the pumpkin with hot glue.
Having grown up in a home brimming with sewing notions and paintbrushes, Amy has a deep love for all things creative. On any given day, you’ll find her knee-deep in her latest creative endeavor, with projects ranging from sewing and crafts to home decor and kid-friendly ideas. Amy believes that everyone, regardless of skill level or experience, possesses the ability to create something beautiful, and Positively Splendid was born of her passion for helping others harness their innate creative potential.