• Skip to primary navigation
  • Skip to main content
  • Skip to primary sidebar

Positively Splendid {Crafts, Sewing, Recipes and Home Decor}

Handcrafted. Splendidly.

  • Home
  • Blog
  • + Handmade
    • Crafts
      • Craft Gift Ideas
      • Holiday Crafts
      • Home Decor Crafts
      • Kids’ Crafts
      • Paper Crafts
      • Quick and Easy Crafts
      • Wearable Crafts
      • Wreaths
    • Gift Ideas
      • Budget-Friendly Gifts
      • Gift Wrapping
      • Gifts for Dads and Grandpas
      • Gifts for Kids
      • Gifts for Men
      • Gifts for Moms and Grandmas
      • Gifts for Neighbors
      • Gifts for Sports Fans
      • Gifts for Teachers
      • Gifts for Women
      • Quick and Easy Gifts
    • Kid-Friendly Projects
    • Sewing
      • Sewing for Children
      • Sewing for Men
      • Sewing for the Home
      • Sewing for Women
      • Sewing Techniques
      • Sewn Accessories
      • Sewn Gifts
  • + Home & Garden
    • DIY Home Decor Projects
    • Helpful Tips
    • Home Decor Crafts
    • DIY
    • Home Tour
    • Mantels and Tablescapes
    • Organization
    • Outdoor and Garden
  • + Holidays & Seasons
    • Spring
    • St. Patrick’s Day
    • Summer
    • Teacher Appreciation
    • Thanksgiving
    • Valentine’s Day
    • Winter
    • Back to School
    • Christmas
    • Easter
    • Fall
    • Fathers’ Day
    • Graduation
    • Halloween
    • Independence Day
    • Mothers’ Day
    • New Year’s
  • + Printables
  • + Recipes
    • Soups and Stews
    • Appetizers and Salads
    • Breads
    • Desserts
    • Food Crafts
    • Main Dish

Book Page Medallion Ornament (Swell Noel #23)

November 3, 2011 By Amy @ Positively Splendid

FacebookTweetPinYummlyPrint
My sweet friend Kara from Creations by Kara is in the house this morning, and the ornament idea she is sharing with us couldn’t possibly be more darling – or versatile!

***

This Swell Noel series has sure been amazing! I’m thrilled to be a part while Amy is taking time off to snuggle cute baby George.

I’m Kara from Creations by Kara.
I am kind of an all over the place crafter. I like DIY projects, thrift store re-purposing, craft tutorials, sewing, and pretty much anything creative. Oh, and I also like cooking and sharing my favorite recipes. I think that sums it up. 🙂
Today I am sharing a cheap and easy Christmas ornament. I think it would also make a darling embellishment on a gift. Or if you wanted to, you could make it much larger and use it like a wreath. You choose. 🙂

Here’s what you need to do:
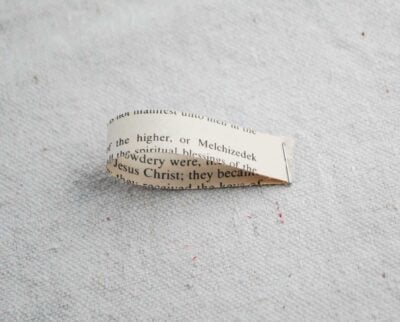
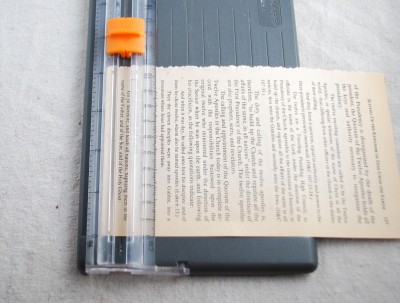
1-Take a small stack of book pages (I used three), and cut them into 1/2″ strips. This is much easier if you have a paper cutter.
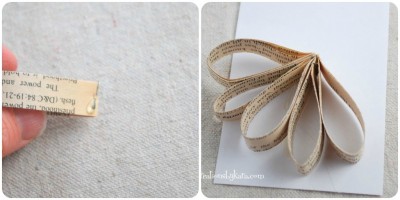
2-After you have 12-18 stacks cut, staple each one of them together right at the bottom.
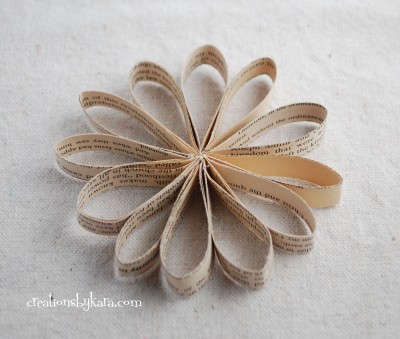
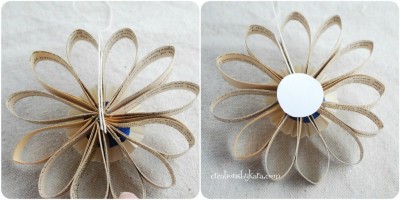
3-Add hot glue right at the end and start attaching the loops together.
When you are done you should have something like this. I used 12 loops in mine, but you can use more if you want.
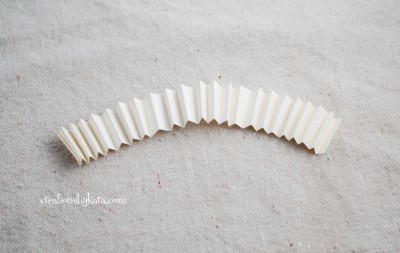
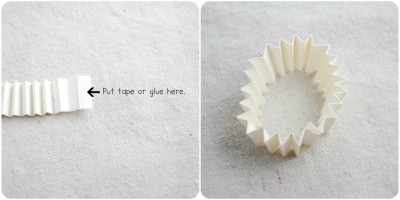
4-Now it’s time to make the paper medallion for the middle. Take a 12″ piece of cardstock and cut it 3/4″ wide. Score it every 1/4″, and fold it up accordion style.
5-Put double sided tape or glue on one end of the strip, and attach both ends together. You will end up with a circle. An uneven circle, but a circle. 😉
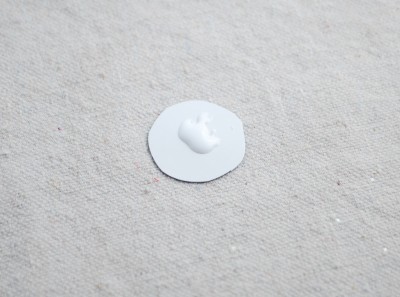
6-Now cut a little circle out of cardstock. Mine was about 1″ across. Put some craft glue in the middle.
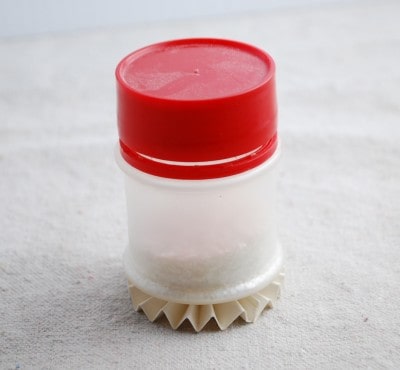
7-Now comes the tricky part. You have to push down the middle of your folded circle so that it will lay flat. It will not want to cooperate. Just remember that you are bigger than it, and you can force it! Stick it on top of the gluey cardstock circle and use something to weigh it down as it dries. I used my jar of glitter. Which is actually an old spice jar. Very handy.
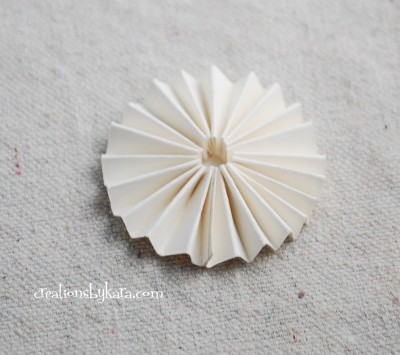
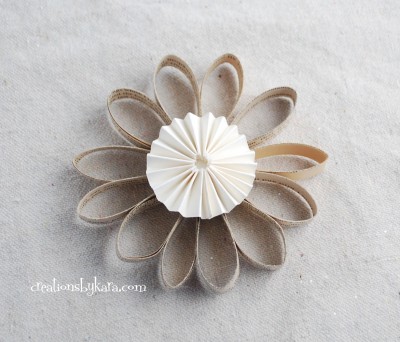
After you are sure that it is dry, take off the weight, and you will have this:
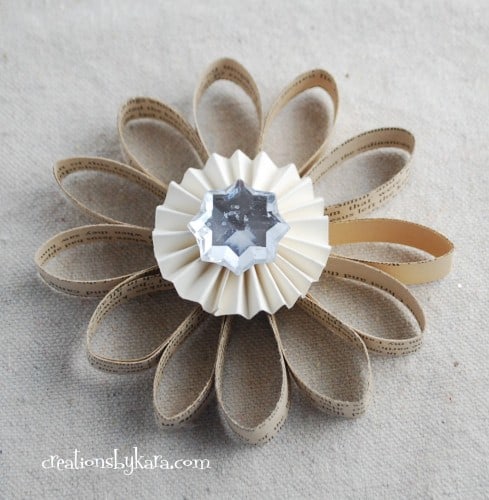
8-Hot glue it to the center of your loopy flower:
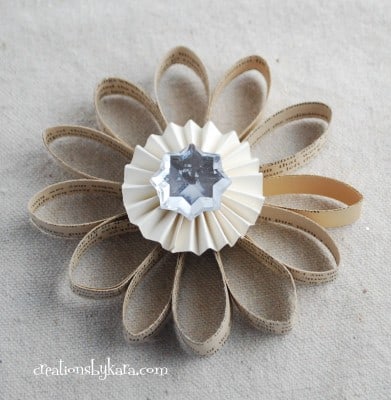
9-Add an embellishment to the center. I hot glued a clear gemstone on mine. You could also use a brad, button, or chipboard. Whatever you like!
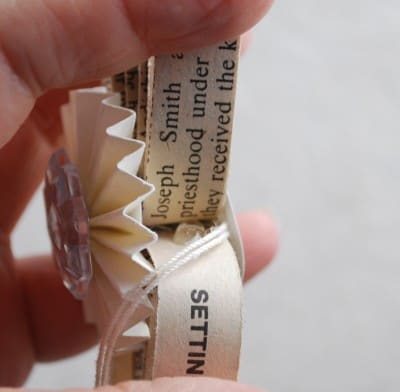
10-Add a hanger to the back. I cut a piece of thread 10″ long. Put it in the middle of the back. Then cut a piece of carstock, cover it with hot glue, and put it over the string, sandwiching it in the middle.
Tip: My ornament fell forward when I hung it, so I pulled apart the top two loops, put a dab of hot glue in the middle, and pushed my string up into that glob. Much better!
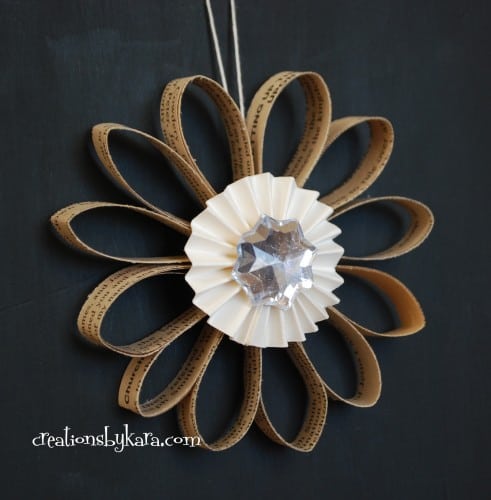
Here it is all finished:
Thanks so much for having me Amy!!
***
Isn’t it incredible how glamorous humble book pages can be once they are gussied up a bit? I adore this idea! Thanks, Kara!

Photobucket

Amy @ Positively Splendid

Having grown up in a home brimming with sewing notions and paintbrushes, Amy has a deep love for all things creative. On any given day, you’ll find her knee-deep in her latest creative endeavor, with projects ranging from sewing and crafts to home decor and kid-friendly ideas. Amy believes that everyone, regardless of skill level or experience, possesses the ability to create something beautiful, and Positively Splendid was born of her passion for helping others harness their innate creative potential.
EVEN MORE GREAT IDEAS JUST FOR YOU!

FacebookTweetPinYummlyPrint

Filed Under: Christmas, Gift Ideas, Holiday, Swell Noel, Tutorials Tagged With: Christmas, Christmas Decor, Christmas Ornaments, Gift Wrapping, Guest Posts, Paper Crafts, Swell Noel

Previous Post: « Win a Canon 60D Camera + JoTotes Bag from Lifestyle Crafts!
Next Post: Where Women Create Winter 2012 Giveaway! »

Reader Interactions

Comments

  1. Beth @ dot...in the city says

    November 3, 2011 at 2:45 pm

    So pretty! I did something similar for wedding shower decorations. I love it!

  2. Jen @ My Own Road says

    November 3, 2011 at 2:52 pm

    So gorgeous! I could imagine a whole tree full of these beautiful ornaments

  3. Heather says

    November 3, 2011 at 3:28 pm

    This would be so fun on the Christmas tree this year!

  4. Myfriendscallmesuzy says

    November 3, 2011 at 3:41 pm

    Wow this is beautiful. Amazing Job. I can’t wait to add this to the list of ornament I plan to make this year. It will defiantly be part of the countdown on my blog.

  5. Amanda Kristeen says

    November 3, 2011 at 4:43 pm

    Adorable!

  6. Vickie says

    November 3, 2011 at 5:22 pm

    Thanks for sharing! This just give me a great idea for my family ornaments! I am going to use some of my Granny’s really old jewelry for the center! It will mean so much to everyone!

  7. Tammy says

    November 4, 2011 at 11:54 am

    This is just so pretty and so delicate. I love it!

  8. Diana says

    November 4, 2011 at 9:11 pm

    Oh, so pretty – will definitely be playing with this idea. Tnanks

Primary Sidebar

PS Search

Search this website

Seasonal Inspiration

Hocus Pocus Wreath
Ghost Plushies
Paper Pumpkins
Fabric Yo-Yo Pumpkins

Copyright © 2023 · Positively Splendid · All Rights Reserved. · Privacy Policy

Privacy & Cookies: This site uses cookies and other tracking technologies to assist with navigation and your ability to provide feedback, analyse your use of our products and services, assist with our promotional and marketing efforts, and provide content from third parties. To find out more, as well as how to remove or block these, see here: Our Cookie/Privacy Policy


Loading Comments...