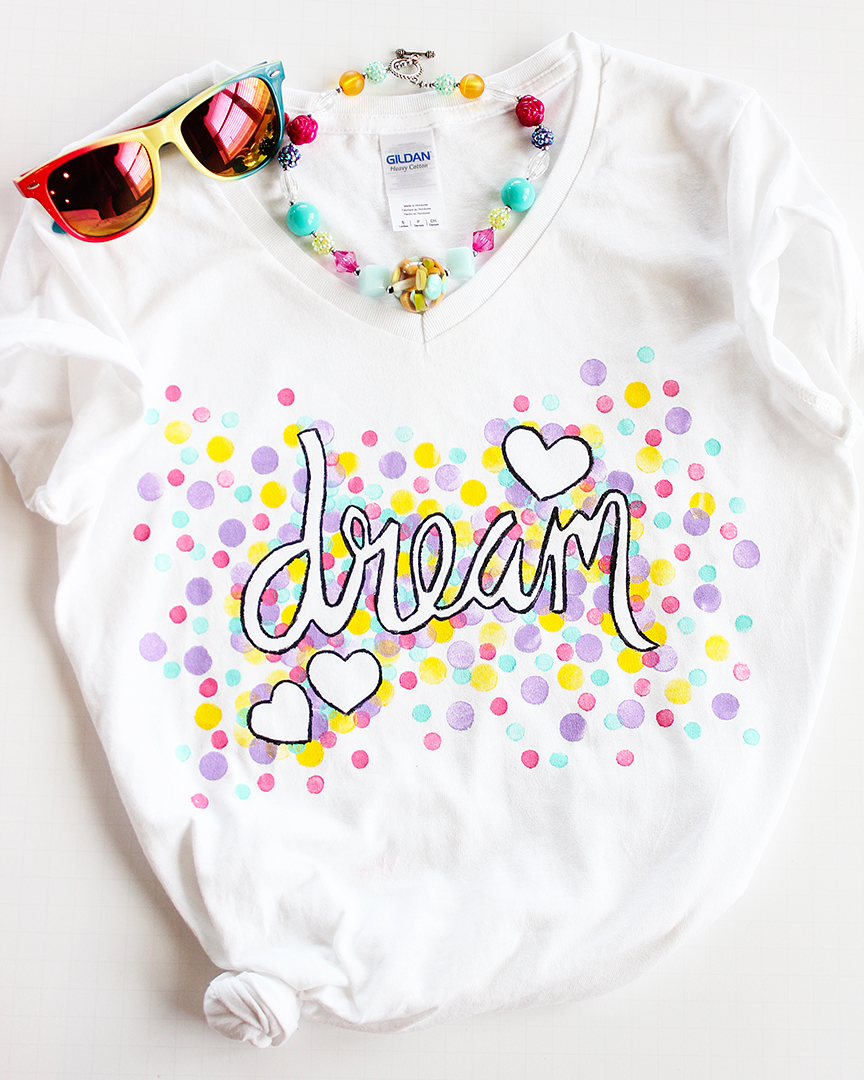
Use freezer paper and craft paint to create this confetti freezer paper shirt. A great tween craft project, but also fun for smaller kids and adults, too!
There is something so amazing about breaking out the craft supplies to make something with your kids, and especially during the summer, when it’s always nice to find something fun to do that beats the heat! This fun painted confetti freezer paper shirt is a great tween craft project, but it is also fun for smaller kiddos, too. I’m going to fill you in on how awesome freezer paper is for creating custom stencils, plus all the details for how to use great multi-surface paint from FolkArt to create a shirt that is as unique as your child! Let’s get started.
Today’s great kids’ craft idea is sponsored by Plaid. All opinions are entirely my own. This post contains affiliate links.
Now that my daughter is getting a bit older, one of our favorite things to do together is craft. She astounds me with her creativity! This shirt was actually one of her latest ideas, and she was so proud of the end result. Tween craft ideas like this one are such a great way to minimize screen time and encourage kids to flex their creative muscles!
Confetti Freezer Paper Shirt Supplies
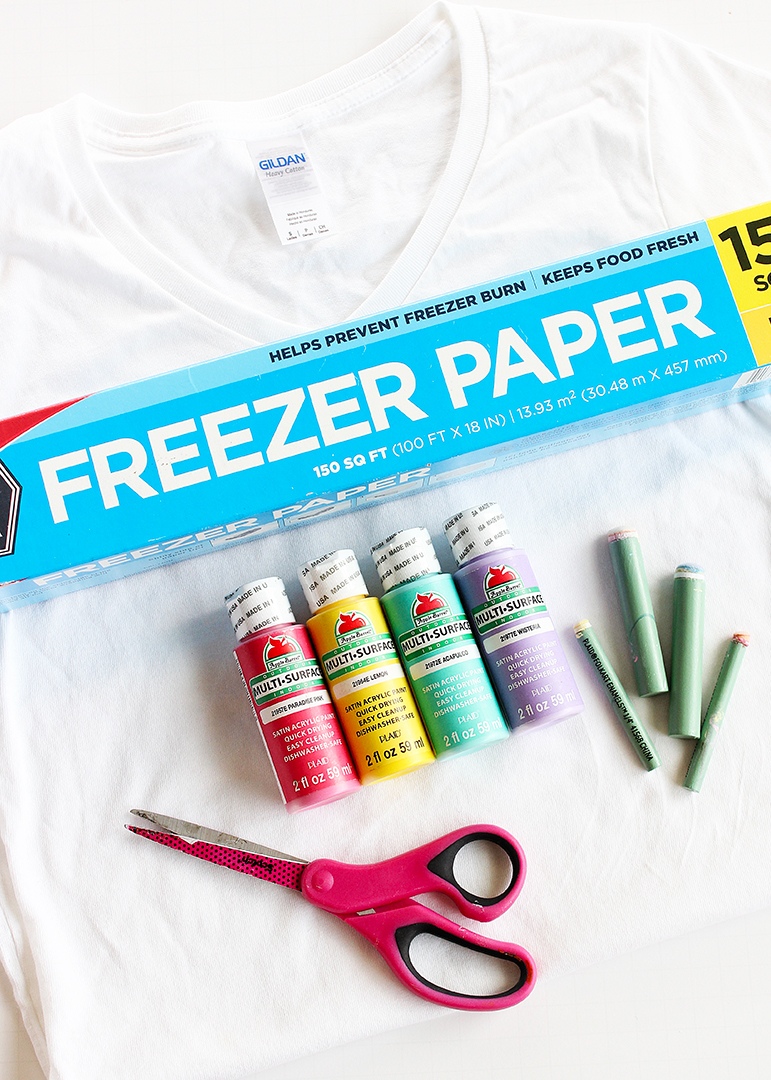
- White t-shirt
- Freezer paper
- Permanent marker
- Scissors
- Iron
- FolkArt Multi-Surface Paint Set (mix and match at least 3 different colors for a confetti effect)
- FolkArt Detail Painters Set
- Fine-point paint brush
Freezer paper is such a great craft supply! Did you know it can be used to create iron-on custom stencils to use in any of your painted projects? The wax coating on the back of the paper makes it adhere to fabric when pressed with an iron. I love to use freezer paper to make custom throw pillows!
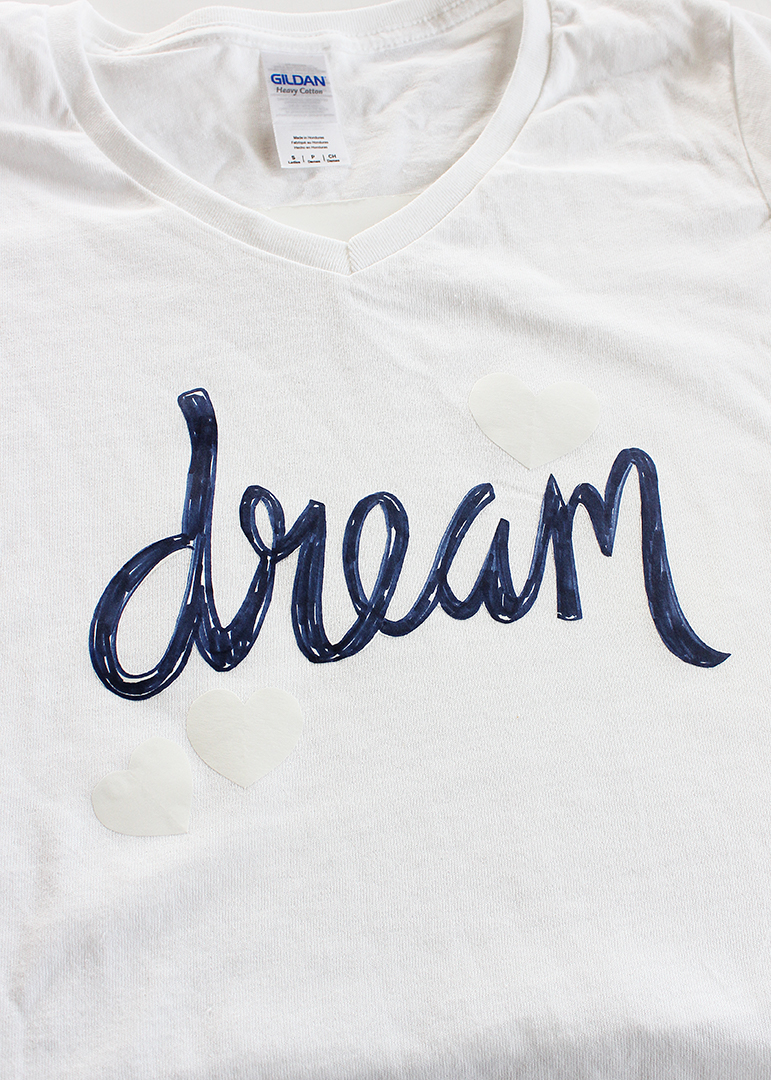
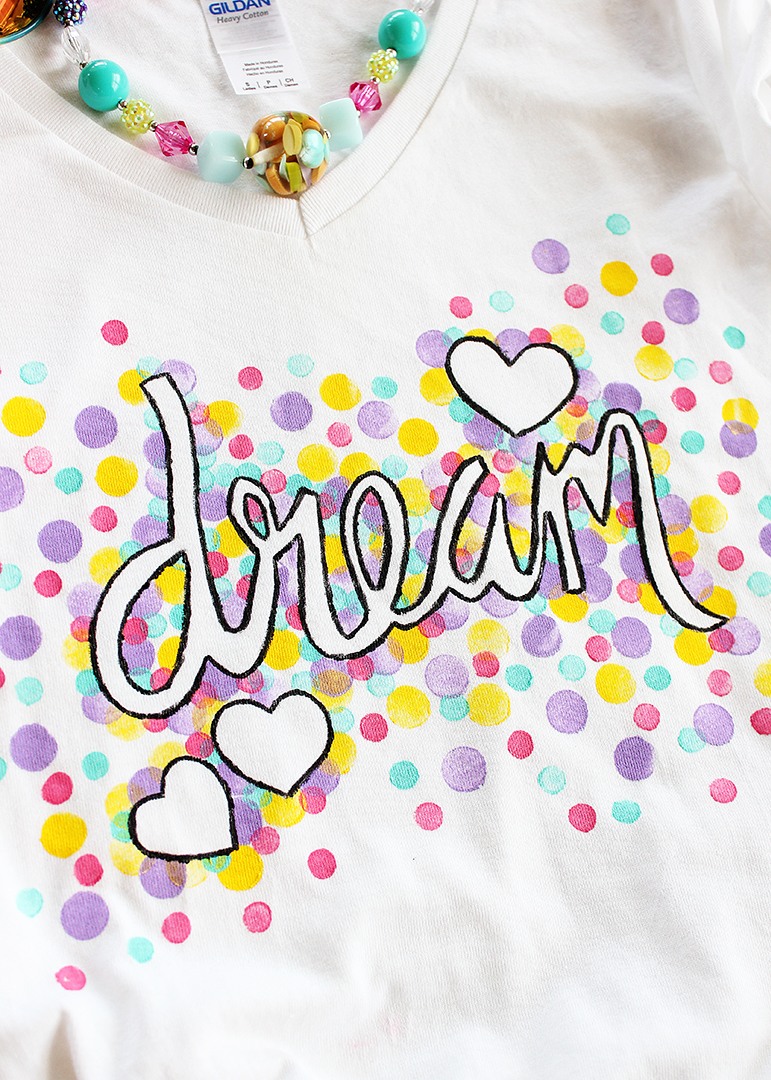
For this freezer paper shirt project, instead of a stencil, we’re going to create a freezer paper mask by writing a favorite word or phrase in “bubble” script with the permanent marker. To do this, simply write your word, and then use the marker to widen each of the strokes to about 1/4″. Parents can help out by making a cursive script word design, but I also love the idea of letting kiddos us their own handwriting for this step! When the word is finished, cut it out with scissors. (If not using a connected script font, cut each individual letter out separately.)

Position the freezer paper word/letters as desired on the front of the shirt. Use an iron on a cotton setting (no steam) to secure the wording in place. If you like, you can also cut out some hearts or other shapes from the freezer paper to add to the design. (It’s a bit hard to see, but I added hearts to the top right and bottom left of my wording design.)
Now, the fun part: painting!
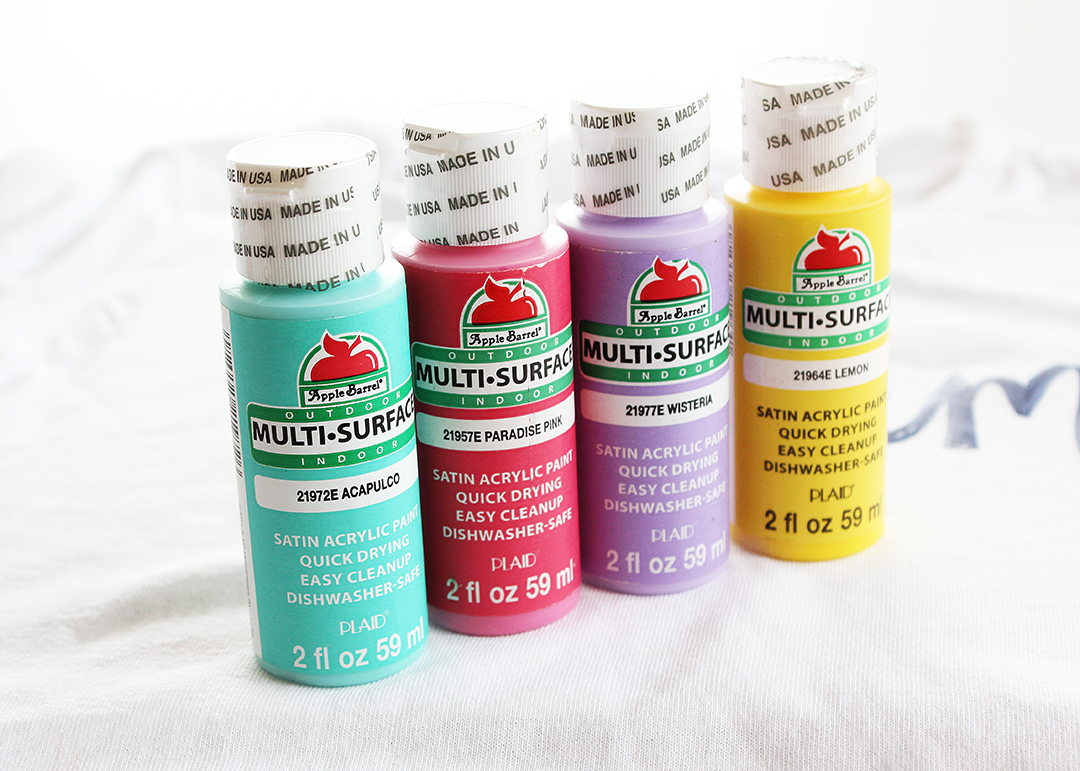
The Apple Barrel Multi-Surface Paint Set is such a great value. These beauties can be used to paint on everything from tin, terracotta, paper mache, canvas, wood, plaster, rigid plastic, concrete, glass, and ceramics, to (you guessed it) fabric! Apple Barrel Multi-Surface Paint is perfect for indoor and outdoor use, and finished projects are dishwasher-safe and machine washable. This kit contains sixteen 2 oz. bottles of the multi-surface paint in a variety of colors you’ll love to use for all sorts of projects. It is so great to find paint that you can use multiple times instead of buying and then setting aside to never be used again.
The FolkArt Enamel Detail Painters are the perfect little set of tools to make perfectly shaped circles the easiest way possible. The short shape of the tools make them perfect for small hands! Essentially, these tools are a round foam dauber attached to a wood applicator. The kit contains a number of different circle sizes to make creating the confetti on this shirt so, so simple!
To paint the confetti, start with one color, and use the circle detail painting tool to apply a scattering of circles, painting directly over the freezer paper design. Allow the paint to dry before repeating this process with each of the remaining paint colors.
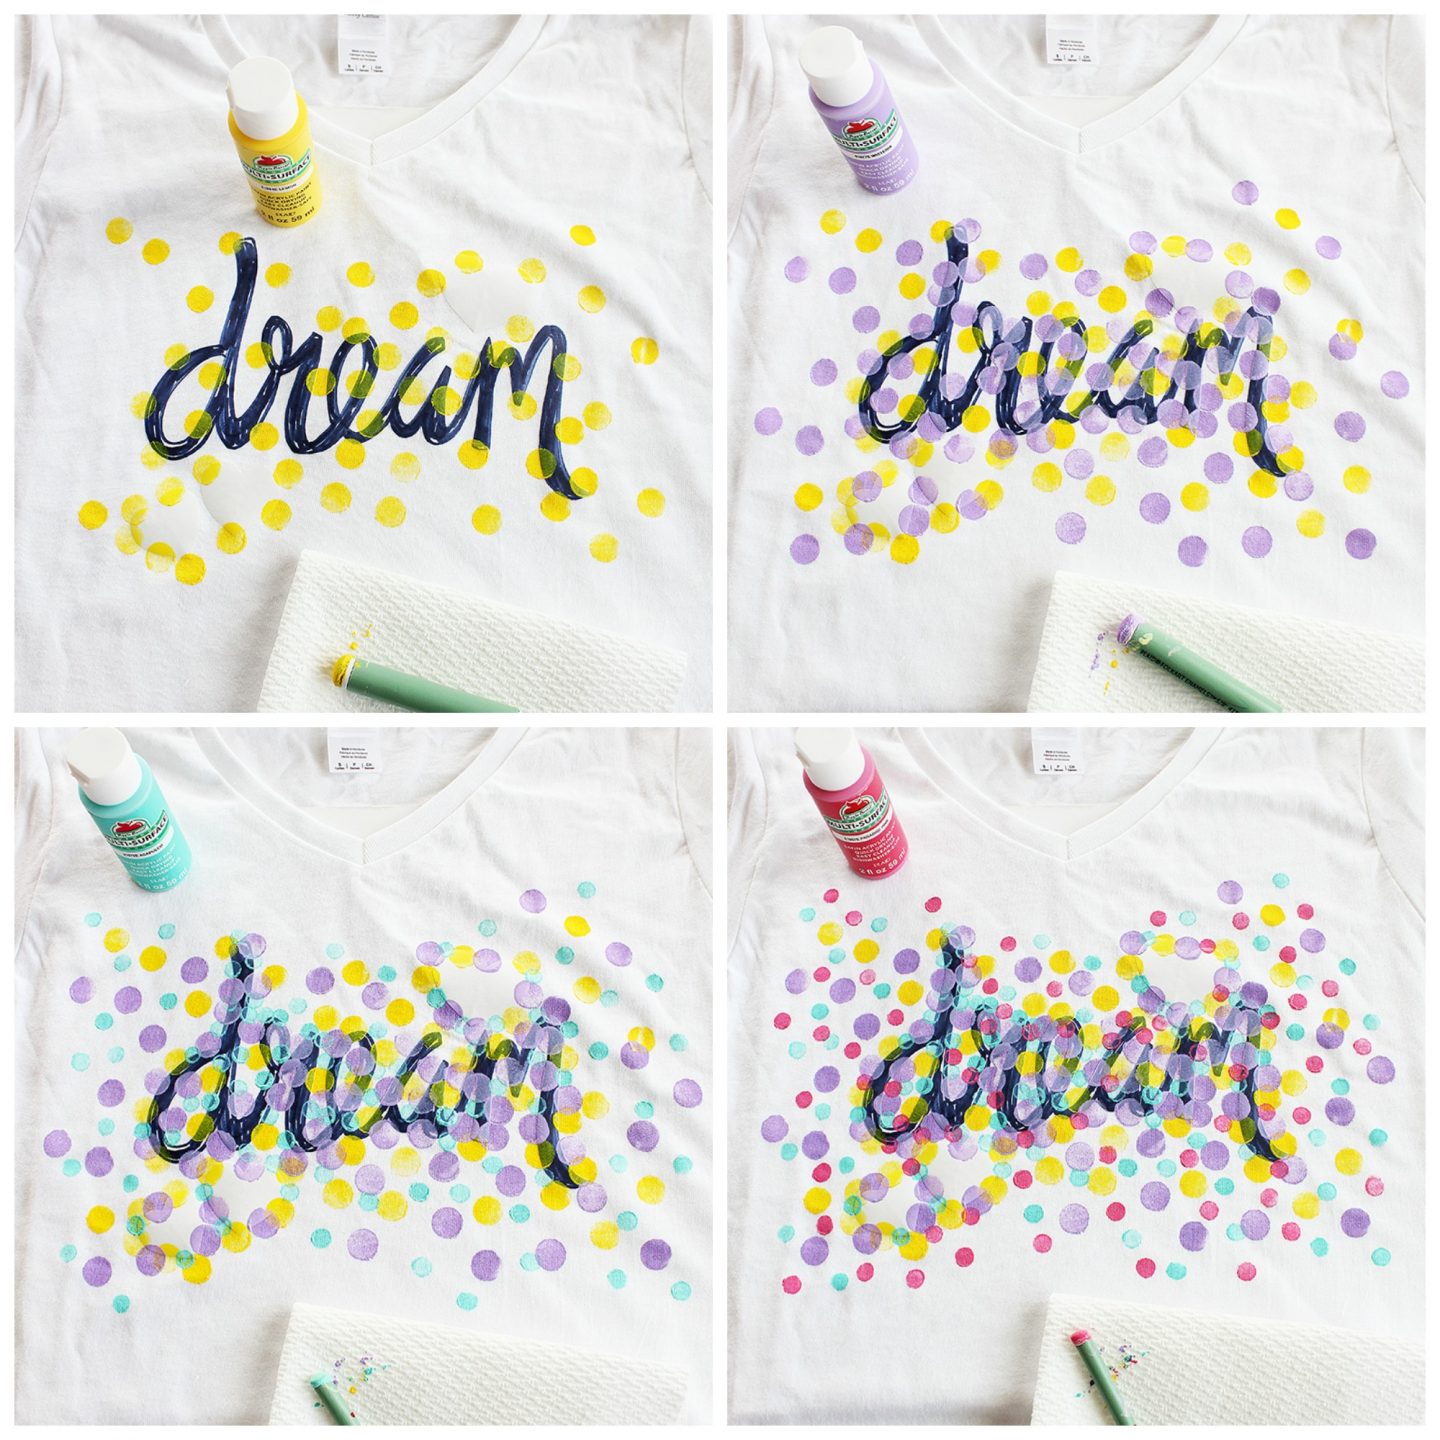
When the paint is dry, remove the freezer paper designs.
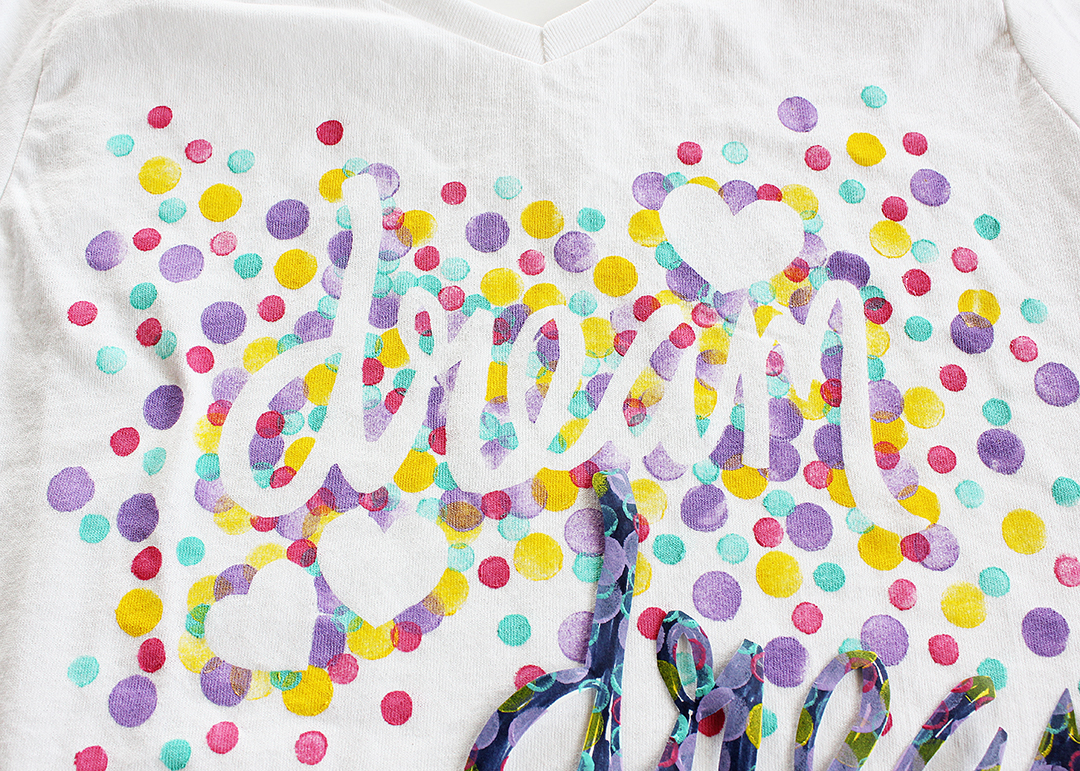
Use the fine-point brush and black paint to outline the stenciled shapes and lettering. (This step is completely optional, but I really like how it makes things pop!) This step might be hard for younger crafters, so an adult’s help might be just the ticket.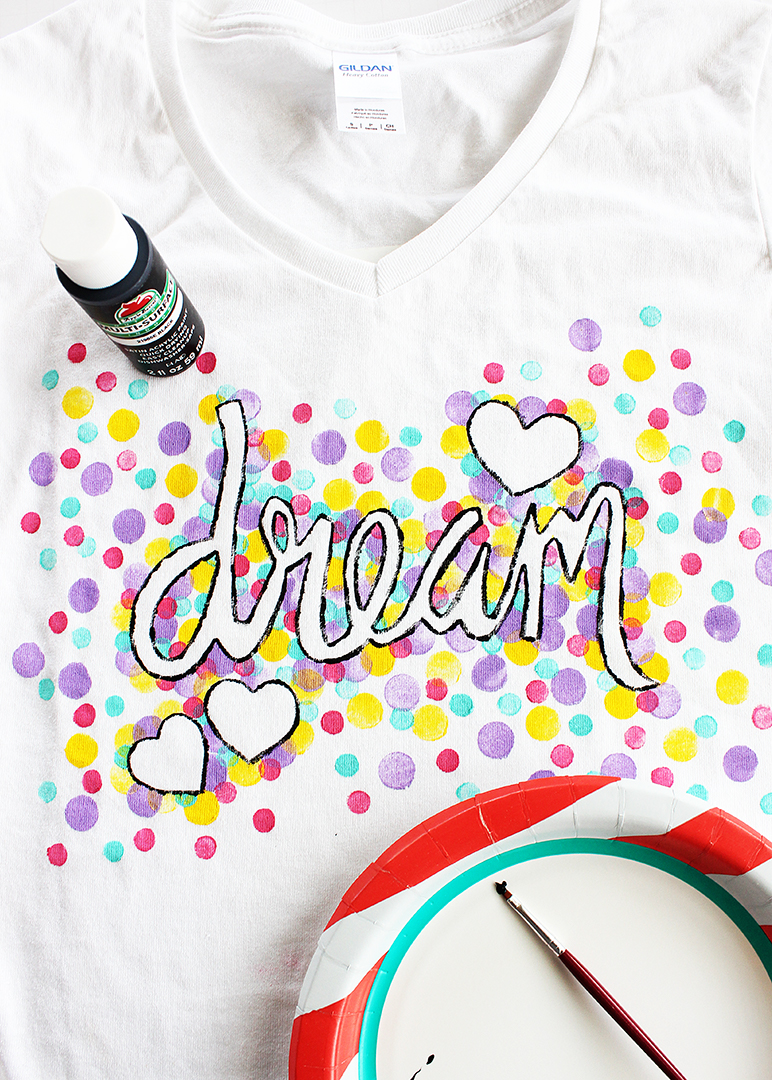
When the painted design is dry, allow the paint to dry for 24 hours. Have an adult position the painted side of the shirt facing up on an ironing board, and cover the design with a pressing cloth. Using an iron set on the highest temperature for the shirt fabric and no steam, press an iron in one spot of the design for 30 seconds, lift the iron, and move to a new area and press again for 30 seconds. Repeat this step until the entire design has been pressed. Taking the time to heat set your design will keep you freezer paper shirt looking great wear after wear! To machine wash, turn inside out and wash on a gentle setting.
This adorable confetti freezer paper shirt is such a great craft project to make with kids, but it would be fun for an adult craft night, too!
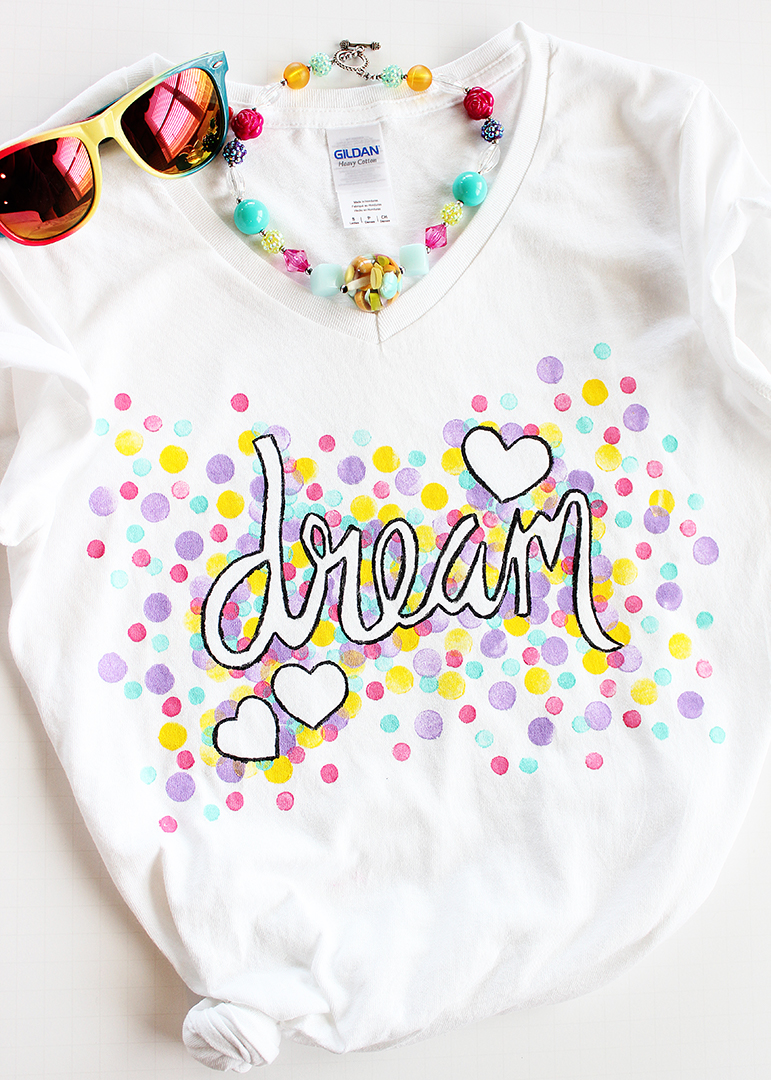
The scattering of confetti gives this painted t-shirt such a bright, whimsical feel. My tween daughter and I had so much fun making this together!
This kids’ craft idea is part of a fun event I’m taking part in with some of my favorite blogging friends and Plaid!
Each blogger used the Apple Barrel Multi-Surface set to create some fantastic craft projects your kids are going to love!
Cheers to connecting through creativity this summer instead of connecting to Wifi!
Click below to check out each of the great ideas for the Create Your Summer series.
- DIY Foosball Table at The Cards We Drew
- Patriotic Flag Pins at Amy Latta Creations
- Painted Rock Photo Holders at Made to Be a Momma
- Pretty Life Girls
Having grown up in a home brimming with sewing notions and paintbrushes, Amy has a deep love for all things creative. On any given day, you’ll find her knee-deep in her latest creative endeavor, with projects ranging from sewing and crafts to home decor and kid-friendly ideas. Amy believes that everyone, regardless of skill level or experience, possesses the ability to create something beautiful, and Positively Splendid was born of her passion for helping others harness their innate creative potential.
Great job. I wish I could do the same.