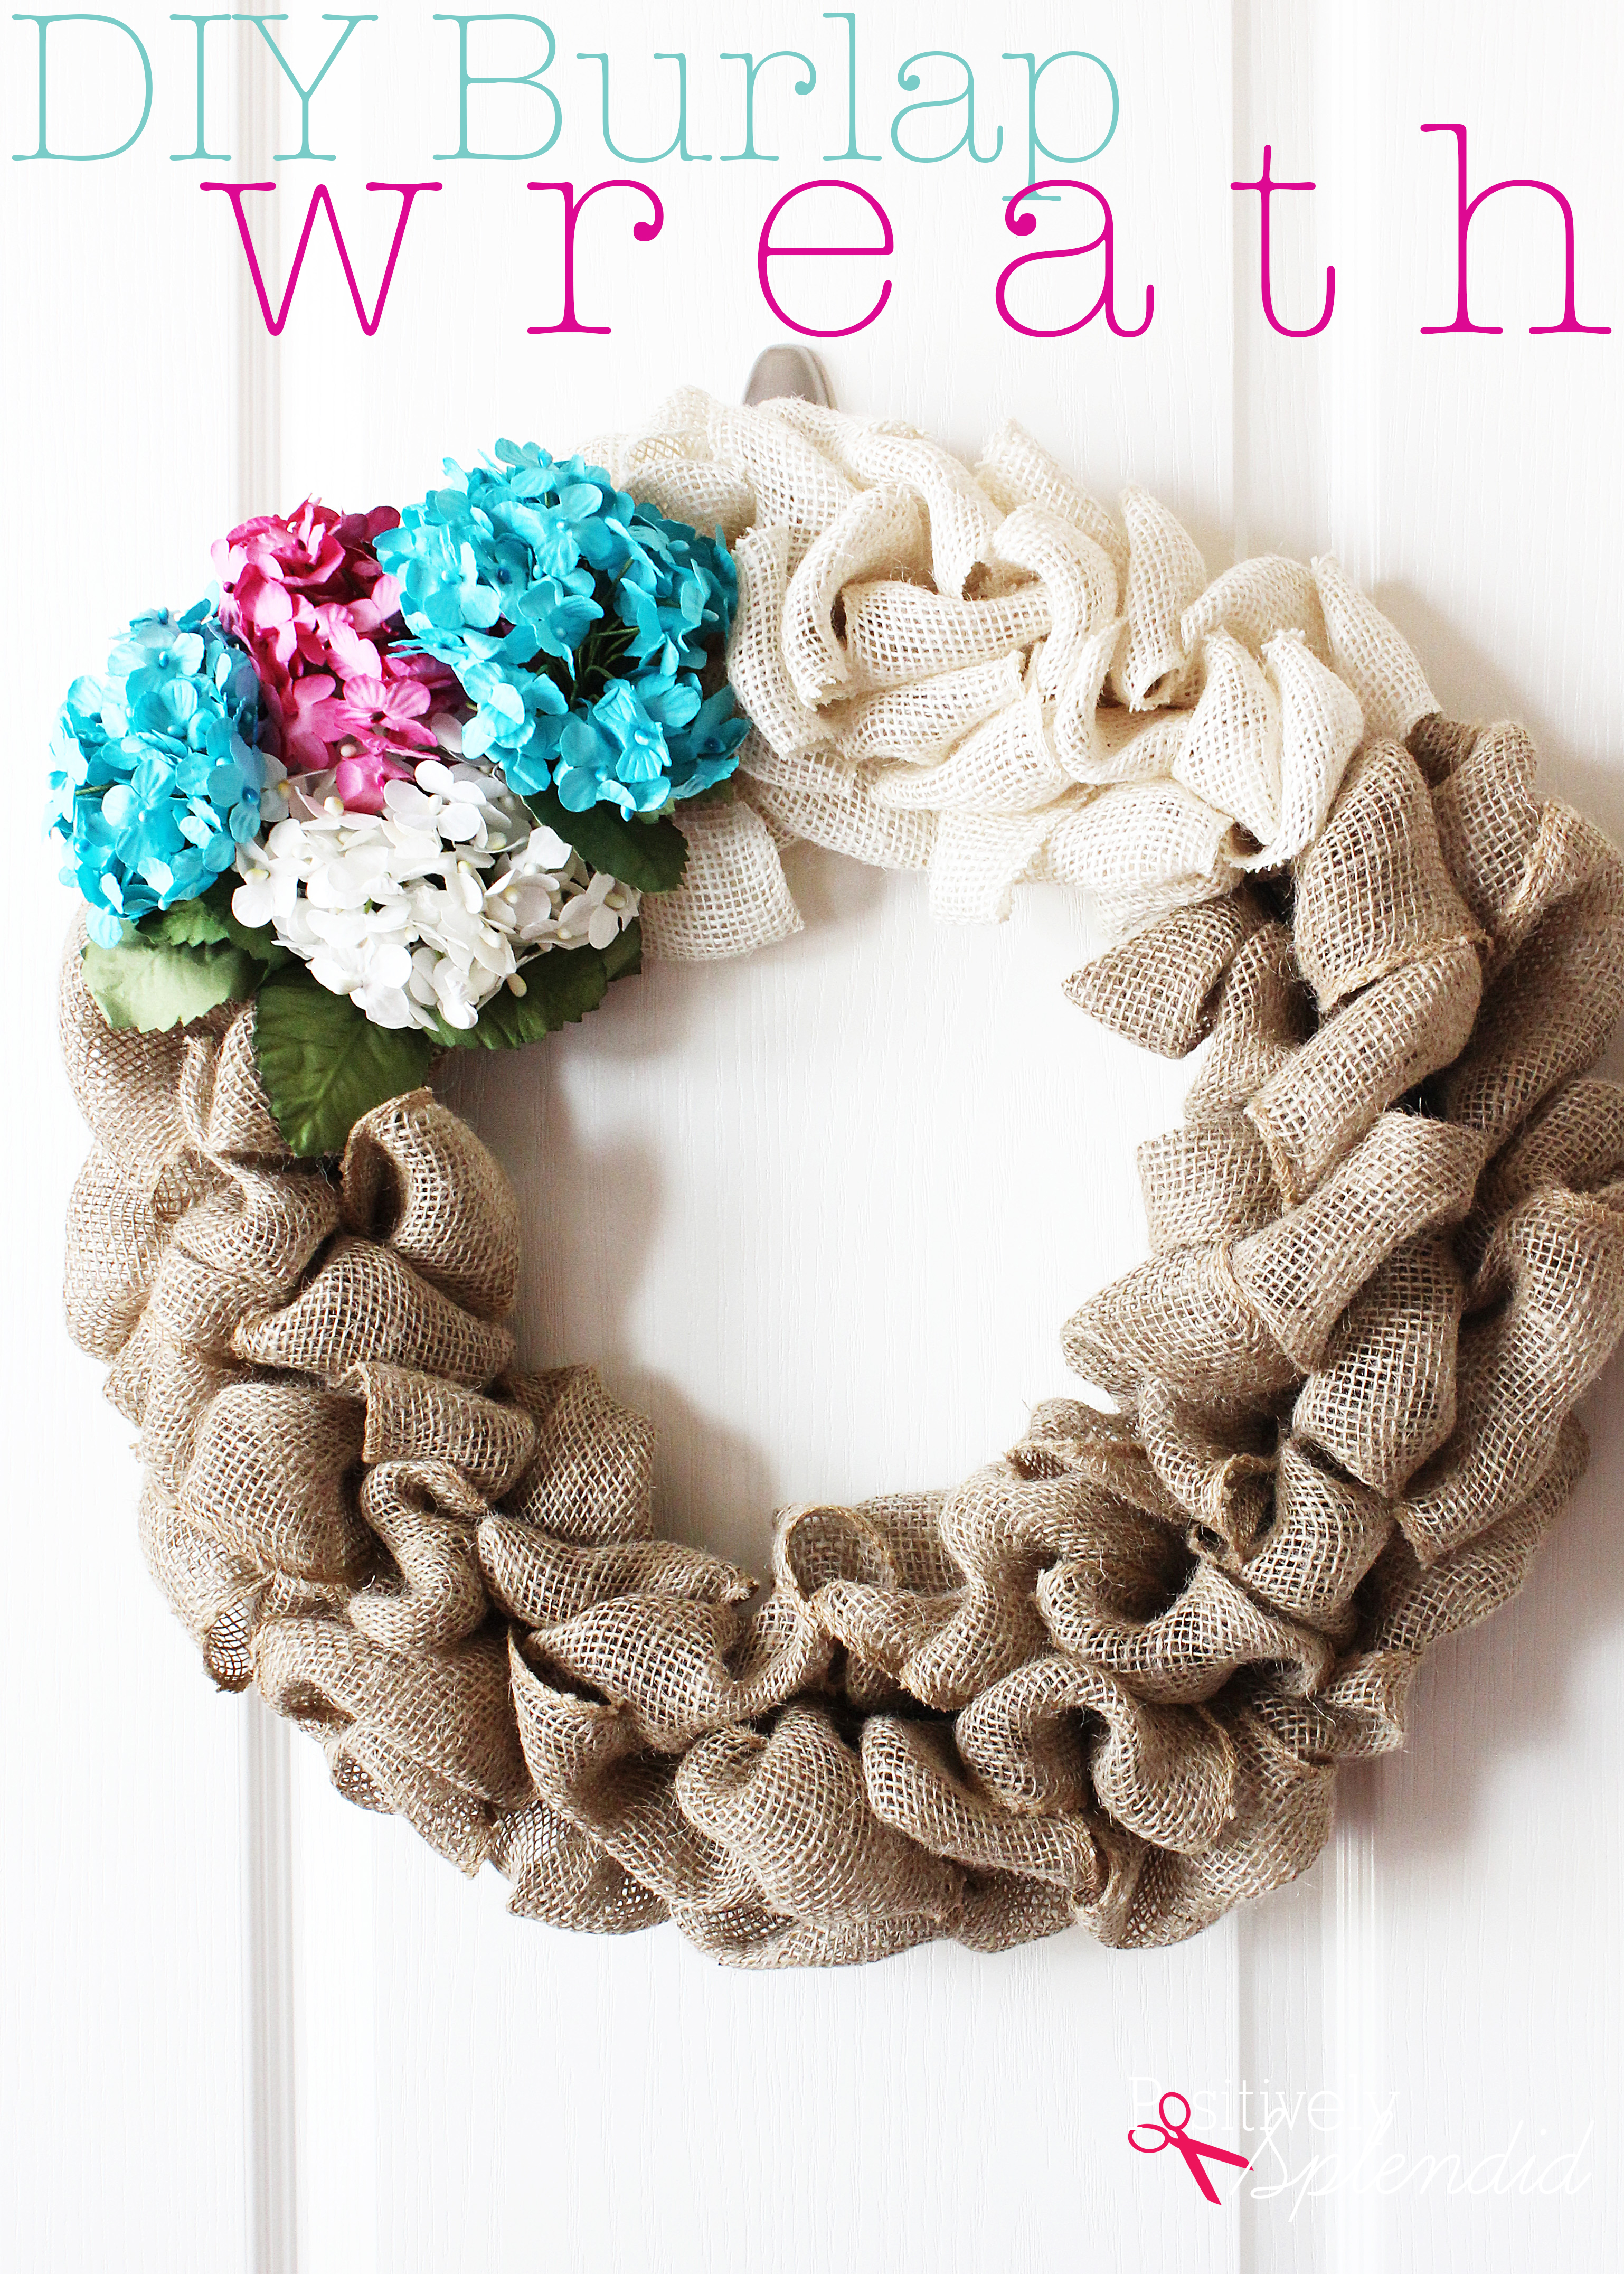
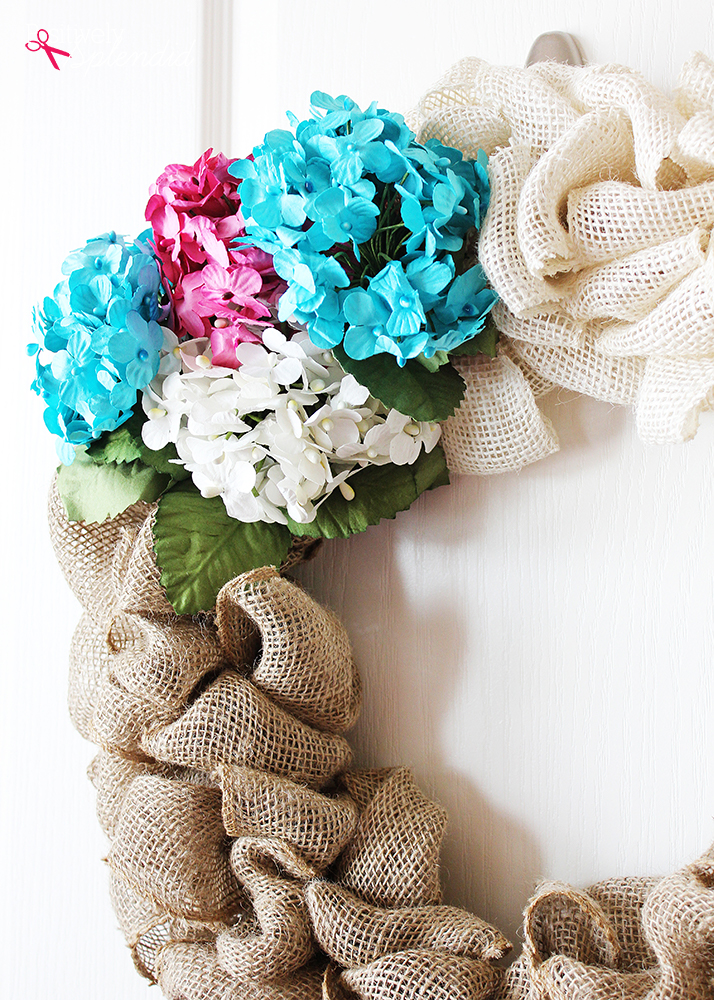
I’ve said it many times before, but it bears repeating: wreaths are such a terrific way to spruce up your home throughout the seasons quickly and easily without having to make a big investment of time or materials. This DIY burlap wreath will add an elegant touch to your front door, and it requires just four supplies and about 15 minutes of time to make. Once you’ve made one, you’ll want to make one for every season! Easily swap out the hydrangeas here for poinsettias at Christmas, lilies at Easter, mums in the fall–you get the idea! Read on to see how easily this project comes together.
To make this DIY burlap wreath, you will need…
- 16-inch Metal Wreath Form*
- 3-inch Burlap Ribbon* (Each wreath requires between 2-3 10-yard packages. Use all the same color, or mix and match different colors.)
- Floral Wire * (or twist ties)
- Faux Hydrangea Flower Picks (or any type of flower that suits your fancy)
*affiliate link
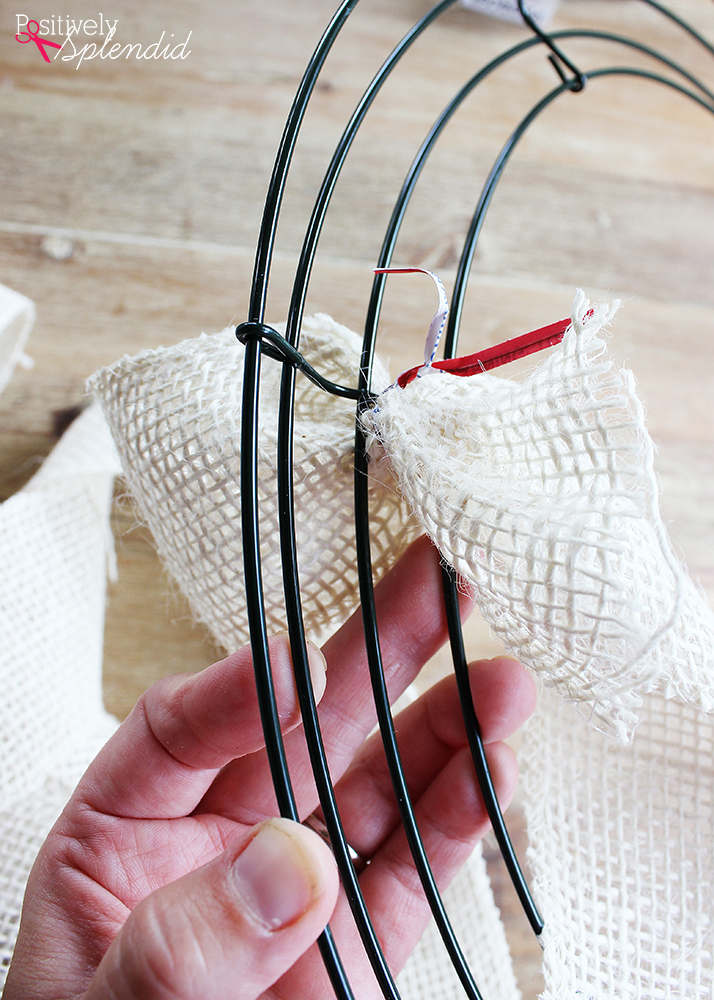
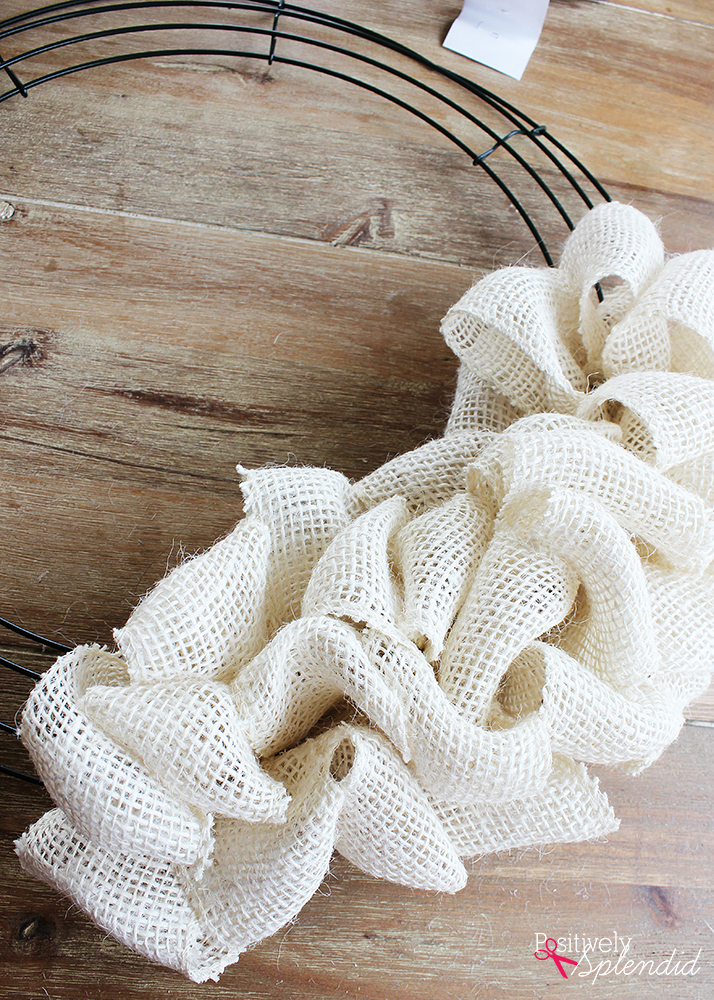
To begin, fold the burlap ribbon down and over to form a 3-4″ loop. Working from the back of the wreath to the front, press the loop up and through the innermost ring of the wreath form. Secure the ends with a section of the floral wire or a twist tie.
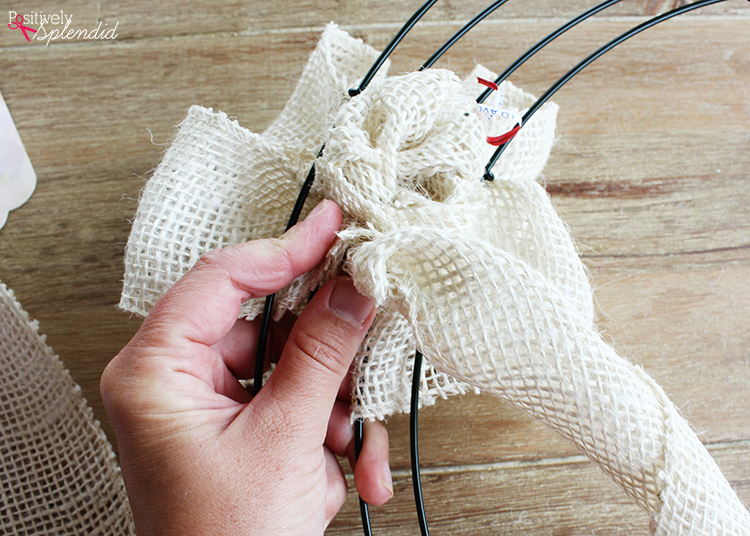
Fold the ribbon again to form another loop, and push this loop and and through the middle ring of the form, directly next to the first loop. Create another loop in the same fashion in the outermost ring of the wreath form, so that you have a single complete burlap row.

When the first row is complete, flip the wreath over and twist the end of the burlap 3-4 times to secure.
Fold another loop and press it up and through the innermost ring of the form, directly below the first row of loops you created in the previous steps. Continue adding loops across the form, twisting the end of the burlap when you reach the outermost ring each time, until the entire wreath is covered in the burlap loops.
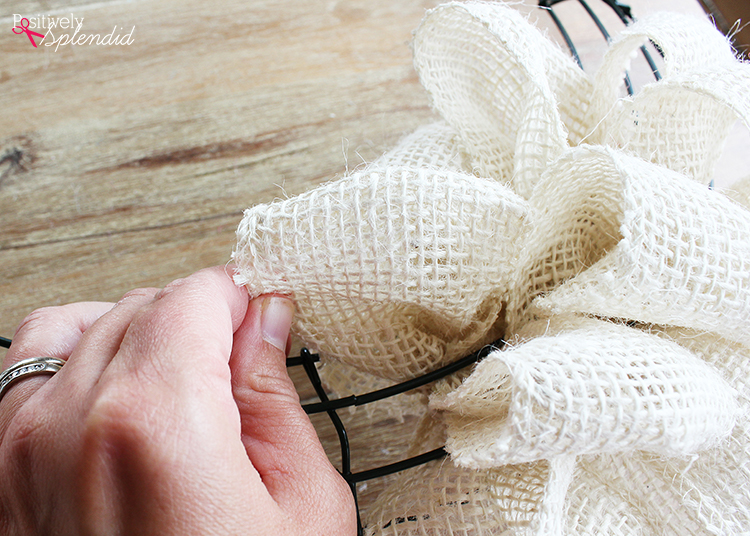
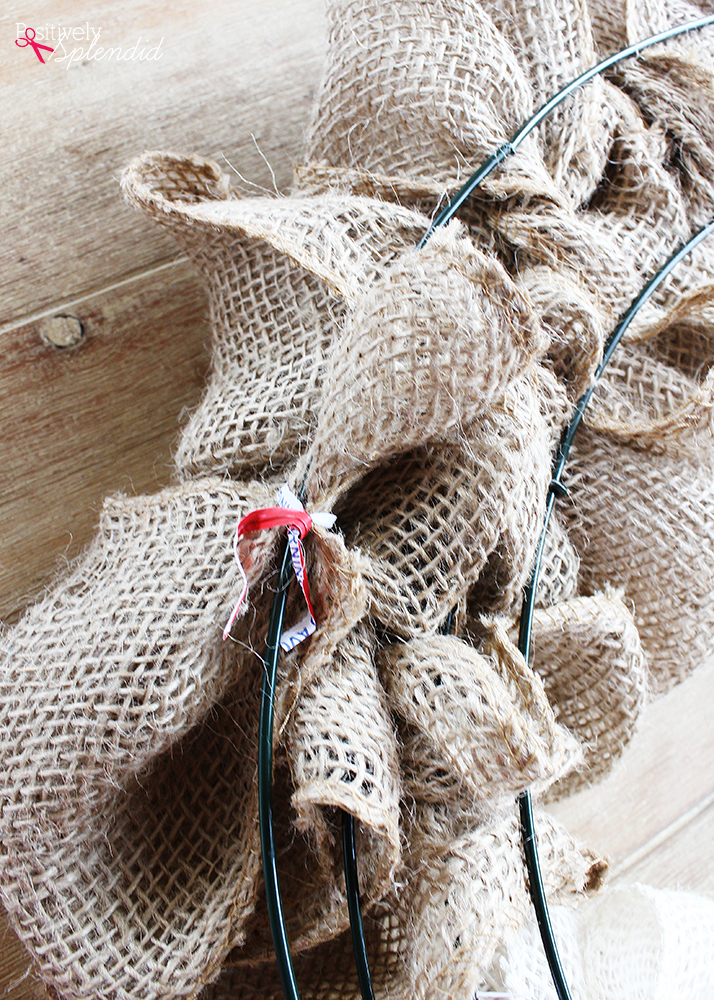
When finished, trim any excess burlap with scissors leaving a 3-inch tail, and secure the end of the burlap to the wreath with floral wire/a twist tie. Note: If creating a wreath with different burlap colors, simply trim and secure the end of the first burlap color to the wreath form before securing the next color to the wreath and continuing the looping/twisting process.
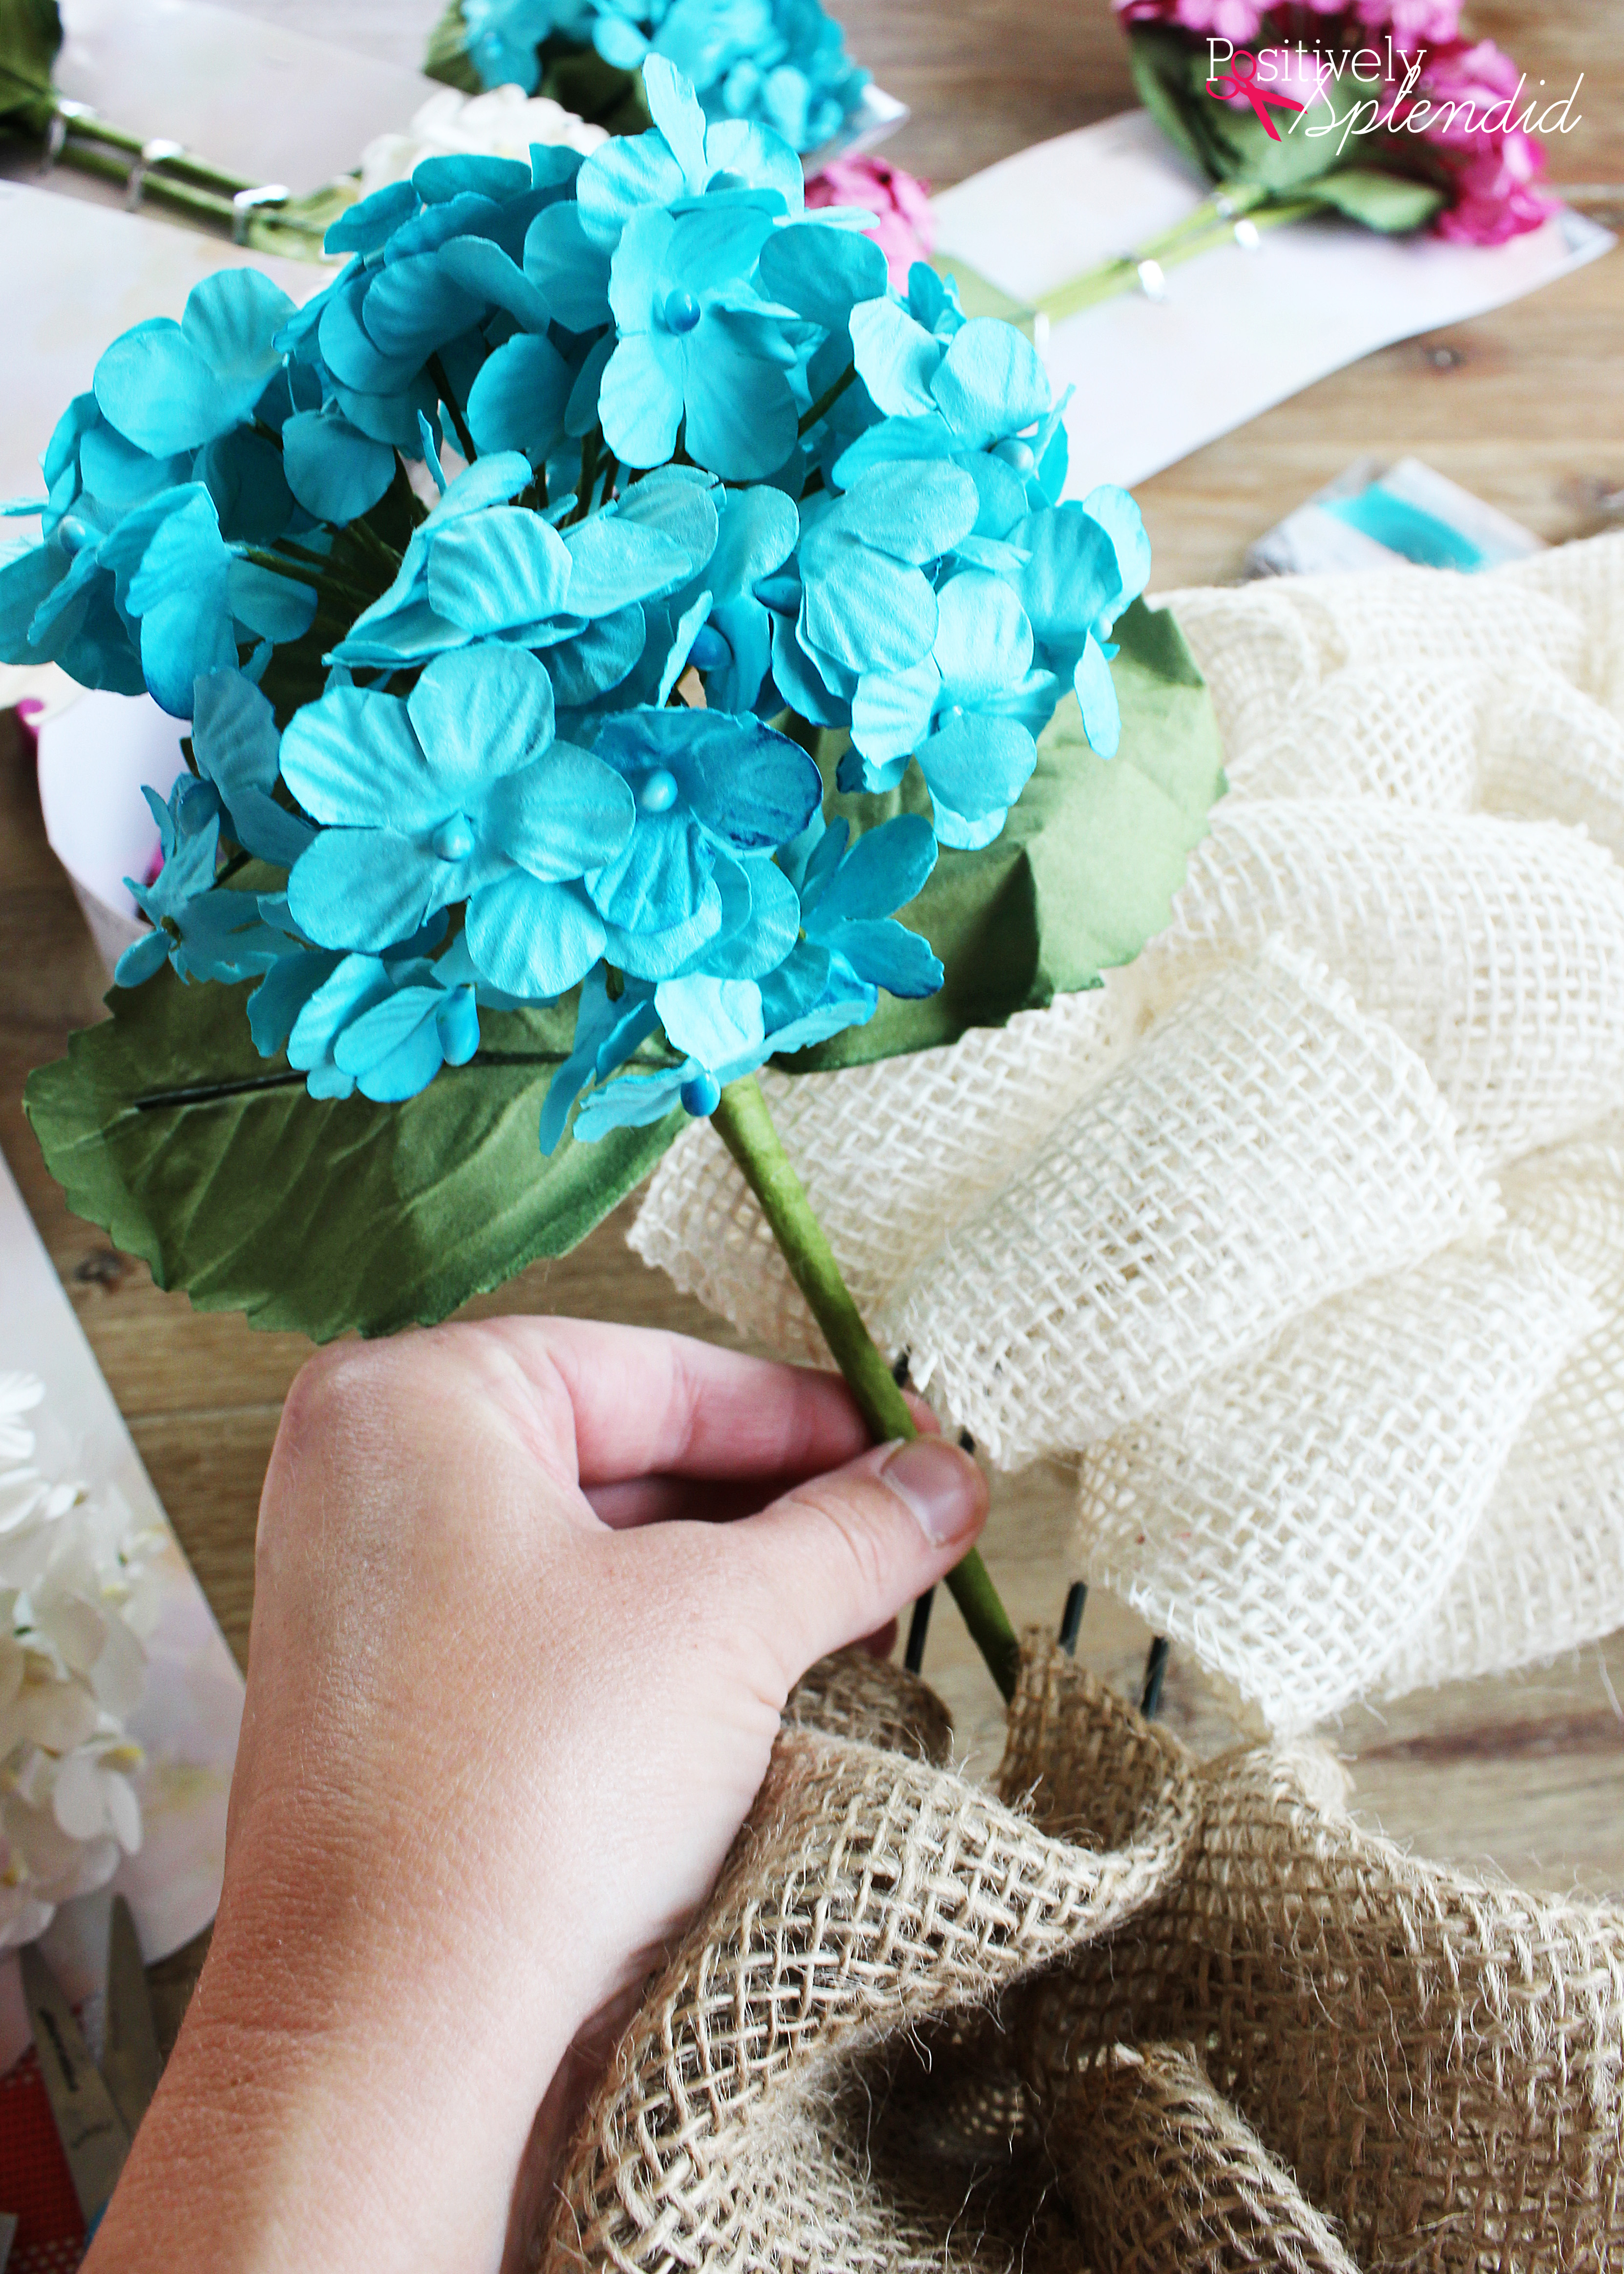
Pulling two rows of the loops apart slightly, tuck the flower picks down through the wreath, working from front to back. Flip the wreath over, and secure the flower in place by twisting the wired end of the pick around one of the wire sections of the wreath form. Continue adding other floral picks in this fashion until you have achieved the desired look.
Your DIY burlap wreath is complete!
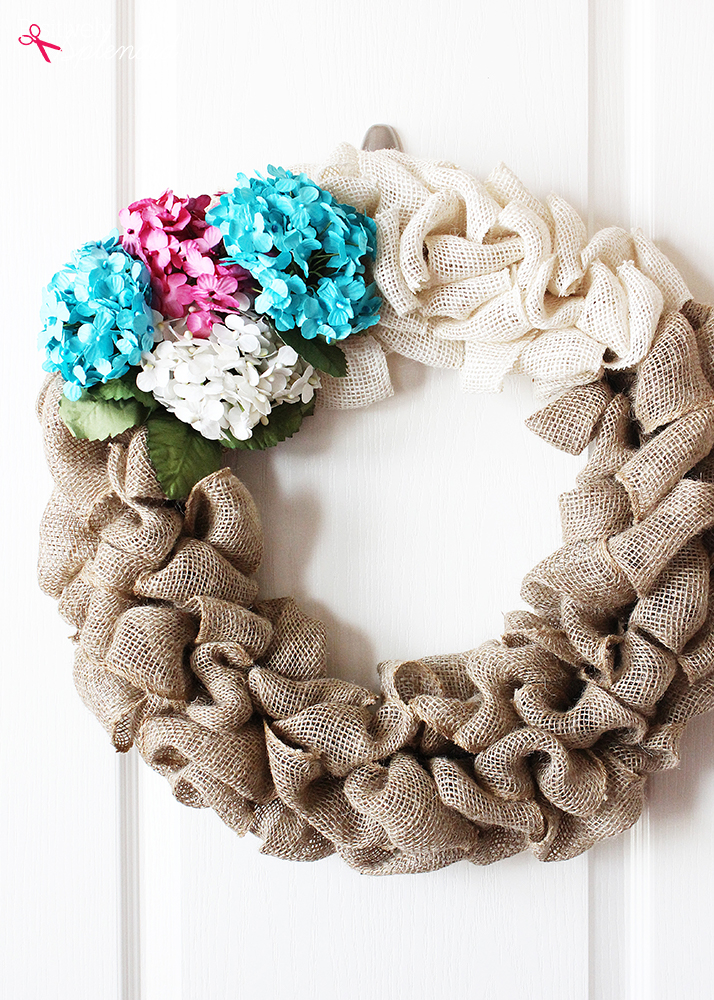
Instead of flower picks here, you could also substitute a monogram, or even some fun pom-poms or just a simple ribbon bow. There are so many possibilities!
Inspired by this wreath and looking for even more great ideas? Check out some of my other favorite past wreath projects!
Botanical Wreath

Patriotic Wreath

Floral Wreath

Rolled Paper Wreath

Having grown up in a home brimming with sewing notions and paintbrushes, Amy has a deep love for all things creative. On any given day, you’ll find her knee-deep in her latest creative endeavor, with projects ranging from sewing and crafts to home decor and kid-friendly ideas. Amy believes that everyone, regardless of skill level or experience, possesses the ability to create something beautiful, and Positively Splendid was born of her passion for helping others harness their innate creative potential.