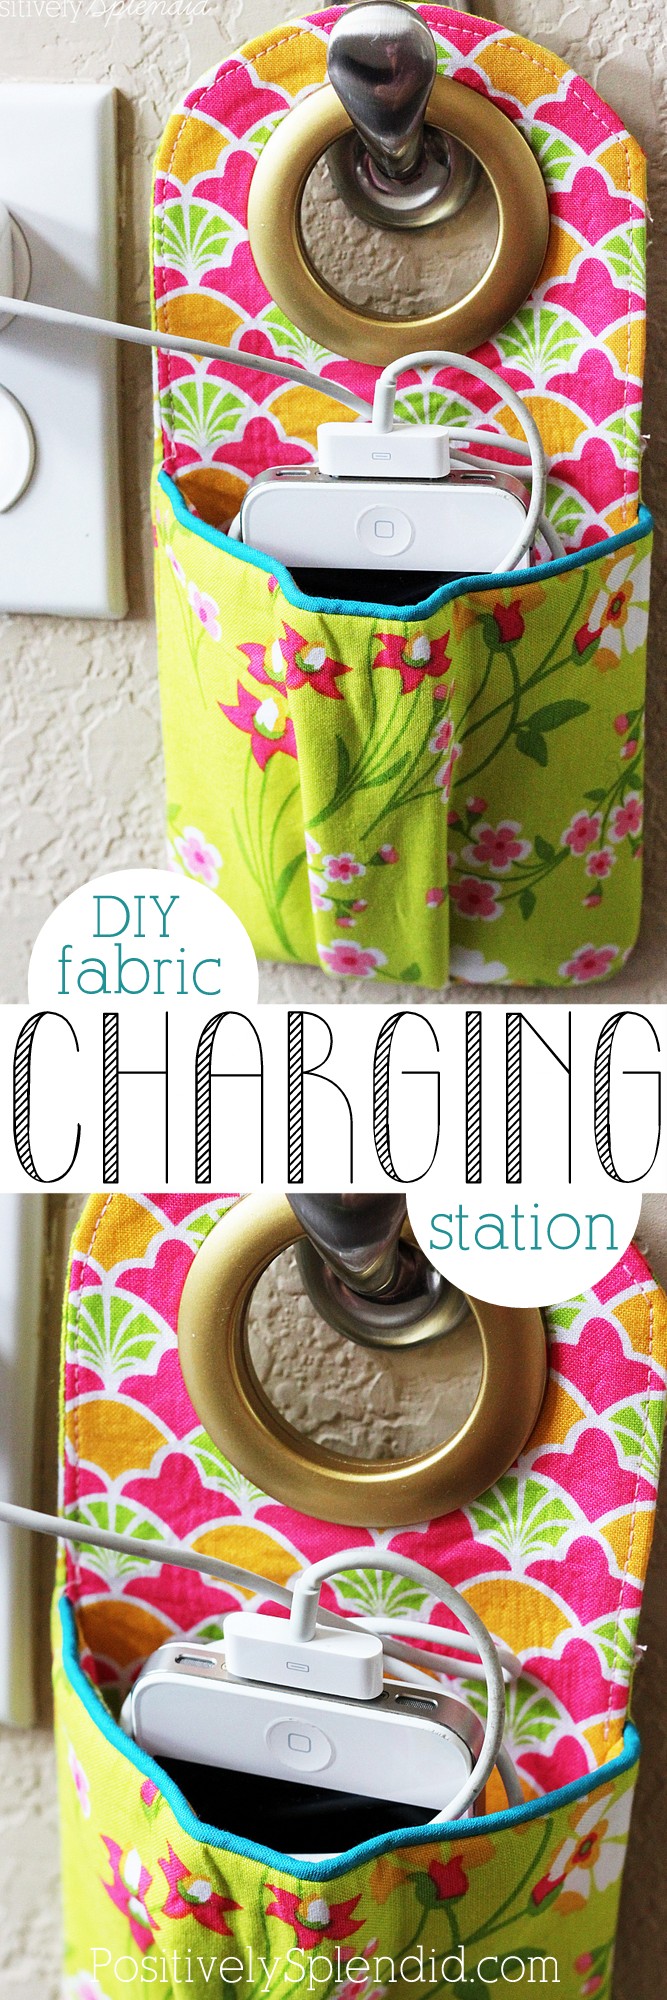
Chances are, if you have a smart phone, you’ve found yourself at one point or another struggling to find a safe place to charge it. When staying in hotels or others’ homes (or in dorm rooms for college students), it can be a challenge to find an outlet next to a raised surface, so phones can wind up on the floor while charging, just one misstep away from a shattered screen. Today, I’m sharing the perfect solution for keeping a charging phone protected while also stowing away the cord in a tidy fashion. This DIY fabric phone charging station is an easy sewing project that can be personalized to any taste using different fabrics and materials, and it makes a stylishly functional gift for just about anyone on your list: moms, dads, teachers, graduates and more. Read on for the full tutorial, including a free PDF pattern to make stitching these up as easy as can be!
Note: This device is intended for supervised use. As a precaution when using this station for unsupervised prolonged periods (as for overnight charging), I highly recommend hanging the device on a Command hook next to the outlet instead of over the outlet itself. As with any of my tutorials, please be responsible when using any of the projects created and bear in mind that I cannot be held liable for the results of improper use. Thanks, and happy sewing!
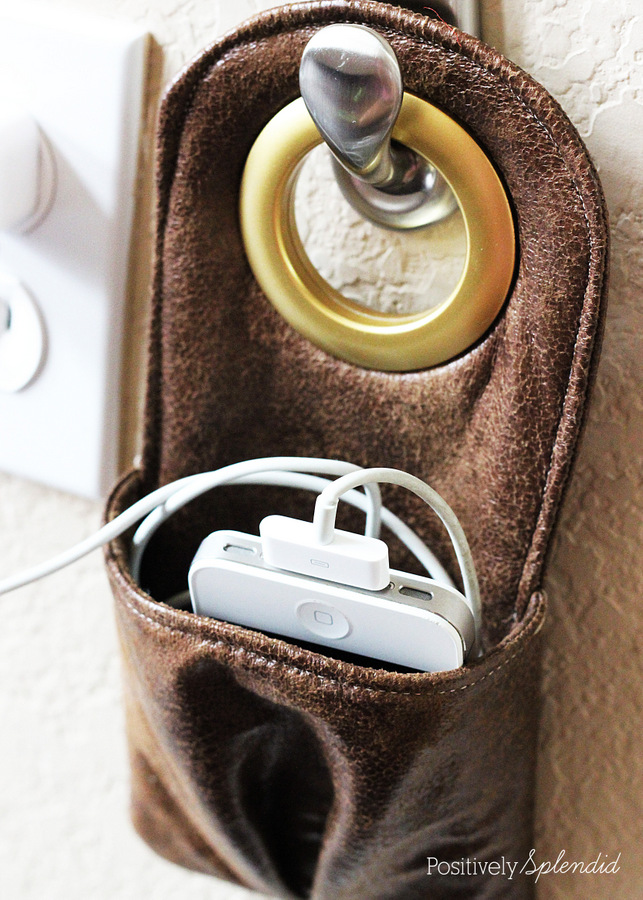
Earlier this year while traveling to Utah for the Snap conference, I noticed a woman at the airport with a handy little fabric phone charging station similar to this one. I immediately approached her to ask where she purchased it, and she said it was a gift she had received from a friend who had purchased it on Etsy. Once I got home, I did a bit of research and discovered Bow of the Tiger, the darling shop responsible for this brilliant idea. Having plenty of pretty fabrics on hand that I knew would be perfect for making a few of these little gems, I tried to no avail to find a sewing tutorial for something similar, and I am sure you can guess what happened next: I opted to come up with one of my own! I loved the overall design of the holders from Bow of the Tiger, but I knew I wanted to tweak the design to make it a bit more functional for my needs. The pattern I designed includes a holder with a generously pleated pocket for nice and roomy storage plus fusible fleece lining to keep the phone padded in case of any mishaps.
For this project, you will need…
-
Fabric Phone Charging Station PDF Pattern Piece (Free Download)
- Fabric in two coordinating patterns (scraps or fat quarters work great for this project)
- (1) 10×5″ piece Peltex
- (1) 10×5″ piece fusible fleece
- Washable ink marker
- 6.5″ of 1/2″ bias tape maxi piping (optional)
- (1) 1 9/16″ plastic curtain grommet with setting kit
- Coordinating thread
- Denim sewing needle
- Basic sewing supplies: machine, shears, iron, pins, etc. (Be sure to check out the list of my 10 must-have sewing tools.)
To begin, print off and cut out the pattern pieces, and then use them to make your cuts. For each charging station, you will need:
From the coordinating fabrics:
- 1 front main body piece
- 1 back main body piece
- 1 outer pocket piece*
- 1 lining pocket piece
*Be sure to transfer the markings along the bottom edge of the pocket pattern piece onto the outer pocket piece.
From the Peltex:
- 1 main body piece
From the fusible fleece:
- 1 main body piece
- 1 pocket piece
Use an iron to fuse the main body fleece piece to the wrong side of the back main body piece according the the product instructions. Fuse the main body Peltex piece to the wrong side of the main front piece according the product instructions. Fuse the fleece pocket piece to the wrong side of the outer pocket piece.
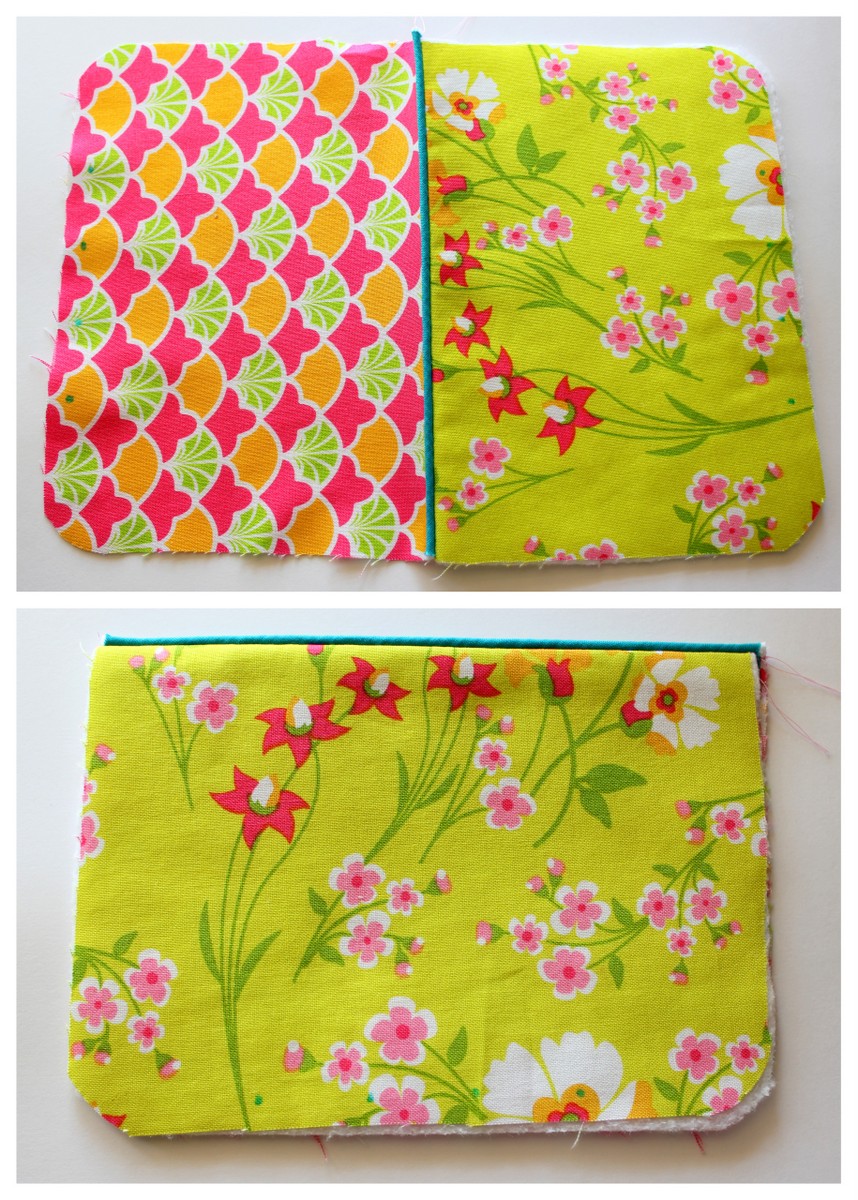
Align the outer and lining pocket pieces along their top straight edges, matching right sides together; pin. Stitch along the top edge using a 1/4″ seam allowance. (If desired, the optional piping can be inserted in this seam.) Press seam open, and the fold the pocket piece wrong sides facing along the seam. Press pocket flat. Baste 1/8″ along the open edges of the pocket piece to prevent shifting in the following step.
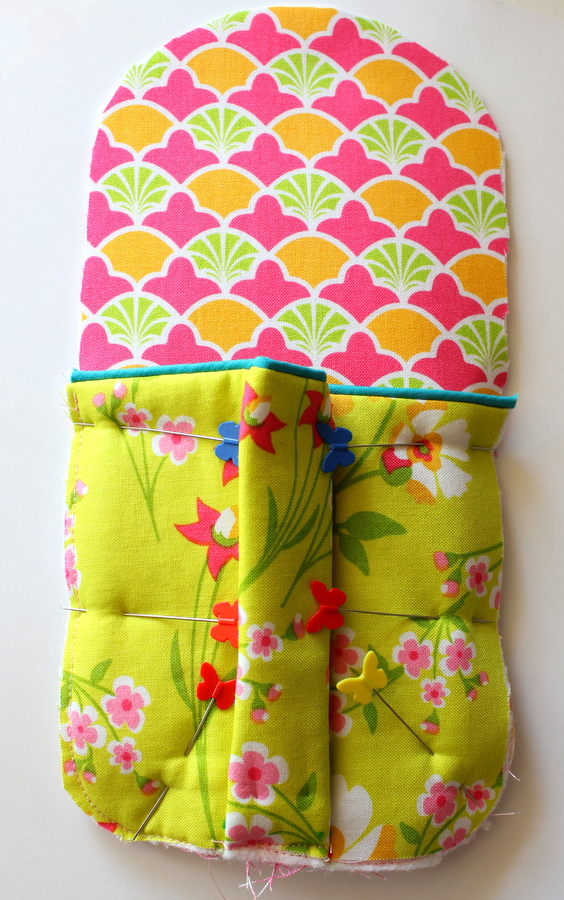
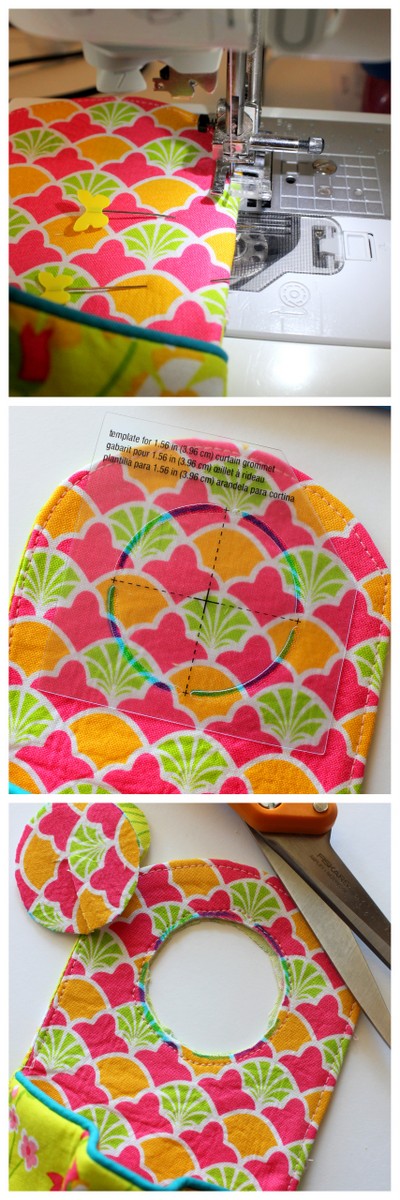
To form the pocket pleat, pinch the fabric together at the transferred mark B (the left center marking), and fold it over to the left so it is aligned with transferred mark A (the left outermost mark). Pin the fold into place. Now, do the same in reverse, pinching at point C (the right center marking) and folding it over to the right to align it with point D (the right outermost mark). Pin the fold into place. At this point, point B should be directly on top of point A and point C should be directly over point D, forming a pleat, as seen below. Baste 1/8″ from the lower edge of the pleat to secure it into place and remove pins.

Pin the pocket piece on top of the fused Peltex outer main body piece, so that the right side of the body piece is facing the wrong side of the pocket piece. Make sure to precisely align all of the raw edges, adjusting and pleating the pocket as necessary. Baste 1/8″ from the edge around the raw edges of the pocket to secure it to the main body piece; remove pins.
Position the fusible fleece-lined back main body piece on top of the front main body/pocket piece, aligning the raw edges. Pin. Use the washable ink marker to make 1 mark 1/2″ above the top edge of the pocket along the top right-hand side of the piece. Make another mark 2″ above the first mark. Using a 1/4″ seam allowance, stitch around the perimeter of the piece, beginning and ending at the marks to leave an opening for turning. Notch the top curve of the piece, and trim the seam to 1/8″, leaving the unstitched portion of the seam untrimmed. Carefully turn the piece right-side out through the opening and use a point-turner or skewer to make sure the seam is entirely turned. (The stiffness of the Peltex lining can make this a bit challenging, but trust me: it can be done! Also, if you notice the Peltex piece seems to be a bit puckered after turning, don’t worry: that will get taken care of when we press everything in the next step.)
Note: The photos below do not show the fusible fleece backing on the back main body piece, since that was a later addition to the pattern.

Press the piece thoroughly, making sure the opening portion of the seam is tucked neatly inside of the piece. Pin the opening closed. Edgestitch 1/8″ from the outer top edge of the piece, securing the opening as you stitch, starting and ending at the portion of the holder just above the left and right top edges of the pocket.
Using the template provided in the grommet kit, use the washable ink marker to transfer the template onto the top center of the piece. If desired, stitch just outside of the outside edge of this circle marking to prevent shifting as you set the grommet. Affix the grommet to the piece according to the instructions in the grommet kit.
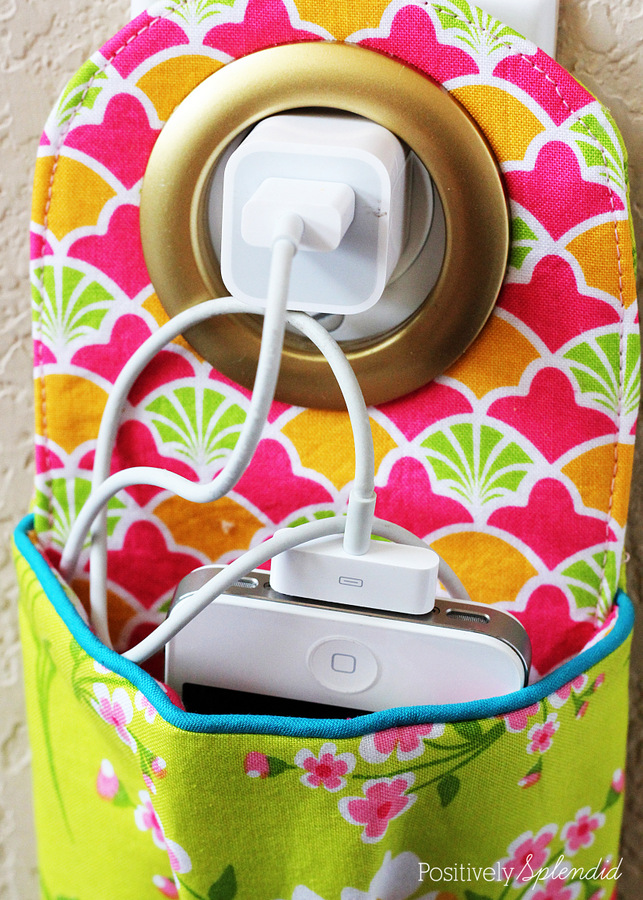
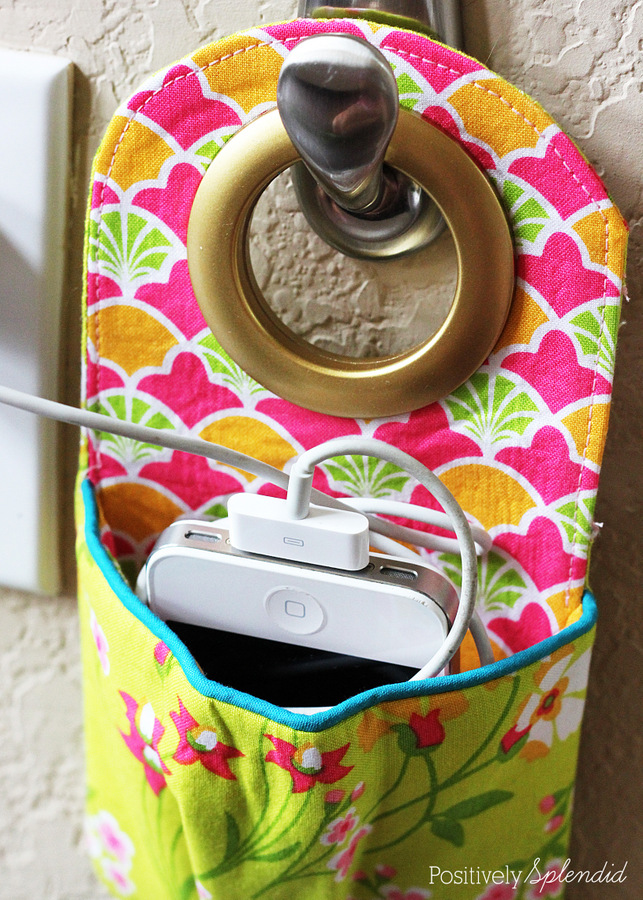
Your fabric charging station is complete!
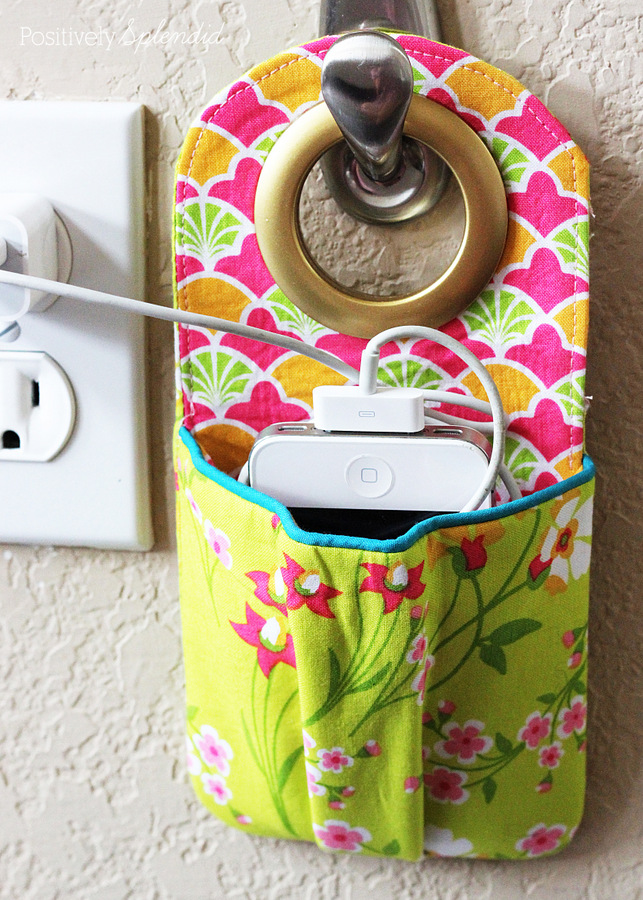
To use, simply hang the holder on the plug portion of the charger, and then tuck the phone and cord down inside. I’ve learned from experience that these also work great hooked onto the handle of a stroller to hold a phone and keys!
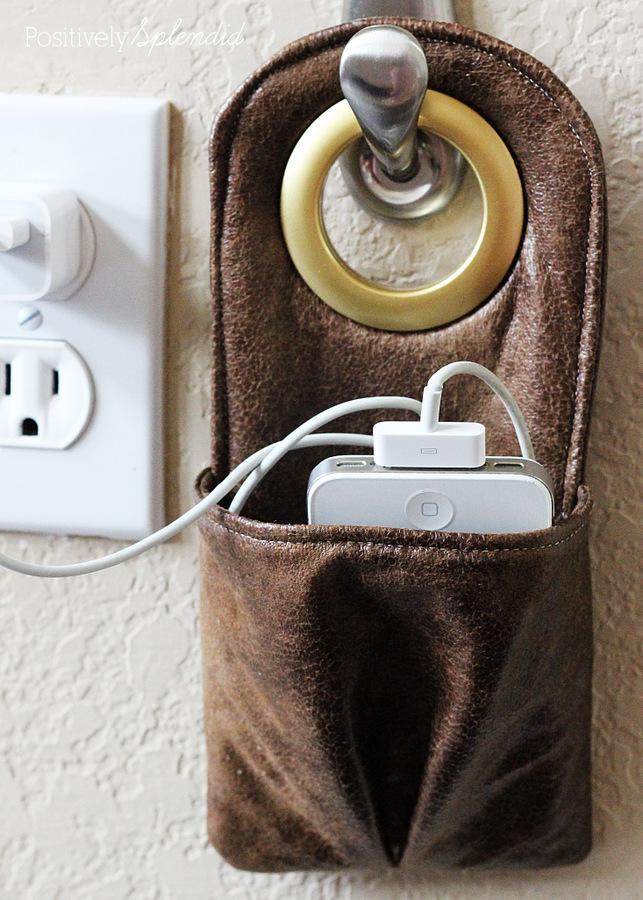
Stitched up in faux leather, these cane be made with a more masculine appeal, too. This would be a terrific gift for men who travel often!
Wanting even more inspiration for fun projects to stitch up with your stash of fabric scraps? Check out these other great ideas!
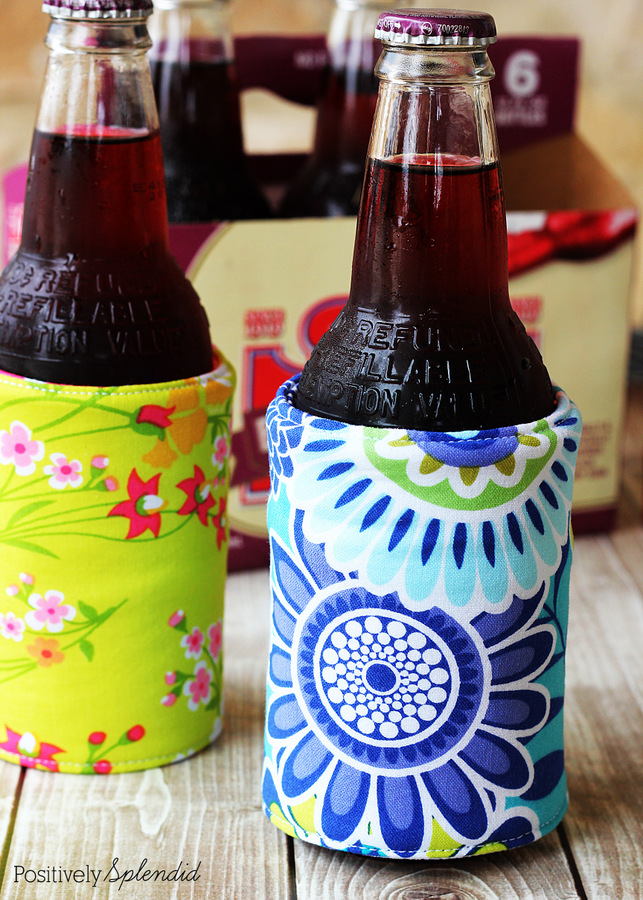
DIY Insulated Beverage Holders (AKA, Koozies)
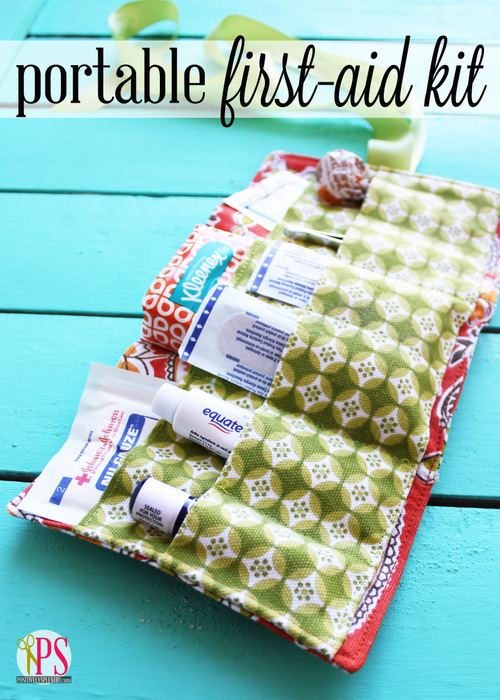
Portable First-Aid Kit Roll
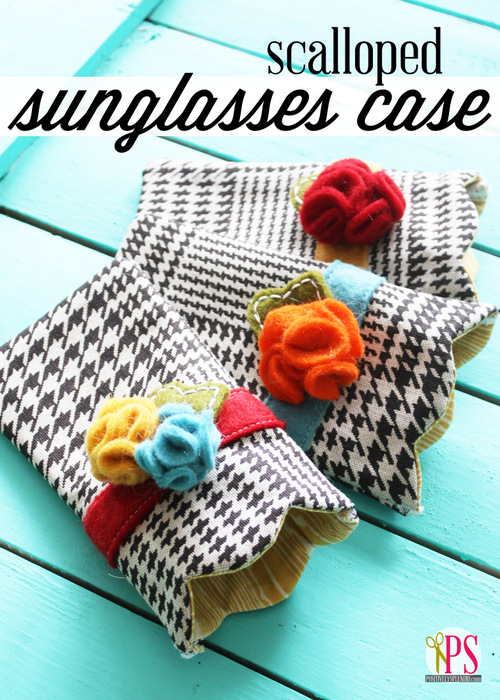
Scalloped Sunglasses Case
See-Through Zipper Pouches
Wristlet Clutch

Thanks for making PS a part of your day!
Having grown up in a home brimming with sewing notions and paintbrushes, Amy has a deep love for all things creative. On any given day, you’ll find her knee-deep in her latest creative endeavor, with projects ranging from sewing and crafts to home decor and kid-friendly ideas. Amy believes that everyone, regardless of skill level or experience, possesses the ability to create something beautiful, and Positively Splendid was born of her passion for helping others harness their innate creative potential.
Do NOT make this with a metal grommet. Please, only use plastic grommets. If the plug comes loose from the outlet and the bag slips between the charger plug and the wall, it can cause an electric fire. It’s happened to me. A metal grommet will conduct electricity from each prong of the charger. This is very serious. Don’t risk it!
Awesome!! I may make up a few to keep in my gifty stash. I’ve got a Craft Gossip post scheduled for this morning that links to your tutorial:
http://sewing.craftgossip.com/tutorial-cell-phone-charging-station-or-stroller-pocket/2014/06/04/
–Anne
Love this idea! Super cute! Sharing on fb today!
I wish you sold this–I would SO buy one–I cannot sew but think several of your items are adorable!
delightful!
I cant find the grommets
I found mine in the upholstery section at Jo-Ann. I hope this helps!
Wow what a cute little idea! At least I’ll never lose my phone now!
Could not find a pattern to cut out. Am I missing something in this tutorial?
Hi, Dee! Scroll to the area at the beginning of the tutorial where it says, “For this project, you will need…” The first item written in bold in the bulleted list is the link to the patterns pieces. Thanks!