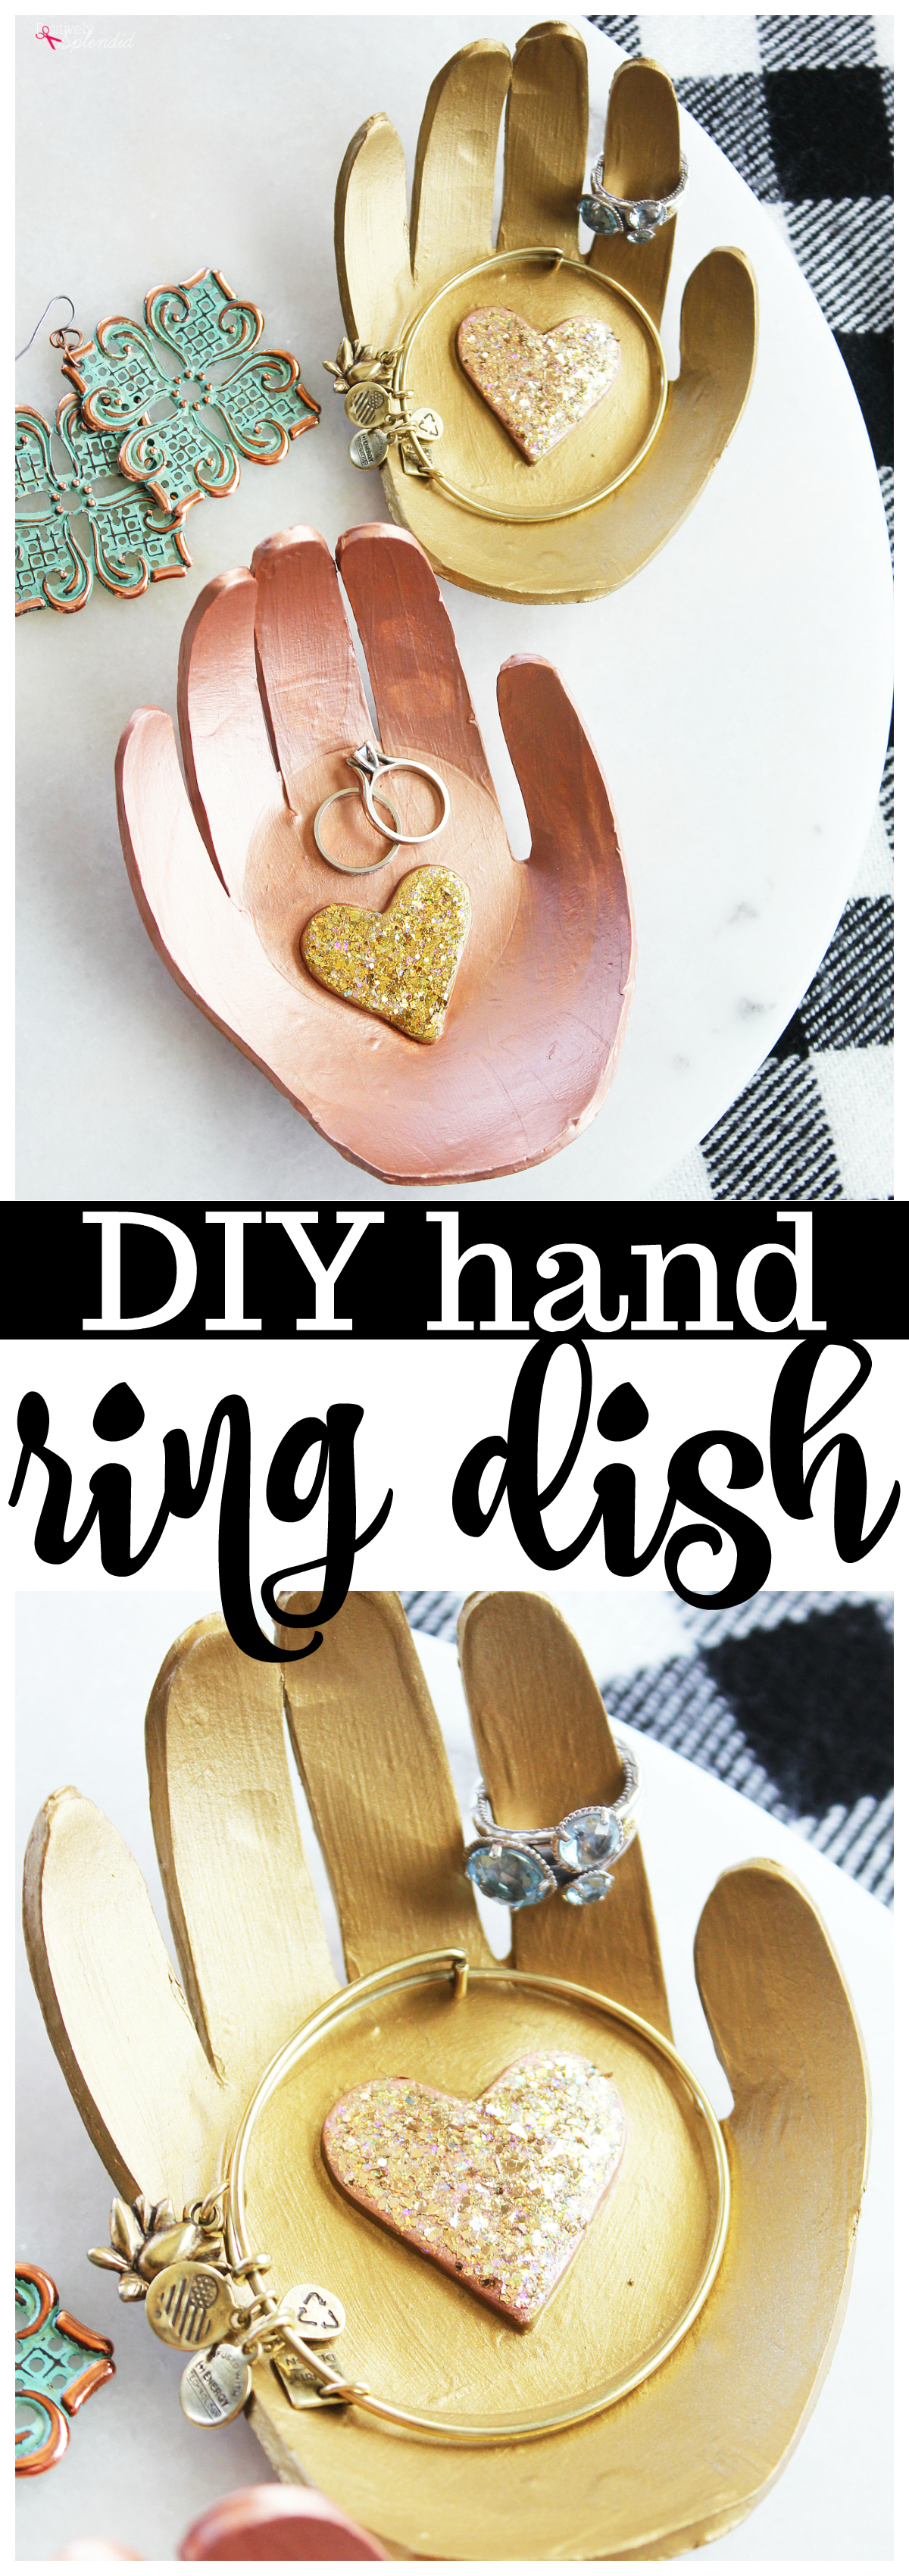
Create a sweet DIY hand ring dish using any handprint and oven-bake clay. A unique personalized handmade gift idea to make!
As a mama, handprint crafts truly are some of my favorite things to give and receive as handmade gifts. This DIY hand ring dish project is a wonderful way to use those handprints to make a unique gift for moms, grandparents, teachers and more, and they are so fun and easy to make! Continue reading for all the details for how I made these hand-shaped ring dishes that really shine with pretty paint from FolkArt.
This is a sponsored post written by be on behalf of Plaid. All opinions are entirely my own. This post contains affiliate links.
DIY Hand Ring Dish Supplies
- Paper
- Pencil
- Scissors
- Oven-bake clay
- Rolling pin
- Parchment paper
- Craft knife
- Heart cookie cutter
- Oven-safe bowl
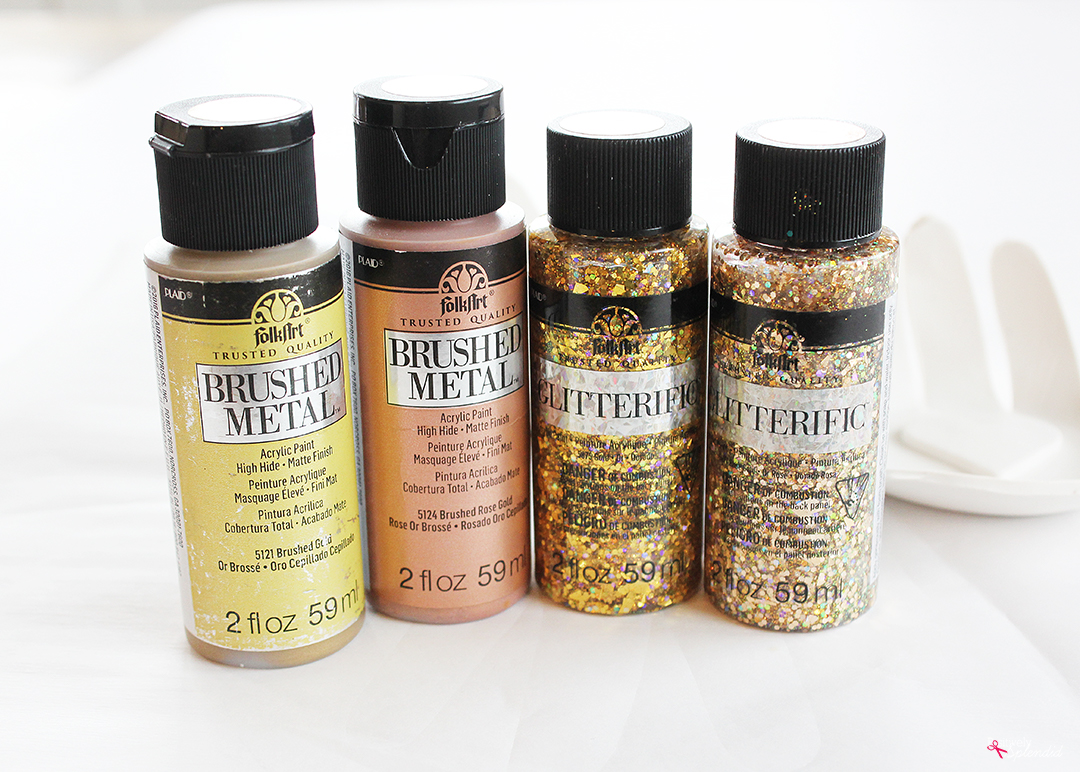
- FolkArt® Glitterific Acrylic Paint
- FolkArt® Brushed Metal Acrylic Paint
- Paint brushes
Directions
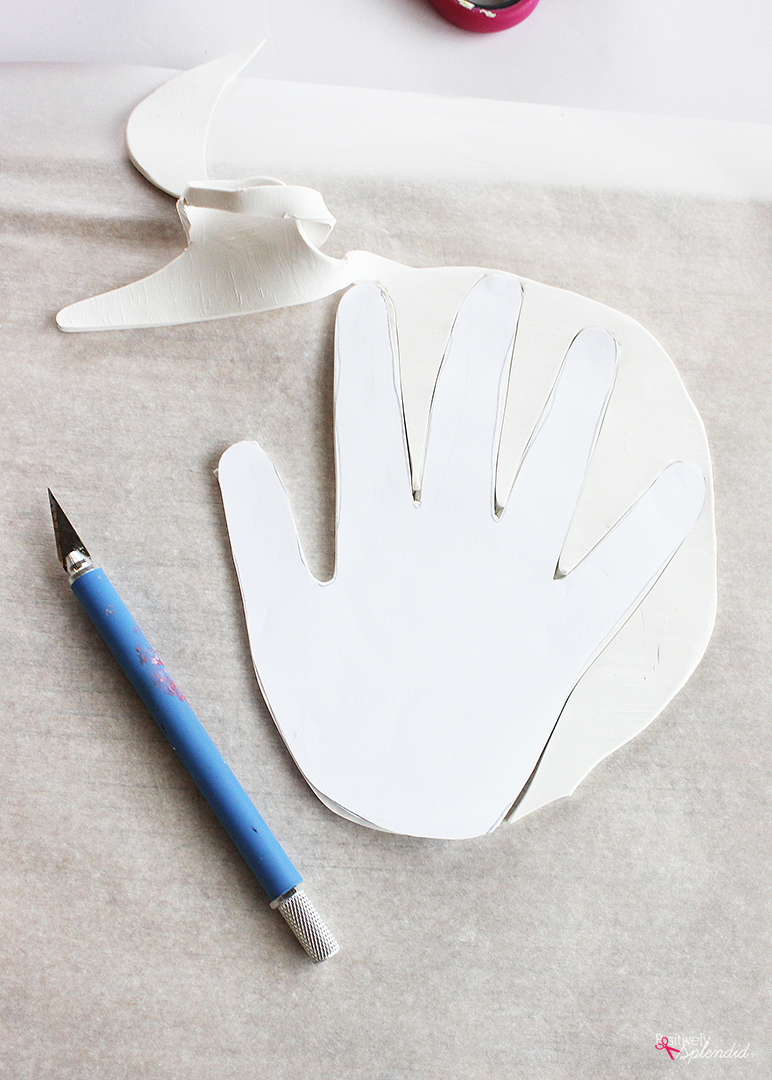
Trace a hand onto the paper with a pencil, and cut out with scissors.
Line a work surface with the parchment paper. Using the rolling pin, roll the clay out to 1/8″ thickness so that the rolled out clay is larger than the hand template. Place the hand template on top of the dough, and cut around the perimeter of the hand with the craft knife.
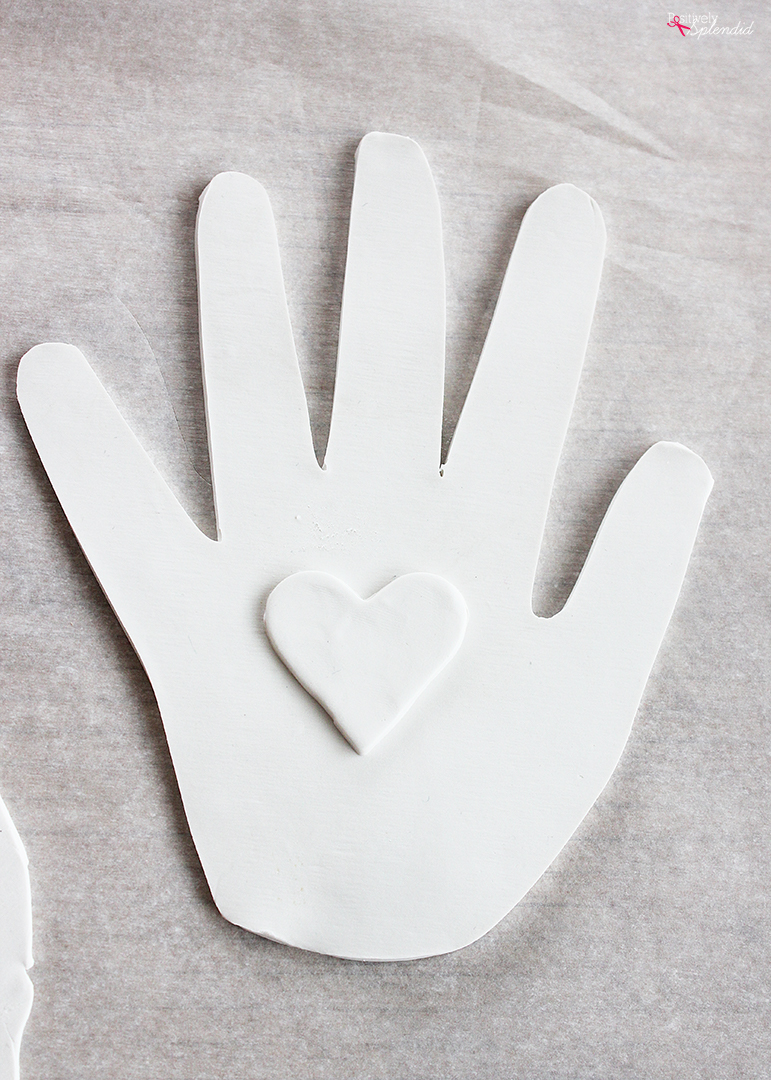
Use the heart cutter to create a heart shape from the extra clay.
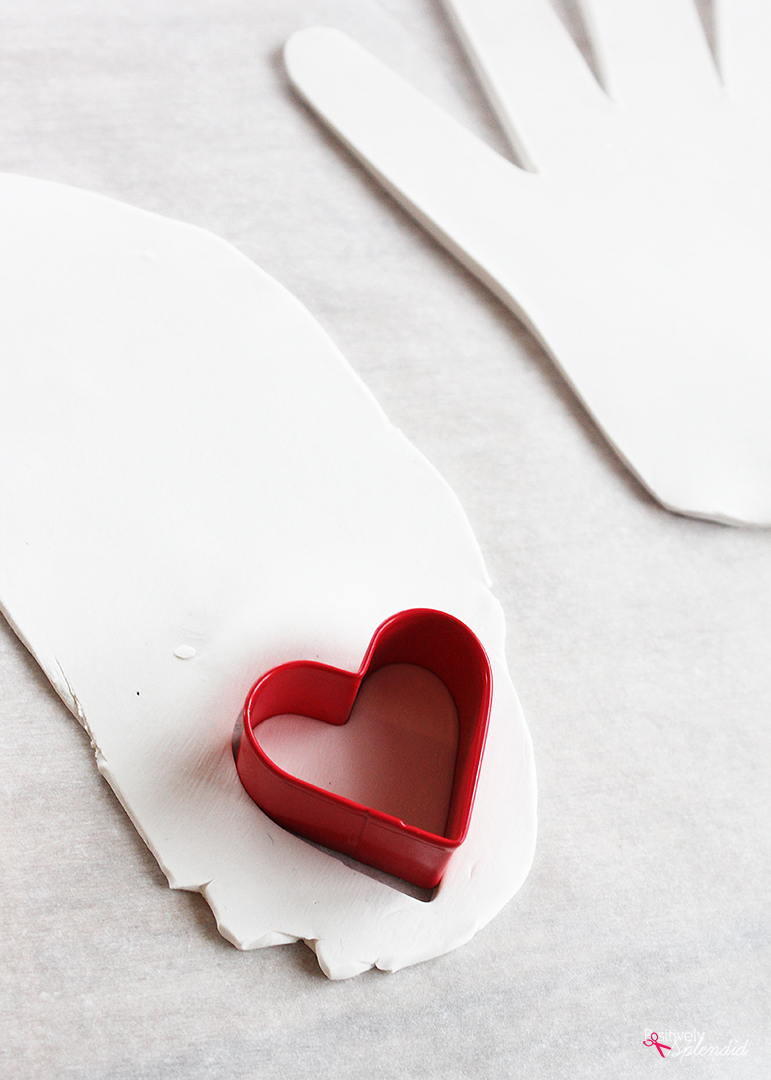
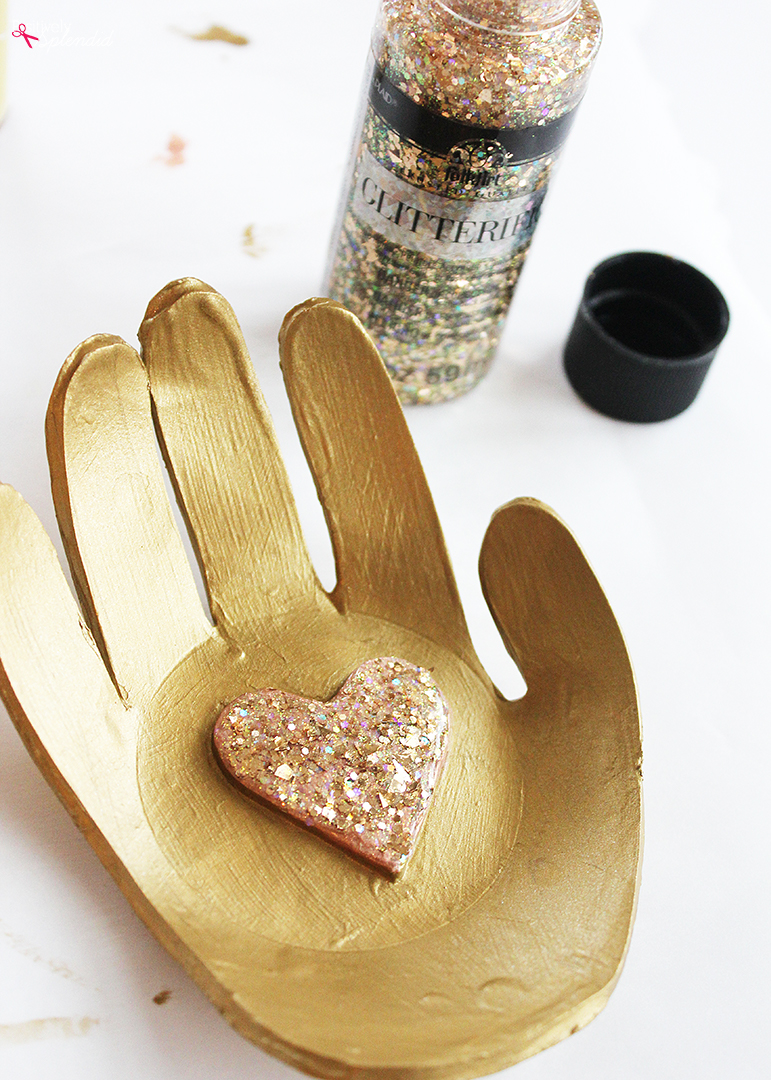
Center the heart on the palm of the cut-out hand, pressing gently to bond it into place.
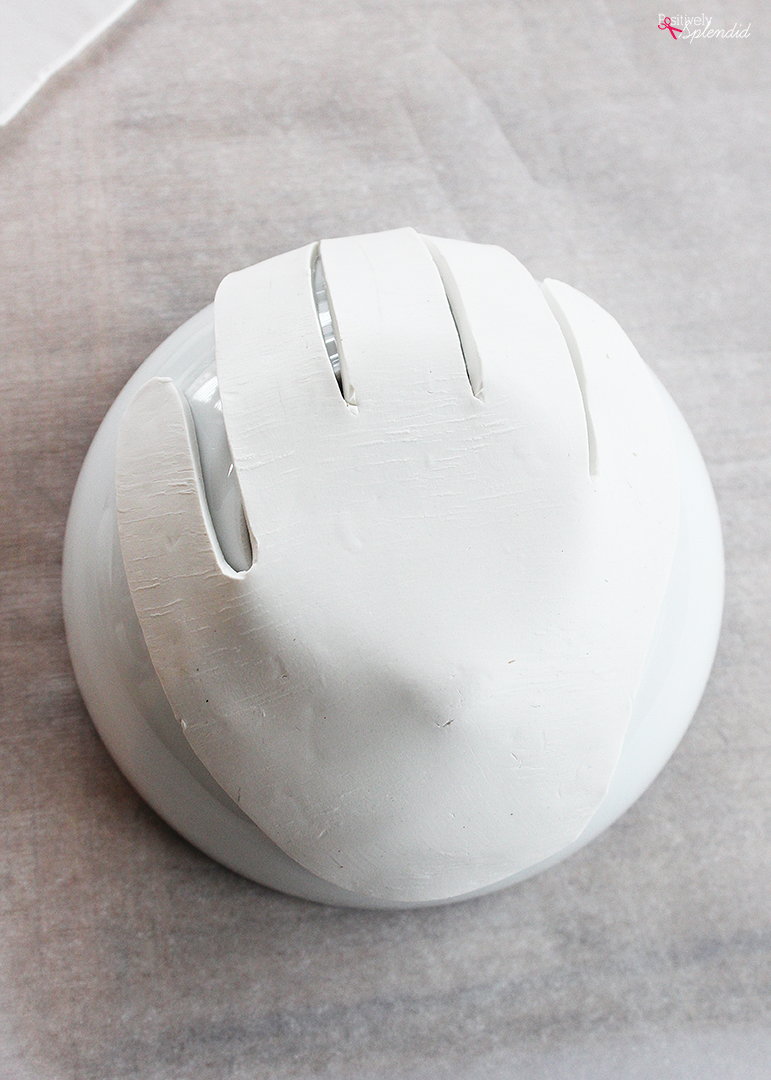
Position the hand so that the side of the hand with the heart is facing down on top of the oven-safe bowl, molding the hand to the shape of the bowl. Place on a baking sheet and bake at 275 degrees for 15 minutes. Remove from the oven and cool for 10 minutes before removing the hand from the bowl underneath. Set the hand aside to cool completely.
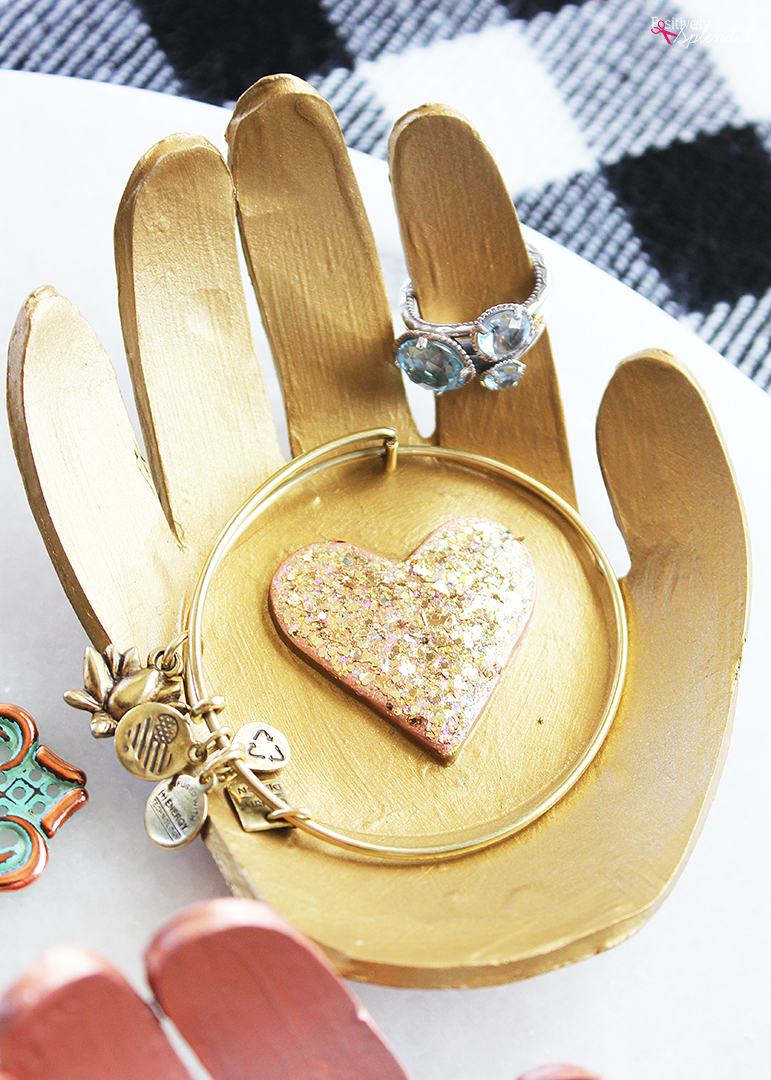
When the hand ring dish is completely cool, let the painting fun begin! My friends at Plaid sent me some ahhhhhh-mazing new glitter paint recently, and I knew it would be perfect for really making this project really pop! The Glitterific paint contains multiple sizes of glitter particles suspended in a crystal-clear base to create the most dazzling glitter paint available today! This stuff is absolutely gorgeous, y’all, and it pairs beautifully with the FolkArt Brushed Metal paints. And it is so much easier to work with than conventional glitter!
Paint the entire surface of the hand dish (front, back and sides) with the Brushed Metal using a paint brush, really paying attention to all of the nooks and crannies between the fingers. Apply as many coats as needed for even, smooth coverage. (Two coats was just right for my dishes.) If desired, paint the heart shape a contrasting color from the rest of the hand. Allow the paint to dry completely.
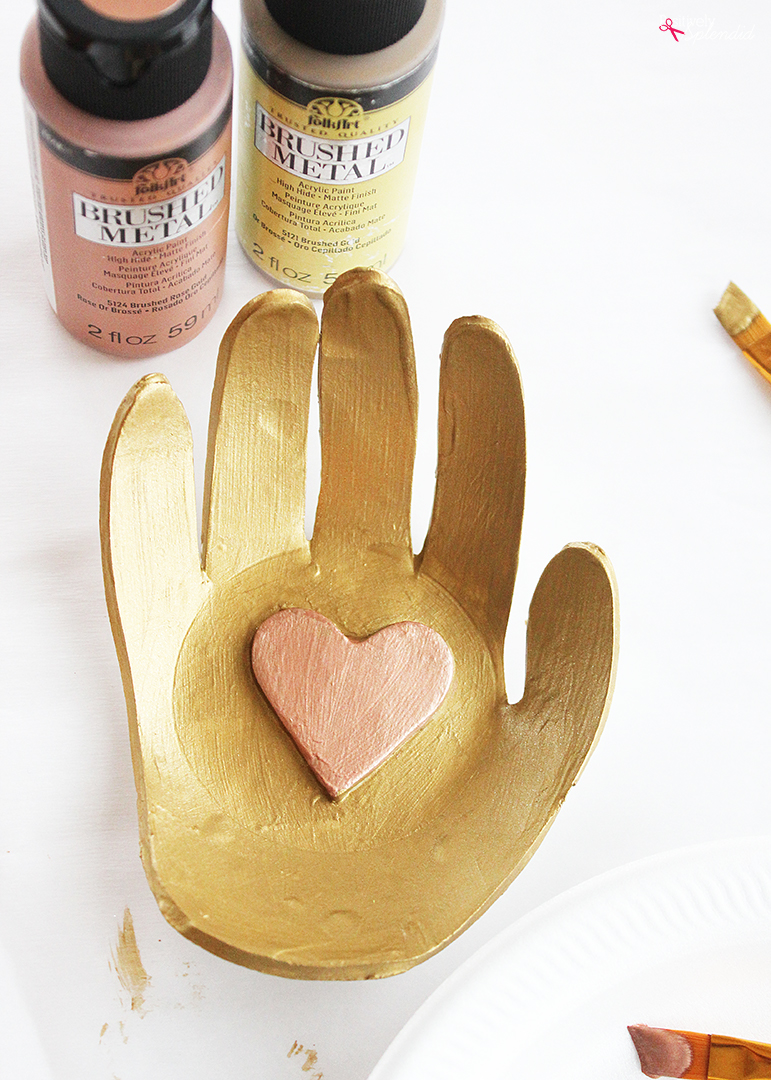
Now, it’s time to add some shimmer and shine! Apply the Glitterific onto the heart shape with a brush. This paint is super fun to work with, but it doesn’t go on like a conventional paint. You really have to dab it on in small amounts, working all the way around the shape, instead of using actual brush strokes. The Glitterific provides the most awesome dimensional, ultra high-gloss finish when dry, and because it’s water-based, it cleans up easily with soap and water. There are 21 gorgeous, glittery colors to choose from to be used on wood, metal, glass, canvas, paper, decorative fabrics, and rigid plastic. Find 10 colors available now at Plaid Online, with more colors launching later this spring as well as at more retailers!
Once the Glitterific is applied, allow the project to dry overnight before use.
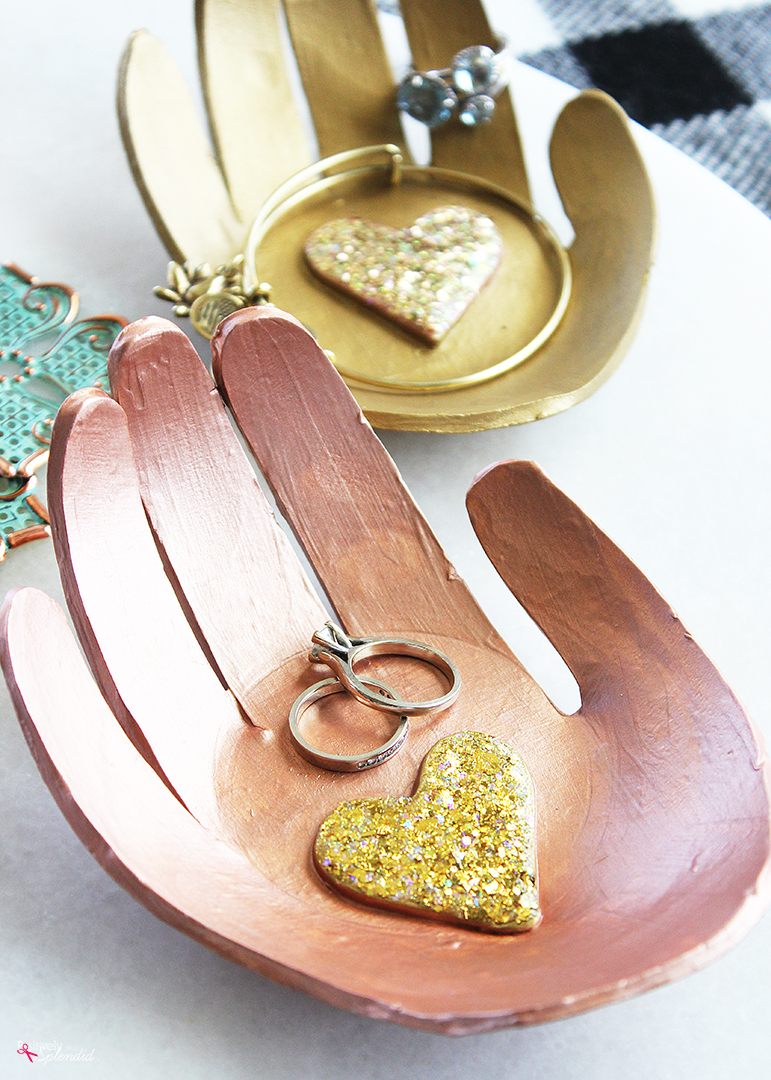
Your DIY hand ring dish is complete!
I love the idea of giving these as gifts to Mom or Grandma, but they would also be sweet given to a special teacher for Teacher Appreciation or a friend for a birthday or any other occasion.
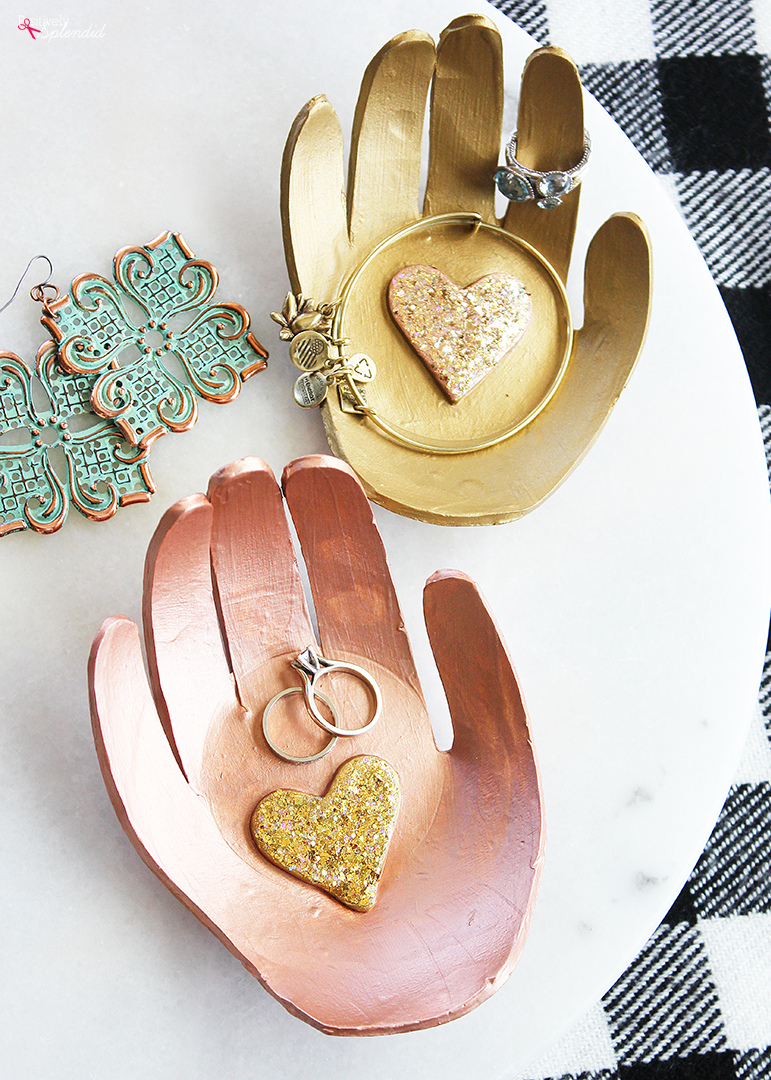
The glittery heart center here really makes this project special! The Glitterific paints really are perfect for this!

These dishes make my heart so happy! I love that they will help me always remember my kids’ sweet little hands for many years to come.
Having grown up in a home brimming with sewing notions and paintbrushes, Amy has a deep love for all things creative. On any given day, you’ll find her knee-deep in her latest creative endeavor, with projects ranging from sewing and crafts to home decor and kid-friendly ideas. Amy believes that everyone, regardless of skill level or experience, possesses the ability to create something beautiful, and Positively Splendid was born of her passion for helping others harness their innate creative potential.
What a cute idea!
Thank you, Amy!!
These are so pretty Amy!! What a great keepsake too. The glitter on the heart in the center is perfect!
This is not only adorable but so useful! Love your choice of paints and heart glittered is a great finishing touch. You simply amaze me Amy, don’t know where you find time to do all you do and so brilliantly too!!
What a kind comment, Annie! Thank you so very much!
This idea is just too sweet- love the heart – or flower or butterfly! Thank you for sharing, Susan
Hi, this weekend is nice in favor of me, for the reason that this time i am reading this enormous informative article here at my residence.
A couple of years ago I did this with my two kids, for their Grandma’s. I intertwined their fingers before I baked the clay. They turned out so cute. You will not be disappointed.