This post is brought to you by Michaels. // Earlier this week, I shared about 7 of my favorite time-saving sewing tips and tricks, which included at the number 1 spot the recommendation to use pattern weights instead of pins when cutting out sewing projects. These truly are a sewist’s best friend when it comes to saving time and energy throughout the cutting process!
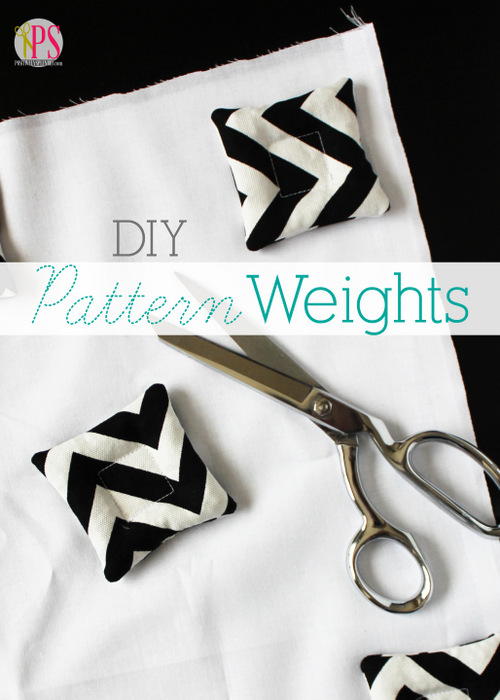
Today I am sharing how to make a set of pattern weights of your own using your favorite kicky fabrics. For the set featured in this post (as well as the coordinating bag I stitched up to keep them contained when not in use), I used some great new fabric now available at Michaels.
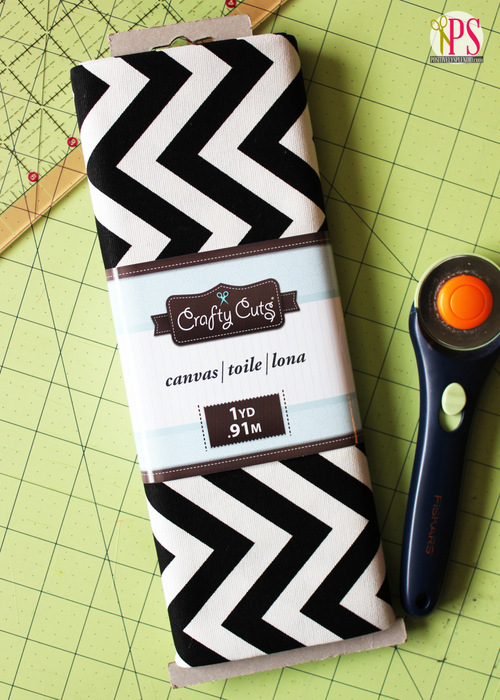
Wait–fabric from Michaels? Yes, you heard that right! Michaels recently started offering fabric in a variety of patterns, weights and textures for just about any project under the sun. Talk about convenient! For this project, I opted to use some of their cute canvas chevron, not only because of the eye-catching design, but also because the heavy weight of the fabric was just what I needed.
Now, let’s get back to today’s quick and easy sewing project. Stitching up a set of these pattern weights can easily be done in an afternoon (or less!). Let me show you how it’s done.
For this project, you will need…
- Heavy fabric (I recommend something like canvas, or even faux suede)
- Coordinating thread
- Washable ink marker
- Metal BB’s* (found at sporting goods stores/departments)
- Basic sewing supplies: machine, shears, etc.
*Why BB’s? Their small size but high weight make them perfect for creating pattern weights that are heavy but not bulky.
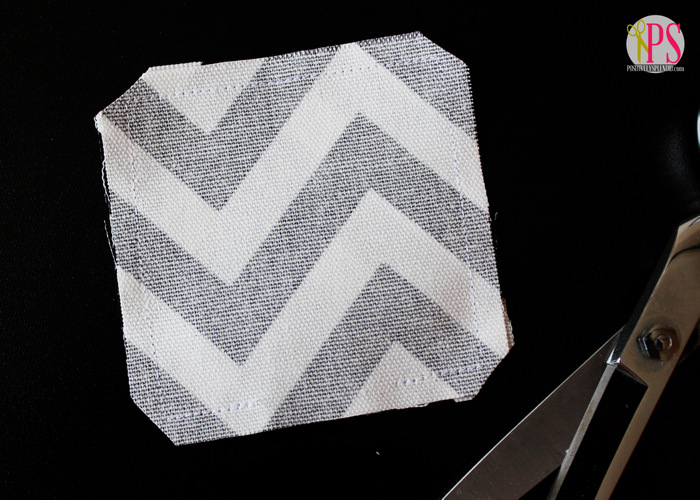
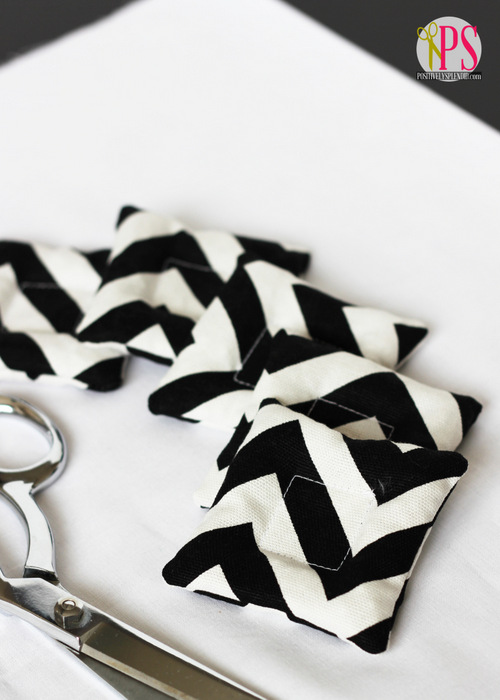
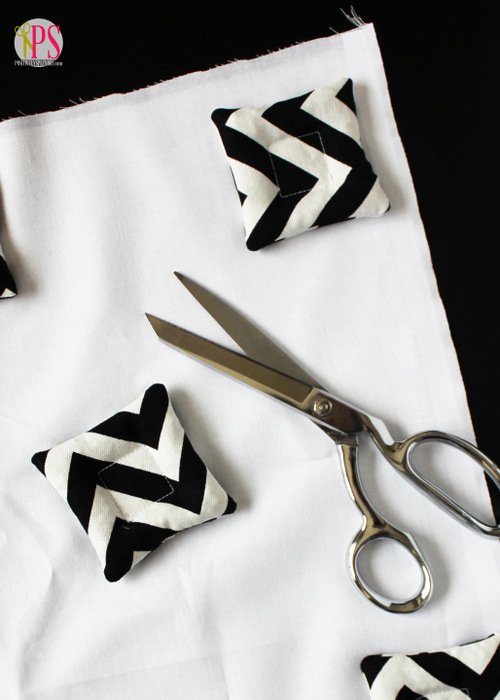
To start, cut (2) 3.5″ fabric squares for each pattern weight you wish you create. A good number to have on hand for a complete set is 6 finished weights, to I recommend cutting out 12 squares.
Place two squares together, right sides facing, and stitch around the outer edges of each with a 1/4″ seam allowance, leaving a 1″ opening at the center bottom of each. Snip the corners and turn the piece right side out.
Use a washable ink marker to draw a 1″ square at the center of one side of the stitched piece. Stitch around this square.
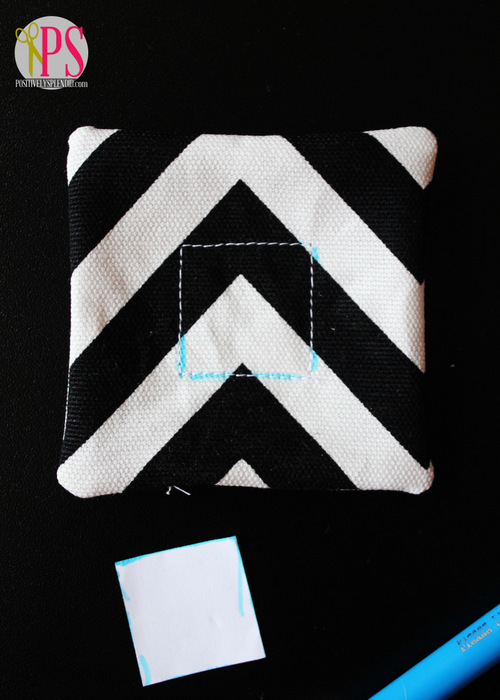
Carefully pour BB’s into the bottom opening, making sure they feed around all four sides of the opening. When the weight is filled around all four sides, carefully hand stitch the opening closed. Repeat the preceding steps to complete the remaining 5 weights.
All finished!
Your weights are now ready to use for any sewing project that suits your fancy.
No more time-consuming pinning of paper patterns to the fabric underneath. Simply place the weights on top of the pattern and fabric to prevent shifting as you cut!
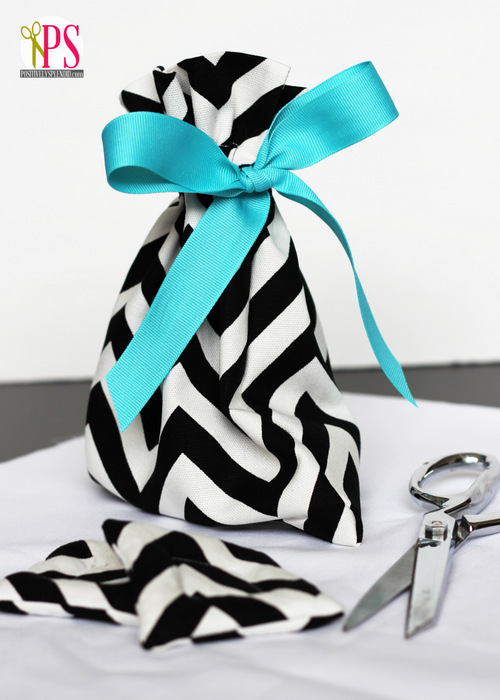
I recommend stitching up a coordinating fabric drawstring bag to hold all of your weights when not in use. My Drawstring Fabric Gift Bag tutorial is perfect for this! I used that tutorial to create a medium-sized (9-inch) bag for storing my weights. Wouldn’t a set like this make a terrific gift for a sewist in your life?
Thanks for stopping by!
This is a sponsored post written by me on behalf of Michaels stores. All opinions are 100% my own.
Having grown up in a home brimming with sewing notions and paintbrushes, Amy has a deep love for all things creative. On any given day, you’ll find her knee-deep in her latest creative endeavor, with projects ranging from sewing and crafts to home decor and kid-friendly ideas. Amy believes that everyone, regardless of skill level or experience, possesses the ability to create something beautiful, and Positively Splendid was born of her passion for helping others harness their innate creative potential.
‘Great idea and simple, too! Thank you! -Marci @ Stone Cottage Adventures
I’ve been using ribbon wrapped bolts from the big box store that I made, but love this idea. Thanks for sharing…Michaels here I come (love the Chevron fabric).
Another simple and useful idea! I’m adding it onto my to-do list.
Thank you, AmyQ
Amy, it would be awesome to have a “pin it” icon on your posts to make it convenient for us pinterest folks!
Could you add one?
Hi, Kathy! When you hover over each photo in my posts, you will see a “Pin It” button in the top right-hand corner that you can click on and pin from there. I hope that helps! And thank you for wanting to pin my projects. 🙂
Love this idea, but could you please tell me what BB’s are exactly haven’t a clue here in OZ. Thank you.
Hi, Candy! BB’s are actually small metal balls used as ammunition in a specific type of gun, called a BB gun. They contain no gun powder, so they are completely safe to use for this purpose.
Haha thanks for the reply the ‘penny’ has now dropped, I’ll see if I can seek them out in Australia. Candy.
This is a great idea Amy! I love that you made a cute matching bag to store them in. 🙂
These are really cute, and I’ve not thought of using BB’s before. And like Kara said above, I love the matching bag to store them in!
Love it! Such fun fabric too. 🙂 Yep had to Pin it! (I just use the Pin It button in my toolbar.)
Juut saw this on CraftGawker.. Really great idea!!! Love it!
Marni @ HaberdasheryFun
Just saw this on CraftGawker.. Really great idea!!! Love it!
Marni @ HaberdasheryFun
I need these like NOW!! Love the modern look of these, too!
Thank you, sweet Kari!
I love this idea! Definitely pinning. Great use of extra fabric scraps too.
What would be a good alternative to BB’s? Im in Australia and as BB guns are completely illegal here I’m assuming the ammo for it wouldn’t be easily accessible or even legal.
Try metal nuts and fill in spaces with rice or sand, or just sand.
Yep Naomi I too scratched me head over the BB’s try looking up ‘split shot sinkers or weights’ used for fishing and can get really tiny ones too. 🙂
A lady who worked at a local sewing store for over 40 years used large metal washers which you can paint or leave plain. I like the idea of fabric covering for color and design. Would still use the square covering and slide the washer into it. The non filled corners would be easy to pick them up by.
Great idea, Pam!