With four children ages 7 and younger, there has been a lot of Dora the Explorer played in our home over the course of the last few years! Last Halloween, my younger daughter decided she wanted to go as Dora, and in putting together an inexpensive DIY costume for her, I made a cute Dora the Explorer backpack using felt and craft foam. She was absolutely delighted with the result! This is a great beginning sewing project, and the entire project can easily be completed for $5 (or less!). Let me fill you in on all the details.

For this project, you will need…
-
Dora the Explorer Backpack Pattern PDF (free download)
- Purple felt
- Coordinating thread
- Tailor’s chalk
- Craft foam: white, red, black and yellow
- Basic sewing supplies: machine, shears, etc.
- Optional, but recommended: rotary cutter and mat
Note: Because this backpack is constructed of felt, it is intended only for play or costume use and not for everyday use.
To begin, download and print the PDF pattern. Then, use the pattern pieces and your rotary cutter and mat to cut the following pieces:
- 2 body pieces (Be sure to transfer the strap placement rectangles onto one of these pieces.)
- 2 pocket pieces
- 1 flap closure piece
- (1) 25 x 2″ connector piece
- (2) 19 x1.5″ strap pieces
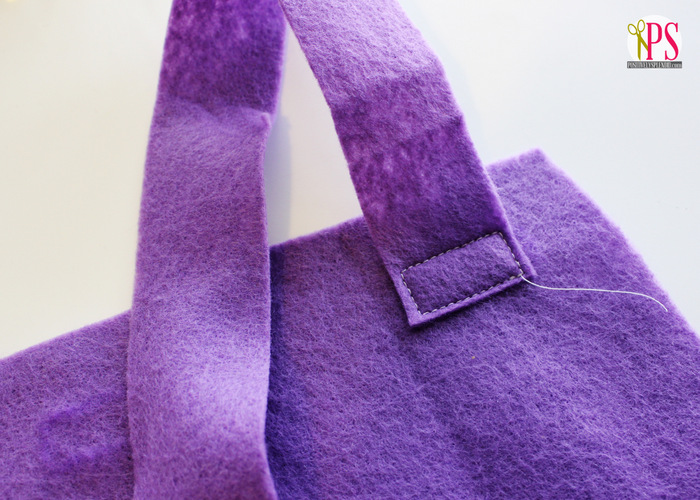
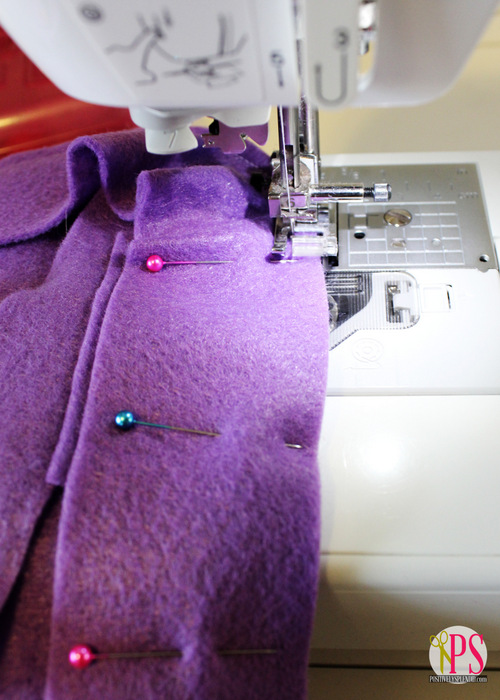
Position one end of one of the strap pieces directly over the top right strap placement mark on one of the body pieces, as shown. Stitch a rectangle to secure.
Loop the strap down and around, and pin the opposite end over the lower right-hand strap placement rectangle. Stitch with a rectangle to secure. Repeat on the left side with the remaining strap piece.
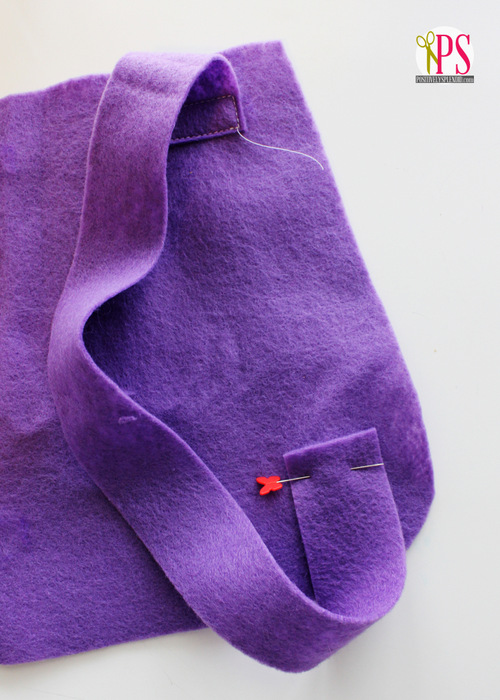
At this point, use pins to secure the straps to the center of the piece to keep them out of the way in the next steps.

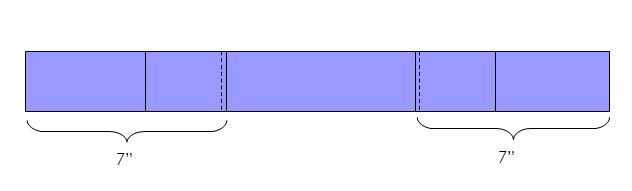
Lay the connector piece flat on a large work surface. Measure == inches either end of the piece; mark with chalk. Align the one of the short edges of each pocket piece with these lines, so that the right edge of the left piece touches the left line and the left edge of the right piece touches the left line. Stitch along the short center edges of each pocket piece to secure. (Refer to diagram below.)
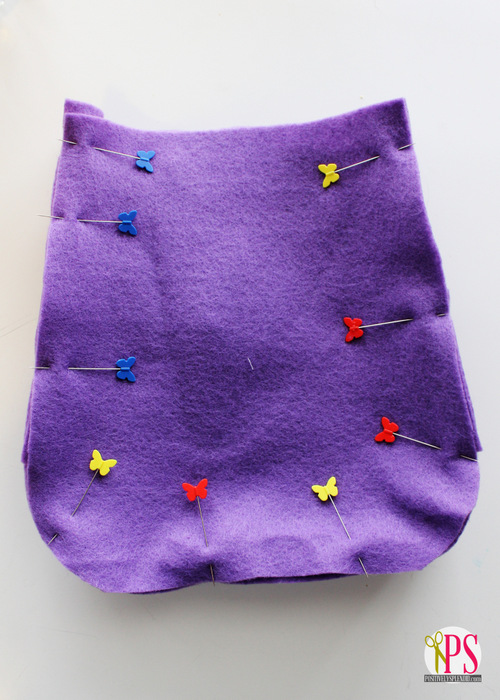
With the assembled body/strap piece lying face up on a work surface, pin the connector piece around the outer perimeter of the body piece, right sides facing, aligning the short ends of the connector piece with the top edge of the body piece. (The pockets on the connector piece should face down.)
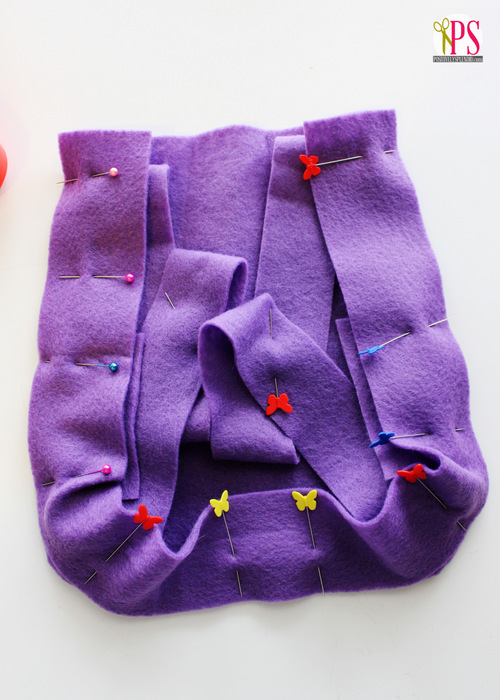
Stitch along the entire long edge of the connector piece with a 1/4″ seam to secure it to the body piece.
Lay the assembled piece face up on a work surface, and cover it with the remaining body piece. Pin to secure the second body piece to the remaining raw edge of the connector piece, and stitch along the long edge with a 1/4″ seam to secure. The top (straight) edge should remain unstitched, as this is the opening of the backpack. Turn the backpack right-side out.
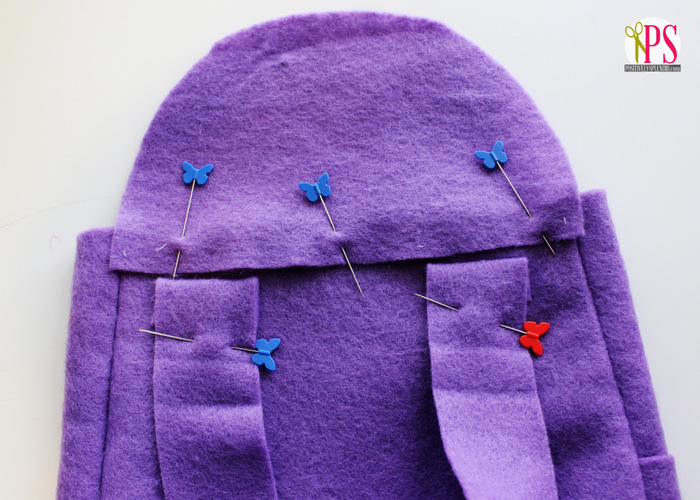
Lay the backpack with the strap side facing up, and center the flap closure piece just above the straps, as shown. Pin. Secure the the flap to the backback with two lines of stitching that are 1/4″ apart.
Now, the fun part: creating Backpack’s face! To create the features for my project, I found an illustration of Backpack that I liked, and I used a pencil to freehand each on onto the appropriate color of foam: black and white eyes, yellow eyebrows, and a red mouth. Once they were all cut out, I adhered them to the front of the backpack with low-temp hot glue. (Don’t use high temp hot glue, or you risk having the foam melt.) I rolled up a small rectangle of yellow foam and tucked it into one of the side pockets of the backpack to serve as Dora’s map.
All finished!
Your own little Dora is sure to love her “authentic” Dora Backpack as much as mine does! I can attest that even after 7 months of play, this backpack is still a dress-up favorite. These would make terrific favors for a Dora birthday party, too.

Thanks so much for stopping by today. Happy sewing!
Having grown up in a home brimming with sewing notions and paintbrushes, Amy has a deep love for all things creative. On any given day, you’ll find her knee-deep in her latest creative endeavor, with projects ranging from sewing and crafts to home decor and kid-friendly ideas. Amy believes that everyone, regardless of skill level or experience, possesses the ability to create something beautiful, and Positively Splendid was born of her passion for helping others harness their innate creative potential.
We love your felted backpack. I’m sure that children will love it!
Thanks for the tutorial. I wish my oldest daughter was still in her Dora phase. Maybe my youngest will like it! Pinned it. 🙂
What a cute project! Thank you so much for the tutorial!
I just saw the title of your post and started singing the theme song of Dora…lol!! Then when i saw the backpack you made which is absolutely adorable, I started singing the backpack song. My girls are 19 & 16 and I still remember the songs! This is such a cute project!! Pinning it!!
I will admit I started singing the theme song too! My niece loves this show, and her birthday is coming up I think I know what I’m getting her now! Thanks!
Do you know what the cost for each one comes out to?
I don’t know exactly, but I would estimate somewhere around $3 or so? Felt is very inexpensive, and this project only requires a very small amount.