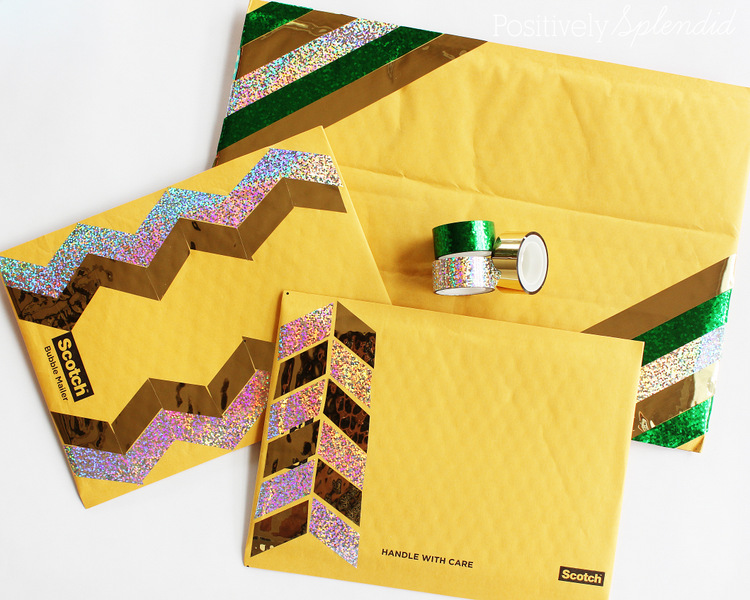
Because we live far away from so many friends and family, I always find myself reaching for bubble mailers to send all sorts of things to loved ones. Today, I’ve teamed up with Scotch to share a fun idea to kick plain-Jane bubble mailers up a notch with some fun metallic tapes. If you’ve got a child heading off for college, or a special grandparent who loves to receive photos of the kids, these envelopes would be a perfect way to send pretty care packages that go beyond the standard manila envelope! I’m sharing quick and easy methods for creating three fun designs: stripes, chevron and herringbone.
Today’s post is brought to you by Scotch.
For this project, you will need…
- Scissors
- Plain bubble mailers or envelopes*
- Scotch® Expressions Metallic Tapes – this project uses Gold, Silver Sparkle and Green Crinkle*
*affiliate links
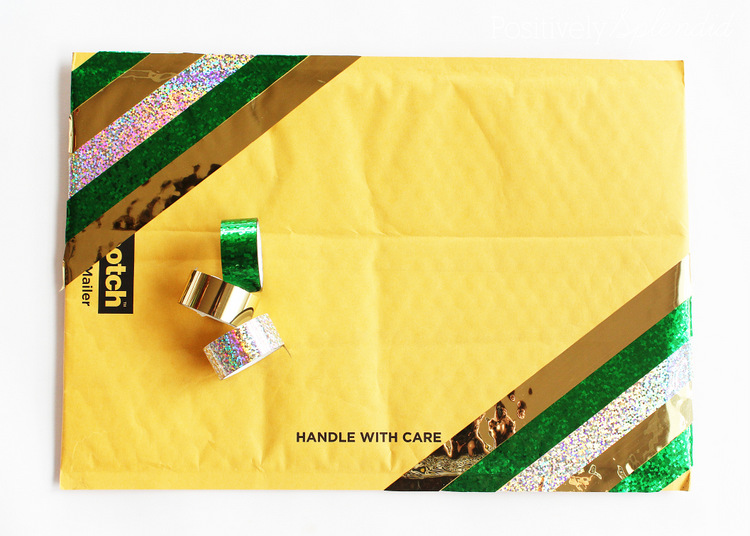
Striped Design
To personalize plain bubble mailers or envelopes with a striped design, start by affixing a strip of Scotch® Expressions Metallic Tape in the top left corner of the envelope at a 45-degree angle. (The metallic tapes are not only perfect for traditional uses like gift wrapping, but they are also perfect for adding a pop of personality to craft projects!) Use scissors to trim away any tape that hangs over the edges of the envelope. Continue adding strips of tape at the same angle in alternating colors so that the edges of each strip just touch.
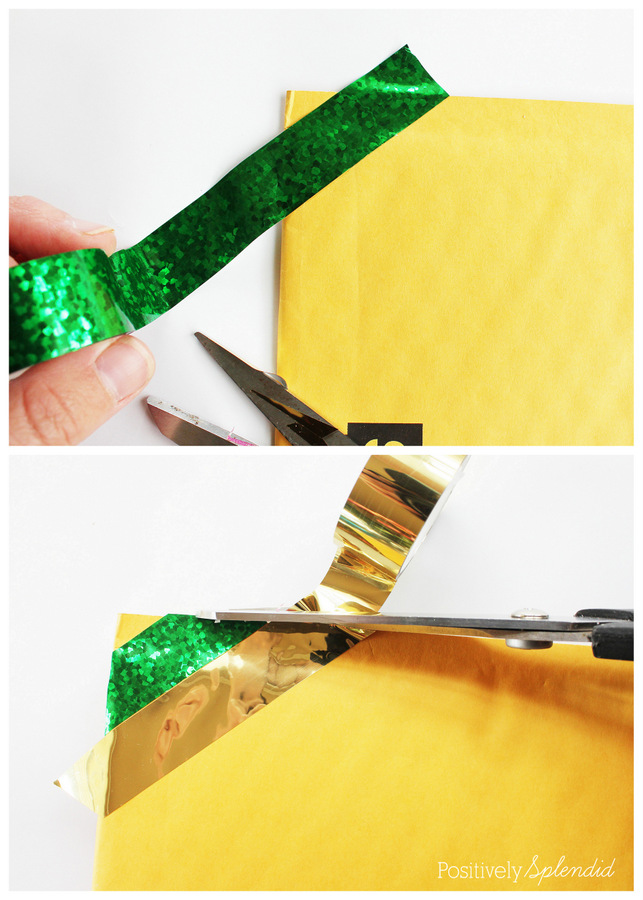
Repeat this process on the bottom right corner of the envelope to finish, leaving enough blank space in the middle of the envelope for a label.
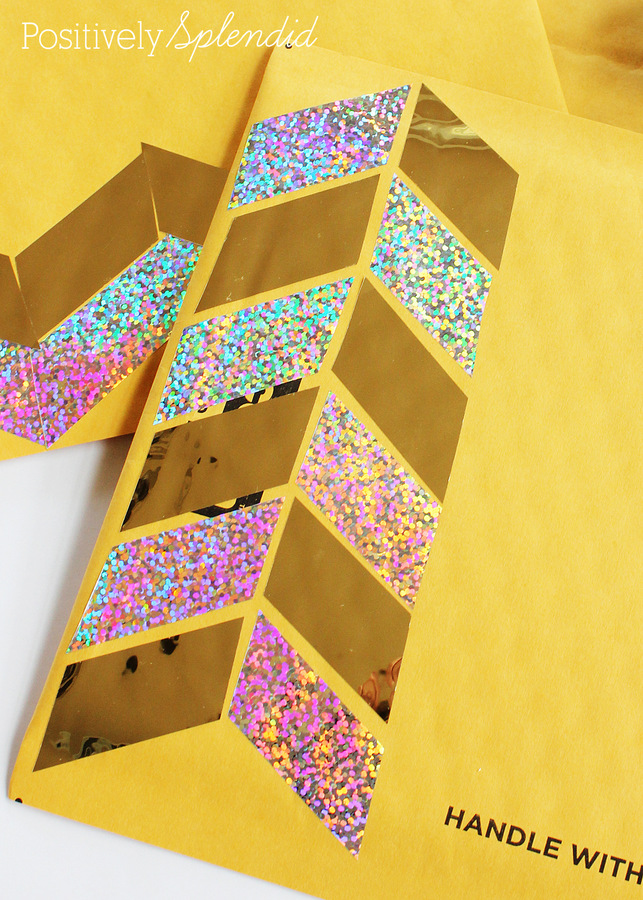
Chevron Design
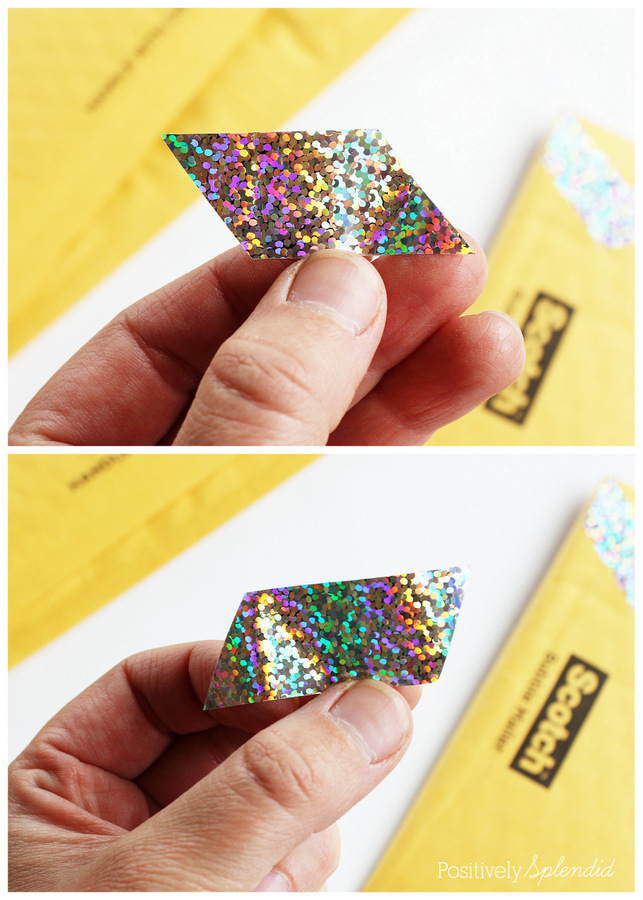
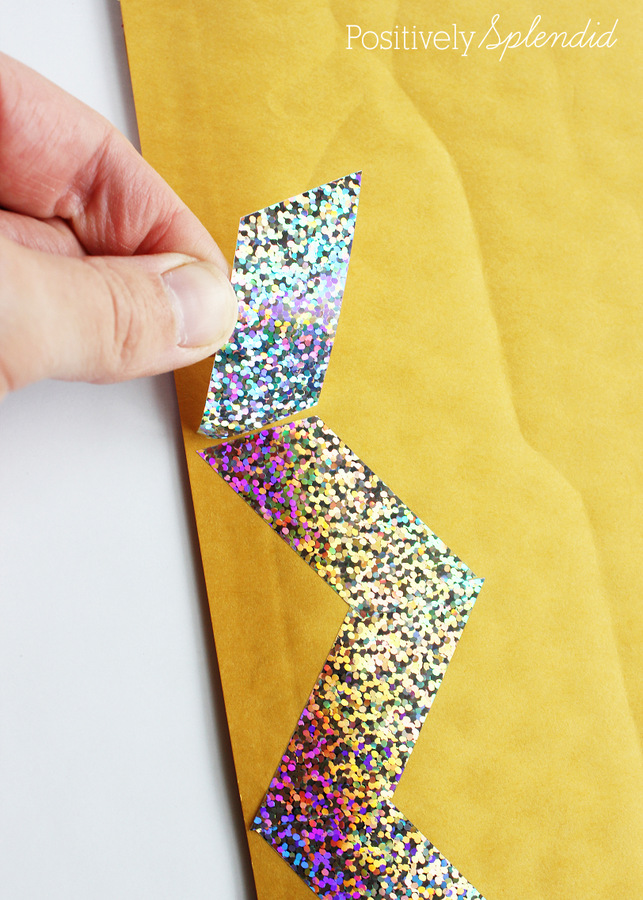
To create a chevron pattern, use scissors to cut various strips of tape to 2.5-inch sections. On half of the pieces, trim the ends at an even angle to the left. For the remaining half, trim the ends at an even angle to the right.
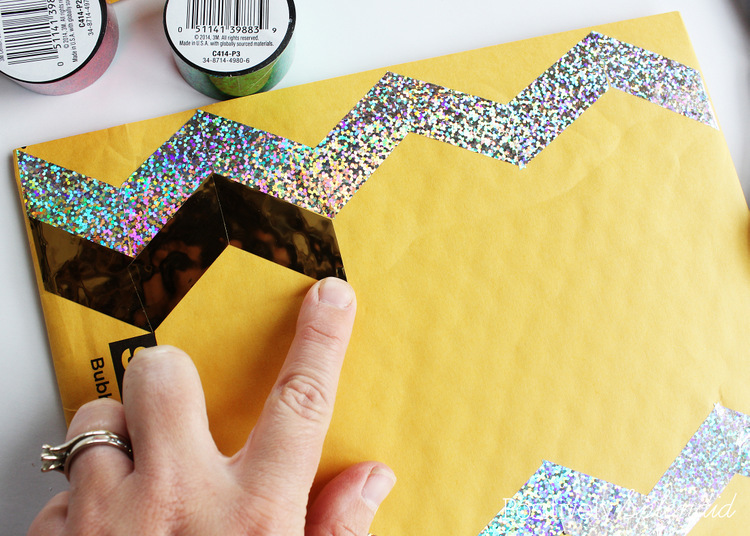
Starting at the top left-hand side of the envelope, affix one piece of tape so that the corner of the tape piece is aligned with the corner of the envelope. Then, take one piece whose end is trimmed at the opposite angle and align it with the previous piece to create a zig-zag pattern. Continue adding pieces in this fashion until you reach the right side of the envelope.
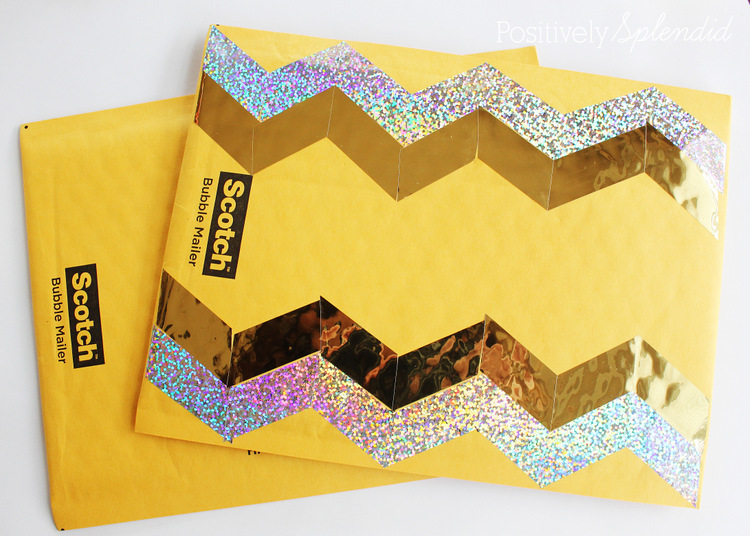
Create as many zig-zag rows as desired with assorted colors of tape until you achieve the desired look.
Herringbone Design
To create a herringbone motif, first trim tape pieces as you did for the chevron design. Then, affix the strips in an alternating pattern along the left-hand side of the envelope, leaving about .125 of space between each piece. The ends of the tape strips should be just aligned with the left edge of the envelope to create a column that extends from the top to the bottom edge. Align the strips that are trimmed at an opposite angle directly to the right of the previous tape pieces in a similar fashion to form a second column.
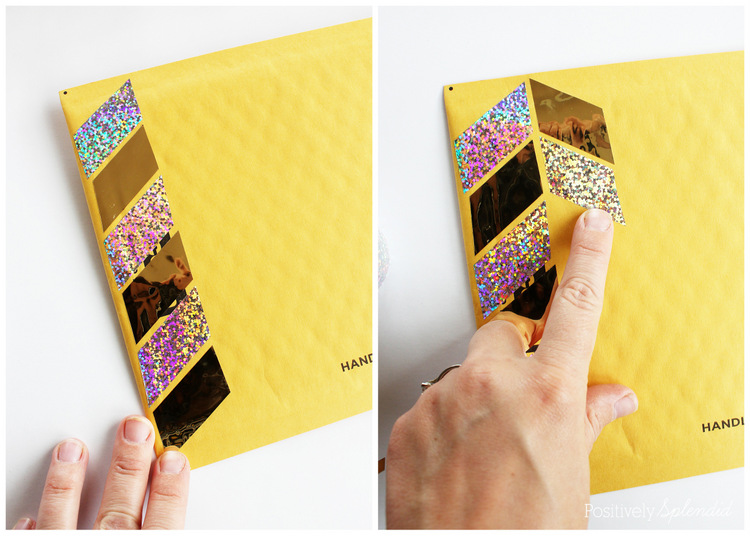
Continue adding tape pieces in this fashion until there are two even columns of alternating tape strips that create a herringbone design.
Next time you have envelopes to drop in the mail, I hope you’re inspired to make recipients feel extra special by adding a touch of personality to each package!
Having grown up in a home brimming with sewing notions and paintbrushes, Amy has a deep love for all things creative. On any given day, you’ll find her knee-deep in her latest creative endeavor, with projects ranging from sewing and crafts to home decor and kid-friendly ideas. Amy believes that everyone, regardless of skill level or experience, possesses the ability to create something beautiful, and Positively Splendid was born of her passion for helping others harness their innate creative potential.