
Aside from the Canvas Bunny Buckets I shared a few weeks back, I had yet to create anything else Easter-related until this week. I had a few extra minutes during naptime a couple of days ago, so I decided to remedy that! This super-quick, super-easy framed carrot Easter decor is a snap to put together, and the bright colors exude spring! In 30 minutes to and hour, you can create one of your own with this step-by-step tutorial. So let’s hop to it!
For this project, you will need…
Green and orange fabric
Fusible Peltex (a very heavyweight interfacing)
Coordinating thread
Dimensional adhesive foam dots
Craft glue
A washable ink marker
1 piece of yellow cardstock
1 pieces of white cardstock
Letter stickers
Black pen
(1) 8×10 frame
Basic sewing supplies (machine, shears, etc.)
step 1 / Iron your Peltex to the wrong side of your green and orange fabrics according the the product instructions. Use a marker to trace your carrot base and carrot top templates onto the interfacing side of your fused fabric (orange for the bases, green for the tops). Cut out all of the pieces.

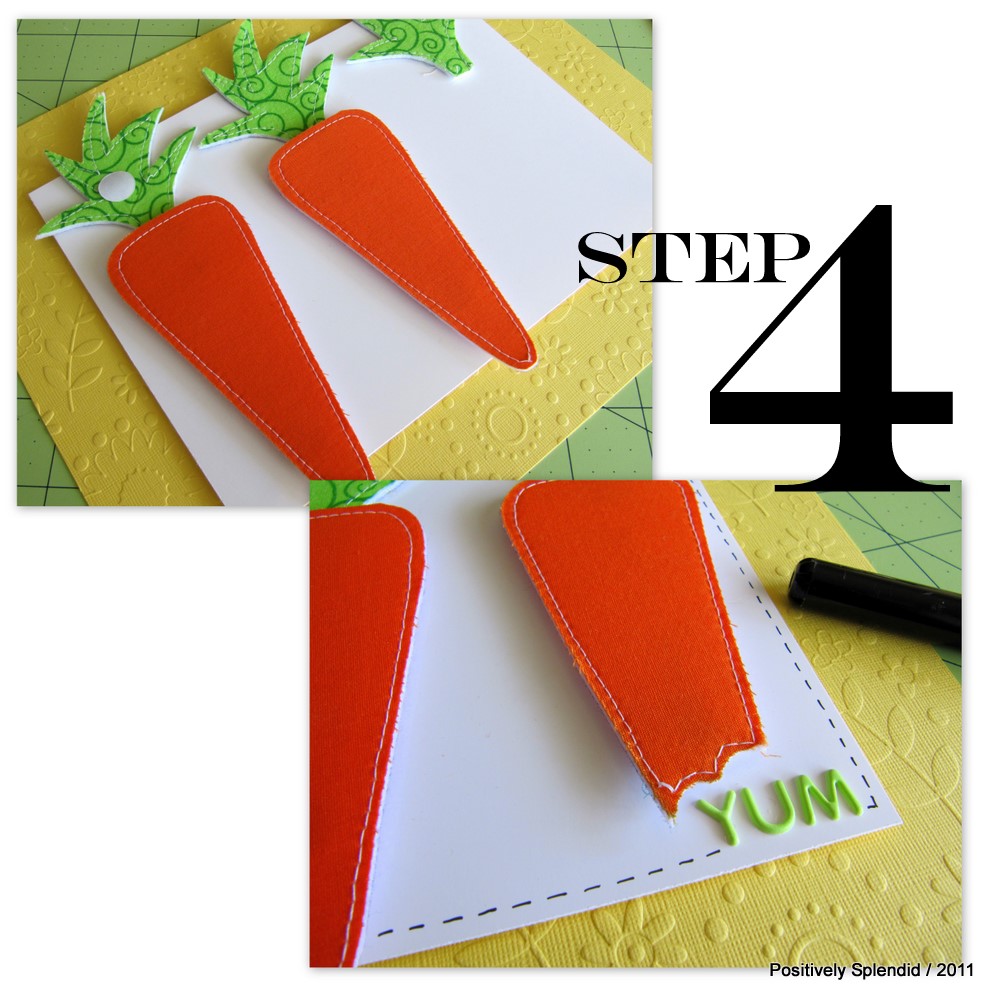
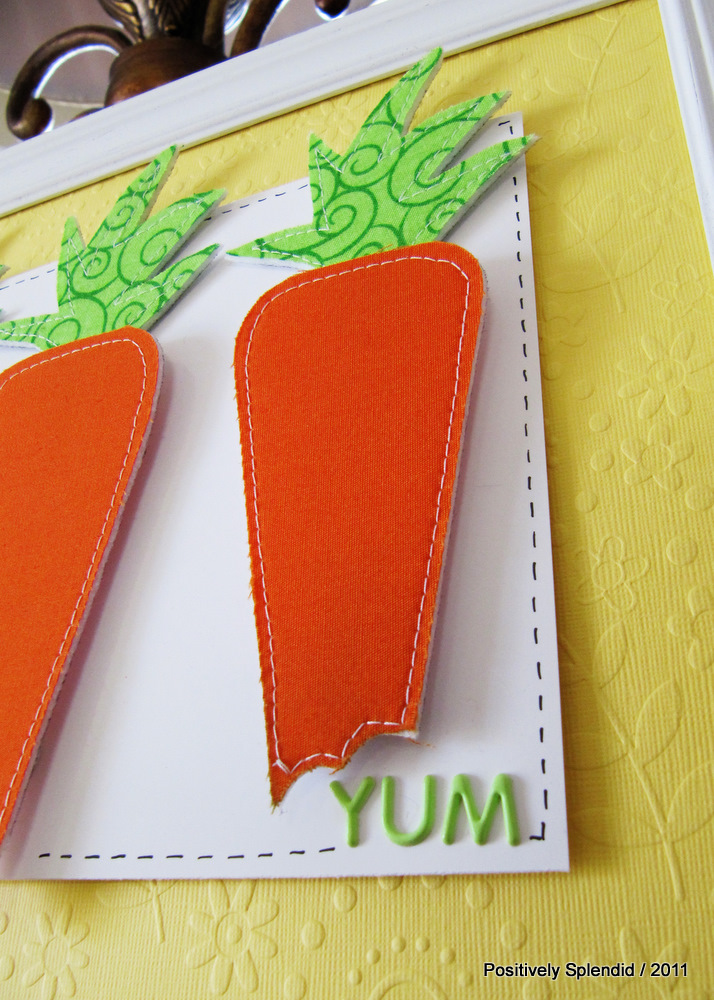
step 2 / Use your washable ink marker to trace two little bunny-sized teeth marks onto one of your carrot base pieces. Trim away the excess. Now, head to your machine and edgestitch around the perimeter of each of your carrot base and top pieces. (This stitching is optional, but it really does make this project pop!)

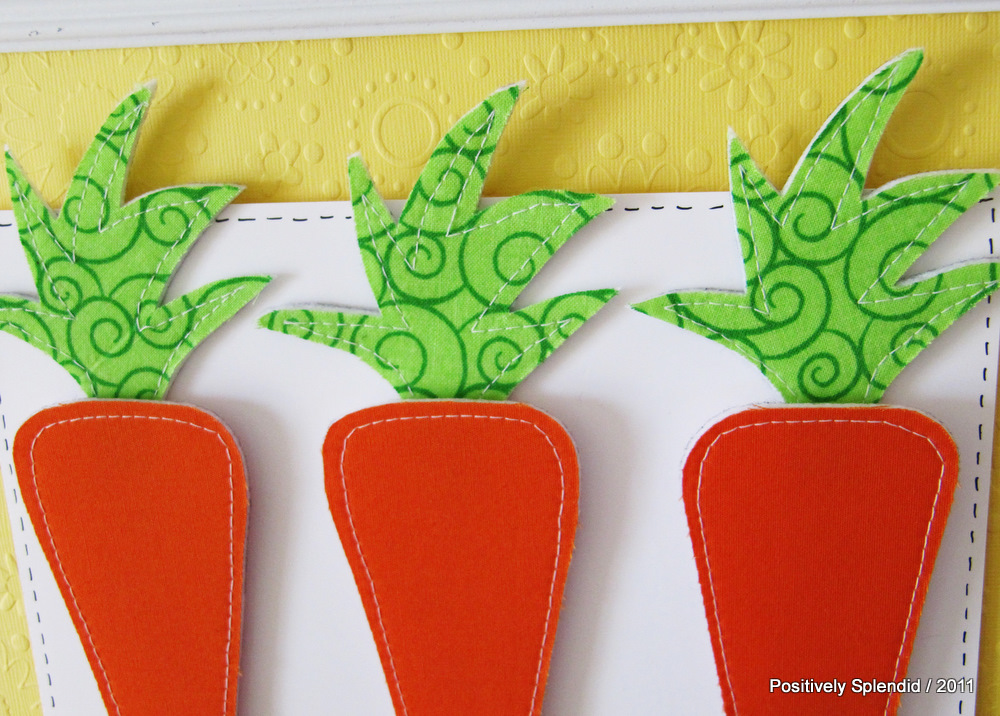
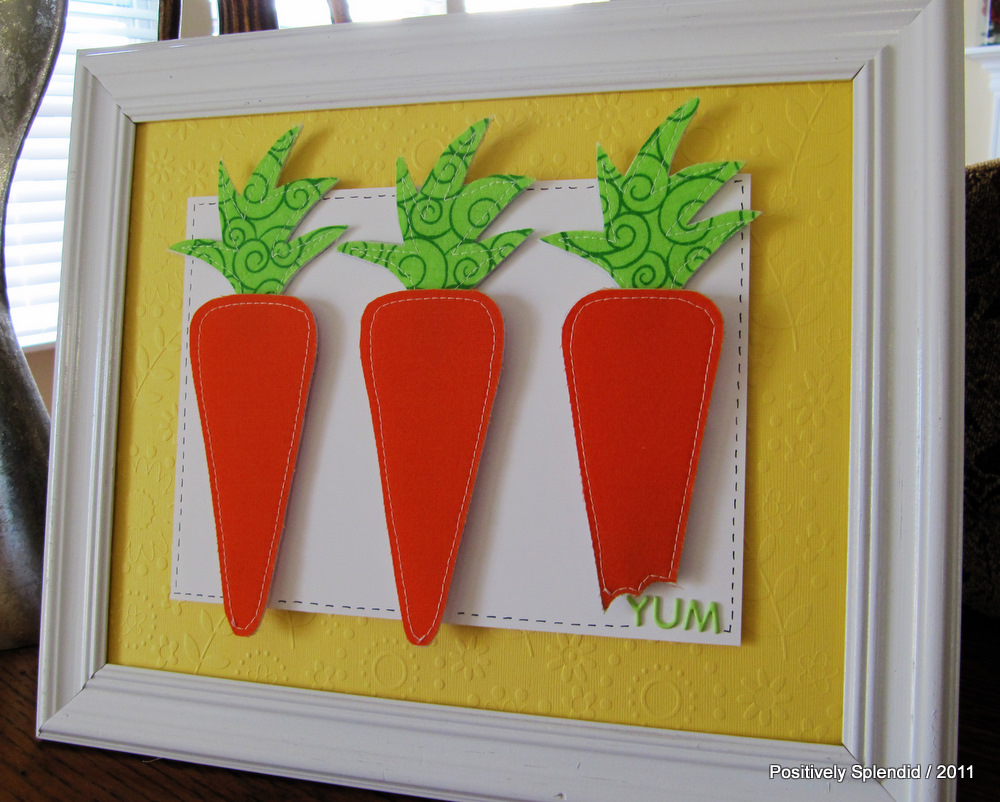
step 3 / Trim a piece of yellow cardstock to 8 inches by 10 inches, and a piece of white cardstock to 5.5 by 7.5 inches. Place foam dots on the outer corners of your white cardstock piece, and adhere it on your yellow cardstock piece, taking care to ensure it is precisely centered. Use craft glue to adhere your carrot tops to you white cardstock, as shown.

step 4 / Apply foam dots to the back of each of your carrot base pieces, and adhere them to your white cardstock so they are centered over their respective top piece. Make sure to reserve the “chomped” carrot for the third place in line. Adhere letter stickers with your chosen sentiment (I used “Yum”) just below the cut-out portion of your third carrot. If desired, use a black pen to create faux “stitching” all the way around your piece of white cardstock for added impact. Now, slip your creation into your frame.
All done, and (almost) good enough to eat!

Having grown up in a home brimming with sewing notions and paintbrushes, Amy has a deep love for all things creative. On any given day, you’ll find her knee-deep in her latest creative endeavor, with projects ranging from sewing and crafts to home decor and kid-friendly ideas. Amy believes that everyone, regardless of skill level or experience, possesses the ability to create something beautiful, and Positively Splendid was born of her passion for helping others harness their innate creative potential.
So cute! I love the bite with “yum.”
Amy this is adorable! I love the stitching detail and the little bite out of the last carrot!
Super cute!
Such a cute and simple project for Easter! Absolutely love the snippet of missing carrot!
Love this! What a fun little project!
I {Heart} this! Love the dimension to the inside of the frame. The little “Yum” is so cute. 🙂
That is too cute! I love the simplicity of it!
So cute, Amy!
I may just have to try it out!
Also, I created some canvas art for a friend of mine that just had a baby girl using your Nursery Wall Hangings as inspiration! Loved it!
EEK SO SO SO SO CUTE, I LOVE IT! winks-jen
Amy this is just darling!!! I love the carrot with the bite out of it – so stinkin’ cute!
Too, too cute! It makes my mind whirl with spin-off ideas! Thank you for sharing. 🙂
Thanks for the tut! This is SO CUTE!
<3
Risa
Yum indeed. I love this! Carrots are my favorite. I’ve already eaten two today and it’s 12:19 am. I guess I’m averaging one every ten minutes today. =) Thanks so much for this, I’ll be linking.
It’s super cute Amy! I love it! And you are right, so easy! Have a great day!
Look at the one with a BITE!! Love that! I have a thing for carrots this year. I just love them. But I still haven’t made any. I really need to! Love the colors. It’s perfect. As always. 🙂
Love this. I need some Easter decor, but I don’t love pastels. This is adorable.
This is absolutely darling, Amy!! I love the idea of using carrots!! Truly original!
I found your blog via Be Different. I absolutely love what you have done with this project – so many great techniques!
Adorable Amy. I love those carrots!
I shared it on my TT&J FB page 🙂
xoxoxo
Jen
This is amazing. I love it. End of story!
Thank you so much for posting this, I have hardly any Easter decorations and this will be so cute hanging on my wall.
So cute! Thanks for the inspiration! You can check out my version over at: http://moderndaysupermommy.blogspot.com/2011/03/nibbled-carrots.html
Look at how cute those little carrots are! the little “yum” bite is so super cute!
Thank you so much for sharing your tutorial for this darling idea! I recreated it with my own twist and love it!
http://gigglesgalorenmore.blogspot.com/2011/03/easter-carrot-decor.html
Tudo maravilhoso. Parabéns…
http://multiartes-rosabela.blogspot.com/
Faça uma visita…
There’s just something so sweet and eye-catching about this. I’m including it in my Friday Favorites feature tomorrow!
I love this! It will look perfect in my foyer come Easter!
Happy Crafting,
Megan and Emily @ WhimsicallyHomemade
Please visit us at Whimsically Homemade
so cute! i saw these a while back on a site called http://www.homeseasons.com and fell in love with them . so glad i found your site on a walk through tip so i can just make it at home.