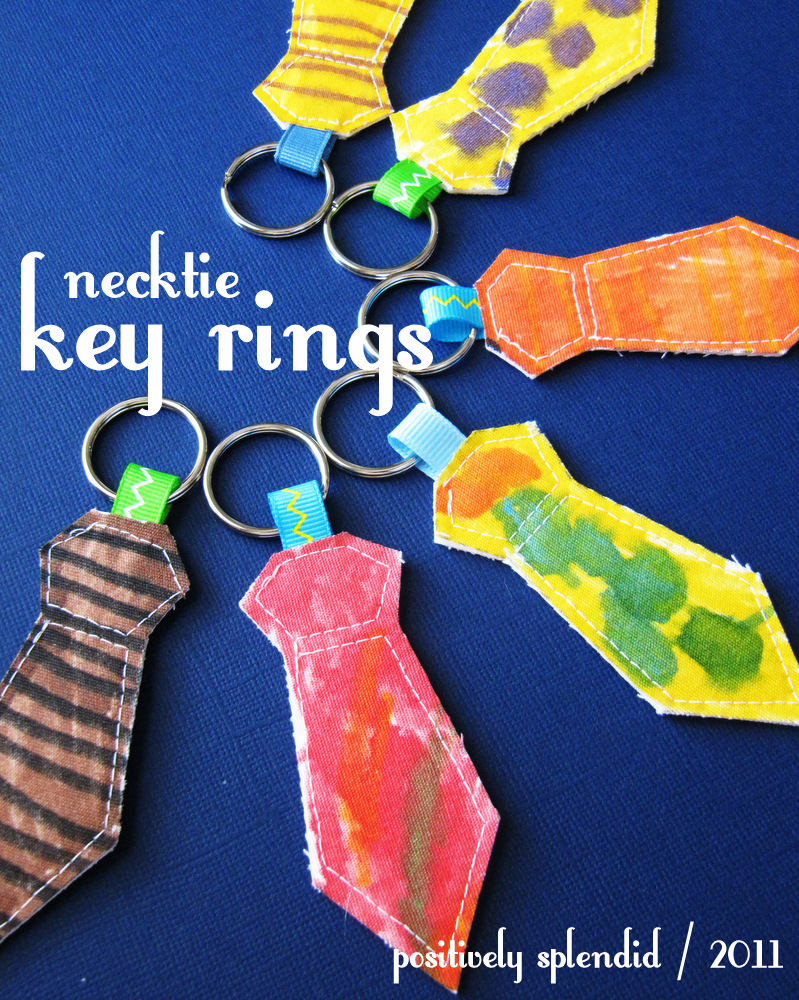
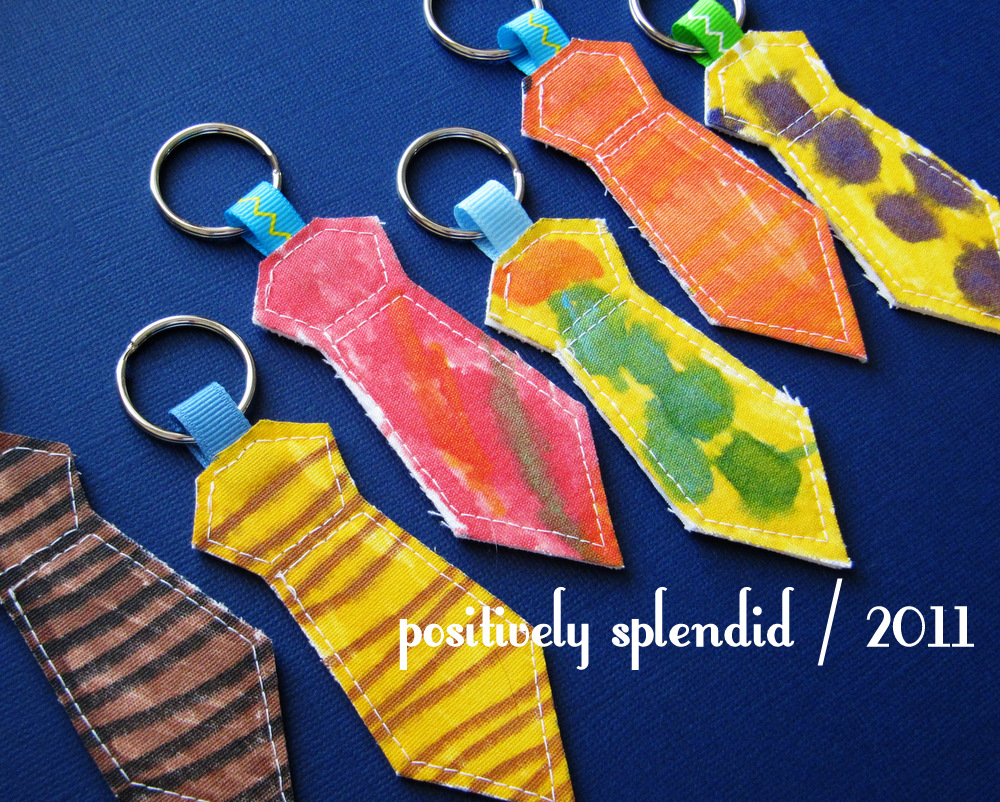
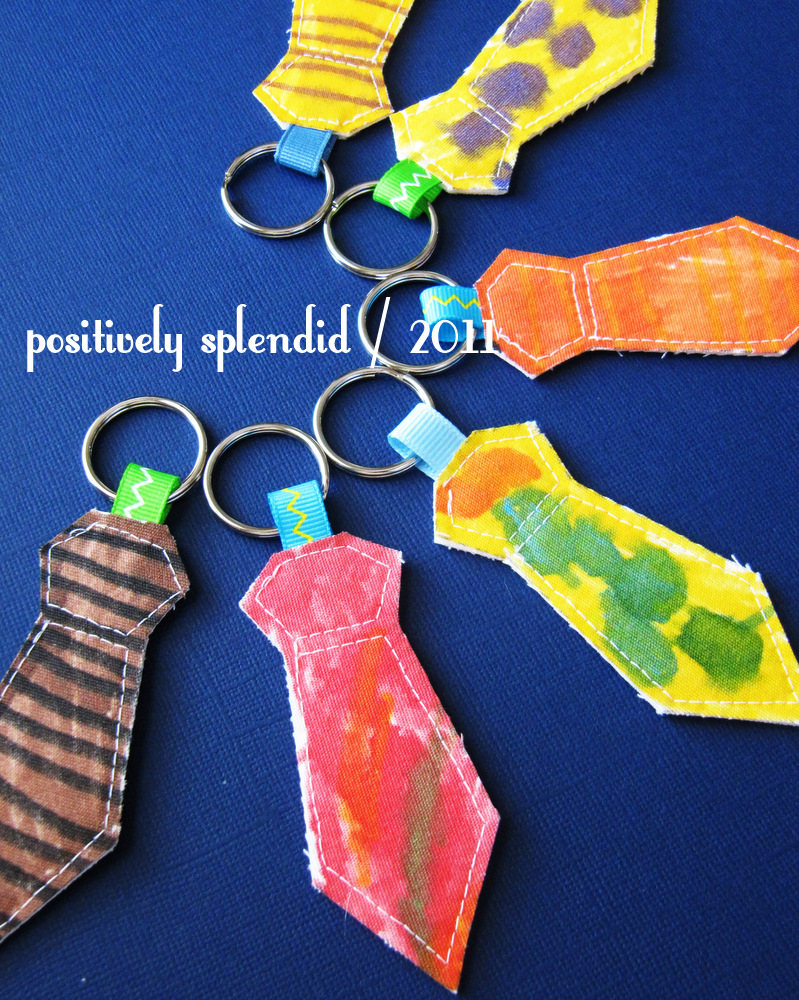
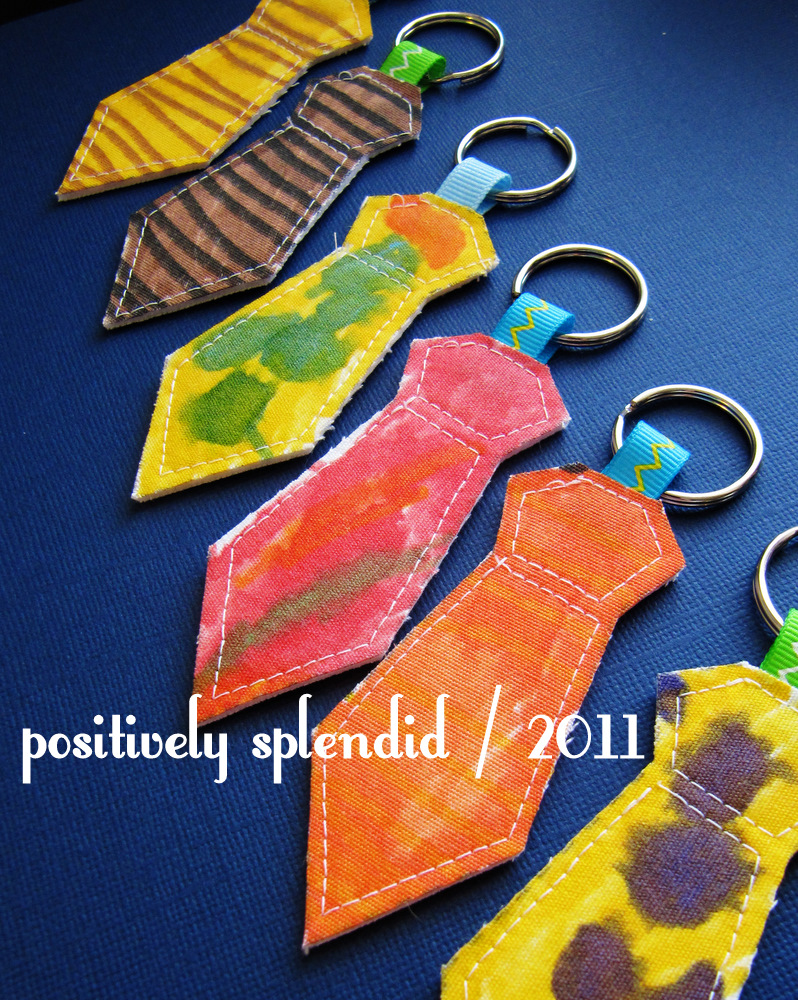
Looking for something unique for your little ones to make for Fathers’ Day, and wanting it to be something that can also be put to good use? These Necktie Key Rings will be the perfect way for Dad to carry around a little piece of artwork made by little hands with him everywhere he goes!
My inspiration for this project concept came from these Whimsical Key Chains shared by Jess of Craftiness is Not Optional during the Scrap Your Stash series going on right now over at Living with Punks. These little guys are super simple to put together: children use fabric markers to embellish the provided tie templates, and then Mom (or older kiddos learning to use a sewing machine) can assemble them in no time flat!
Interested in seeing how these come together? Let’s get started!
For this project, you will need…
Freezer paper
Light-colored fabric scraps (I used white twill)
Fabric markers
Double-sided stiff fusible interfacing (I used Dritz InnerFuse)
Ribbon scraps
Split rings, found in the jewelry findings section of most craft stores
Coordinating thread
Basic sewing supplies: machine, shears, iron, etc.
step 1 / Cut a piece of freezer paper that is 8.5×11″. Cut a piece of your fabric that is the same size. Use an iron to adhere the freezer paper to your fabric, making sure the edges of each piece are carefully aligned. Now, use your computer printer to print the necktie template onto the fabric side of this piece. (Adhering the freezer paper to your fabric allows you to run it through your printer. Cool, right?) Now, let your little one color the tie templates using fabric markers. (Helpful hint: I recommend using light colors for this, as it will make seeing the border around your ties as you trim each one much easier!) Heat set the marker ink according to the marker package instructions.
step 2 / Trim around each of your colored ties, leaving a small border around each one. Trim a piece of interfacing that is large enough to accommodate all of your tie pieces. Line up your trimmed tie pieces on top of your interfacing, with the right side of each tie piece facing up. Use an iron to adhere the tie pieces to the interfacing according to the interfacing package instructions. Cut an additional piece of fabric that is large enough to completely cover your interfacing piece. Flip your adhered tie/interfacing piece over, and iron this piece of fabric to this side. At this point your will have created a little “sandwich”: tie fabric pieces, interfacing, fabric.

step 3 / Cut out each tie along the dotted lines of the template. Cut a piece of ribbon that is 1.5″ long. Carefully pull back the fabric on the top center front of your tie piece, and tuck one end the ribbon piece down into this crevice, so it is sandwiched between the top layer of your tie and the middle interfacing layer. Flip your tie over and pull the top center back down in the same manner. Slip a split ring onto your ribbon piece before tucking the loose end of your ribbon into this space to create a loop.

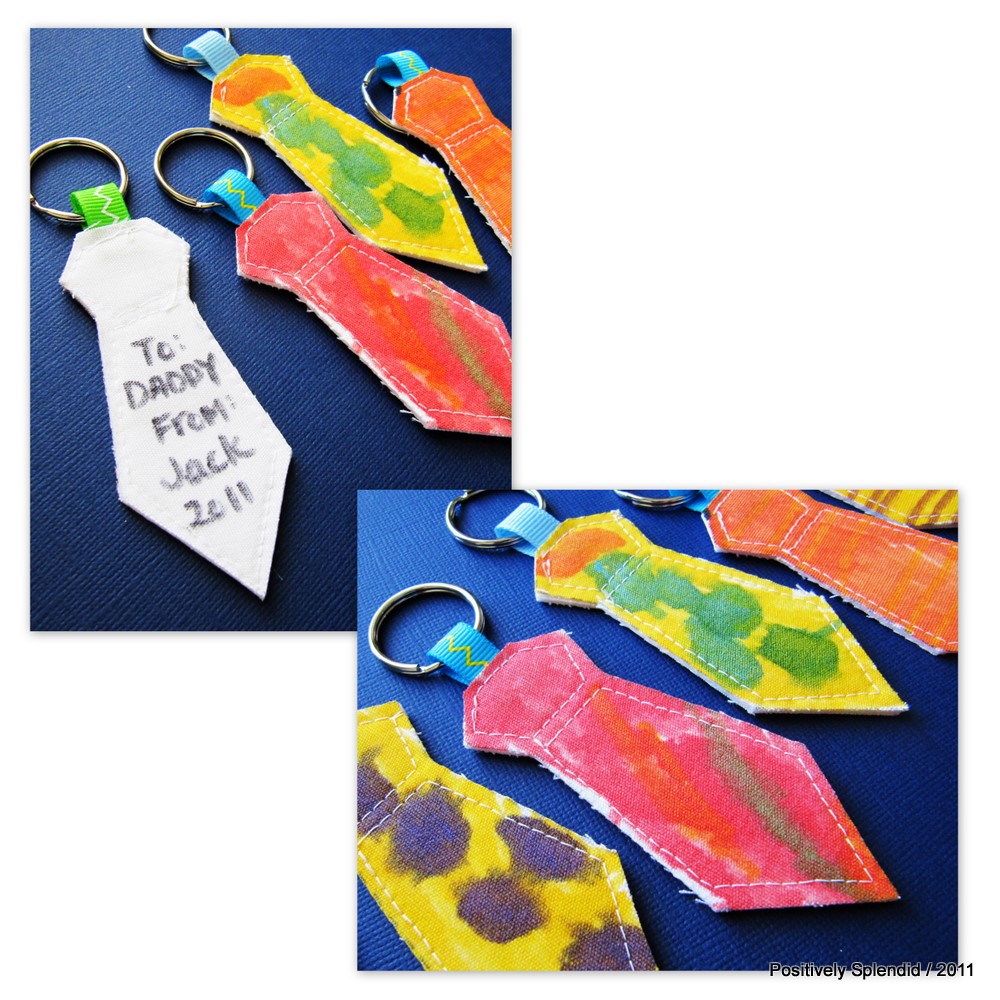
step 4 / Head over to your sewing machine, and stitch around the top section of your tie in a hexagonal shape, as shown, securing your ribbon as you stitch. Stitch around the edges of the bottom section of your tie, as well. If desired, flip your tie over and write a sentiment and the date on the back.

You are finished!

Having grown up in a home brimming with sewing notions and paintbrushes, Amy has a deep love for all things creative. On any given day, you’ll find her knee-deep in her latest creative endeavor, with projects ranging from sewing and crafts to home decor and kid-friendly ideas. Amy believes that everyone, regardless of skill level or experience, possesses the ability to create something beautiful, and Positively Splendid was born of her passion for helping others harness their innate creative potential.
This is absolutely adorable! Great idea and I love how personalized they are with the fabric markers by the kiddos! So sweet.
So cute! Great idea.
Would love it if you’d link this up to my 20 Minute Tuesday party.
It’s for projects that take 20-30 minutes and cost less than $10.
Thanks for considering 😉
Tina
http://sweetfloweret.blogspot.com
Adorable!!
Super cute keychains. So simple to make other shapes too.
Very cute idea! And loads of fun for the kids!
So very cute!
What a fantastic idea! Too bad my dad rarely wears ties, or I’d consider making one 🙂
Great idea though, seriously.
Very cute, but I have a question! Do you leave the freezer paper on to help keep it stiff?
That was my question too! Maybe peel it off once the kids are done coloring…?
What can I do if I do not have a sewing machine available?