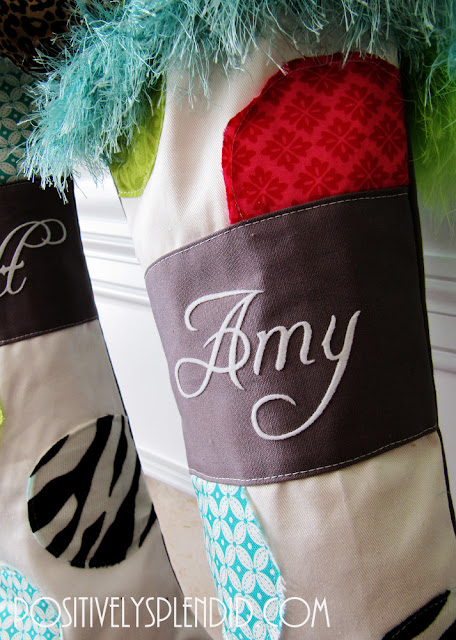
If you are a long-time PS reader, you might remember my Whimsical Christmas Stocking tutorial from last year. I made that particular set for my parents, so I was eager to put together a set for our family this year. Suffice it to say that making six stockings was quite a labor of love! I really enjoyed putting these together, though, and I love how they look hung from our mantel. (Head to this post to see my full mantel display.)
I did a couple of things differently when making these stockings from how I made my parents’. First, I opted to use my Silhouette and some white flocked heat transfer for the lettering instead of going the embroidery route. I love that this allowed me to use any font I wished! I was going for a bright, whimsical feel with these, and I thought Freebooter Script fit that bill. Second, I added a bit of furry trim just under the ruffle for added interest. I found it on clearance a couple of months ago at Hobby Lobby for just fifty cents a yard. Not too shabby!
Since I just got done hanging our stockings, I thought I would share a couple of tips and tricks for making hanging your stockings a breeze, and for making the end result look nice and polished.
Tip One: Use Command Hooks for Mounting.
I opted this year to use small Command hooks to hang my stockings. I love that this allowed me to position them exactly as I wished without having to damage the wood of our mantel by nailing or mounting something like cup hooks. Because the decorative ruffle at the top of the stockings could conceal the hook itself, I opted to mount them to the top of the mantel instead of underneath, but this method would work just as well for under-the-mantel positioning. The best part of all is that I’ll be able to remove the hooks after the decorations have been packed away, and my mantel will be absolutely no worse for the wear!
Tip Two: Use Empty Grocery Bags to Stuff Your Stockings.
I always use a filler to give my stockings some extra oomph before I hang them. Amply filled stockings look so much happier hanging from a mantel than sad, limp ones! You can really use anything at all to stuff your stockings, but I have found empty grocery bags are the perfect solution. It takes about 6-7 bags per stocking to achieve my desired level of fluff. Santa will have to take them out before he deposits his presents, but I don’t think he’ll mind. 😉
Look at the difference the bags make in the overall appeal of the hung stockings. These two stockings are absolutely identical, save for the added volume of the grocery bags. Big improvement!
I hope you’ve found these tips helpful!
***
By the way, I am guesting over at Infarrantly Creative today for Beckie’s Pennywise Presents series. I would love for you to stop by and say hello!
Thanks so much for making me a part of your day!

Having grown up in a home brimming with sewing notions and paintbrushes, Amy has a deep love for all things creative. On any given day, you’ll find her knee-deep in her latest creative endeavor, with projects ranging from sewing and crafts to home decor and kid-friendly ideas. Amy believes that everyone, regardless of skill level or experience, possesses the ability to create something beautiful, and Positively Splendid was born of her passion for helping others harness their innate creative potential.


Love those stockings, Amy, and what a great tip about the shopping bags–totally going to try that! 🙂
They look awesome! and thanks for the bag tip!
Those are awesome!! Ive been looking for “christmas” material for our stockings….and I think I may not have to any more! 🙂 Cute Cute Cute!
They look great! So colorful and fun. I just finished our 6 stockings too. I got it in my head that we all needed matching ones since Ruby joined us 6 weeks ago. Whew! Have a great weekend!
http://brandyscrafts.blogspot.com/2011/12/scalloped-stocking-tutorial.html
Fun stockings..the circles and ruffles make them so whimsicle! I wish I had a mantle to hang stockings on!
ooh polka dot stockings. Hey can we stuff the socks with paper money instead? If hubby found old grocery bags OH MAN would he be ticked off. 🙂 Very cute.
Such a great idea to stuff them with bags. Why couldn’t I thing of that!
beautiful stockings and great tips! I’m gonna add the grocery bags to mine right now….they look droopy. 😐
Wow! You are a Christmas crafting genius! So glad I found your project via Centsational Girl.
Please stop by for a visit to my blog. I am currently in the midst of a Gifts to Make series.
Be Merry and Bright!