Today’s sewing tutorial from PS contributor Jessica of Sunny Tuesday is great for those looking for a simple, cozy gift for a new baby in your life. Can I make one in my size, too? 🙂
***
Hello, hello! This simple boutique lovey is one of my favorite gifts to make and babies love it, too! I think the soothing textures are appealing to them. My daughter initially bonded with one of those head-attached-to-blanket loveys and then she pulled this simple boutique lovey I made for her out of her toy basket one day and hasn’t let go of it since! You can see a pic of the lovey I made for her in her nursery post here.

You will need:
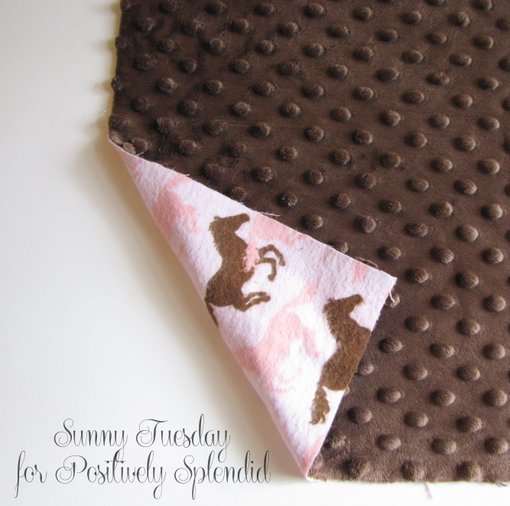
Two 16″x 16″ squares of fabric (one minky, one flannel or cotton)
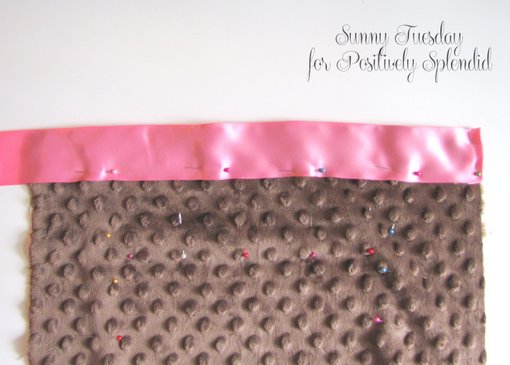
Satin blanket binding
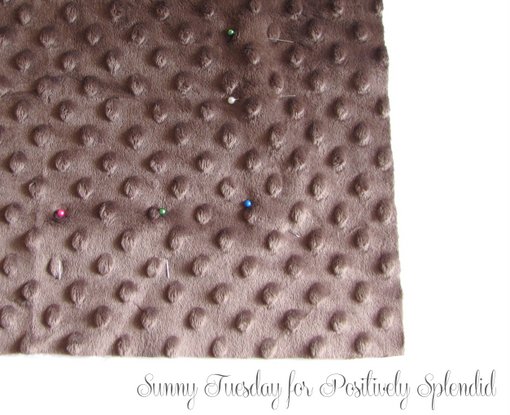
Lots of pins
Sewing machine, thread, scissors, etc.

Place your fabrics wrong sides together.
Pin the fabrics together. The trick to sewing with minky is to use LOTS of pins! I place mine a couple inches from the edge.
Tuck your fabric edges into the folded satin blanket binding.

Fold the ends of the binding in flush with the edge of the fabric and pin in place.

Continue to pin the binding to the edge of the fabric.
When you get to the corners, turn the binding to create a triangle.

Then fold over to create mitered corners.

Make sure you do the same on both sides and pin in place.

Continue around 3 corners. When you get to the last/first corner, trim the binding.

You will then want to fold the excess binding in to create the appearance of a mitered corner. This is the hardest part of the project, so take your time to get it right!

Once you are done pinning, you will want to start at one corner and stitch the binding down. At each corner, I stop with the needle in the fabric, turn it on the diagonal, stitch down the corner and back over the same line, then turn and continue on.

That’s it, you’re done!
If you are giving this as a gift, make two! That way baby always has a lovey if one is in the wash. 🙂

Jessica is a wife and new mom to one sweet little girl. She has always loved to craft, which is her form of stress relief. She is passionate about helping others get into crafting, because she knows first hand how good it feels to complete a project and think, “Hey, I made that!” and she wants others to be able to feel that sense of accomplishment, too. Visit Sunny Tuesday for quick, simple craft ideas that anyone can do.
Having grown up in a home brimming with sewing notions and paintbrushes, Amy has a deep love for all things creative. On any given day, you’ll find her knee-deep in her latest creative endeavor, with projects ranging from sewing and crafts to home decor and kid-friendly ideas. Amy believes that everyone, regardless of skill level or experience, possesses the ability to create something beautiful, and Positively Splendid was born of her passion for helping others harness their innate creative potential.
Thank you for the tutorial. I might make 3 for my grandson.