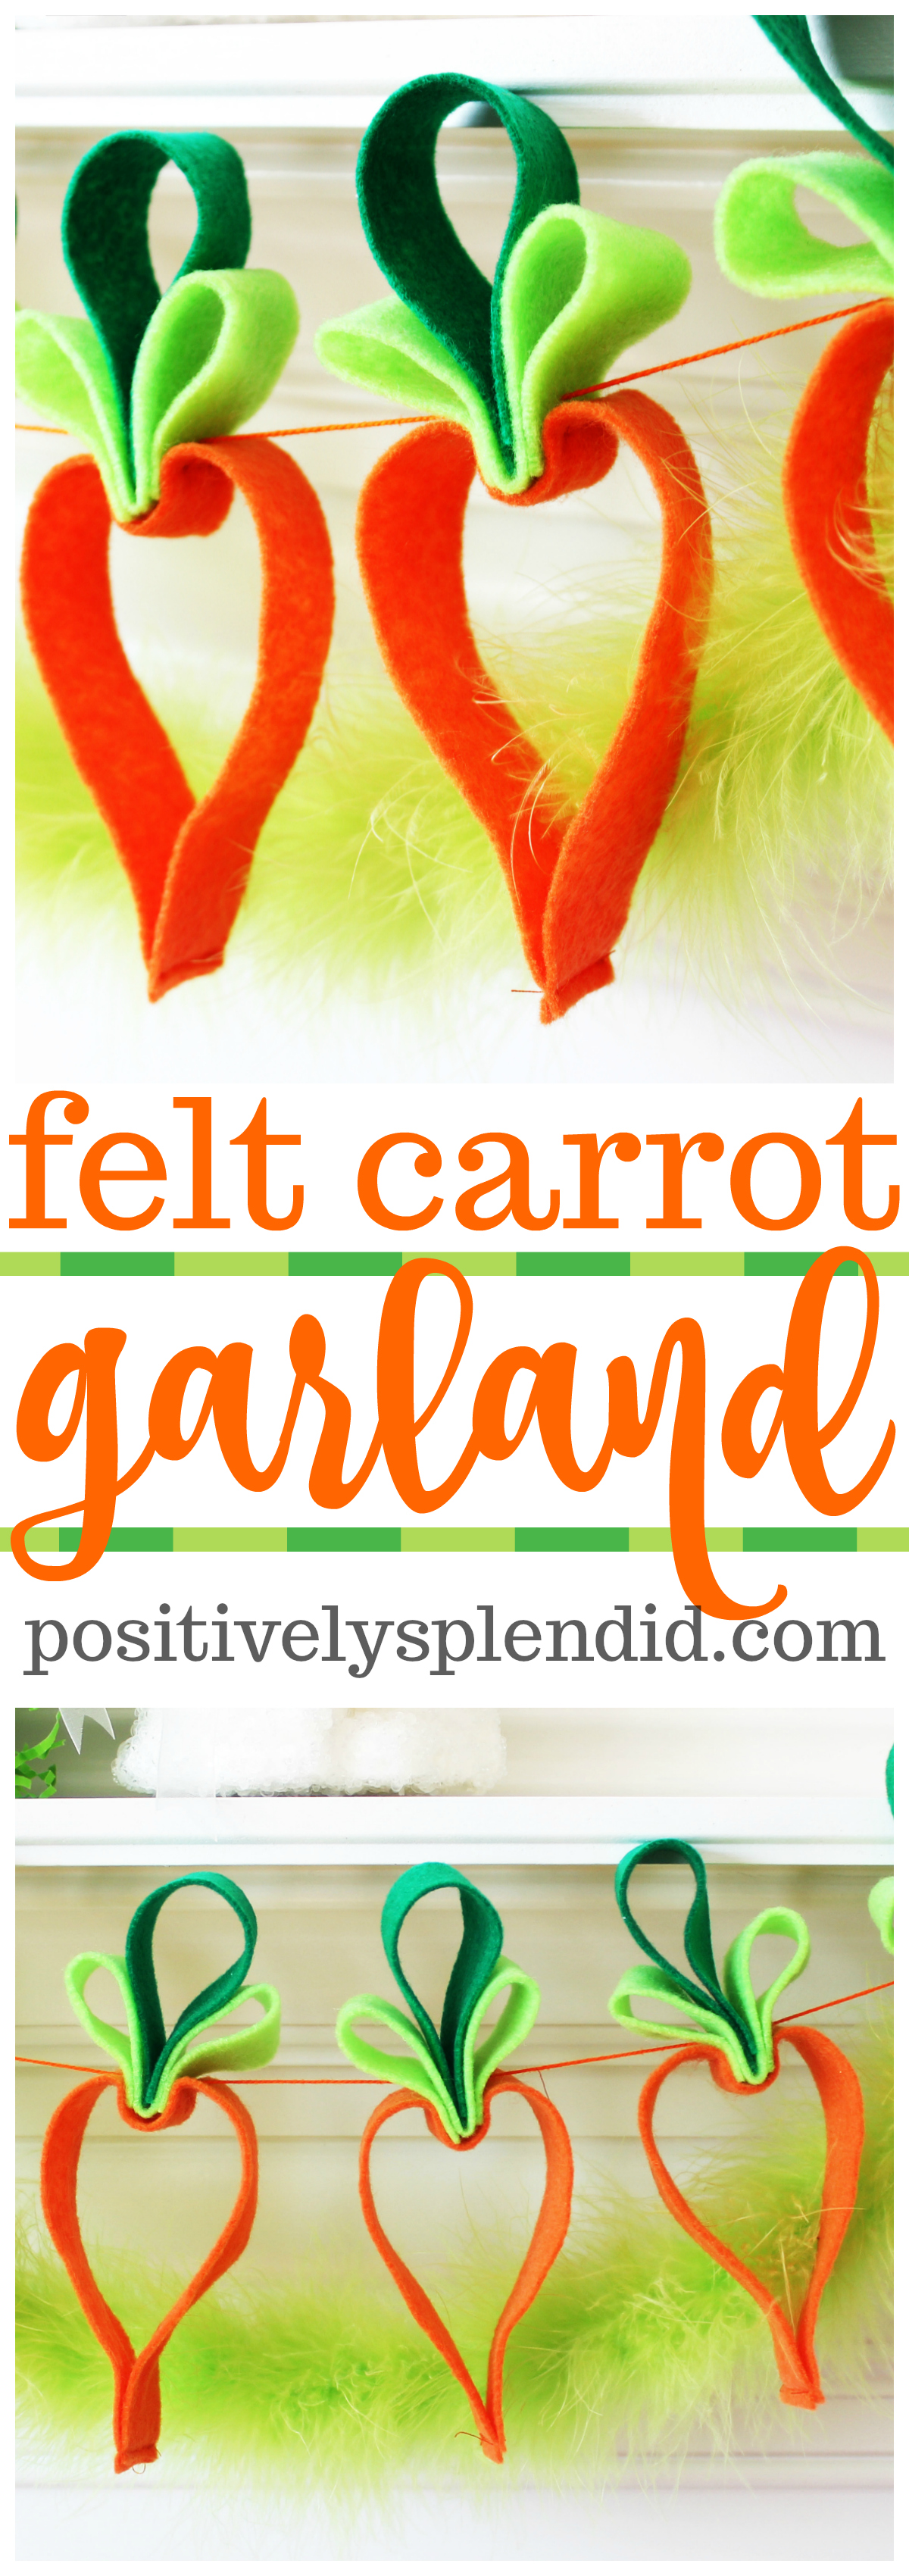
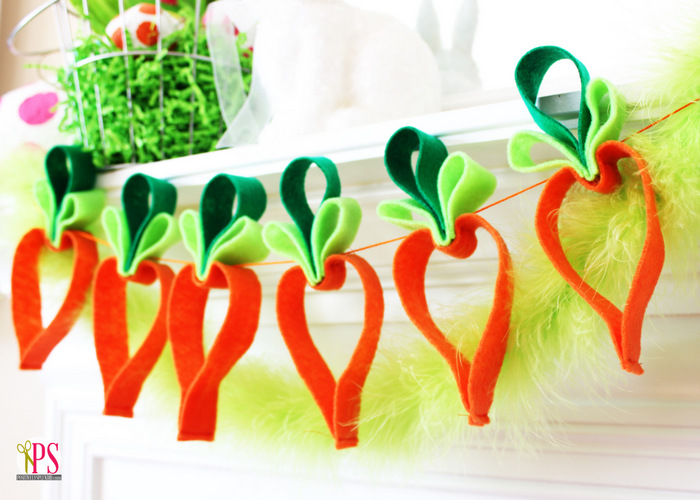
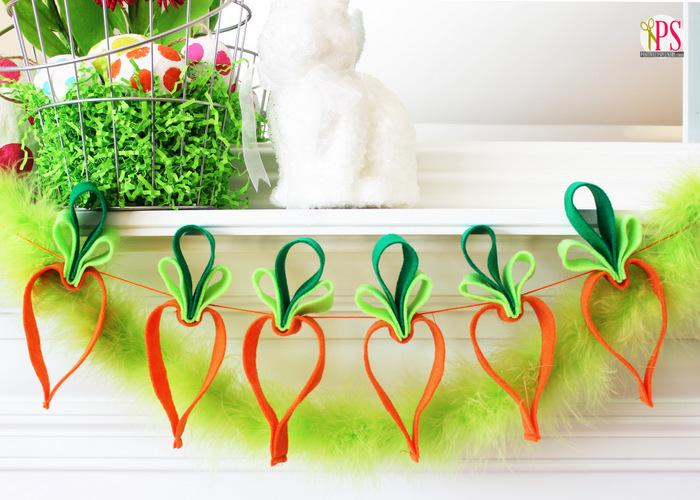
Learn how to make an adorable felt carrot garland Easter craft to use to as an Easter decoration at home, for a party and more! This step-by-step tutorial guides you every step of the way.
To me, Easter crafts are the best possible way to kick off my spring crafting season. Today’s easy craft idea for making a sweet carrot garland out of felt is one that can easily be finished in the span of an afternoon, and the bright, vibrant colors are sure to break through the winter blahs and add some pizzazz to your Easter decorations!
This post contains affiliate links.

Full credit for this project idea must be given to Lisa Storms of Fiskars who inspired me with her paper carrot garland., and I adapted that idea to make a similar garland out of felt.
Felt Carrot Garland Easter Craft Supplies
- Felt in 3 colors: dark green, light green, and orange
- Orange thread, yarn, and/or embroidery floss
- Shears
- Embroidery needle
- Sewing machine
- Optional, but recommended: rotary cutter and mat, mini clothespins
To begin, cut your felt into strips. (I recommend doing so with a rotary cutter and mat.) For each carrot, you will need (1) 8-inch strip of light green felt, (1) 6-inch strip of dark green felt, and (1) 11-inch strip of orange felt. Note: these dimensions yield carrots that are 6.5 inches long.
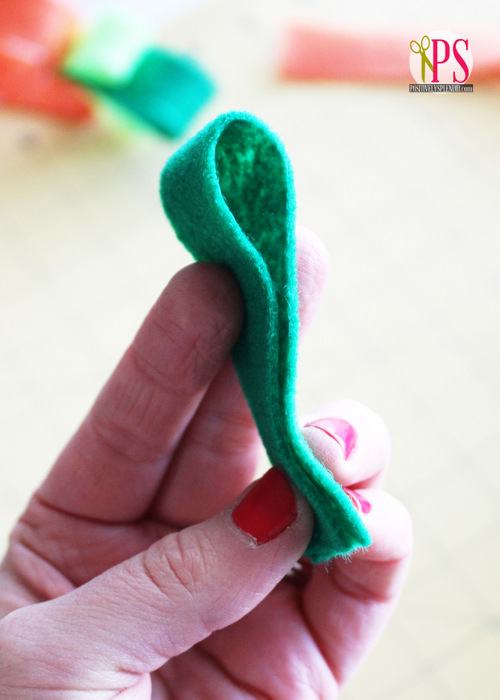
Now, fold the dark green piece in half width-wise, as shown. Press it flat with your fingers, and lay it down on your work surface. (It should stay folded, but in case it doesn’t, use a mini clothespin to secure it.)
Working with the light green felt strip, fold the piece in half width-wise, and then fold each remaining edge down to meet the fold, as shown.
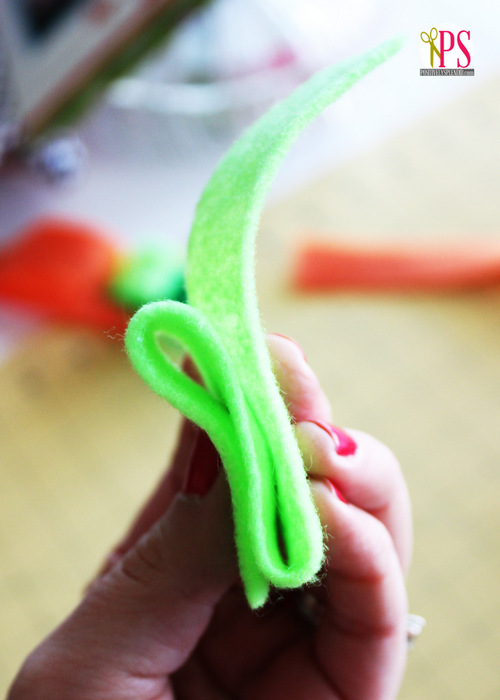
Your light green piece will look like an accordion.

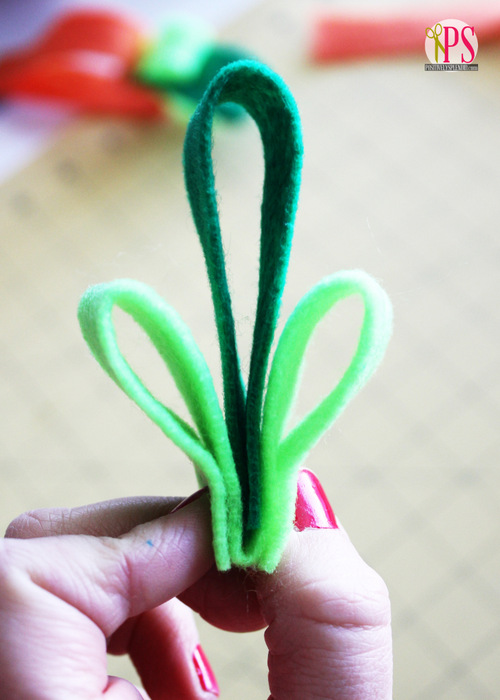
Tuck the folded dark green piece in between the two folds in the light green piece, as shown, pinching to secure.
Fold the orange strip in half width-wise, and then wrap it around the stacked green pieces, making sure the center of the orange strip is aligned with the center of the green pieces.
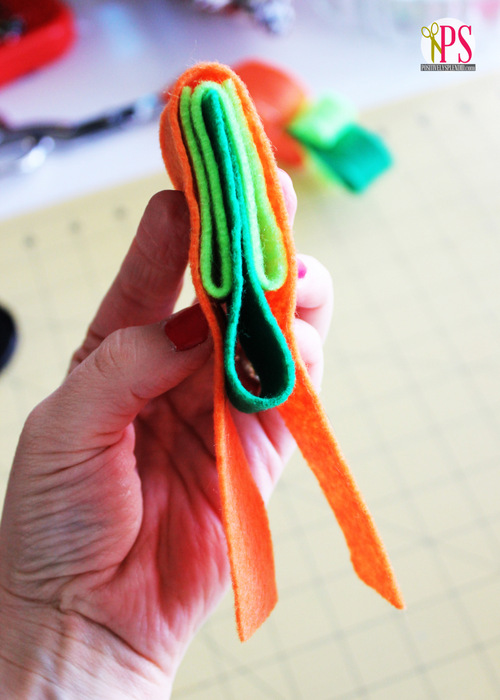
At this point, I highly recommend clamping everything together securely with a mini clothespin. This will prevent the frustration of having your pieces come undone in the next step.

Thread the embroidery needle with orange thread, and stitch in and out through the base of the folded pieces, as shown.
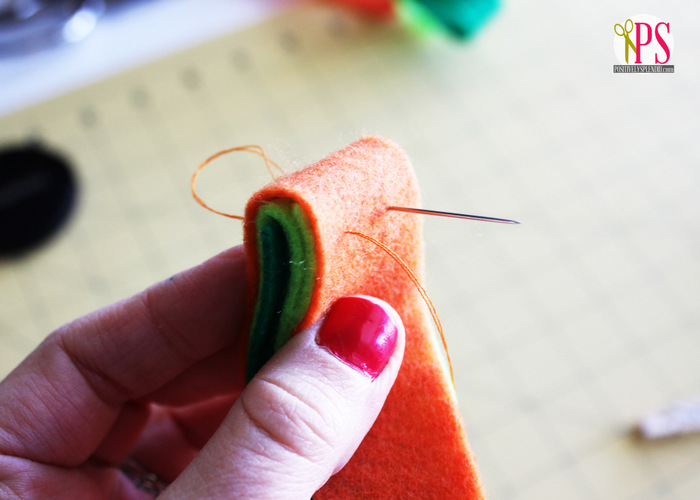
Tie the thread tightly in a knot.
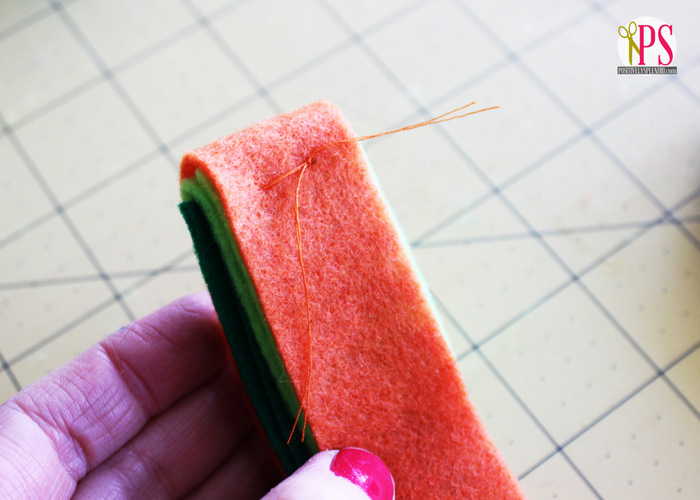
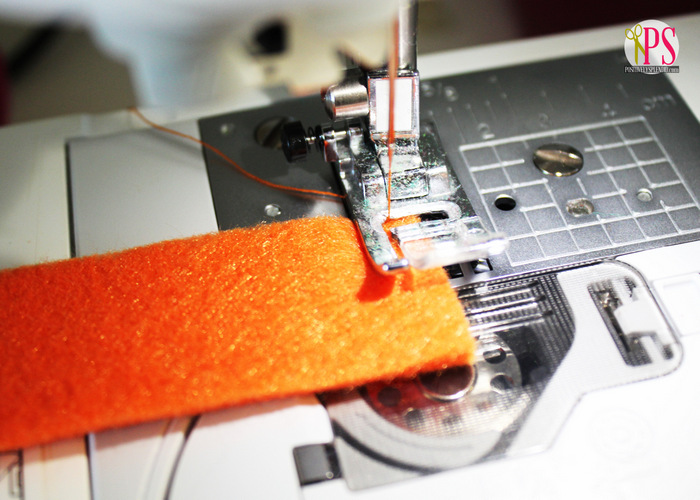
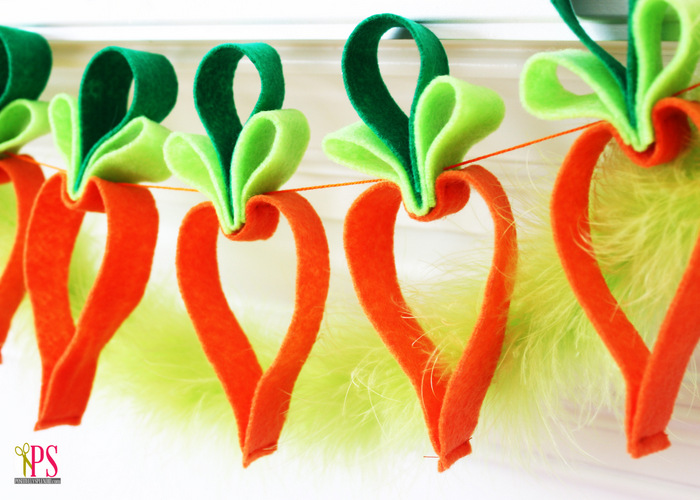
Now, fold the remaining loose edges of the orange felt down, around and together, and stitch together about 1/8″ from the edge to secure. Your carrot is finished!
Repeat this process until you have your desired number of carrots, and then thread the carrots together through the green leaf portion of each to form a garland using the embroidery needle and orange embroidery floss or yarn. (I recommend against using standard thread for this step, as it tends to break easily.)
Your adorable felt carrot garland is complete!
This carrot garland is such a quick and easy Easter craft project, yet it can be used for any number of purposes: Easter party decor, mantel decor, and so much more!

Having grown up in a home brimming with sewing notions and paintbrushes, Amy has a deep love for all things creative. On any given day, you’ll find her knee-deep in her latest creative endeavor, with projects ranging from sewing and crafts to home decor and kid-friendly ideas. Amy believes that everyone, regardless of skill level or experience, possesses the ability to create something beautiful, and Positively Splendid was born of her passion for helping others harness their innate creative potential.
Adorable! I made some cute carrot Easter eggs that I’m going to post tomorrow.
This is so cute!! Definitely making this with my kids!! Thanks for sharing!!
This is so cute! I’ve had a craft-less winter; this might be just the thing to re-charge my batteries! 🙂 Pinning this to my Easter board!
These are adorable!
OH my goodness this is adorable!! 🙂
I would love for you to join my Blog Hop Link Up!
http://www.pluckys-secondthought.com/pluckys-link-up-and-a-giveaway/
this is so stinking adorable. I can’t wait to make this.
This is such a cute idea, thanks for sharing.
Wow, that is so stinkin’ cute!
This is so adorable!!!!!!
Absolutely adorable!!! Brightens up the space and makes you in the mood for spring. Love it!!
I forgot to tell my favorite Easter decorations. I found them on Pinterest last year and loved them. Here are the pins for them (it would take too much to decribe when a picture is much easier). http://pinterest.com/pin/181410691210119485/ This one is a picture of the one I made http://pinterest.com/pin/181410691210200604
http://pinterest.com/pin/181410691209807110/ – I also made a version of this one, but I guess I forgot to pin the picture.
I love fresh flowers in the spring and especially at Easter time.
What a terrific idea, Crystal! Thanks for sharing it with me. 🙂
Did I miss where it says how wide the strips are supposed to be? I see how long, but I don’t see how wide. HELP!!
Hi, Ali! My strips are 1″ wide. Have fun!
Thank you! Cutting begins…NOW! 🙂
This is so sweet Amy. Pinned it 🙂
<3 Christina at I Gotta Create!
I made two sets of these. One is for my MIL who is hosting Easter dinner. 🙂 cost me less $2 to make both! Instead of sewing the bottom, I used a glue gun to finish the carrot. No sew! 🙂 thanks for sharing this project.
Thanks so much! Crazy cute.
I’m using what few felt scraps I have.
I’ve made my with 1/2 inch strips. And a bit shorter by about two inches each strip.
Instead of machine sewing- I just hand stitched and looks good.
Nice evening project for TV time with the hubby.
ok, no more pinterest. Back to my taxes!
oh my gosh, these are the cutest things! Love for you to link up with us at our blog party. Open to crafts, recipes, DIY, and etsy shops.
http://spatulasonparade.blogspot.com/2013/03/in-and-out-of-kitchen-link-up-party_25.html
Following you on FB now! Found you mentioned on another blog.
I made 16 of these cute carrots this evening while watching Tv with my husband. I used pinking shears adding a flair to them. I had fun making them and love the final product.