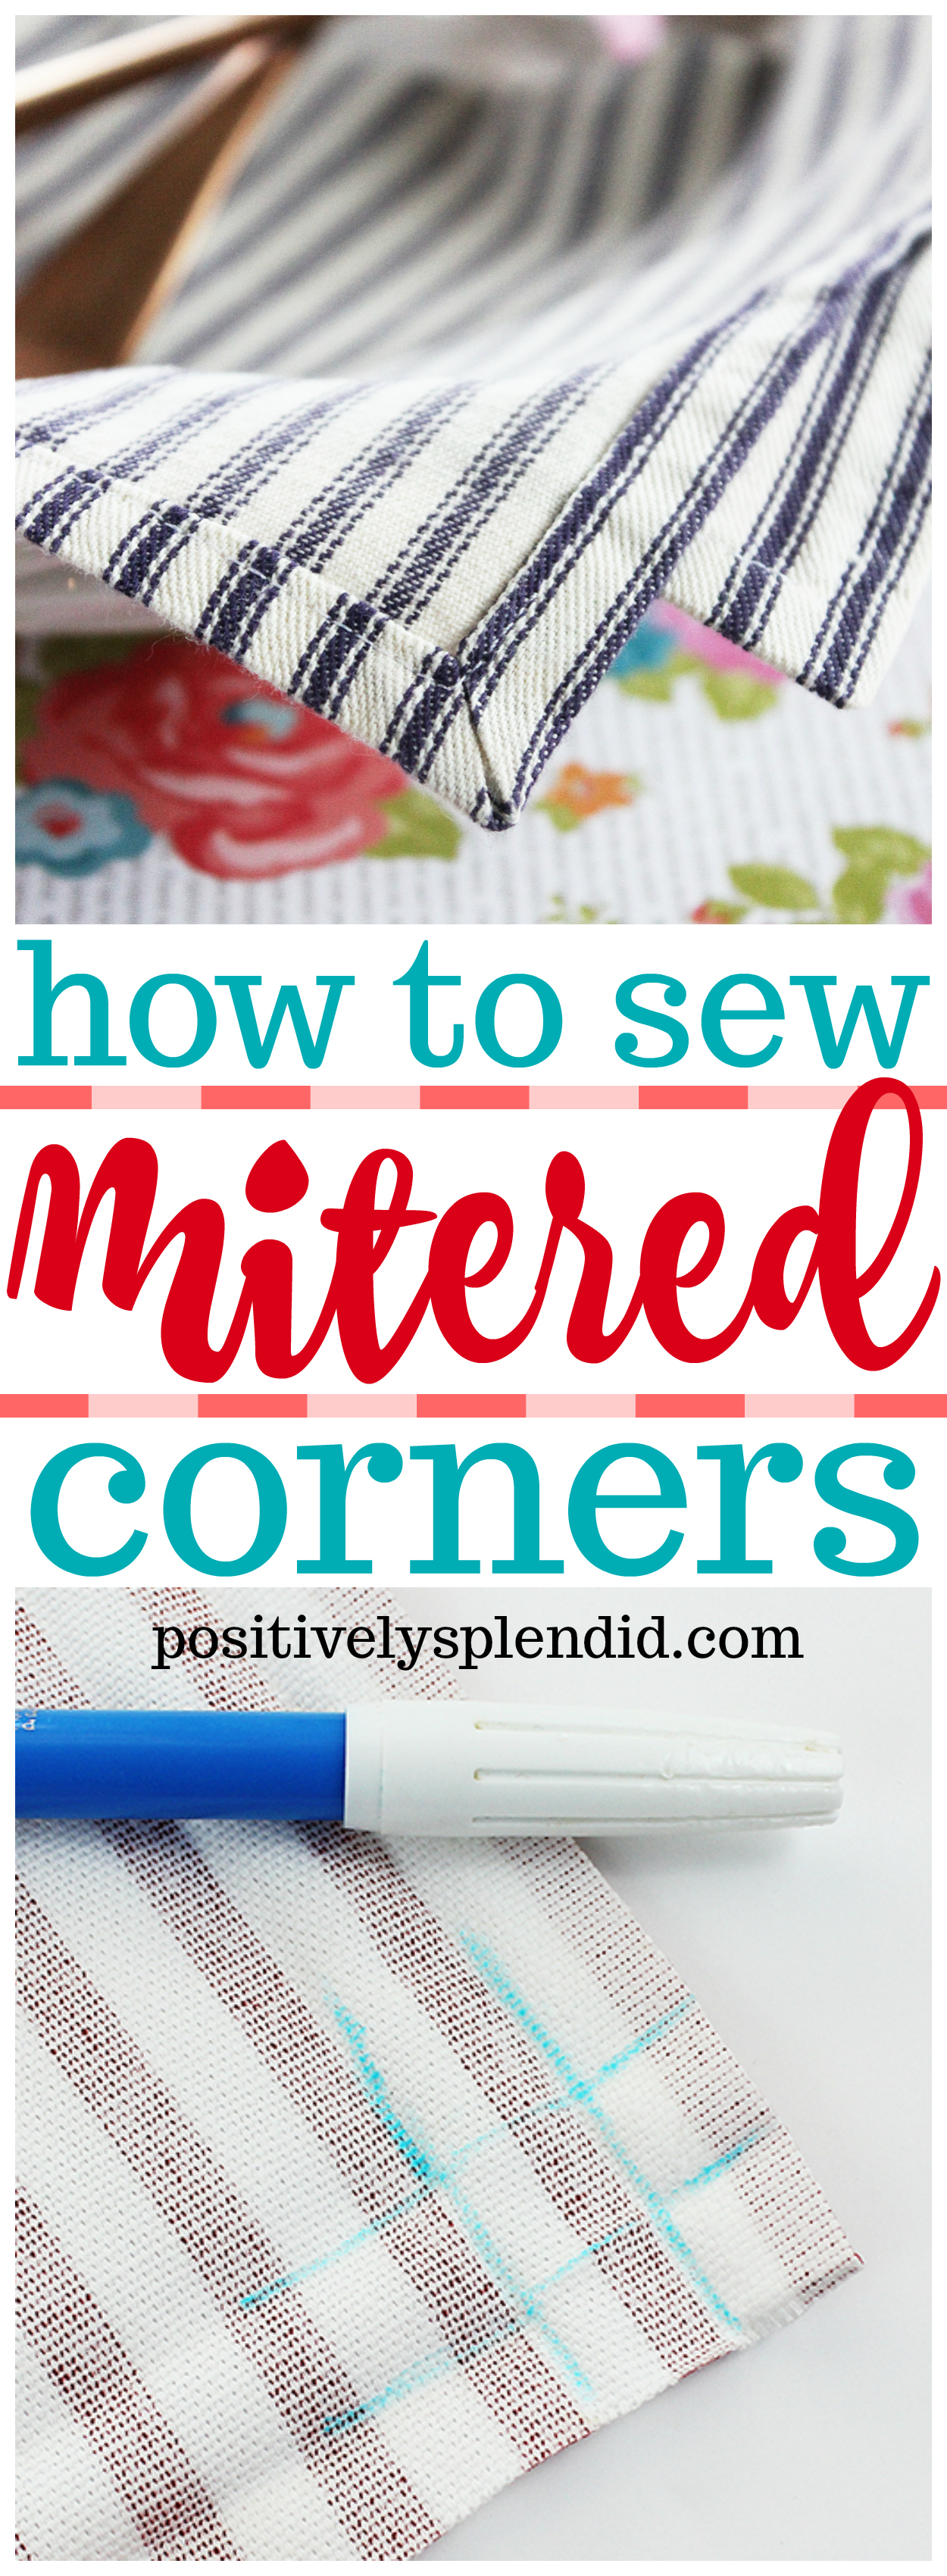
Learn how to sew mitered corners with this easy method that produces polished, professional results every time! Use this step-by-step photo tutorial to guide you every step of the way.
Sewing mitered corners used to intimidate me–until I learned a clever shortcut method for making the task a breeze! Today, I’m going to show you use to sew mitered corners with professional results every time. This technique is perfect for making cloth napkins, blankets, or even burp cloths and other baby essentials.
This post contains affiliate links.
For today’s post, I am demonstrating how to sew mitered corners with a DIY fabric napkin project, but this same process will work any time you want to stitch a tidy mitered corner on any square or rectangle of fabric with an unfinished edge. Before you get started, you’ll need to have the following supplies on hand:
- Fabric piece
- Iron
- Seam gauge
- Marking pen
- Shears
- Coordinating thread
- Sewing machine
Check out my handy list of must-have sewing essentials.
How to Sew Mitered Corners (My Fool-Proof Shortcut Method)
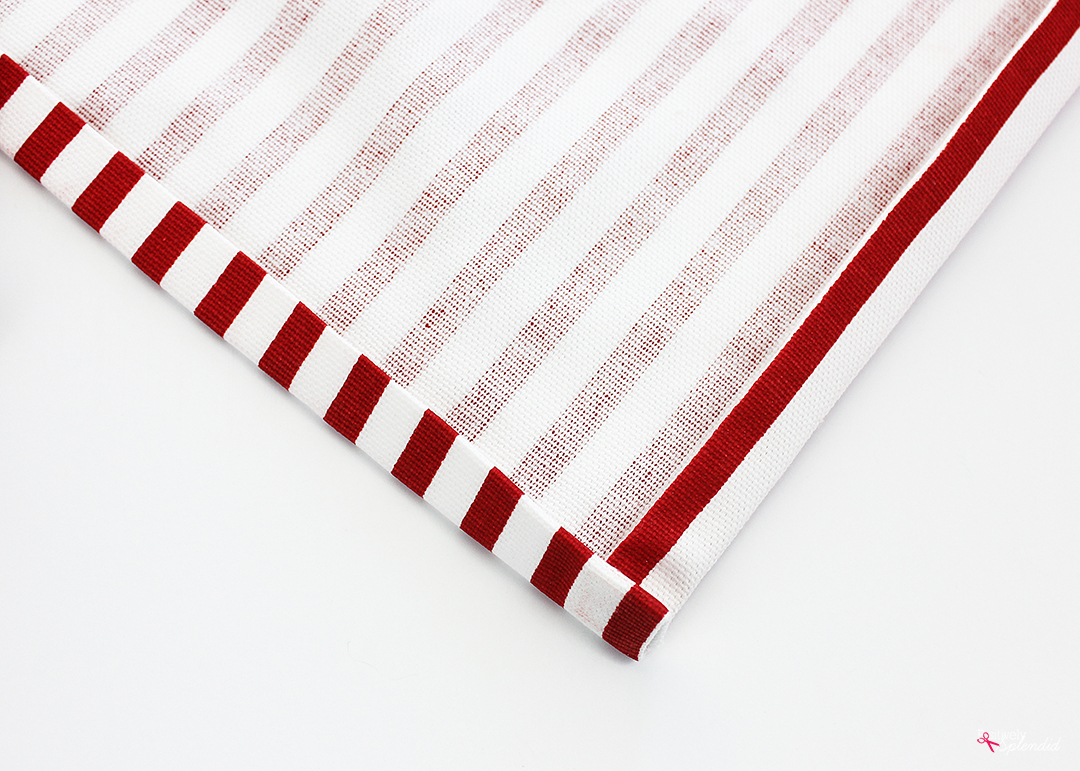
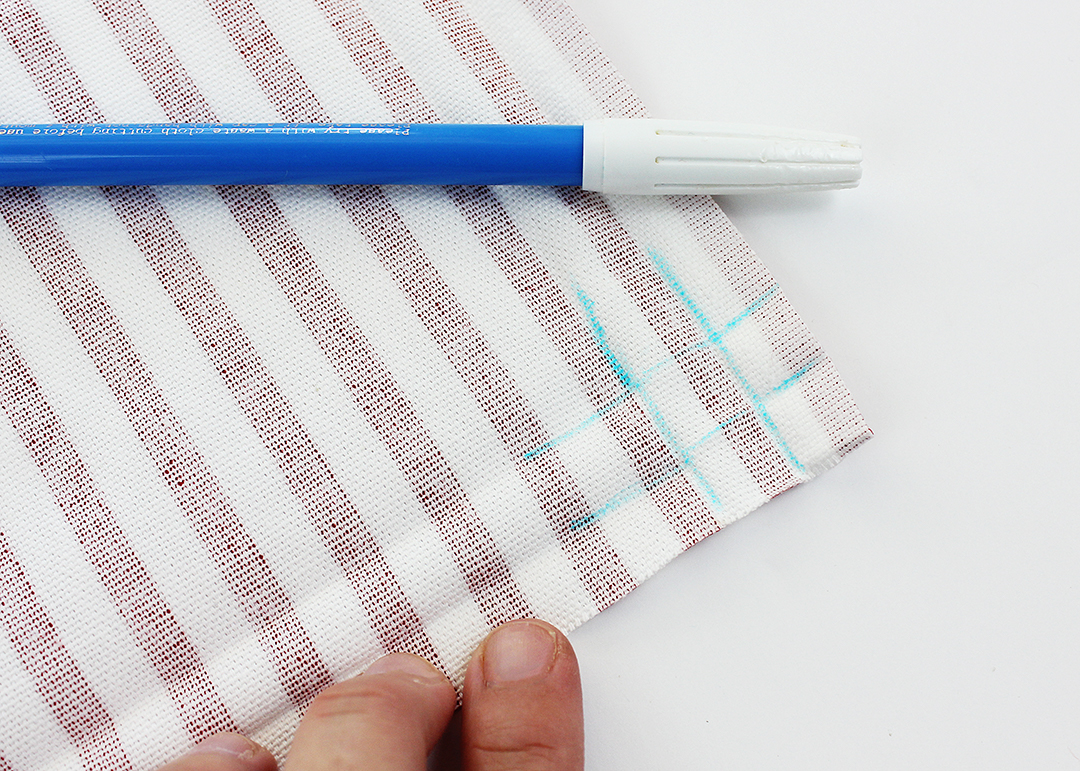
Place the fabric piece face down on a work surface. Using an iron and the seam gauge, fold up the top and bottom raw edges of the fabric piece by 1/4″. Press. Fold the same edges up by another 1/4″ and press again. Depending upon the weight of the material you are working with, use a good amount of steam to ensure all of the pressed lines are very crisp. Next, fold the remaining left and right edges of the piece and press in the same fashion. When you are finished, the corners of your pressed piece should look like this:
Open up the pressed folds. (This is why I recommended in the first step to apply a very generous amount of team as you press, since that will help make the pressed folds easier to see.) Use the marking pen to trace the two pressed lines along each adjoining edge, forming a hashmark where the lines intersect, as seen below. (As you become more familiar with this method, you might be able to skip this step, but it is very helpful as you get the hang on things!)
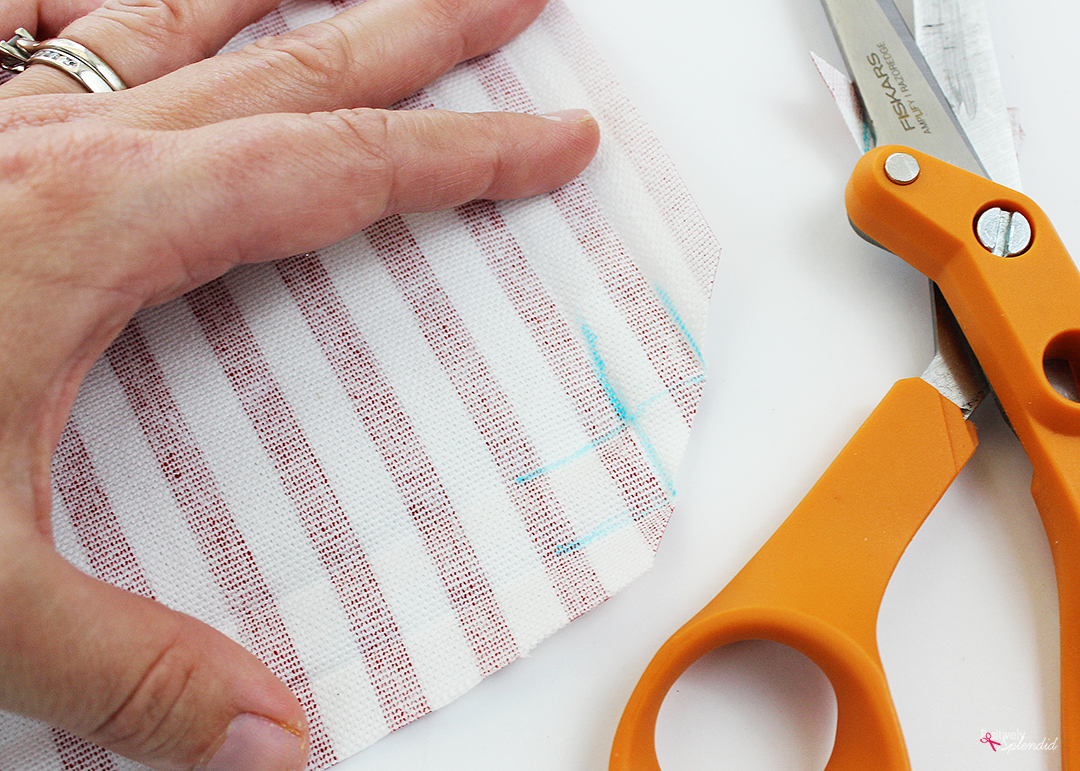
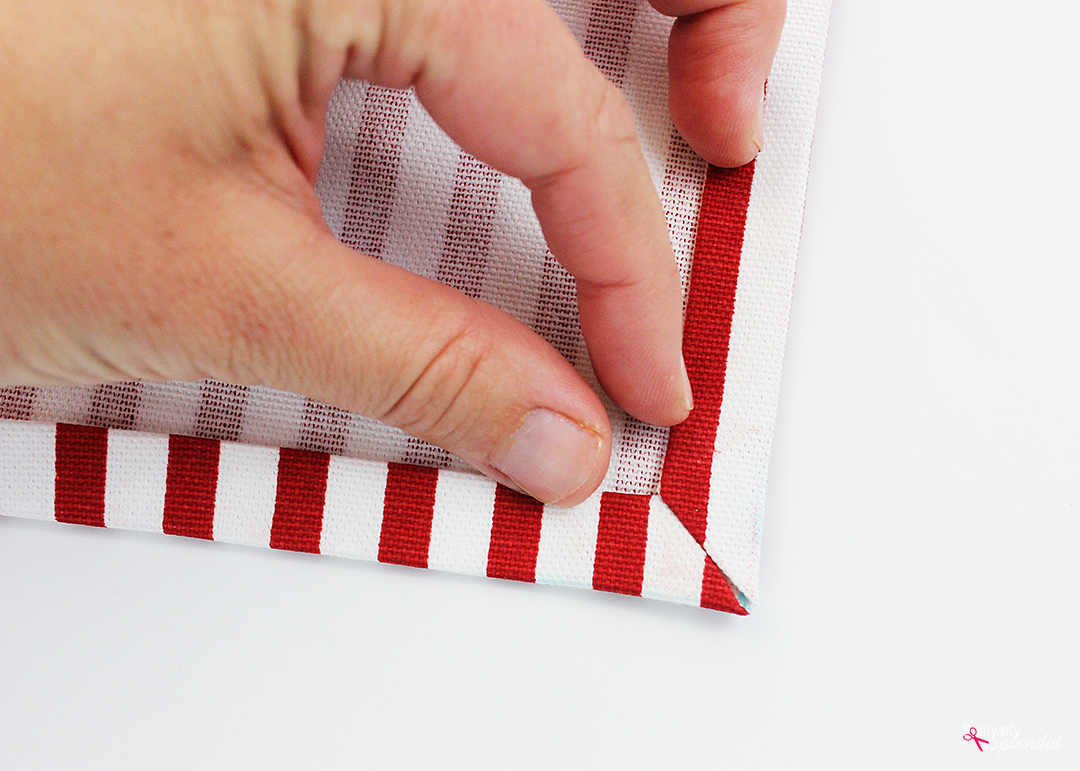
Use the shears to trim away the corner of the piece at a 45-degree angle, so that the square formed by the intersecting pressed lines is cut precisely in half.
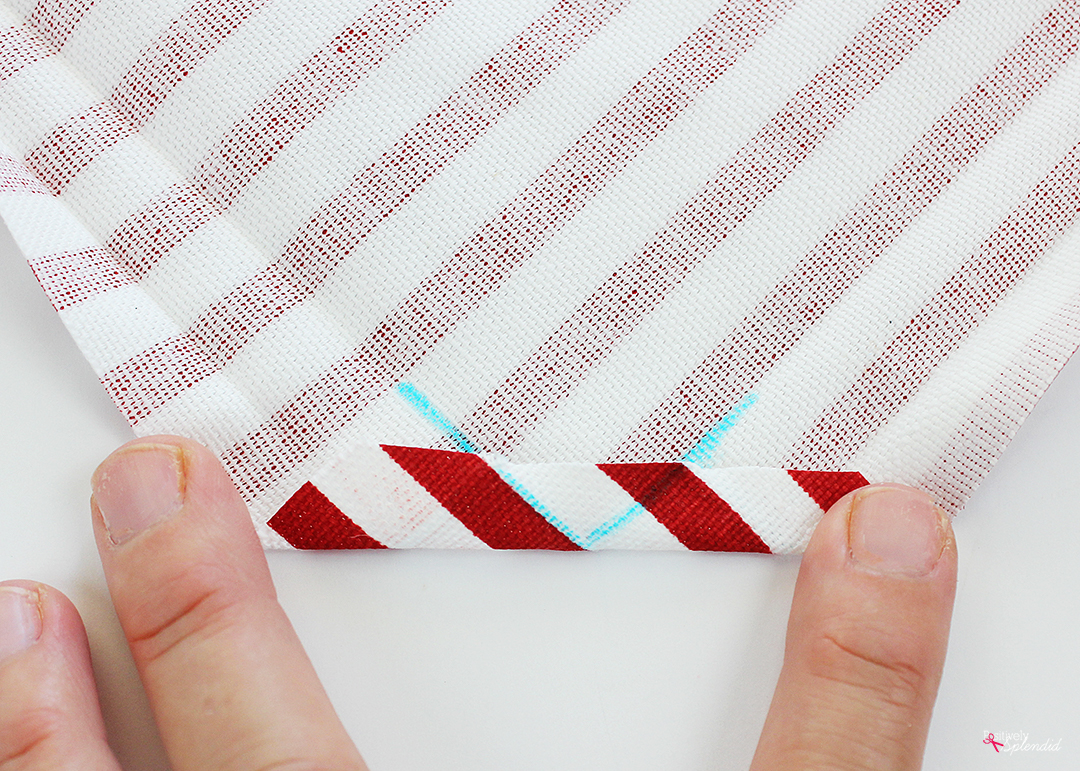
Fold the raw edge of the trimmed corner up by 1/4″, aligning the pressed seams so that the remaining sides of the square you trimmed in half are precisely aligned with the innermost pressed crease (see below). Press lightly to prevent pressing out the other folds.
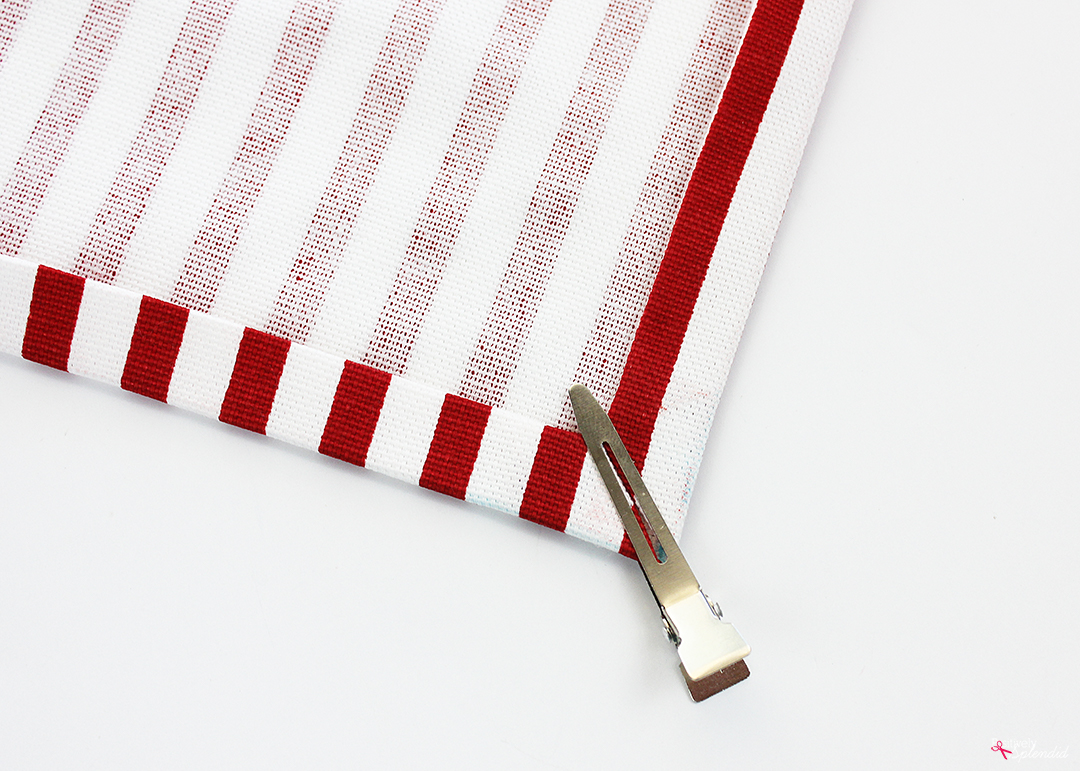
Fold the left edge along the previously pressed creases, as seen below…
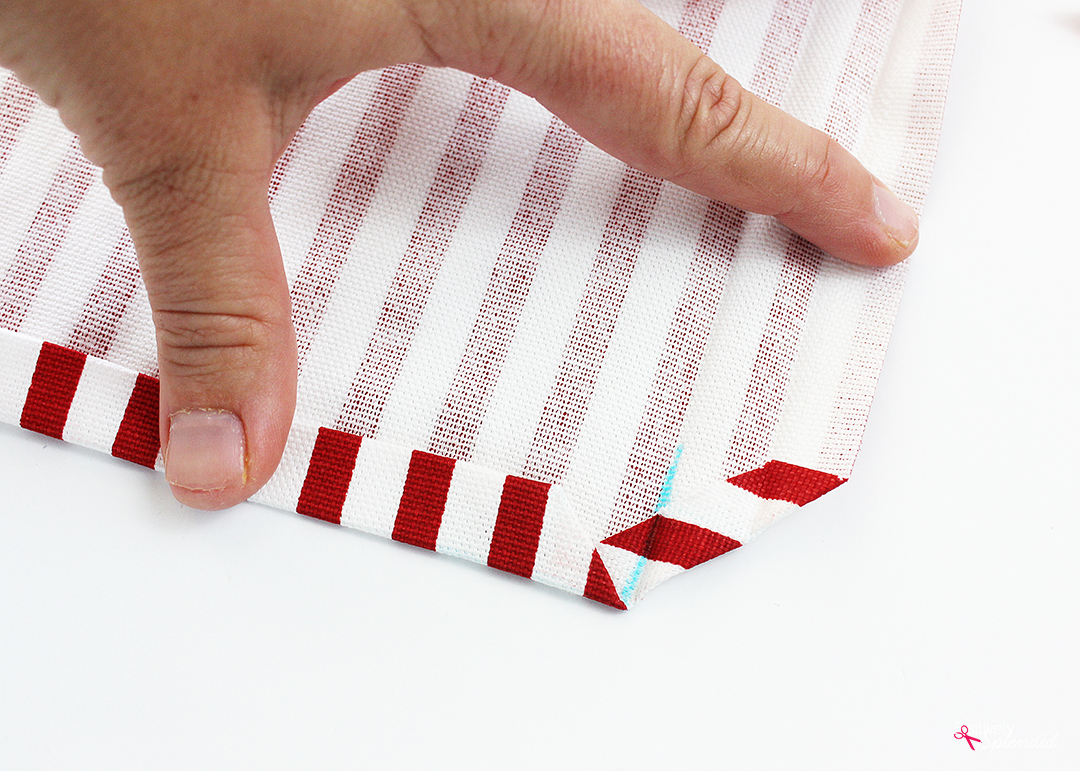
…before folding the right edge along its pressed creases. Press everything well.
Secure the pressed corner, either by pinning, or (my favorite handy method!) with a hair clip.
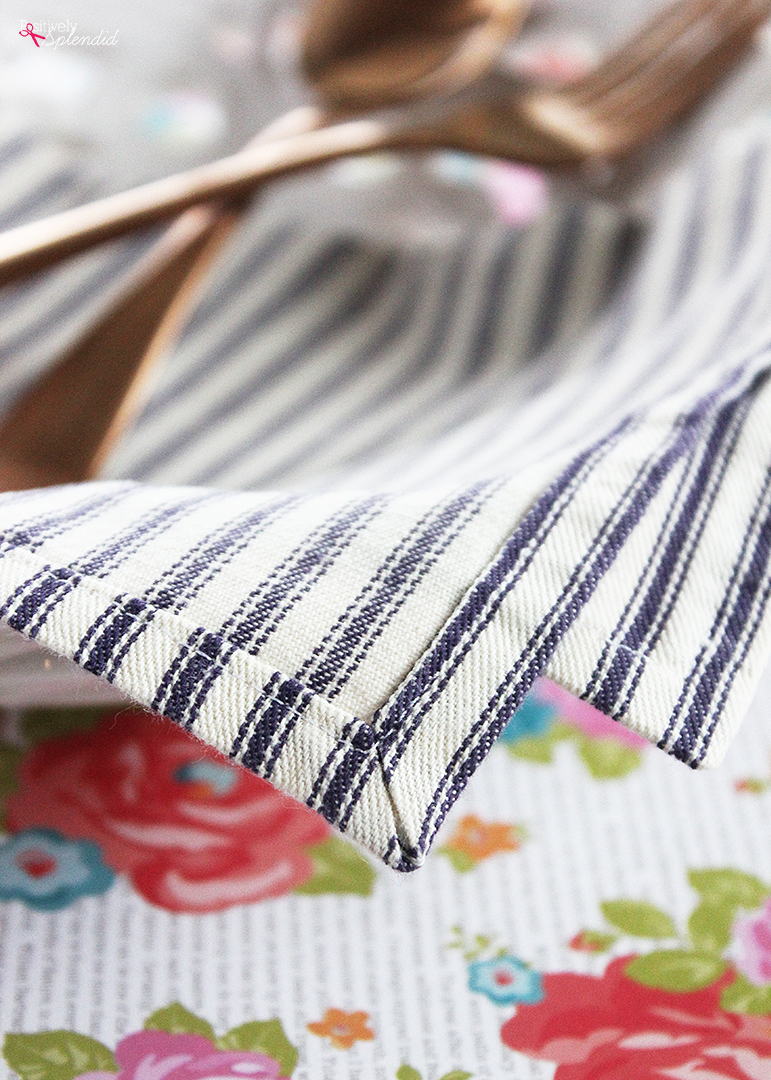
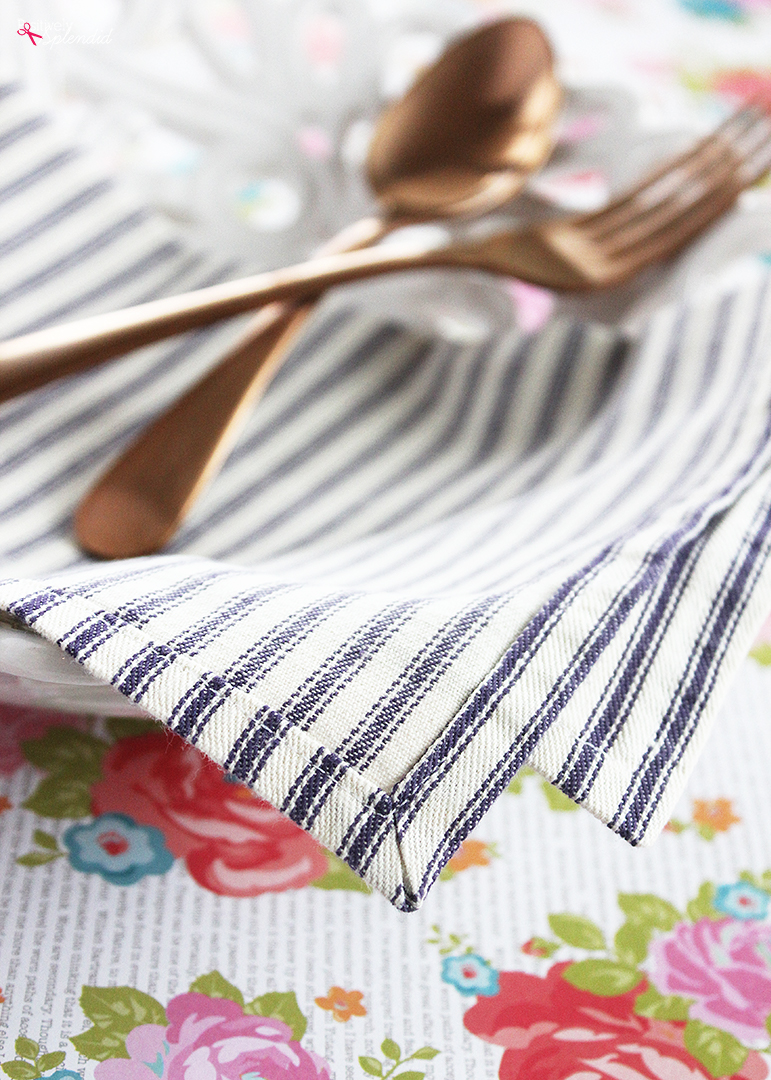
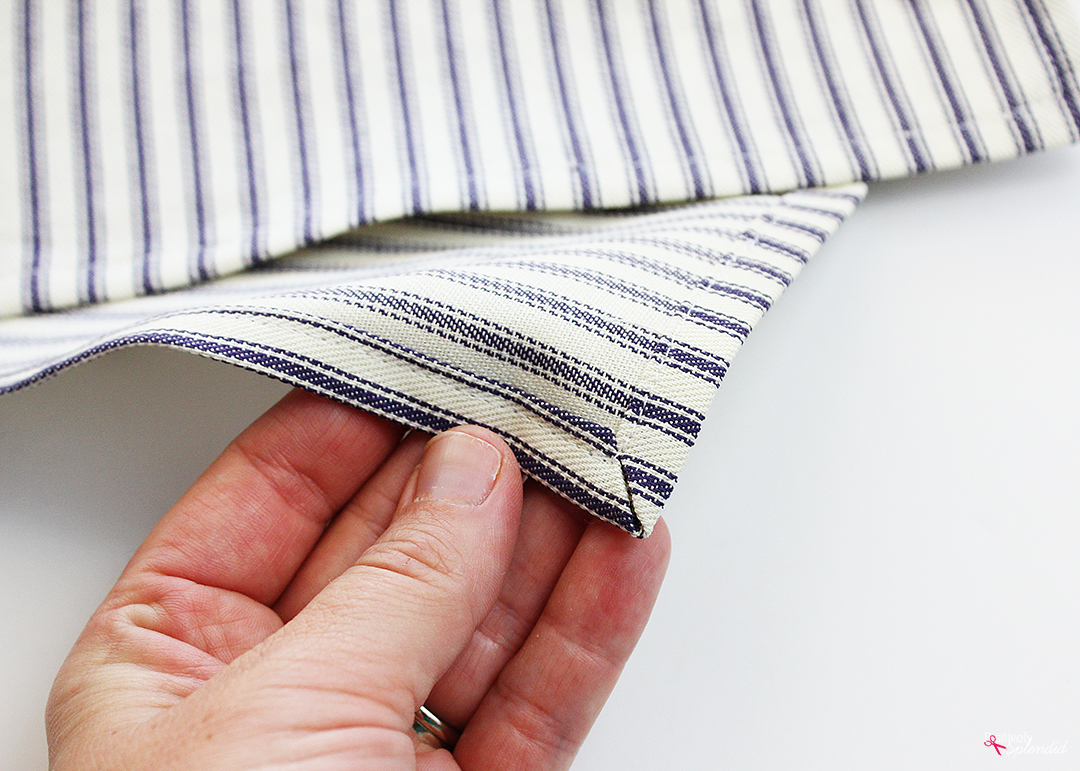
Repeat the preceding steps at the remaining 3 corners of the piece. When everything is pressed and secured, stitch around the entire perimeter of the fabric about 1/8″ from the inside folded edge, pivoting at the corners. Give the finished piece another good pressing before taking as step back to enjoy your beautifully mitered corners! (I somehow missed taking a finished photo of the project made with the red and white fabric above, but this blue ticking fabric was done with exactly the same method.)
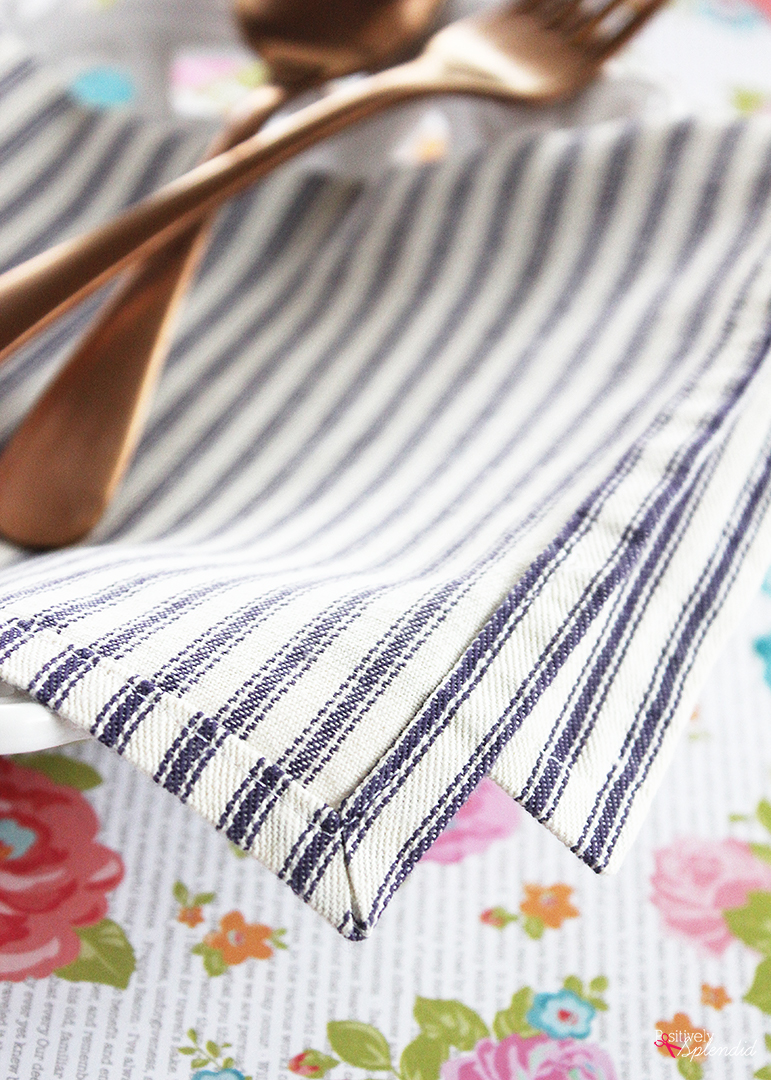
Once you see that sewing mitered corner is super simple with this easy method, you’ll want to add mitered corners to all the things! I love to make my own cloth napkins with this process. Ticking fabric is perfect for this, as it is durable and just the right weight for everyday use.
And now you will never again have to wonder how to sew mitered corners with professional, polished results every time!
Having grown up in a home brimming with sewing notions and paintbrushes, Amy has a deep love for all things creative. On any given day, you’ll find her knee-deep in her latest creative endeavor, with projects ranging from sewing and crafts to home decor and kid-friendly ideas. Amy believes that everyone, regardless of skill level or experience, possesses the ability to create something beautiful, and Positively Splendid was born of her passion for helping others harness their innate creative potential.
So many uses for this little trick
Thank you!
It really is a handy method! Thanks for stopping by, Dianne!
Oh my goodness !!! This is it !!!! Can’t wait to try this !!!!!
Awesome! I am glad you are excited to try this technique!
Thank you! You explained this so well and the photos are very helpful.
So glad you found this helpful, Michele! Thanks so much for stopping in!
I absolutely love the way you did the mitered corner,looks so easy compared to the way I do it,thank you so much for sharing your ideas,you are very blessed.
Thanks for that tutorial! Even though I have been sewing projects for my home for years, I have never learned how to do a mitered corner well. Can’t wait to try your method…it looks easy and crisp.
Thanks for the great tip!
I was wondering, if it is still possible to download your free printable,
“Sewing Project Planner”?
TIA,
deb
Can you tell me if this way can be done with making pot holders or explain to me how that would work please