• Skip to primary navigation
  • Skip to main content
  • Skip to primary sidebar

Positively Splendid {Crafts, Sewing, Recipes and Home Decor}

Handcrafted. Splendidly.

  • Home
  • Blog
  • + Handmade
    • Crafts
      • Craft Gift Ideas
      • Holiday Crafts
      • Home Decor Crafts
      • Kids’ Crafts
      • Paper Crafts
      • Quick and Easy Crafts
      • Wearable Crafts
      • Wreaths
    • Gift Ideas
      • Budget-Friendly Gifts
      • Gift Wrapping
      • Gifts for Dads and Grandpas
      • Gifts for Kids
      • Gifts for Men
      • Gifts for Moms and Grandmas
      • Gifts for Neighbors
      • Gifts for Sports Fans
      • Gifts for Teachers
      • Gifts for Women
      • Quick and Easy Gifts
    • Kid-Friendly Projects
    • Sewing
      • Sewing for Children
      • Sewing for Men
      • Sewing for the Home
      • Sewing for Women
      • Sewing Techniques
      • Sewn Accessories
      • Sewn Gifts
  • + Home & Garden
    • DIY Home Decor Projects
    • Helpful Tips
    • Home Decor Crafts
    • DIY
    • Home Tour
    • Mantels and Tablescapes
    • Organization
    • Outdoor and Garden
  • + Holidays & Seasons
    • Spring
    • St. Patrick’s Day
    • Summer
    • Teacher Appreciation
    • Thanksgiving
    • Valentine’s Day
    • Winter
    • Back to School
    • Christmas
    • Easter
    • Fall
    • Fathers’ Day
    • Graduation
    • Halloween
    • Independence Day
    • Mothers’ Day
    • New Year’s
  • + Printables
  • + Recipes
    • Soups and Stews
    • Appetizers and Salads
    • Breads
    • Desserts
    • Food Crafts
    • Main Dish

Painted Outdoor Canvas Floor Cloth

April 4, 2013 By Amy @ Positively Splendid

FacebookTweetPinYummlyPrint
Make a striking painted canvas floor cloth for your outdoor space with a bit of paint and a drop cloth. What a simple, stunning alternative to a pricier outdoor rug! PS Contributor Megan from The Homes I Have Made is here today to show you exactly how it’s done.

Hello PS Readers! It’s Megan, from The Homes I Have Made, back with another fun and simple tutorial that I hope will help make your home a bit brighter for Spring! The second the calendar officially rolled over to Spring a few weeks ago, I excitedly began pulling out our bright-colored outdoor furniture and accessories. One project that I didn’t get to last year was some sort of ground covering or rug for our covered porch, so it was at the top of my To Do List once it began to warm up!

This “rug” was very simple to make; and by using paints I had on hand along with a cheap canvas drop cloth from the hardware store, it was really affordable too! A few short hours of painting, and my porch is fresh and alive and ready for Spring!

Let me show you exactly how I did it!

I started with a 6’x9′ canvas dropcloth from the hardware store. Look in the paint section – there are lots of shapes and sizes to choose from. This one cost me about $10.


Before getting started, lay your drop cloth down where it’s going to be once finished to check the sizing. On my porch, it was just a little too wide and a little too long for my liking. To fix it, I cut off 11″ from both the length and the width and then hemmed it back up. I also took the time to iron out all those creases. When it came time for taping and painting, it was nice to have a smooth surface to work with.


Once the drop cloth is hemmed to the right size and pressed flat, wait for a clear, sunny day to do this project (unless you have a garage or workshop you can work in! I found the driveway the best place…) It was a slightly windy day, so I taped the cloth to my driveway to keep it from blowing away as I worked.


Using a ruler, a disappearing ink pen, and lots and lots of painter’s tape, tape out your desired stripe pattern.


You can certainly tape out any number and width of lines you’d like, but if you’d like to follow my stripes, here’s the pattern I used (done on a 45″ angle):


All the blue lines are stretches of blue painters tape. I used both 2″ wide and 1″ wide tape to achieve my pattern.
Next, it’s time to start painting. I used three different colors of latex paint that I had leftover from other projects around the house. The red is Rust-oleum’s Apple Red, the navy is Martha Stewart’s Azurite, and the turquoise is Martha Stewart’s Lagoon. I mixed all three paints with Martha Stewart’s fabric medium and applied it using a 4″ roller. The paint will bleed through the canvas so be sure to place a tarp or additional dropcloth under your dropcloth 😉

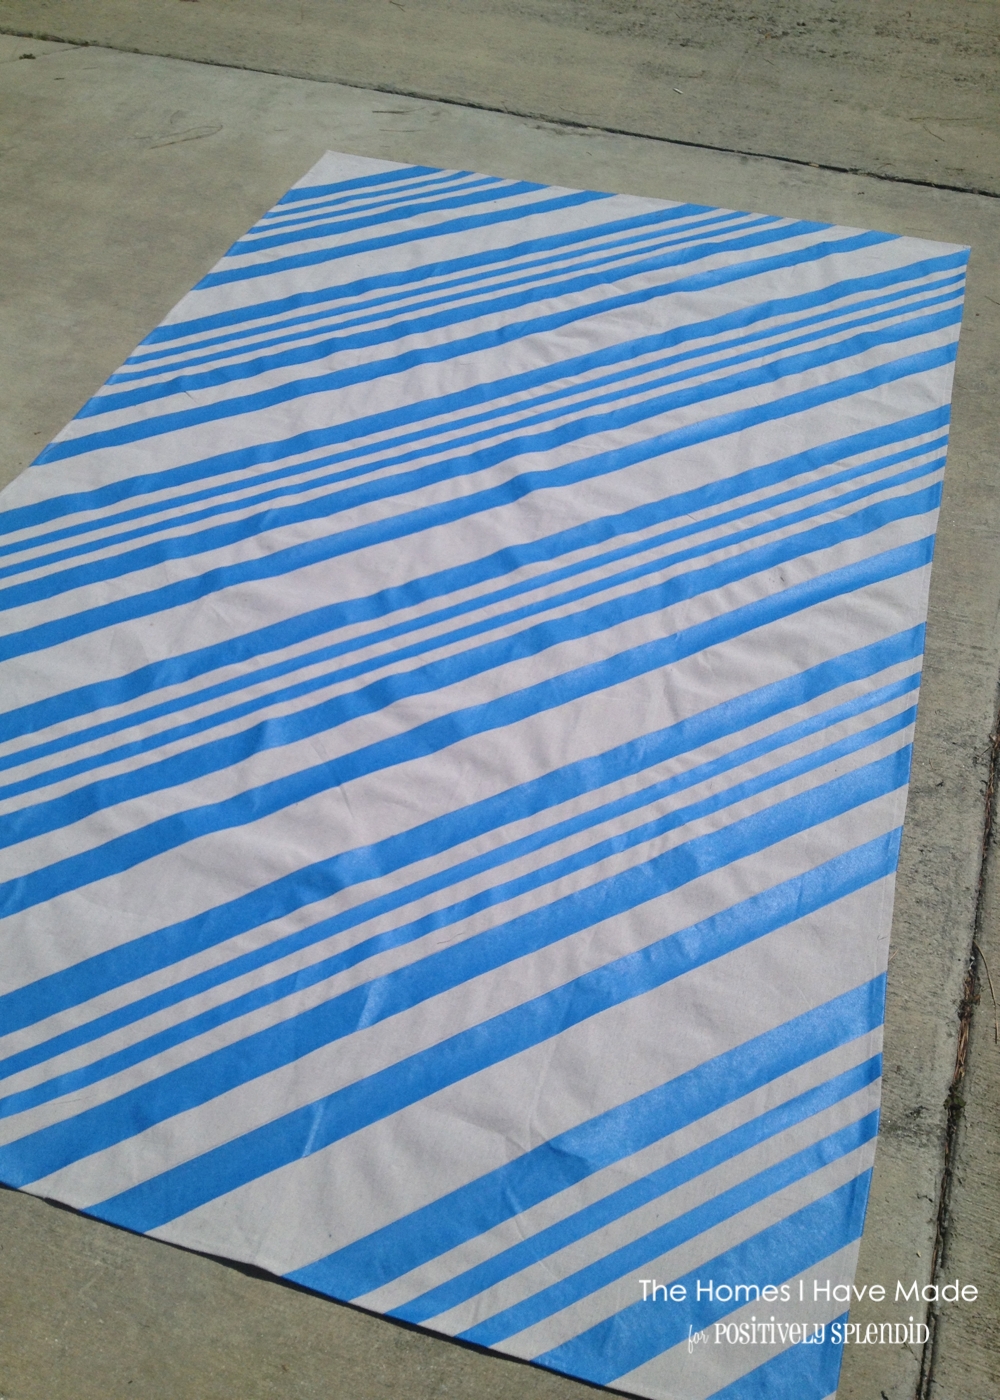
To replicate my pattern, start by painting the red skinny stripes and then the blue medium stripes; don’t paint the final turquoise color just yet!


First, paint the red…


Then paint the navy blue. Note – both the navy blue and the turquoise required two coats of paint; but it dries so quickly on the canvas, that you can apply one coat right after the other.


Next, remove ALMOST all of your tape. Peel off all the skinny tape from the red lines and the 2″ tape next to the navy blue stripes. Keep the 2″ tape that borders the red skinny stripes.


Before you paint the final color, re-tape OVER the navy blue stripe with the 2″ painters tape. You’ll see why we did this in a minute!


Now, go in and paint your third color, in my case, the turquoise!


When you remove all the tape, you are left with a pretty spectacular pattern! By taping over the navy blue stripe before painting the turquoise, the two colors are right next to each other instead of having a canvas-colored line in between.


I gave the canvas overnight to fully dry. I then heat set the entire dropcloth with a hot iron and press cloth before placing it on the porch and adding some of our Spring accessories!


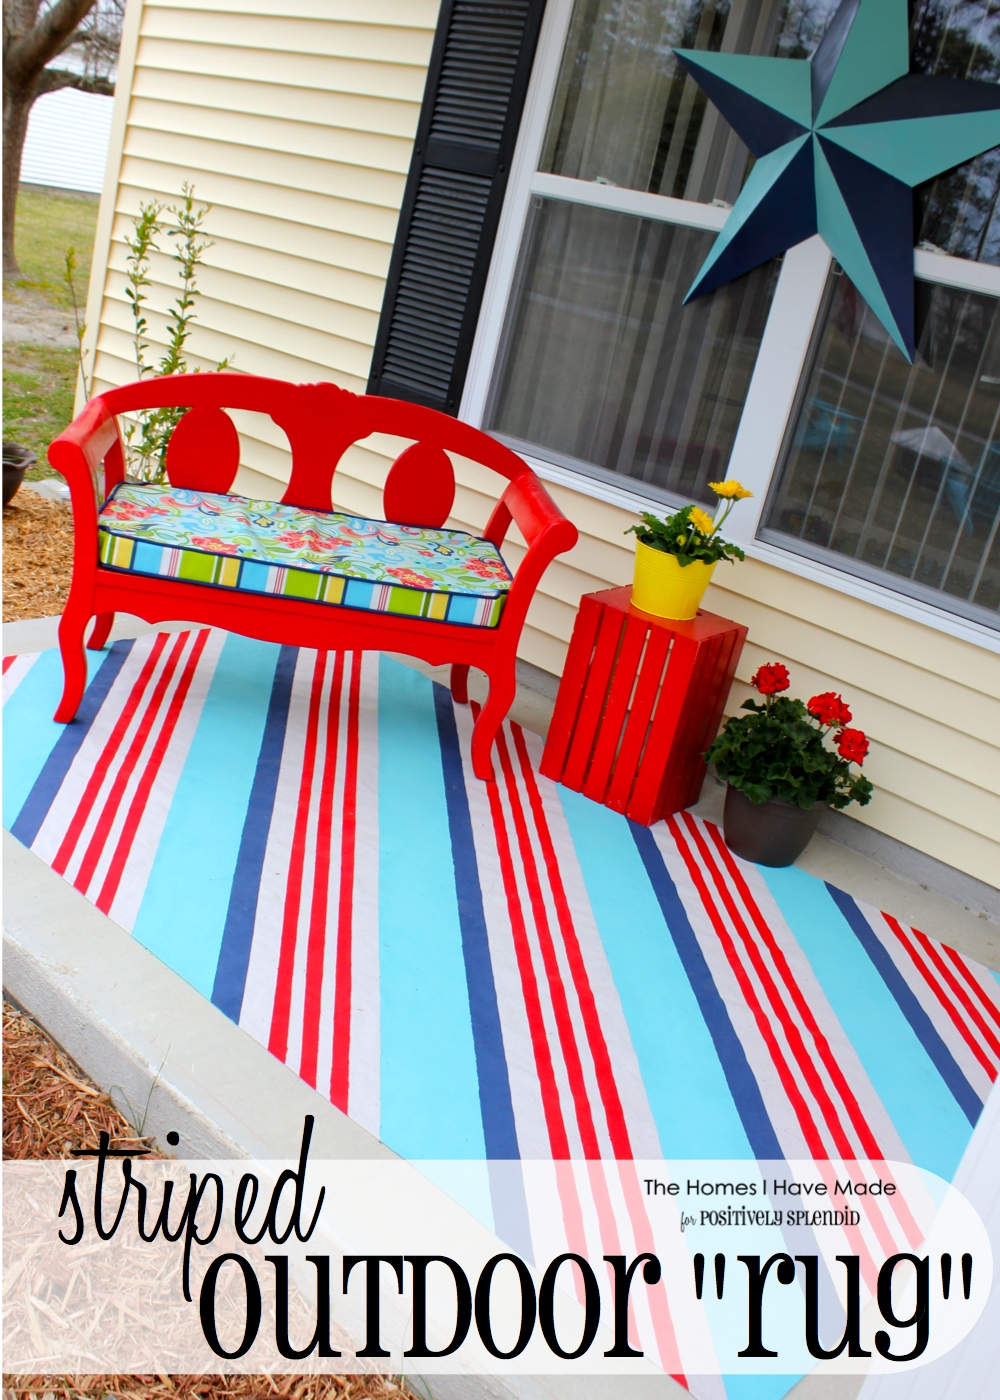
Our red bench with flower cushion (made over last year), a red crate acting as a plant stand, and some bright Spring flowers bring the whole front of the house to life!


I also added a painted star to our big front window. Are you curious how I did it? Head on over to see me today at The Homes I Have Made and I’ll show you exactly how!


Just add a book and a glass of lemonade and I am ready for some warm-weather relaxing!


Thanks, as always, to Amy for the opportunity to be here with you today! See you all next month!

Thanks to Megan for stopping by to share this terrific idea today. Get to know a bit more about Megan by checking out a terrific about-me post she recently shared at The Homes I Have Made!

Amy @ Positively Splendid

Having grown up in a home brimming with sewing notions and paintbrushes, Amy has a deep love for all things creative. On any given day, you’ll find her knee-deep in her latest creative endeavor, with projects ranging from sewing and crafts to home decor and kid-friendly ideas. Amy believes that everyone, regardless of skill level or experience, possesses the ability to create something beautiful, and Positively Splendid was born of her passion for helping others harness their innate creative potential.

EVEN MORE GREAT IDEAS JUST FOR YOU!

FacebookTweetPinYummlyPrint

Filed Under: Crafts, DIY, Home Decor Crafts, Home Decor Crafts, Positively Home & Garden, Positively Seasons, Spring, Summer, Tutorials Tagged With: Crafts, DIY, Outdoor, Paint, Rugs, Tutorials

Previous Post: « DIY Office Chair Slipcover
Next Post: Free Parenting Webinar with Positive Parenting Solutions! »

Reader Interactions

Comments

  1. Ann says

    April 4, 2013 at 7:45 am

    Oh my gosh you make it look so easy! I’m pretty sure this would take me a long time but it would be so worth it in the end. Love the bright colors too!

  2. Beth Perry says

    April 4, 2013 at 7:56 am

    what an awesome tutorial!! thanks for sharing!

  3. Diane | An Extraordinary Day says

    April 4, 2013 at 8:09 am

    Your rug is beautiful! I made one last summer and used a paintbrush which laid down a bit more paint than I could with the roller and really was quick to do. I’m wondering about the heat setting. Is that really necessary? My paint really seemed to become one with the canvas. My biggest concern is for the unpainted canvas which looks so snappy. I noticed that it easily gets dirty and isn’t easy to clean. I was thinking of coating it front and back with a sealer of some type…and that’s where the project gets expensive. I’m interested to hear how your rug fairs with the elements and soil. I pulled mine up and am not using it until I get that last detail worked out.
    Blessings!

    • Jenni says

      August 18, 2013 at 1:55 pm

      you can paint it with a non yellowing varnish to protect it. then you could sponge wash it.

  4. Gina says

    April 4, 2013 at 8:58 am

    If this gets rained on will it be ruined?

  5. Carrie - Worth Pinning says

    April 4, 2013 at 10:04 am

    Megan- I really love it. Looks like you have it in a non-traffic pattern area. Can you wash the painted drop cloth when it starts showing signs of dirt?

  6. Crystal says

    April 4, 2013 at 10:37 am

    Love the rug!! It’s so fun and bright!!! Love it!!

  7. Laura Bray says

    April 5, 2013 at 11:35 am

    I was wondering how you can keep it down? Maybe some two-sided tape? Once you start walking on it, does it get bunched up? I love, love, love your porch! Can I come over for some lemonade?

    • Amy @ Positively Splendid says

      April 9, 2013 at 11:02 am

      Carpet tape might be a great option for preventing the rug from slipping. Thanks for stopping in!

  8. PiperPixieDesigns says

    April 6, 2013 at 4:11 pm

    This is AMAZING! Super brilliant idea, thanks for the post!

Primary Sidebar

PS Search

Search this website

Seasonal Inspiration

Hocus Pocus Wreath
Ghost Plushies
Paper Pumpkins
Fabric Yo-Yo Pumpkins

Copyright © 2025 · Positively Splendid · All Rights Reserved. · Privacy Policy

Privacy & Cookies: This site uses cookies and other tracking technologies to assist with navigation and your ability to provide feedback, analyse your use of our products and services, assist with our promotional and marketing efforts, and provide content from third parties. To find out more, as well as how to remove or block these, see here: Our Cookie/Privacy Policy