Always be prepared with this handmade portable first aid kit! Continue reading for this DIY tutorial for how to sew a small first aid kit to take on the go.
As a mom, I always try to be as prepared as possible for unexpected injuries and boo-boos, and I like to have a portable first aid kit to take with me on family outings. I can’t begin to count how many times my small kit of first aid supplies has come in handy over the years! This easy first aid kit sewing tutorial is a great sewing project no matter your level of sewing experience, and it is a great project to use up fabric scraps from your stash.
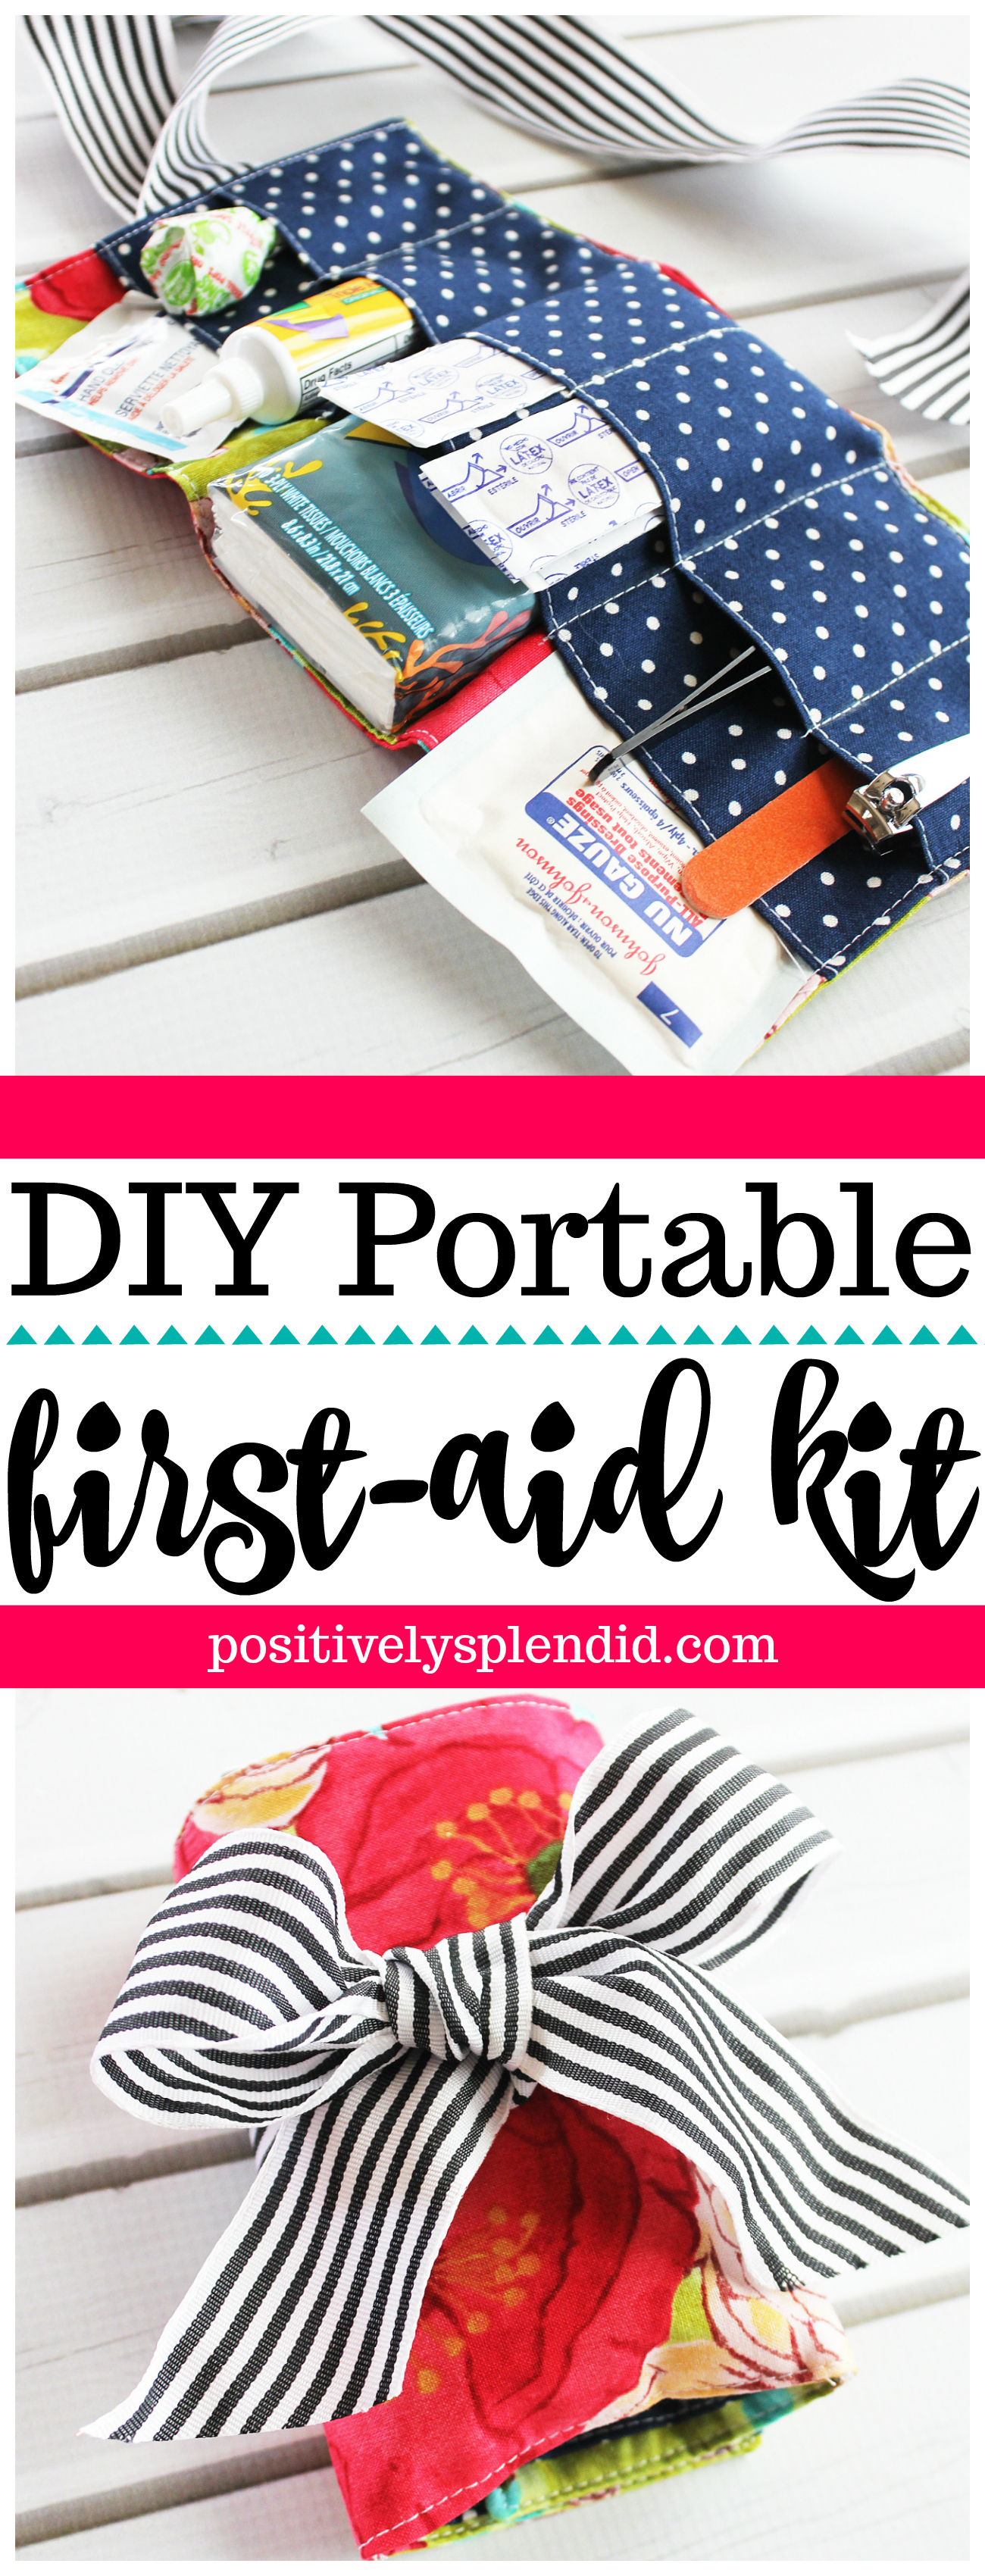
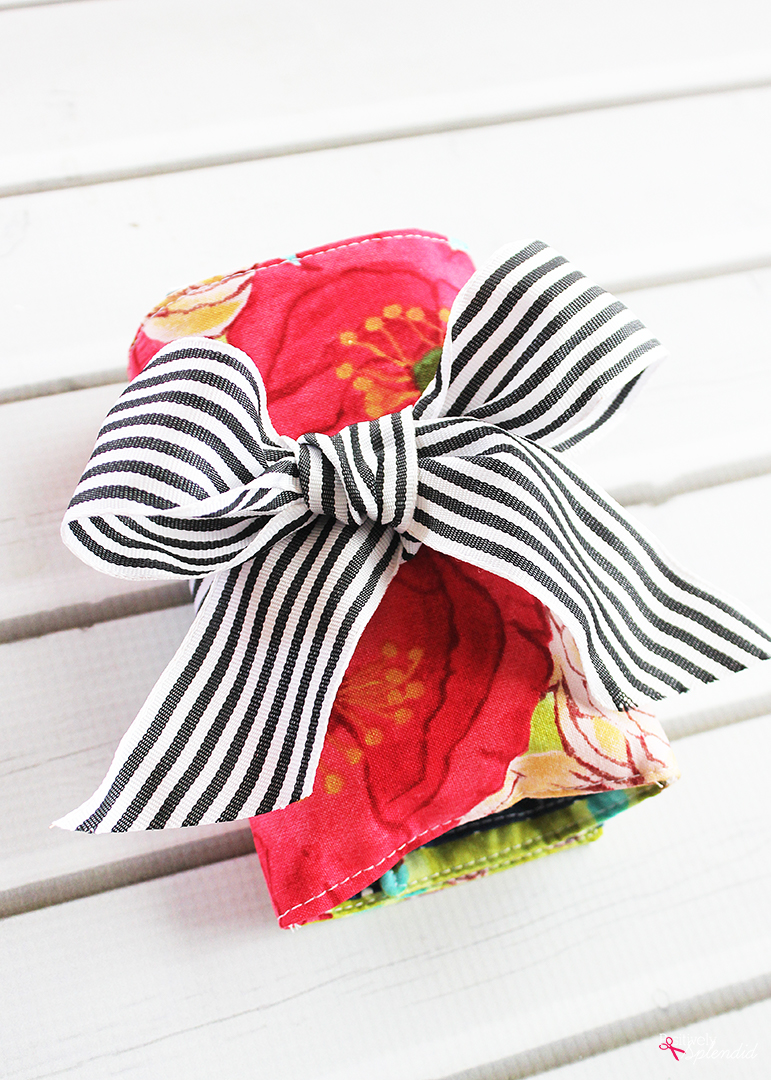
I am always on the hunt for unique gift ideas for family members, teachers, friends, and more. This first aid kit roll is the perfect combination of function and style, as essential first aid supplies are stowed away in an attractive fabric organizer, complete with a pretty bow. Tucked in a glove box, brief case, diaper bag or gym bag, this is one gift that is sure to come in handy!
To make this portable first aid kit, you will need…
- Fabric in two coordinating patterns
- Light-weight fusible interfacing
- Coordinating thread
- Washable ink marker
- Ruler
- Ribbon
- Basic sewing supplies: machine, shears, etc. (Check out my list of must-have sewing tools)
- Rotary cutter and mat (optional, but recommended)
- First aid supplies (see below for details on where I purchased all of the supplies for my kit)
List contains affiliate links
- 1 outer piece, 1 main inner piece and 1 piece of interfacing that are each 6×11″
- 1 pocket piece that is 13×11″
- 2 pieces of ribbon that are 16-18″

Fold up the opposite edge 4″; press. (The raw edges of each folded section should just meet.)

Now, fold the 2.5″ section up and over the 4″ section, as shown. Press. It’s looking like we’ve got the makings of a pocket!

Grab your washable ink marker, and make a set of marks 2″ from the left edge of the narrow (2.5″) section of your pocket. Position the marks so that one is toward the top of the section and the other is closer to the bottom, as shown.

Make another set of marks 1.75″ from the first set. Make 4 additional sets of marks in the same manner, leaving 1.75″ between each set. There should be 2″ between the last set of marks and the right-hand side of your pocket piece.

Use your ruler to draw lines to connect each pair of marks. You will have 5 lines total, which will divide your pocket piece into 6 sections.
Now, use your ruler to lengthen the 2nd and 4th marks so that they extend onto the wider flap of your pocket piece, as well.

Open up your pocket piece. Edge stitch along both of the folded edges.

Refold the pocket piece so that the narrow flap is once again on top of the wider flap. Stitch down the 1st, 3rd and 5th lines from the top to the bottom of the narrow flap, using the lines you drew earlier as your guide.

Place the main inner piece face up on your work surface. Position your pocket piece on top of the main inner piece so that the bottom edge of the pocket piece is 1/2″ from the lower edge of the main inner piece. Pin. Edgestitch along the lower edge of the pocket piece to secure it to the main inner piece.

Now, stitch along the 2nd and 4th lines on your pocket piece, from the very top of the pocket (including the wider flap portion) to the very bottom, as shown.

Stack your ribbon pieces, right sides facing, and pin them to the right edge of your inner piece. Baste 1/8″ from the edge to anchor them in place. Pin the tails of your ribbon pieces at the center of the piece, as shown, to keep them out of the way in the next step.

Fuse the interfacing to the wrong side of your outer piece.
Place the inside piece face up on your work surface. Place the outside piece face down on top of the inside piece, so that the right sides of each are facing. Pin.

Using a 1/4″ seam allowance, stitch around the perimeter of the joined pieces, leaving a 3″ opening at the bottom for turning. Snip corners and turn. Helpful hint: Remove the pin anchoring your ribbon strands and gently pull the ribbon through the opening to help you with this process.

Press the assembled organizer flat before edgestitching around the perimeter of the piece, closing the 3″ opening you used for turning as you go.

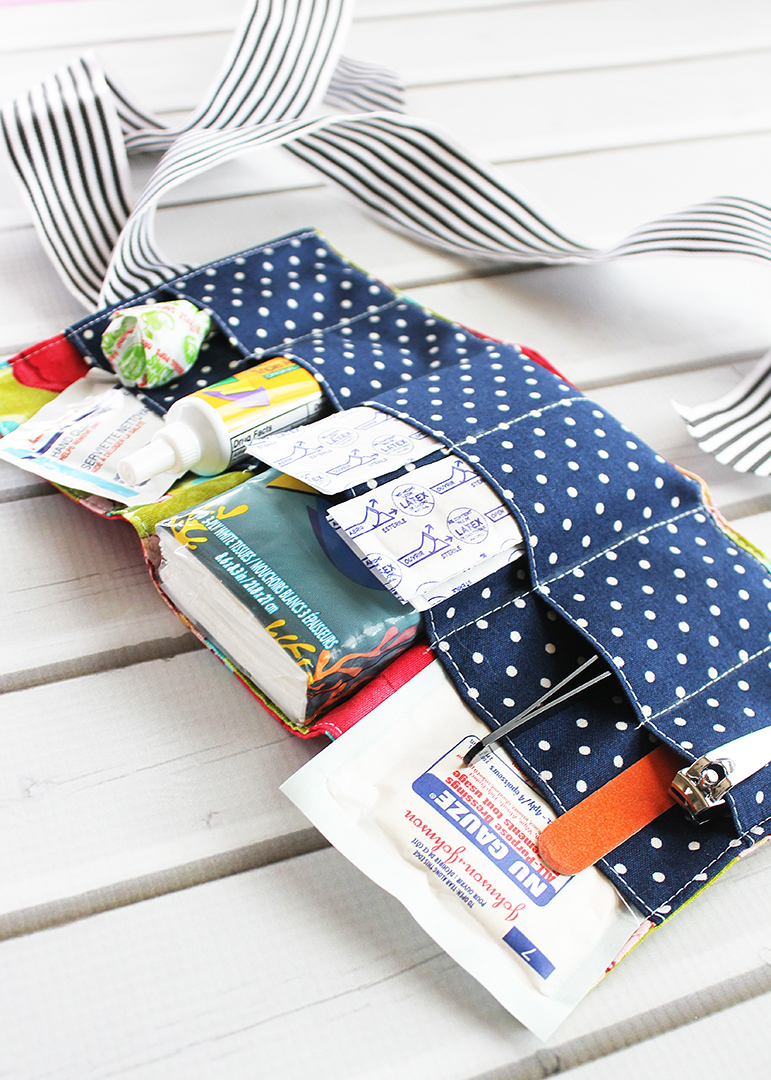
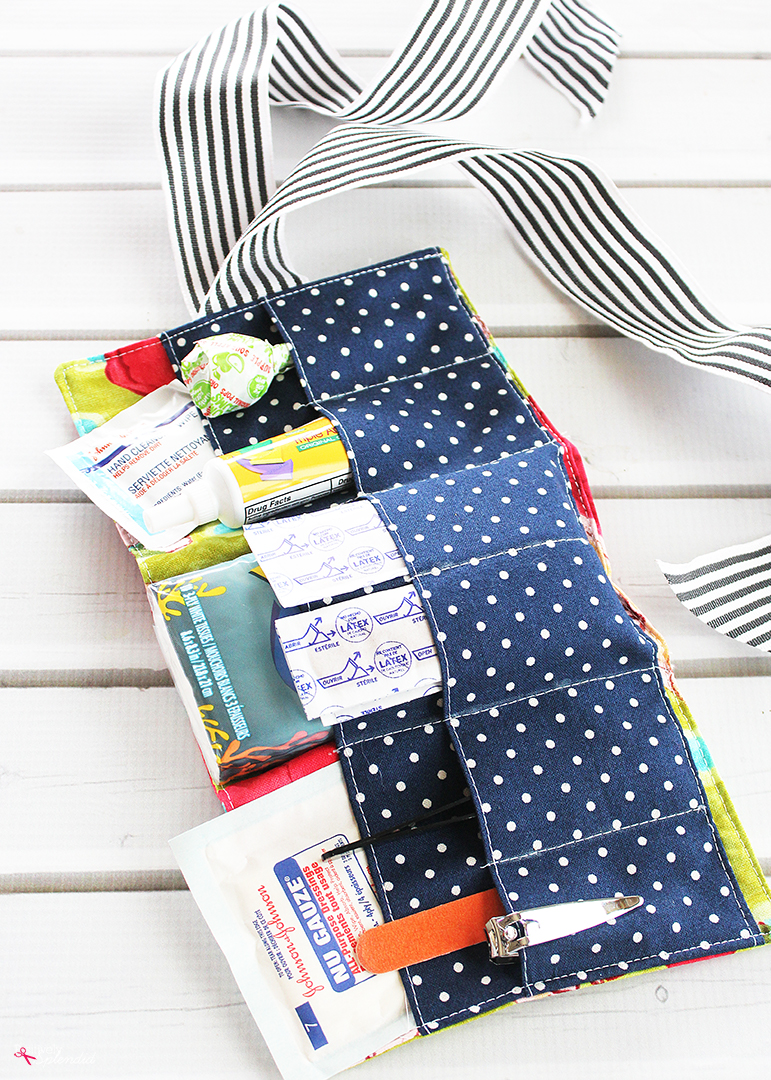
In no time at all, you’ve whipped up a portable first aid kit to take along anywhere!
The pretty, feminine appearance of this roll…
…belies the fact that it is a veritable first aid command center for on the go!
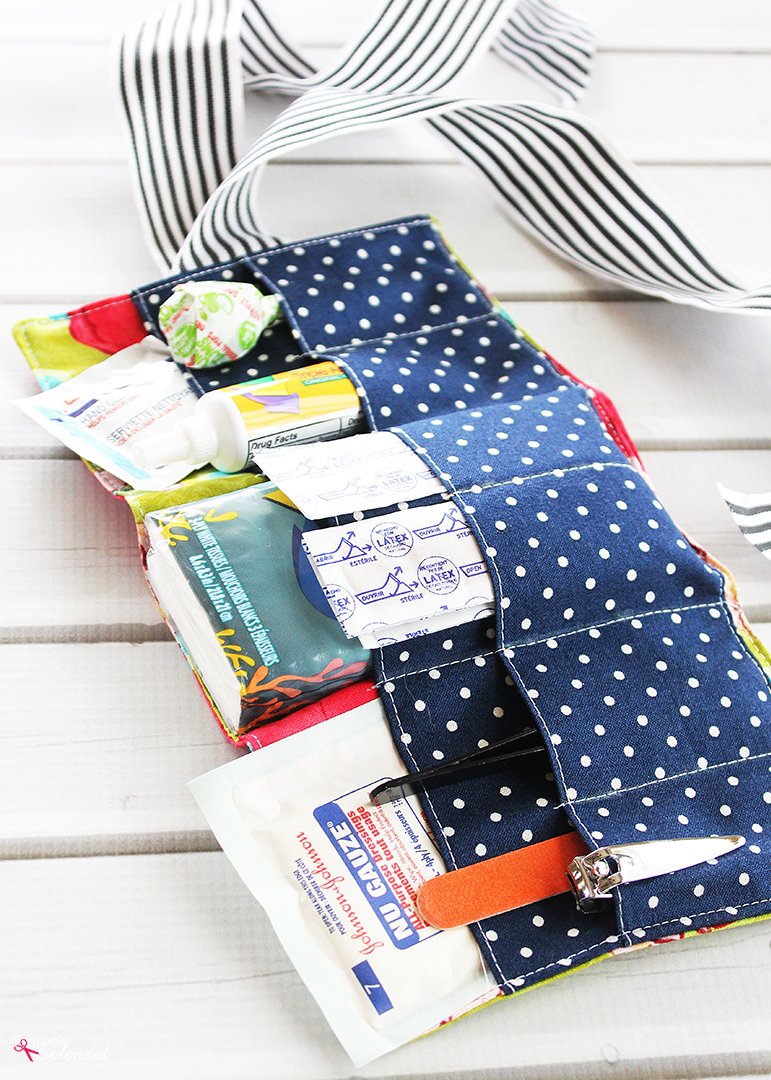

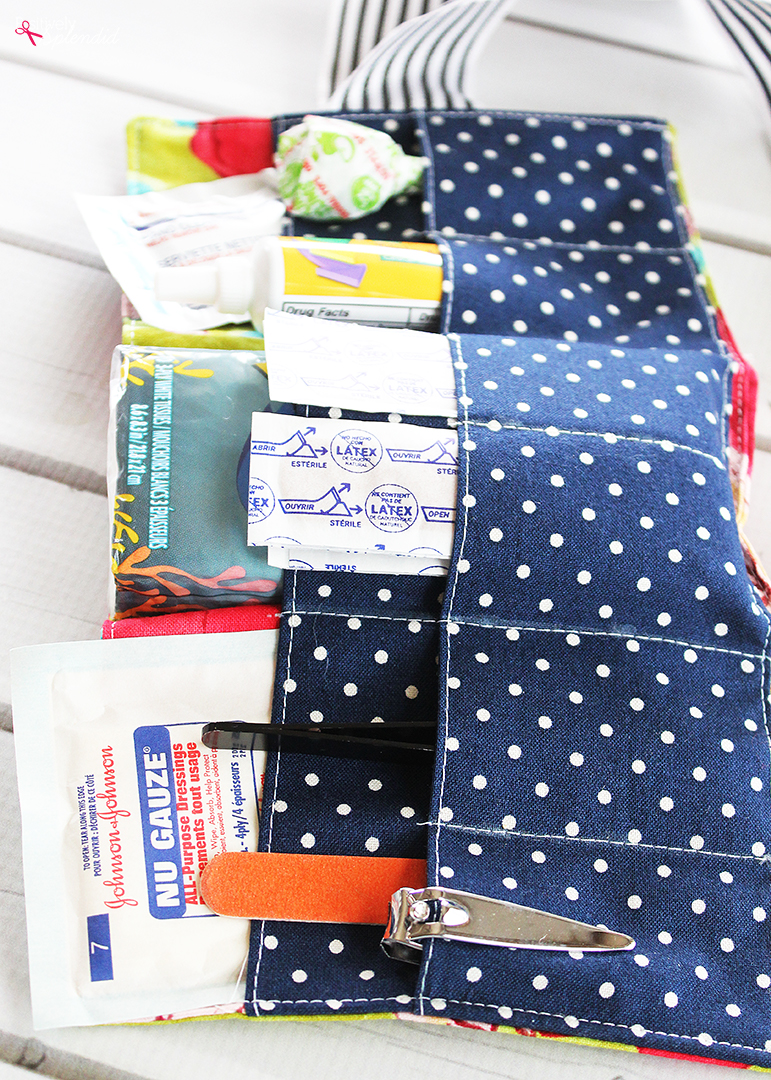
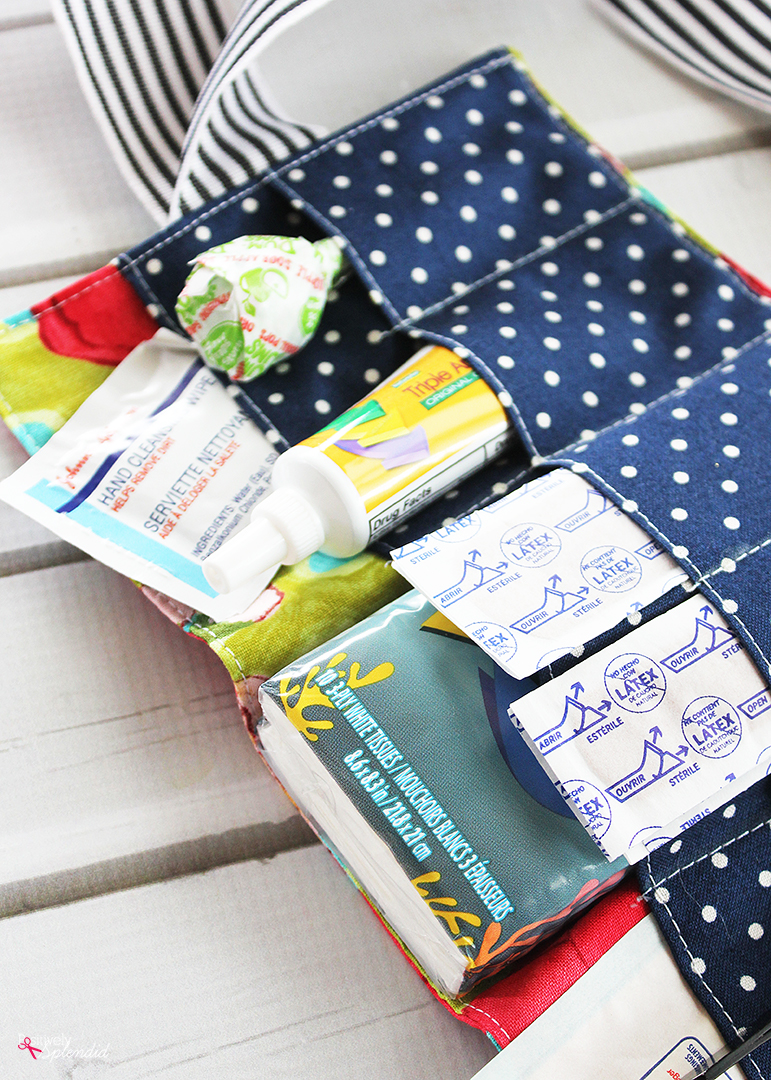
I filled my portable first aid kit with the following supplies:
- Gauze squares, alcohol wipes, band-aids
- Pocket-size Kleenex
- Chapstick
- Antibiotic ointment
- Tweezers
- A lollipop (Because anyone knows a lollipop can make even some of the worst boo-boos feel better.) 😉
Please remember that all of my patterns, including this portable first aid kit, are for personal, non-commercial use only. You may not use this pattern to make items to sell, but you can feel free to use it to make as many gifts or kits for personal use as you like. Thank you!
Having grown up in a home brimming with sewing notions and paintbrushes, Amy has a deep love for all things creative. On any given day, you’ll find her knee-deep in her latest creative endeavor, with projects ranging from sewing and crafts to home decor and kid-friendly ideas. Amy believes that everyone, regardless of skill level or experience, possesses the ability to create something beautiful, and Positively Splendid was born of her passion for helping others harness their innate creative potential.
I love this but I don’t sew! Would anyone like to make one for me?
Vicki, if you are interested, I’d be happy to make one to sell to you. Email me at amy (at) positivelysplendid (dot) com. Thank you! 🙂
I love this! As a mom of three, I have those really ugly store bought first aid kits in the car. Well, today I will be making a pretty one! 😉 Thanks for the tutorial. Have a great week.
Terrific, Christy! So glad you like the tutorial.
Your mom would like one in her stocking…just saying!!!
I’ll keep that in mind, Mom! 🙂
I love this! I don’t sew but my mom does 😛
Maybe you can convince her to whip one up for you. 🙂 Thanks for stopping in, Patty!
Would you be willing to sell me one of these?
Absolutely, Connie! Email me, and we can discuss pricing. amy (at) positivelysplendid (dot) com.
I love this project. Is it okay with you if I pin it to my Sewing board on Pinterest?
Absolutely, Sandy! I would love for you to pin any of my projects. 🙂
I know now what I am making for Christmas for those Motorcycle riders in the family. Thank you.
Terrific, Patty! So glad you’ll be able to use this tutorial.
Love this, Amy! With a couple filler modifications, this would also be great for my daughter’s backpack – chapstick, bandaids, hair ties, lollipop…
Thanks, Stef! I agree – there are so many possibilities. 🙂
I absolutely love this idea, Amy. Cheery fabrics and all:) I’ve been working on my own design for about two weeks after I saw one that is used by black ops called a medical bag roll with a rather hefty price tag.
I’m not a great sewer, but my head has been spinning with ideas on how to make it happen with minimum sewing. My main one will be larger, with rugged material, waterproof if possible, but there is no reason I can’t have a pretty little girly one for my mini version, including some candy:) I’ll be experimenting – that’s the fun part anyway:)
Besides, our local dollar store just added an entire section of first aid related stuff and I got a little carried away with emergency preparedness with Sandy on my mind. So now I need organization.
Found you via pinterest – great blog!
Thank you so much for the comment, and also for the dollar store tip! I’ll have to check my local store to see what kind of selection they have. I am glad you found your way here, and I hope you’ll stop in again soon!
Your blog is so bright and fresh, just like the fabric you used :). Love this!
I have a weekend party I’d love for you to share this on:
http://westernwarmth.blogspot.com
Thanks!
Bobi
Thank you so much, Bobi!
Love this and the mani/pedi, it’s a really great gift idea. I’m pinning this
This is awesome Amy! Love it!
Thanks so much, Desiree!
Super cute! I’d love to have you join my Pin Me Linky Party because this is an awesome idea!
Thanks for the great tutorial. I love this idea. I always seem to be digging to the bottom of my bag for a bandaid or something that ends up being wrinkly and no good when I find it.
Donna @onceuponasewingmachine.com
Thanks, Donna! So glad you like this idea. 🙂
So cute!!! Love the idea! Thanks so much for sharing the great tutorial!
Happy weekend !
Hugs from Portugal,
Ana Love Craft
http://www.lovecraft2012.blogspot.com
So adorable!
what a lovely gift or stocking stuffer idea! I would be honored if you shared this at my Ginger Jamboree Link Party!
Who says essentials have to be utilitarian?! Great tutorial; pictures and steps are very clear. Thanks for sharing it.
Thank you, Amy! So glad you could stop in.
Hi. Thanks for the clear tutorial. I made 2 tonight one to keep and one as a gift and it was such a satisfying little project to complete in an evening.
Hello, last week I noticed the tutorial as a popular pin and would like to make the kit as gifts, but the pictures are not displayed as they “contain errors” (so stated when I click on them). This is the same case for the equally excellent looking mani-pedi kit. I hope you can fix the issue, so that I can get on to making them both! Thanks 🙂
Sheela, thanks so much for letting me know. I’ve reported this issue to my web expert, and I’ll hopefully get things resolved soon. Thanks so much!
I made one fatal error in this how-to. I read the instructions on the folding up and pressing section to make the inner pocket, and the directions stated “Place your pocket piece face down on your work surface. Fold up one of the short edges 2.5″; press.” When in fact, it seems as if I should have folded one of the long edges. My pocket piece is now 2″ longer than my backing piece, and my pocket is slimmer than it should be. Other than that, it’s great.
Hi, there! I am sorry you are experiencing difficulties. After looking at the tutorial, it is indeed written correctly. I have a feeling you might have folded up the 13″ (longer) side of the pocket piece instead of the 11″ (shorter) side of it, which would have resulted in the 2″ of excess fabric overhang you described. I would recommend measuring your pocket from side to side, and if that measurement is 13″, it means you folded up the wrong side. Thanks for reading, and please let me know if you have any other questions.
I’m waaay behind on my reader feeds and I’m just now getting to this fabulous idea! I need, like one for every room and every bag I own. Not to mention what great and easy gifts these would be! thanks for the inspiration
Amy I love your projects. I have used some in the past. example the bunny pants. I liked it so much I did the same thing to make Santa pants. I love your tutorials. May I ask for you to consider to make your tutorial in a pdf downloadable version for those of us who enjoy your crafty ideas to make it easier to make them for personal use, and gifts. I like to print projects if I plan to make lots for gifts. it is easier than looking at the computer screen. especially if you get distracted by kids and have to stop for awhile. I am looking forward to making some of these. they would make great teacher gifts. Thanks
Thank you so much for the PDF suggestion, Shelley. That is something I will consider looking ahead to 2013! So glad you enjoy my projects. 🙂
I absolutely loved this project, and the tutorial was awesome! Thank you! I blogged about this on my family blog – http://scrivnerburg.blogspot.com/2013/01/i-can-finally-show-my-christmas-gifts.html
Elli, I am so glad to hear you enjoyed this tutorial! Your rolls turned out fabulous, and I love your idea to use an elastic band for the closure. Thanks so much for linking me to your post!
Thanks for the great idea! Making these for my girl scout troops first aid badge for them to fill!
What a great idea, Amy! So glad you’ll be able to put this tutorial to such good use!
I love this…the design has so many possibilities! You could make little drawstring bags to slip into the pockets if you wanted to use it for jewelry. My little granddaughter would put her little doll to bed in it and use the pockets for bottles and blankets and clothes…hmm…it’ll need to be a little bit bigger…with a ribbon handle, I think I’ll get to it right now. Thanks so much for the inspiration!
Just made one! It looks great! Thanks for tutorial 🙂
Just made these for some of my former students for graduation gifts…easy, inexpensive! Thank you!
I made one and it looks so cute. Thanks for the great tutorial. You can see mine here:
http://aretrocatholicfamily.blogspot.com/b/post-preview?token=14brMD8BAAA.5eKT-lbRTgVREvwGruce8w.OdxpeHjbGZsY_c4Y3mZa3g&postId=9081994811500897264&type=POST
Great job, Tina! Thanks so much for sharing.
Love the idea…….and I think it is really cute to add the lolli-pop, but I think all us Moms know what happen to pops left in a hot a car! I would hate to have a sticky mess melted all over the first aid equipment and my pretty case… a tattoo bravery sticker would work as well 🙂
Thank you for the neat tutorial. I have a question about the fusible interfacing and what is it’s purpose? I have not used it before and wonder if I can make one without that? Do you think jeans material would work fine?
Hi, Janette! The fusible interfacing is used to give lighter weight fabrics enough body. If you use jeans material, you should be able to do without. Thanks for stopping in!
This is exactly what I was looking for-my weirdo kids love Band-Aids and everything first aid and I was looking for a way to make a little first aid kit a more fun Christmas present-this is it! Thanks!
***Amy!!! This has got to be one of the cutest things I have seen in a long time. And, boy, the scraps that I have!!! I’m a band mom and a color guard mom; so you could probably imagine how many first-aid kits I go thru. Now I can personalize them and each flag girl can have her own. Now, Christmas gifts for the other 185 bandies. Oh, well. I love a good challenge.
Kudos
-Hunny
Thanks so much for the comment! I am so glad you like this project. 🙂
What a fantastic kit, I absolutely can’t wait to make this! As mini first aid kits, these would make great gifts for coworkers and friends. My husband is big into comic conventions, and (with appropriate super hero fabric, of course) something like this would be a great, simple kit to hold ComicCon necessities without bulk – chapstick, cash, ID, snack bar, keys, etc. I’ve also been looking for a cute tool belt idea for my young nephew, but haven’t been able to find anything small enough. I think I could use this (putting one ribbon on each side for a waist tie and leaving the smaller pocket seams out) to make something he could slip through his belt loops, tie on and use to carry his toys around. And what a great way to use up scraps. Thank you! 🙂
I love the tool belt idea, Karin! What a great tip!
I made one of denim and camouflage for my police officer son in law to keep in his patrol car. I might need to make a larger one though. I used an elastic head band instead of ribbon to make it easier to keep closed.
Thank you for your First Aid project. I have one suggestion for you that would make it much easier to see your print. DARKEN the fonts. I can hardly see the written instructions and would appreciate your doing this. Thanks
Hi Amy,
I have never sown before and this was the first item I made with my new machine. I did do one mistake though, I forgot to put the pockets on the inside when I sewed on the back interface panel. So, I had to sew it again, correctly this time. Didn’t have any ribbon so just sewed a strip of fabric together (like a long bookmark) and used that. All in all, I didn’t think I did too bad, everything fits, even the tissues. Thanks Amy, your new Aussie friend. PS: Will be using it on my cruise next month when I am onshore.