• Skip to primary navigation
  • Skip to main content
  • Skip to primary sidebar

Positively Splendid {Crafts, Sewing, Recipes and Home Decor}

Handcrafted. Splendidly.

  • Home
  • Blog
  • + Handmade
    • Crafts
      • Craft Gift Ideas
      • Holiday Crafts
      • Home Decor Crafts
      • Kids’ Crafts
      • Paper Crafts
      • Quick and Easy Crafts
      • Wearable Crafts
      • Wreaths
    • Gift Ideas
      • Budget-Friendly Gifts
      • Gift Wrapping
      • Gifts for Dads and Grandpas
      • Gifts for Kids
      • Gifts for Men
      • Gifts for Moms and Grandmas
      • Gifts for Neighbors
      • Gifts for Sports Fans
      • Gifts for Teachers
      • Gifts for Women
      • Quick and Easy Gifts
    • Kid-Friendly Projects
    • Sewing
      • Sewing for Children
      • Sewing for Men
      • Sewing for the Home
      • Sewing for Women
      • Sewing Techniques
      • Sewn Accessories
      • Sewn Gifts
  • + Home & Garden
    • DIY Home Decor Projects
    • Helpful Tips
    • Home Decor Crafts
    • DIY
    • Home Tour
    • Mantels and Tablescapes
    • Organization
    • Outdoor and Garden
  • + Holidays & Seasons
    • Spring
    • St. Patrick’s Day
    • Summer
    • Teacher Appreciation
    • Thanksgiving
    • Valentine’s Day
    • Winter
    • Back to School
    • Christmas
    • Easter
    • Fall
    • Fathers’ Day
    • Graduation
    • Halloween
    • Independence Day
    • Mothers’ Day
    • New Year’s
  • + Printables
  • + Recipes
    • Soups and Stews
    • Appetizers and Salads
    • Breads
    • Desserts
    • Food Crafts
    • Main Dish

Boy/Girl Pillow Shams – Custom Bedding, Part 2

March 15, 2011 By Amy @ Positively Splendid

FacebookTweetPinYummlyPrint


This post is Part 2 of my Custom Bedding Tutorial for my final So You Think You’re Crafty project, where I made coordinating boy/girl decor for my oldest kiddos’ shared bedroom. Before reading today, I hope you’ll head over to read Part 1 for a full description of the project and to see how I made the duvet covers that coordinate with these shams. Don’t forget to come back over, though, because the shams are definitely the star of the show!

All caught up? Terrific! Let me show you exactly how I made these little darlings!

For this project, you will need…

Boy and/or Girl Templates
1/2 flat sheet for the front panel
1/2 flat sheet for the back panels
A portion of the remainder of the sheet you cut your stripes from for your duvet
Marine vinyl
Wash Away Wonder Tape
Leather sewing machine needle
Heavy duty thread
Tissue paper
Washable ink marker
Coordinating thread
Basic sewing supplies: shears, machine, measuring tape, etc.
Recommended: rotary cutter and mat

Prep Work

Cut out your pieces. For each standard-size sham, you will need:

(2) 24 x 31″ front panels
(2) 24 x 24″ back panels
(2) 24 x 10″ back panels
(1) 12.5 x 31 stripe
(1) set of boy or girl applique pieces cut from your vinyl, cut out using the templates linked above. For each applique set, you need:
1 head piece
1 body piece
2 legs

step 1 / Press both long edges of your stripe piece under 1/4″. Pin your stripe to one of your front panel pieces 6″ from both the top and bottom of your front panel piece. Edgestitch along the long edges of your stripe to secure it to your front panel. Fold your front panel in half lengthwise, and mark the center point of the top and bottom of your piece using a washable ink marker. Using these marks as a guide, center the pieces of your boy or girl appliques on your sham as shown, adhering the pieces to your panel using Wash Away Wonder Tape.


step 2 / Outfit your machine with your leather needle and your heavy duty thread. Place a piece of tissue paper on top of your applique, and carefully stitch all the way around each piece to secure it to your sham. (The tissue is used to keep your foot from sticking to the vinyl as you sew. Smart!) When you are done stitching, tear the tissue away. Use tweezers to remove any tiny remnants of tissue than remain.

step 3 / Replace your leather needle with a standard sewing needle and your heavy duty thread with your standard thread. Pin your two front panel pieces together, right sides facing, making sure all of the edges are precisely aligned. Stitch them together using a 1/4″ seam allowance, leaving a 3-inch opening for turning. Clip your corners and turn your piece right side out, using a corner-turning tool to push the corners and seams out completely. Press. Edgestitch all the way around your piece, closing the opening you used for turning as you go. Repeat the above steps with your two 24 x 24″ back panels and your two 10 x 24″ back panels.
 With wrong sides facing, pin your smaller back panel on the right-hand side of your finished front panel, with the long sides and corners of each piece precisely aligned. Now, pin your larger back panel piece on the opposite side, precisely aligning the corners and edges, so that the center edges of your back panel pieces overlap by 2″.
step 4 / On the right side of your front panel, make a mark with a washable ink marker 2 inches from each of the outer edges at each corner, as shown. You will use these marks as guides to show you where to pivot when you stitch your front and back panels together. Now, stitch your panels together using a 2-inch seam, pivoting at each of the corner marks you just made. (It might be helpful to place a Post-It note on your machine 2 inches away from where your needle falls to use as a guide to keep your line of stitching precise.)
Now, slip a pillow inside your sham and admire your work!
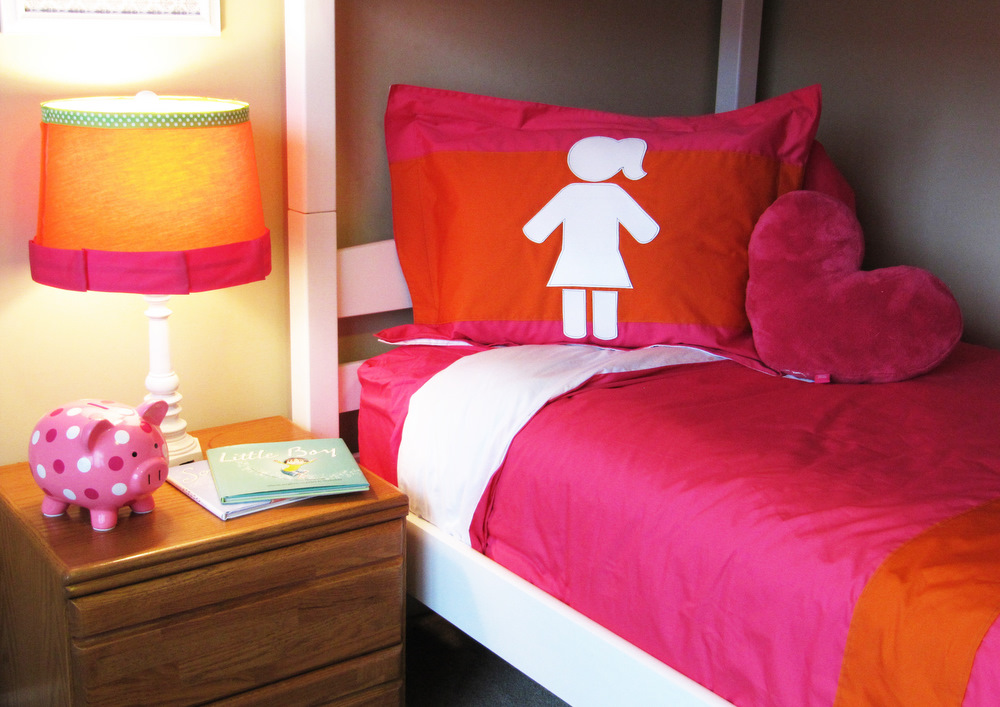
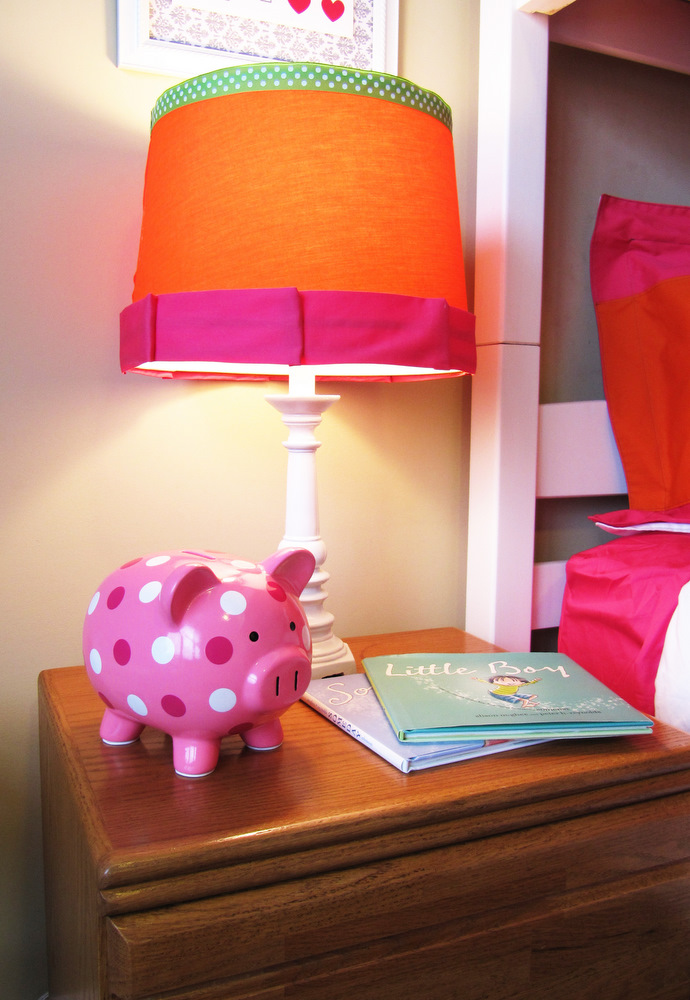
Click here for a FREE printable and tutorials for how I created the wall hangings and lamp shade to coordinate with the room decor!
Photobucket


Linking this to…
Tatertots and Jello
Skip to My Lou
Tip Junkie
Today’s Creative Blog
The CSI Project

Amy @ Positively Splendid

Having grown up in a home brimming with sewing notions and paintbrushes, Amy has a deep love for all things creative. On any given day, you’ll find her knee-deep in her latest creative endeavor, with projects ranging from sewing and crafts to home decor and kid-friendly ideas. Amy believes that everyone, regardless of skill level or experience, possesses the ability to create something beautiful, and Positively Splendid was born of her passion for helping others harness their innate creative potential.

EVEN MORE GREAT IDEAS JUST FOR YOU!

FacebookTweetPinYummlyPrint

Filed Under: Sewing, Tutorials Tagged With: SYTYC

Previous Post: « Make Your Own Custom Bedding – Part 1
Next Post: Spilling the Beans! »

Reader Interactions

Comments

  1. ificould says

    March 16, 2011 at 4:34 am

    super cute!!! thanks for sharing!
    Missy & Kimi
    ificould-ificould.blogspot.com

  2. kiki comin says

    March 19, 2011 at 12:15 am

    love, love, love your bedroom you did…voted for you. SUPER fun.:)

  3. Ladybird Ln says

    March 19, 2011 at 12:47 am

    So cute, I love how it is great for a boy/girl room combo! Very creative and stinkin’ cute!

    Carlee,
    ladybirdln.blogspot.com

  4. radn says

    March 22, 2011 at 4:38 pm

    Lovely tutorial! I did vote for you last time I visited your blog.

    I am having a giveaway on my blog. $35 + free shipping to get a custom trendy backpack for your kid from Paige Holliday Designs. All you have to do is leave a comment. ends 3/23.

    http://houseonashwelllane.blogspot.com/2011/03/35-store-credit-free-shipping-to-get.html

  5. Rebecca M says

    December 31, 2012 at 2:49 pm

    I’m so glad you shared how you made this wonderful bedding; it’s just what I’m looking for! We just ordered bunk beds for our son & daughter, & I’d like their spaces to be individual yet harmonious. This is perfect & sounds simple enough to do even with kids running around. I plan to make the whole set. Thank you for giving me the solution I was searching for!!!
    * I have one question, why do you use marine vinyl for the boy/girl symbols, & can I use a different material (hopefully one easier to sew through)? * Thank you!

    • Amy @ Positively Splendid says

      January 8, 2013 at 10:35 am

      Hi, Rebecca! I am so glad you like the bedding! I used the vinyl because I like the leather look (it reminds me of a varsity letter jacket), but you could easily substitute regular fabric to do traditional applique. Thanks for stopping in!

Primary Sidebar

PS Search

Search this website

Seasonal Inspiration

Hocus Pocus Wreath
Ghost Plushies
Paper Pumpkins
Fabric Yo-Yo Pumpkins

Copyright © 2025 · Positively Splendid · All Rights Reserved. · Privacy Policy

Privacy & Cookies: This site uses cookies and other tracking technologies to assist with navigation and your ability to provide feedback, analyse your use of our products and services, assist with our promotional and marketing efforts, and provide content from third parties. To find out more, as well as how to remove or block these, see here: Our Cookie/Privacy Policy