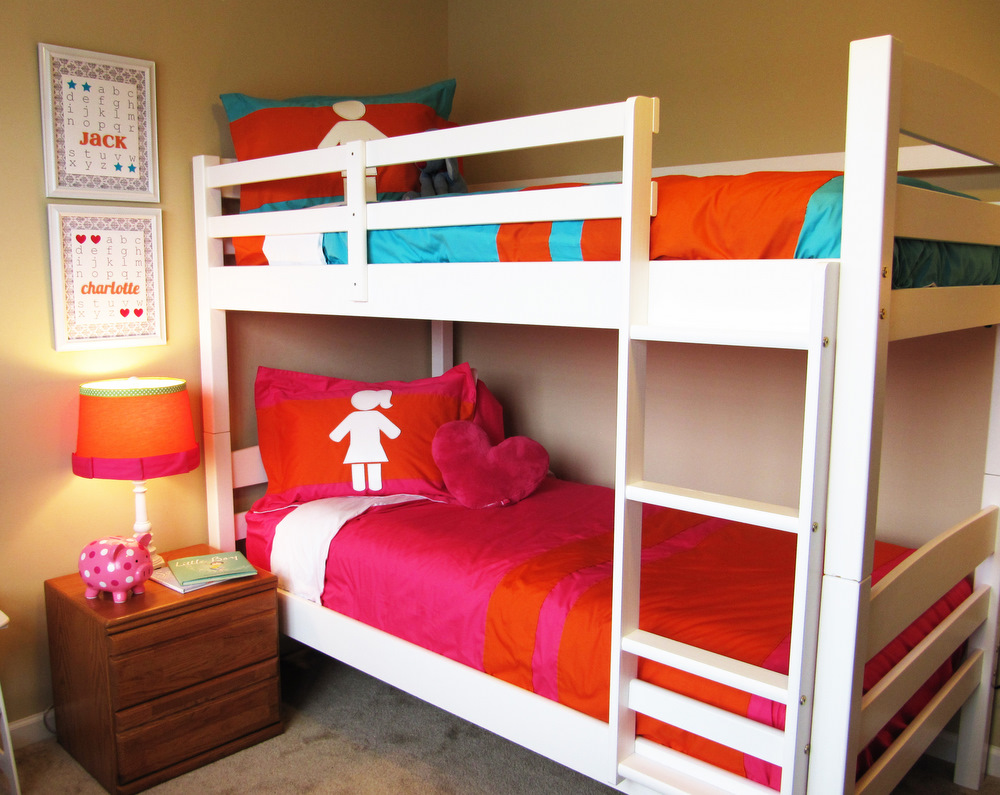
This post will wrap up my series of posts detailing how I created the Boy/Girl Room Decor for my final project over at So You Think You’re Crafty. If you haven’t already, head over to check out the previous posts in the series…
All caught up? Today I’m going to tell you how I created the decorative accents for the room: printable alphabet samplers and a coordinating lamp!
I am going to be completely frank: by the time I was finished with the bedding for this project, I was just. plain. exhausted. (Thank you, first trimester!) Both the lamp here and the framed printable art were projects I put together at (literally) the eleventh hour. There is nothing fussy about these projects, and they require a minimal amount of time and effort. How terrific is that?
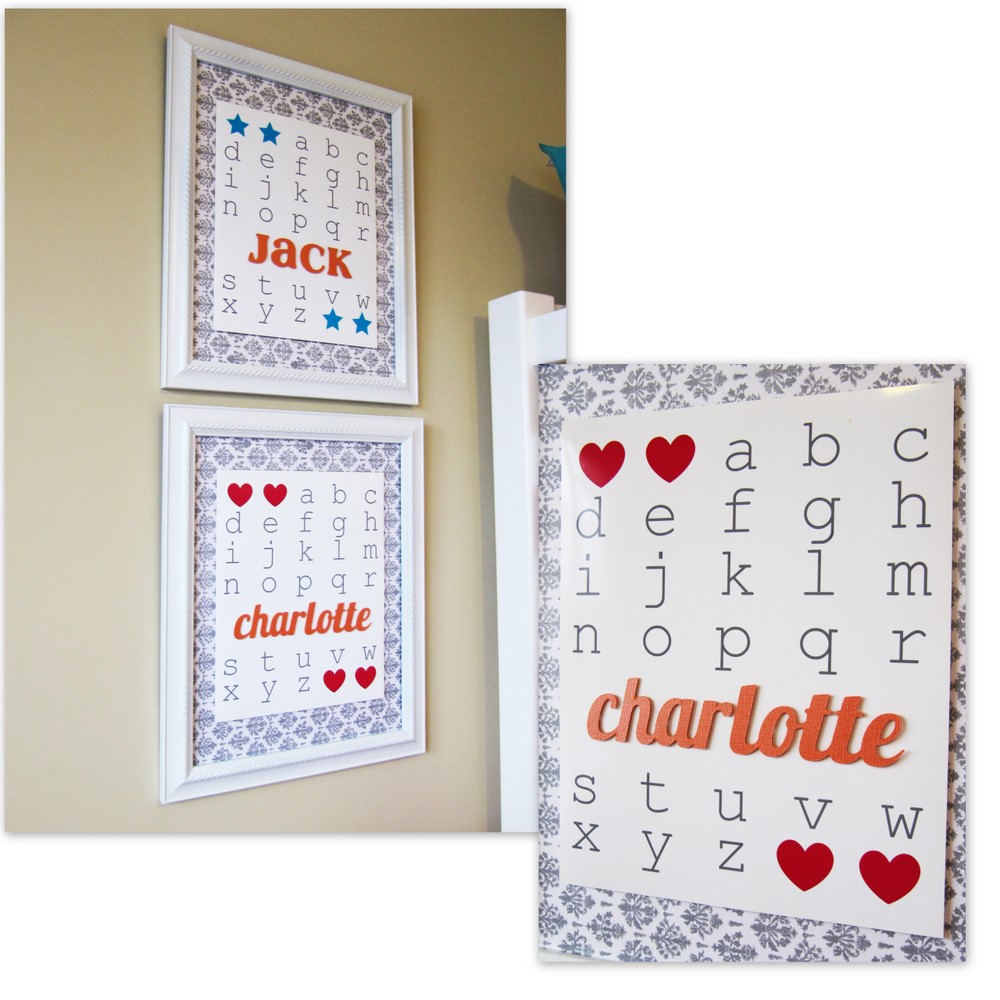
First up – the printable alphabet art.
I knew at the onset of planning this room that I wanted to include personalized alphabet samplers of some sort in the decor. In order to do so in the simplest possible way, I made a two printables with Picnik – one for a boy, one for a girl – and then I printed these in an 8×10 size onto high-quality photo paper. I used my Cricut and Sure Cuts a Lot software to cut a name for each of the samplers. To add dimension to the finished project, I mounted the name cut-outs in the blank space on the each of the samplers with 1/4″ dimensional foam adhesive dots. To frame the samplers, I removed the glass from two 10×13 frames (purchased for $5 apiece at Walmart), and then placed a grey damask mat in each one, which I purchased at Joann on clearance. Finally, I used 1/2″ foam adhesive dots to mount the alphabet printable to the front of the framed mat. All done!
If you’re interested in making these for your own home, below are the links for the printables I created. I only ask that you reserve these for personal use only. Thank you!
Next up – the lamp.
For this project, I doctored up a tired lamp by spray painting the base white and then adding a new lamp shade. I used a self-adhesive lamp shades similar to this one from Joann, and it was a piece of cake! I simply traced the template provided with the shade onto a scrap of the orange fabric from the bedding portion of this project, and I adhered it to the lamp shade according to the product instructions. I then used hot glue to adhere a strip of ribbon to the top of the shade and a 3-inch strip of scrap fabric (hemmed 1/4″ on each side) to the bottom of the shade to hide the raw edges of the orange fabric. I pleated the fabric strip as I went for added interest. That’s all there was to it!

I am still so tickled with how this space came together. Thank you so much for indulging me and letting me share all about it this week!

Having grown up in a home brimming with sewing notions and paintbrushes, Amy has a deep love for all things creative. On any given day, you’ll find her knee-deep in her latest creative endeavor, with projects ranging from sewing and crafts to home decor and kid-friendly ideas. Amy believes that everyone, regardless of skill level or experience, possesses the ability to create something beautiful, and Positively Splendid was born of her passion for helping others harness their innate creative potential.
Everything really does look so great together. I just bought my sticky lampshade. Can’t wait to put my fabric on it!
I LOVE the wall hangings! What a great and simple idea!!! Thank you for sharing!
Thanks for sharing the printables!!! They are adorable:)
1luckeegirl.blogspot.com
I am just going to have to make these printables – and figure out something for the names being Cricut-less! They are just so great!!
love this room! perfect!
melanie
layercakedesigns.blogspot.com
WOW, what a cute printable!! You really did an amazing job of creating a cute girl/boy room. I’m amazed!!
Thank you for sharing with us how you created this amazing boy/girl room, it really is fab! The printable is just fantastic!
I love this! We have a little boy on the way (who will also be names Jack!) and although he will be in our room for the first little while, he will eventually have to share the other bedroom with our daughter and I have been looking and looking for shared room ideas that arent boring or predictable! Thanks for sharing:)