Today’s post is brought to you by 3M.
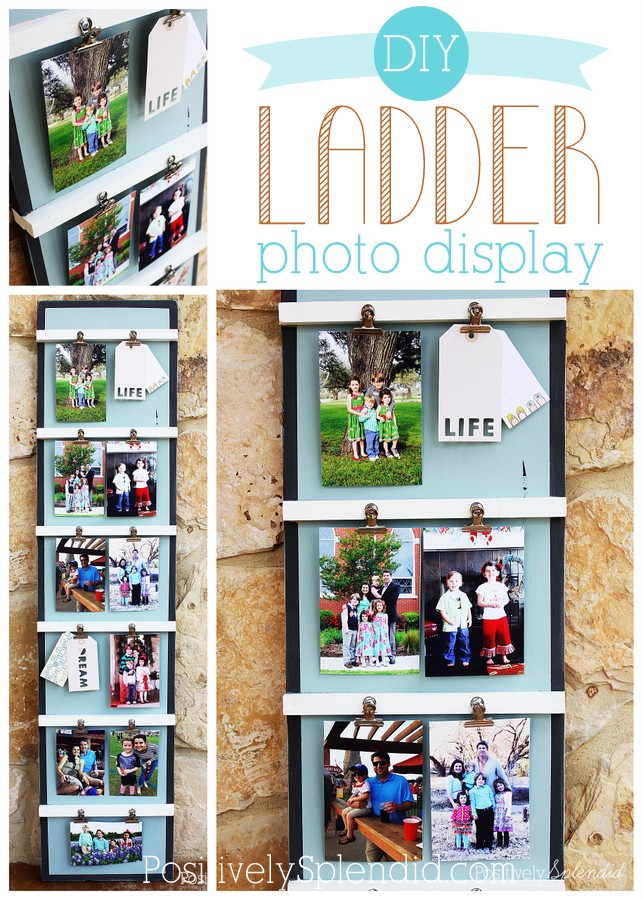
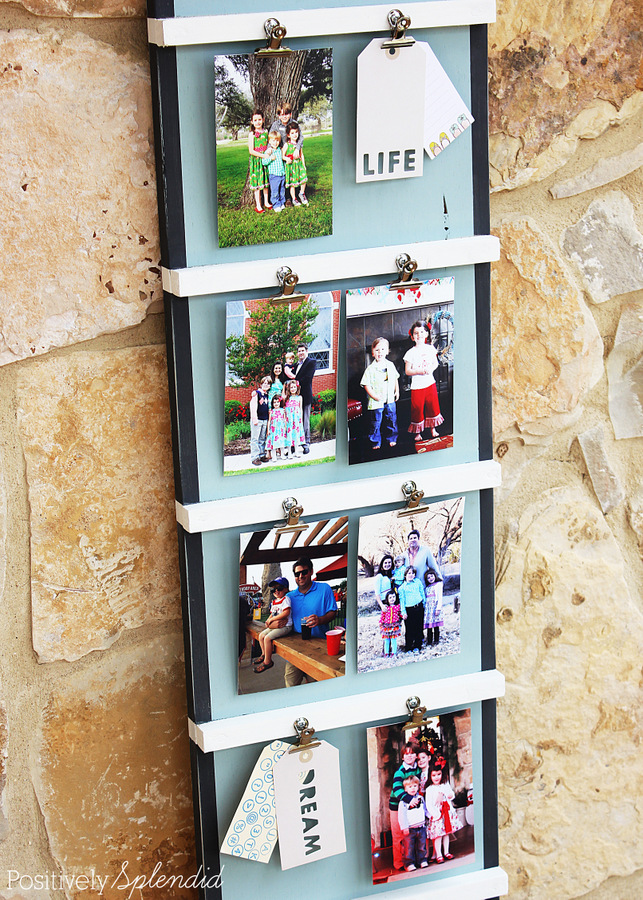
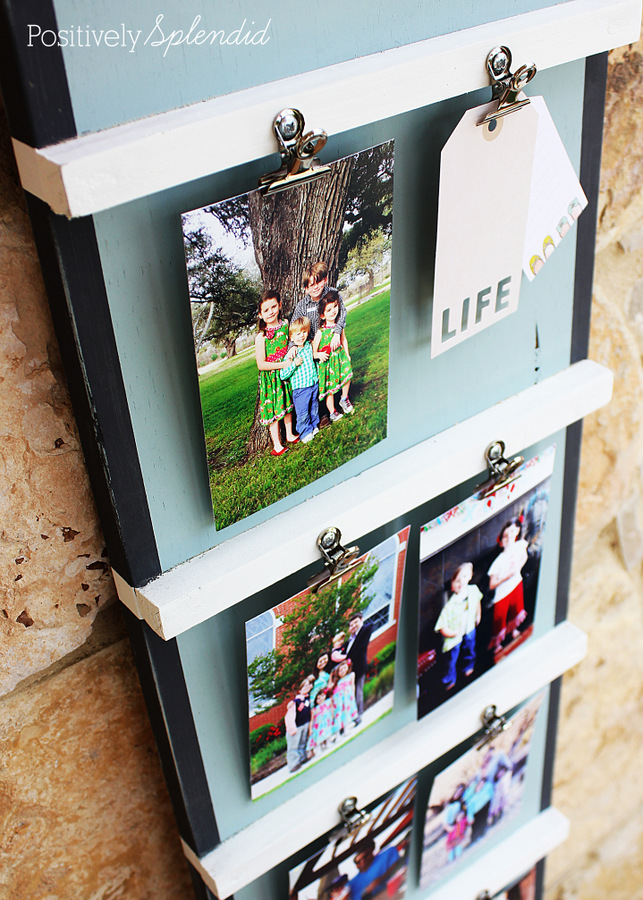
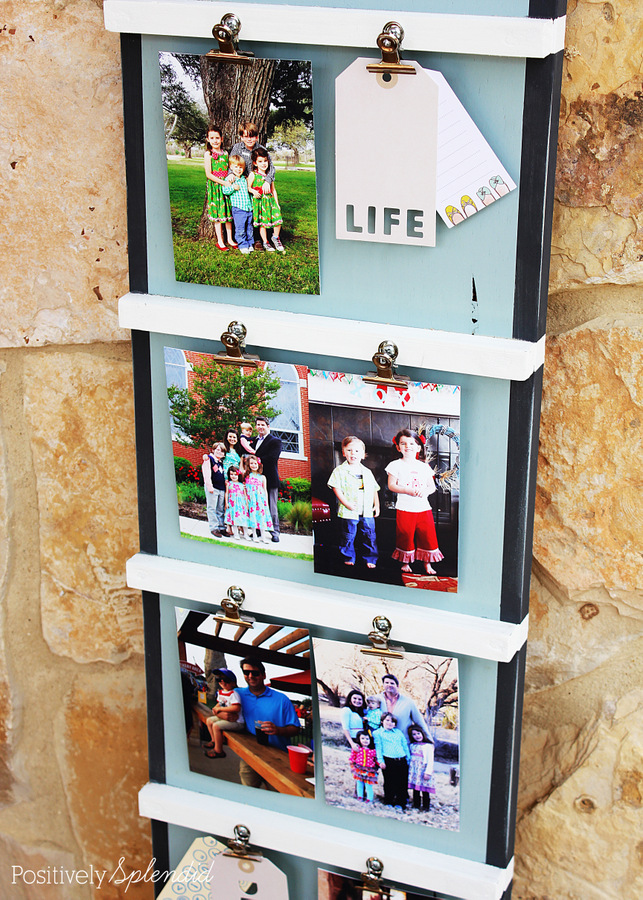
Looking for a fun, unique way to showcase your favorite photos? This DIY ladder photo display is just the ticket! Outfitted with six ladder “rungs,” each containing two bulldog clips, this DIY photo display makes displaying and swapping out photos as easy as can be. Think of the possibilities: weddings, birthday and anniversary parties, graduations, and even displaying Christmas cards! This is a straightforward project suitable even for beginners. Let me fill you in on all of the details for how this comes together!
For this project, you will need…
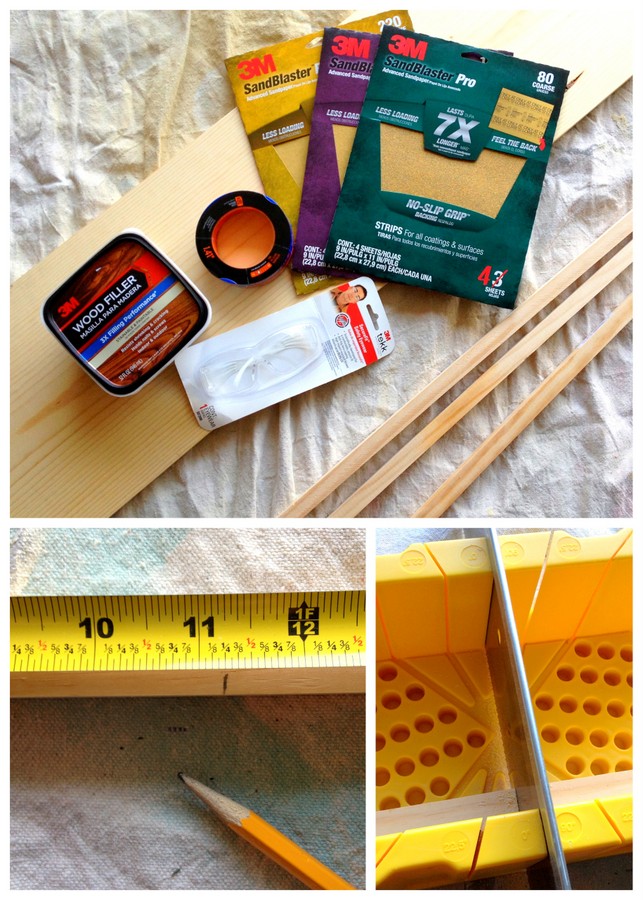
- (1) 1×12″ board cut to 4′
- (2) 3′ 3/4″ square wood dowels
- Measuring tape
- Pencil
- Miter box and hand saw
- 3M™ Advanced Abrasives Sandblaster™ Pro sandpaper: 80-, 120-, and 220 grit
- 3M™ Safety Products Safety Eyewear
- 3M™ Hearing Protection
- Tack cloth
- Paint in 3 colors
- Foam paint roller
- Foam paint brush
- 3M™ Safe-Release™ Painter’s Tape Advanced+ Delicate Surfaces with Edge-Lock™
- (12) #8 1-1/2″ wood screws
- Drill
- 3/32″ drill bit
- Screwdriver bit
- 3M™ Wood Filler
- Putty knife
- (12) 1″ bulldog clips and screws (I purchased mine at the office supply store)
- Small Phillips-head screwdriver
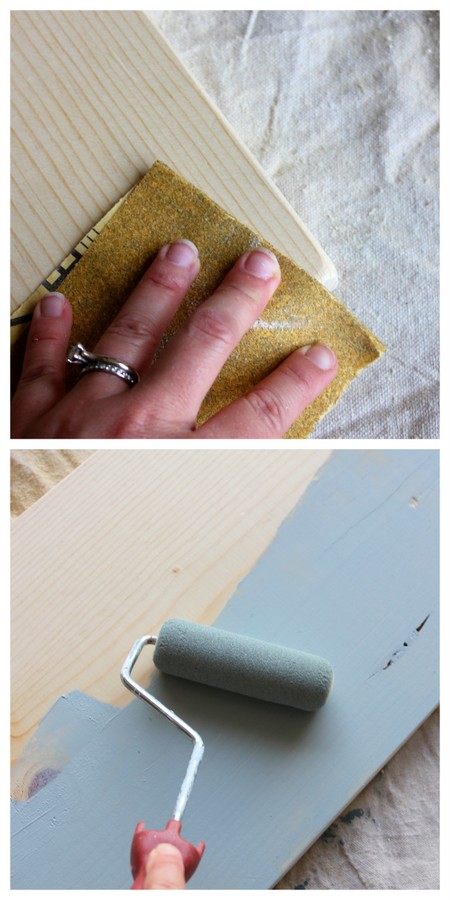
Divide each dowel into 11-1/4″ sections using the tape measure and pencil. (Note: On each dowel, you will have 2-1/4″ of remainder.) Wearing the safety eyewear, use the miter box and saw to trim the dowels along the lines mark to create (6) 11-1/4″ pieces. Use the 80-grit sandpaper to get rid of any splintering at the edges, and then sand an additional time with the 120-grit to smooth. Wipe clean with the tack cloth. Using the foam brush, paint each dowel the desired color along 3 longs sides and both ends. Set aside to dry completely.
With the 120-grit sandpaper, sand the entire surface of the 1×12, rounding each of the corners for a weathered look, as shown. Wipe clean with the tack cloth.
Using the paint and roller, paint the entire front surface and sides of the board, applying as many coats as necessary for the desired finish. Allow to dry for 24 hours.
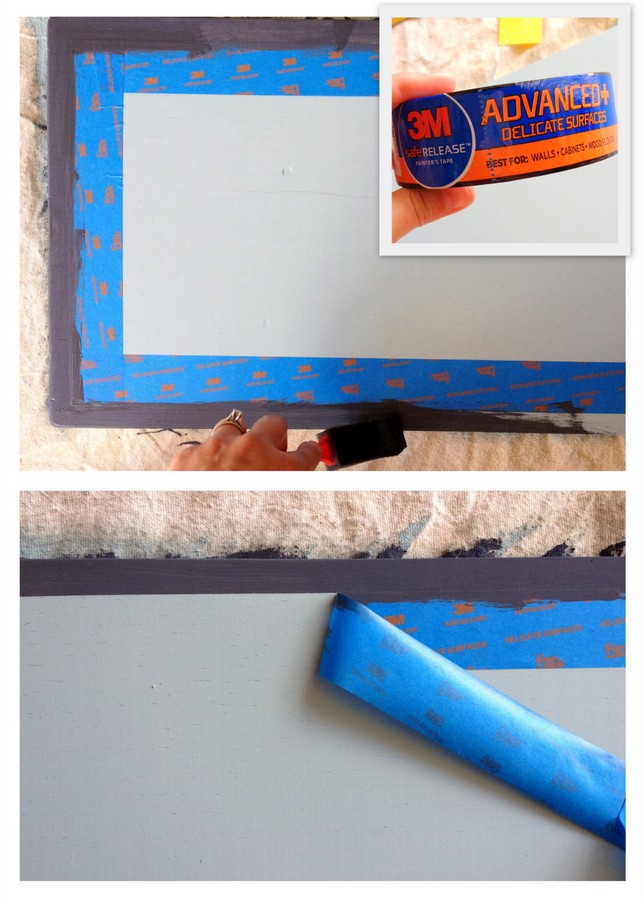
Tape off a 1/2″ border around the front perimeter of the board using the the 3M™ Safe-Release painter’s tape (delicate surfaces). (This tape is wonderful, since it allows you to safely tape over freshly painted surfaces–as little as 24 hours old!) Use the foam brush to paint a contrasting border, applying as many coats as necessary for the desired finish. Allow paint to dry for at least 1 hour before removing the tape.
Use the measuring tape to measure down 2-1/2″ from the top edge of the board; mark with the pencil. Align 1 of the trimmed and painted dowel pieces with this mark, using 2 strips of painter’s tape to temporarily secure in position. Use the drill and 3/32″ bit to make two holes 1/2″ from each end of the dowel. Using the drill and screwdriver bit, screw the wood screws into these holes, reducing the torque on the drill as needed prevent splintering. Continue affixing the additional dowels to the board in a similar fashion so that top edge of each subsequent dowel is 7″ from the bottom edge of the one above it. Fill the screw holes with wood filler using the putty knife, and allow to cure for 24 hours before sanding smooth with the 120-grit sandpaper. Wipe clean with the tack cloth.
Affix painter’s tape along the top and lower edges of each dowel piece, and use the foam brush to apply an additional coat of paint to each. Allow to dry for 1 hour before removing the tape.
Use the drill and 3/32″ bit to drill 1 hole 3 inches from each end of the dowels cross pieces, centering the holes vertically on the piece. Use the hand screwdriver and screws to attach each of the 12 bulldog clips through these holes.

Your ladder photo display is complete!
Now, grab some of your favorite photos and proudly put them on display!
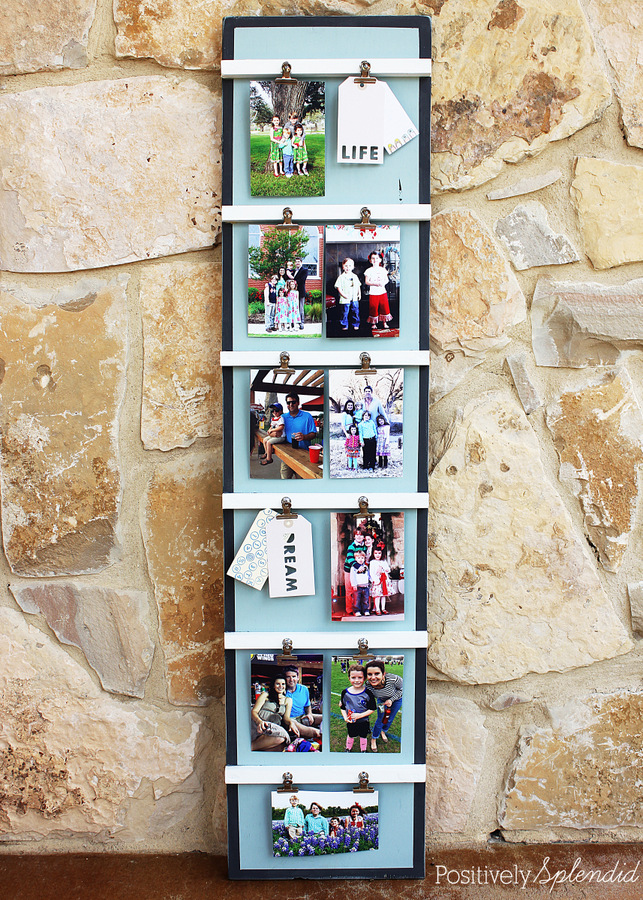
The spacing of the slats on the boards is perfect for accommodating 4×6″ vertical photos, or you can use 2 of the clips on a row to display a horizontal photo.
The board can be leaned against a wall for a casual display, or outfitted with eye hooks and picture wire to be hung on the wall.
I think this would be a wonderful idea for displaying photos at a wedding, graduation, birthday or anniversary celebration. So many possibilities!
I can’t wait to use this display all year long to display my favorite photos. If you are needing a way to show off your favorite snapshots, too, consider adding this project to your DIY to-do list!
With any DIY product, the proper safety gear is incredibly important. Regardless of whether you are completing a home renovation project or a small DIY project like this DIY photo display, accidents can happen in the blink of an eye. Check out the video below to hear more about the safety hear I am never without in my DIY projects.


3M DIY Twitter
3M DIY Facebook
3M DIY Pinterest
Having grown up in a home brimming with sewing notions and paintbrushes, Amy has a deep love for all things creative. On any given day, you’ll find her knee-deep in her latest creative endeavor, with projects ranging from sewing and crafts to home decor and kid-friendly ideas. Amy believes that everyone, regardless of skill level or experience, possesses the ability to create something beautiful, and Positively Splendid was born of her passion for helping others harness their innate creative potential.
What a great idea!! I love how easy it is to change out the pictures. The possibilities are endless! Love it! Pinned 🙂