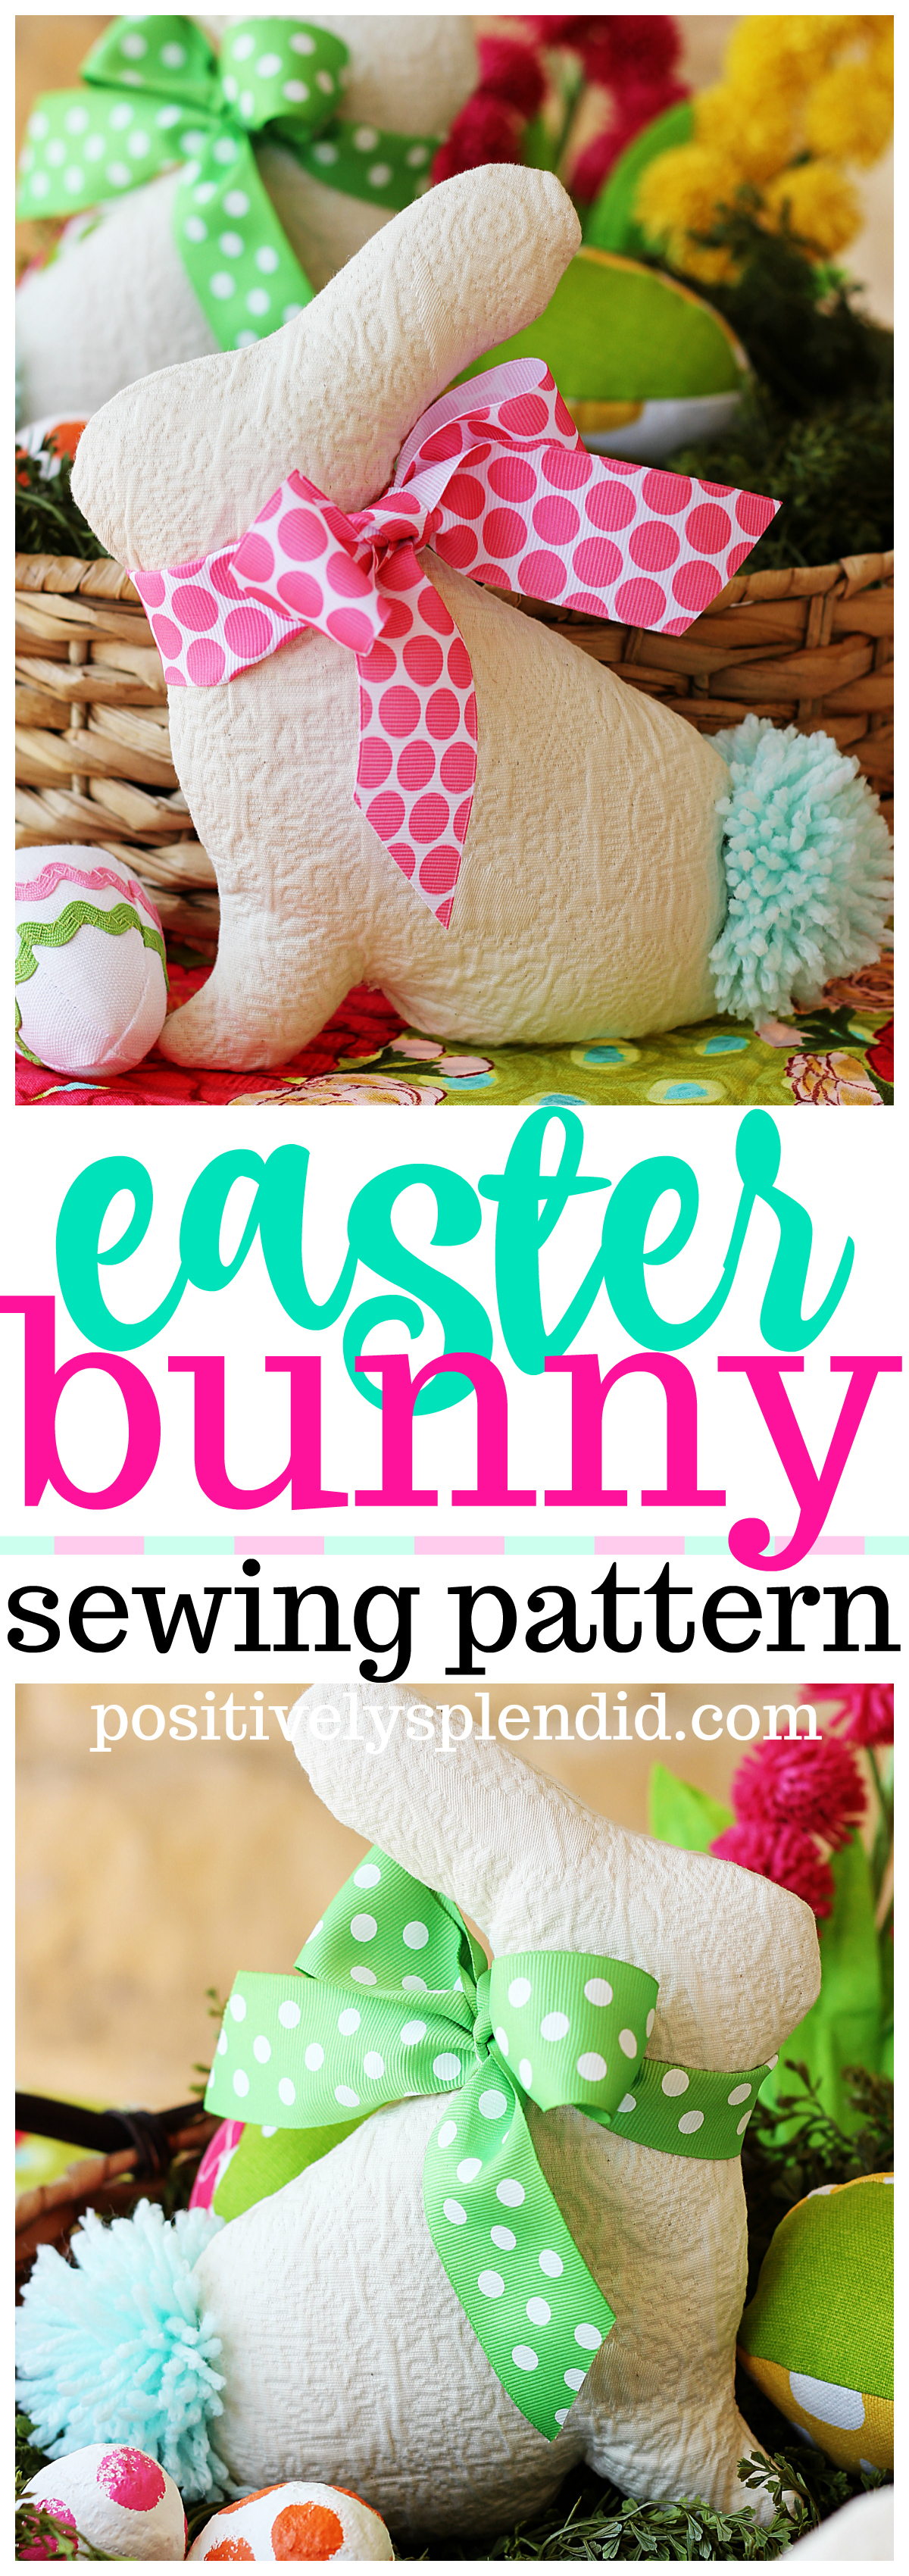
This stuffed Easter bunny sewing pattern is an easy sewing project that is perfect for using scraps from your stash! Free PDF pattern pieces are included with step-by-step instructions.
Stitch up a sweet little Easter bunny softie to tuck into the Easter basket of a special child, or to use as a darling addition to your home’s spring decor. Today, I’m sharing the inspiration behind these little cuties, as well as the free pattern and step-by-step tutorial for how to create them with my free Easter bunny sewing pattern. Would you believe this is an easy sewing project that is entirely do-able in 30 minutes or less? Let me fill you in on all of the details!
This post contains affiliate links.
When I was little, my grandmother used to make the neatest little softies out of old chenille bedspreads and matelasse coverlets. I can still remember vividly a teddy bear version that sat on the bench in our entryway, and there were plenty of other little creatures that he had as sidekicks, one of which was a sweet little bunny rabbit that always made an appearance at Easter time. It was that little bunny that inspired this Easter bunny softie project!
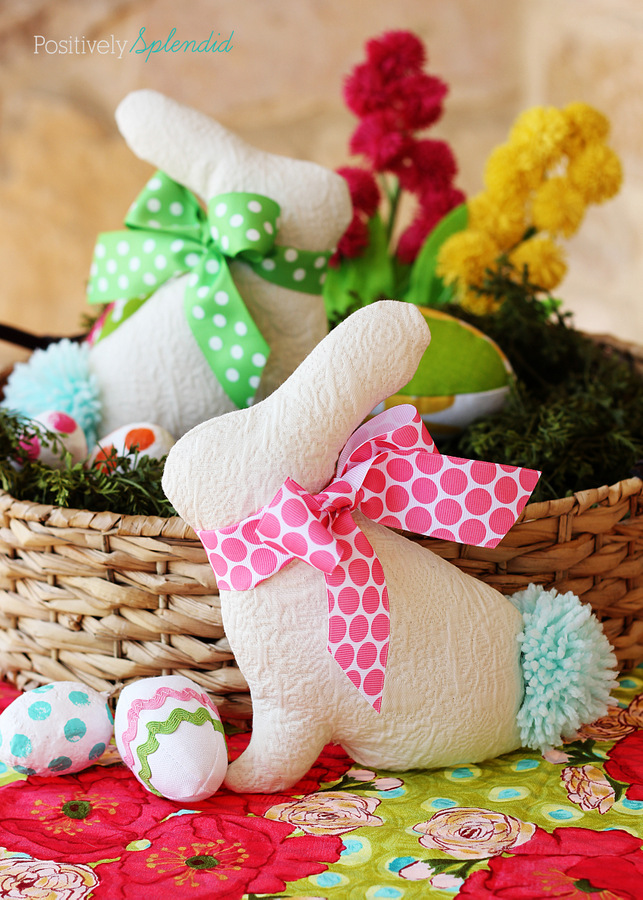
For this project, I used some lovely matelasse fabric I purchased in the home decor section at Jo-Ann. (Matelasse, which is French for “quilted,” is fabric with a quilted design, typically in a monochromatic color scheme.) If you can’t get your hands on any matelasse fabric, some other great options would be to go thrifting for old bedspreads or tablecloths. Or, these little bunnies would be darling stitched up in your favorite brightly colored cottons!
Supplied needed to make a stuffed Easter bunny:
-
Stuffed Easter bunny sewing pattern << Free downloadable PDF
- Matelasse fabric (Refer above for other recommended materials)
- Coordinating thread
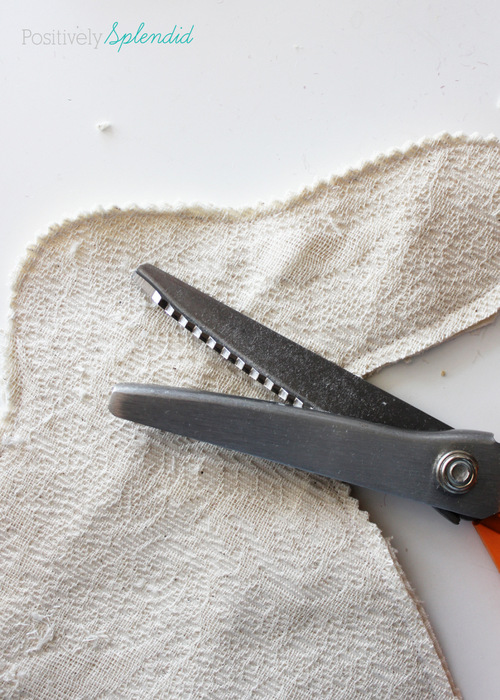
- Pinking shears
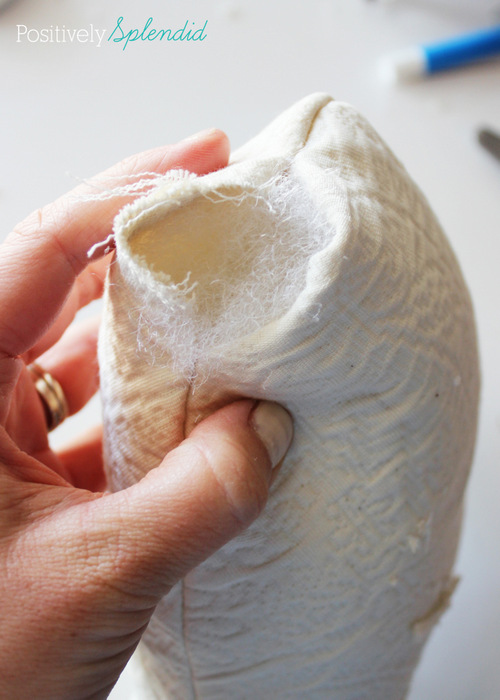
- Turning tool
- Fiber fill
- Hand-sewing needle
- Ribbon
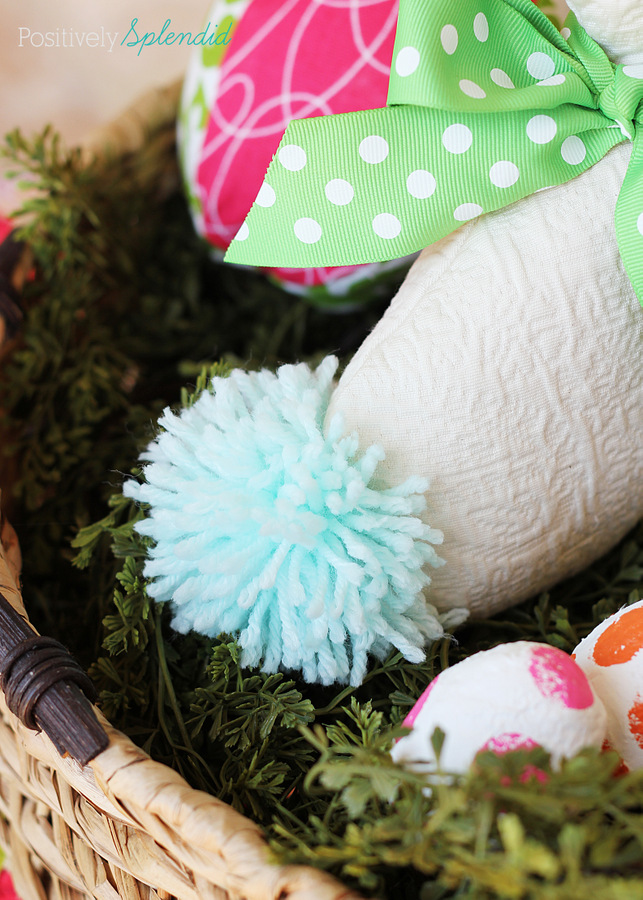
- Pom-pom (I made mine with my easy yarn pom-pom how-to, but you can also buy one pre-made)
- Hot glue (optional)
- Basic sewing essentials: machine, shears, etc.
Instructions:
- Download and print the bunny softie pattern (linked above), and cut out the pattern piece.
- Cut out 2 bunny body pieces, making sure the pieces are a mirror-image of each other.
- Place the body pieces together with right sides facing; pin. Using a 1/4″ seam allowance, stitch around the perimeter of the pieces, leaving a 2-3″ opening on the bottom edge of the pieces for turning and stuffing.
- Using the pinking shears, carefully trim the seam as closely as possible to the stitching, paying special attention to the curves. Do not pink the edge of the fabric at the opening you left in the previous step, as this will make stitching the opening shut more challenging later on.
- Turn the piece right-side out, using the pointed end of the turning tool to ensure the ears, foot and other features are completely turned.
- Working with very small amounts of the fiber fill at a time, carefully stuff the softie, using the turning tool to poke the fiber fill into the small features. Continue stuffing until the softie is completely filled, but not overstuffed.
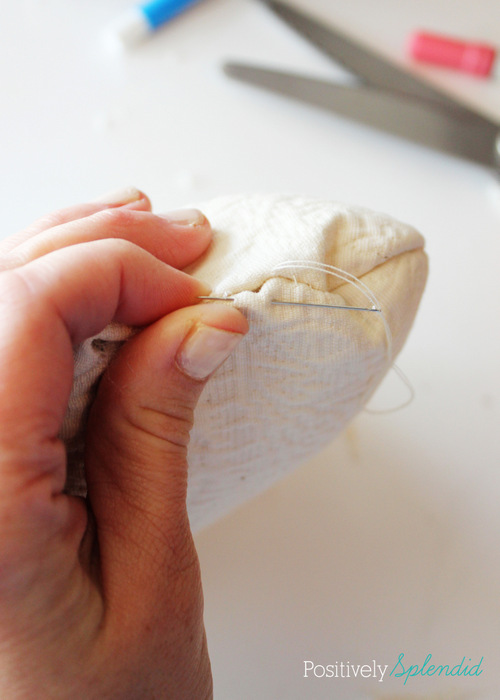
- Use the sewing needle and thread to stitch the opening shut. (Refer here for my easy-to-follow ladder stitch tutorial.)
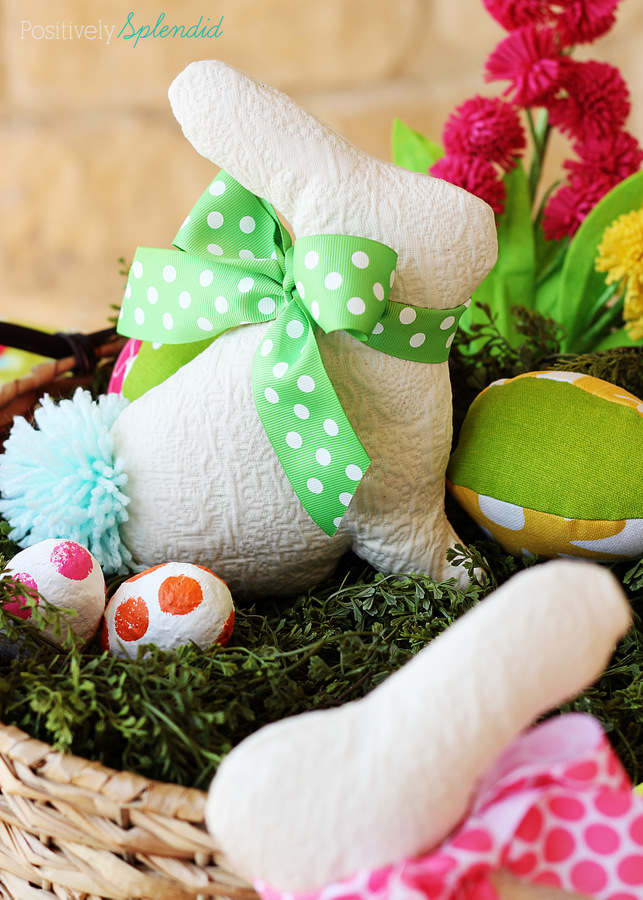
- Use hot glue to affix the pom-pom to the bunny’s back end. (You may also hand stitch this on if you prefer.)
- Finish by tying a bow around the bunny’s neck.
Your Easter bunny softie is complete!
I plan to tuck one of these into each of my children’s Easter baskets this year. I know they’ll love them!
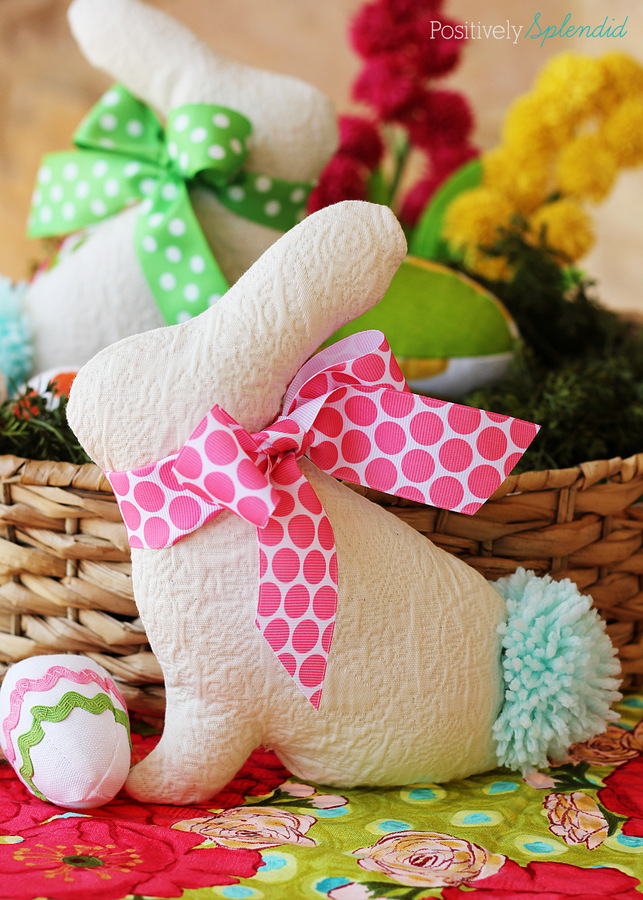
I love how the simplicity of the fabric here allows the brightly colored ribbon and tail to pop. Once you see how easy it is to make a project with this bunny sewing pattern, you are sure to want to make more than just one!
I have to say that my favorite feature has to be those sweet little pom-poms. 🙂
Having grown up in a home brimming with sewing notions and paintbrushes, Amy has a deep love for all things creative. On any given day, you’ll find her knee-deep in her latest creative endeavor, with projects ranging from sewing and crafts to home decor and kid-friendly ideas. Amy believes that everyone, regardless of skill level or experience, possesses the ability to create something beautiful, and Positively Splendid was born of her passion for helping others harness their innate creative potential.
These are adorable! I can totally make this. Pinning this now!
I love the bunnies!! I love the material you chose. It is perfect for the bunnies. The ribbon and tail is super cute. Thanks for the tutorial!! Pinned 🙂
Cute!! I have a Craft Gossip post scheduled for later today that links to your tutorial: http://sewing.craftgossip.com/free-pattern-easter-bunny-softie/2014/03/28/
–Anne
Cute Cute Cute!!! Love these…
Thanks so much for this darling bunny tutorial! I saw it on Julie the Crafty Quilter’s blog and had to come right over for the pattern. I made a couple and did a blog post and directed people back here for the instructions. Hope that it’s okay.
Great project, quick results and really cute. Thanks
AMY, THESE ARE BEAUTIFUL. THANK YOU SO VERY MUCH FOR SHARING THEM WITH US. BLESSING
You are welcome, Rachel! Thank you for stopping by!
Thank you for sharing the template and directions I made one from on old white chenille bedspread I have. It came out adorable and now I think I should make a couple more for around the house.
Amy, I Love this ‘Bunny”…will be making them for my peeps this Easter 🙂
Lobe the easy see bunny but am not able to download the actual bunny template/pattern. I’ve tried twice but the page displays words but no bunny outline. Help!