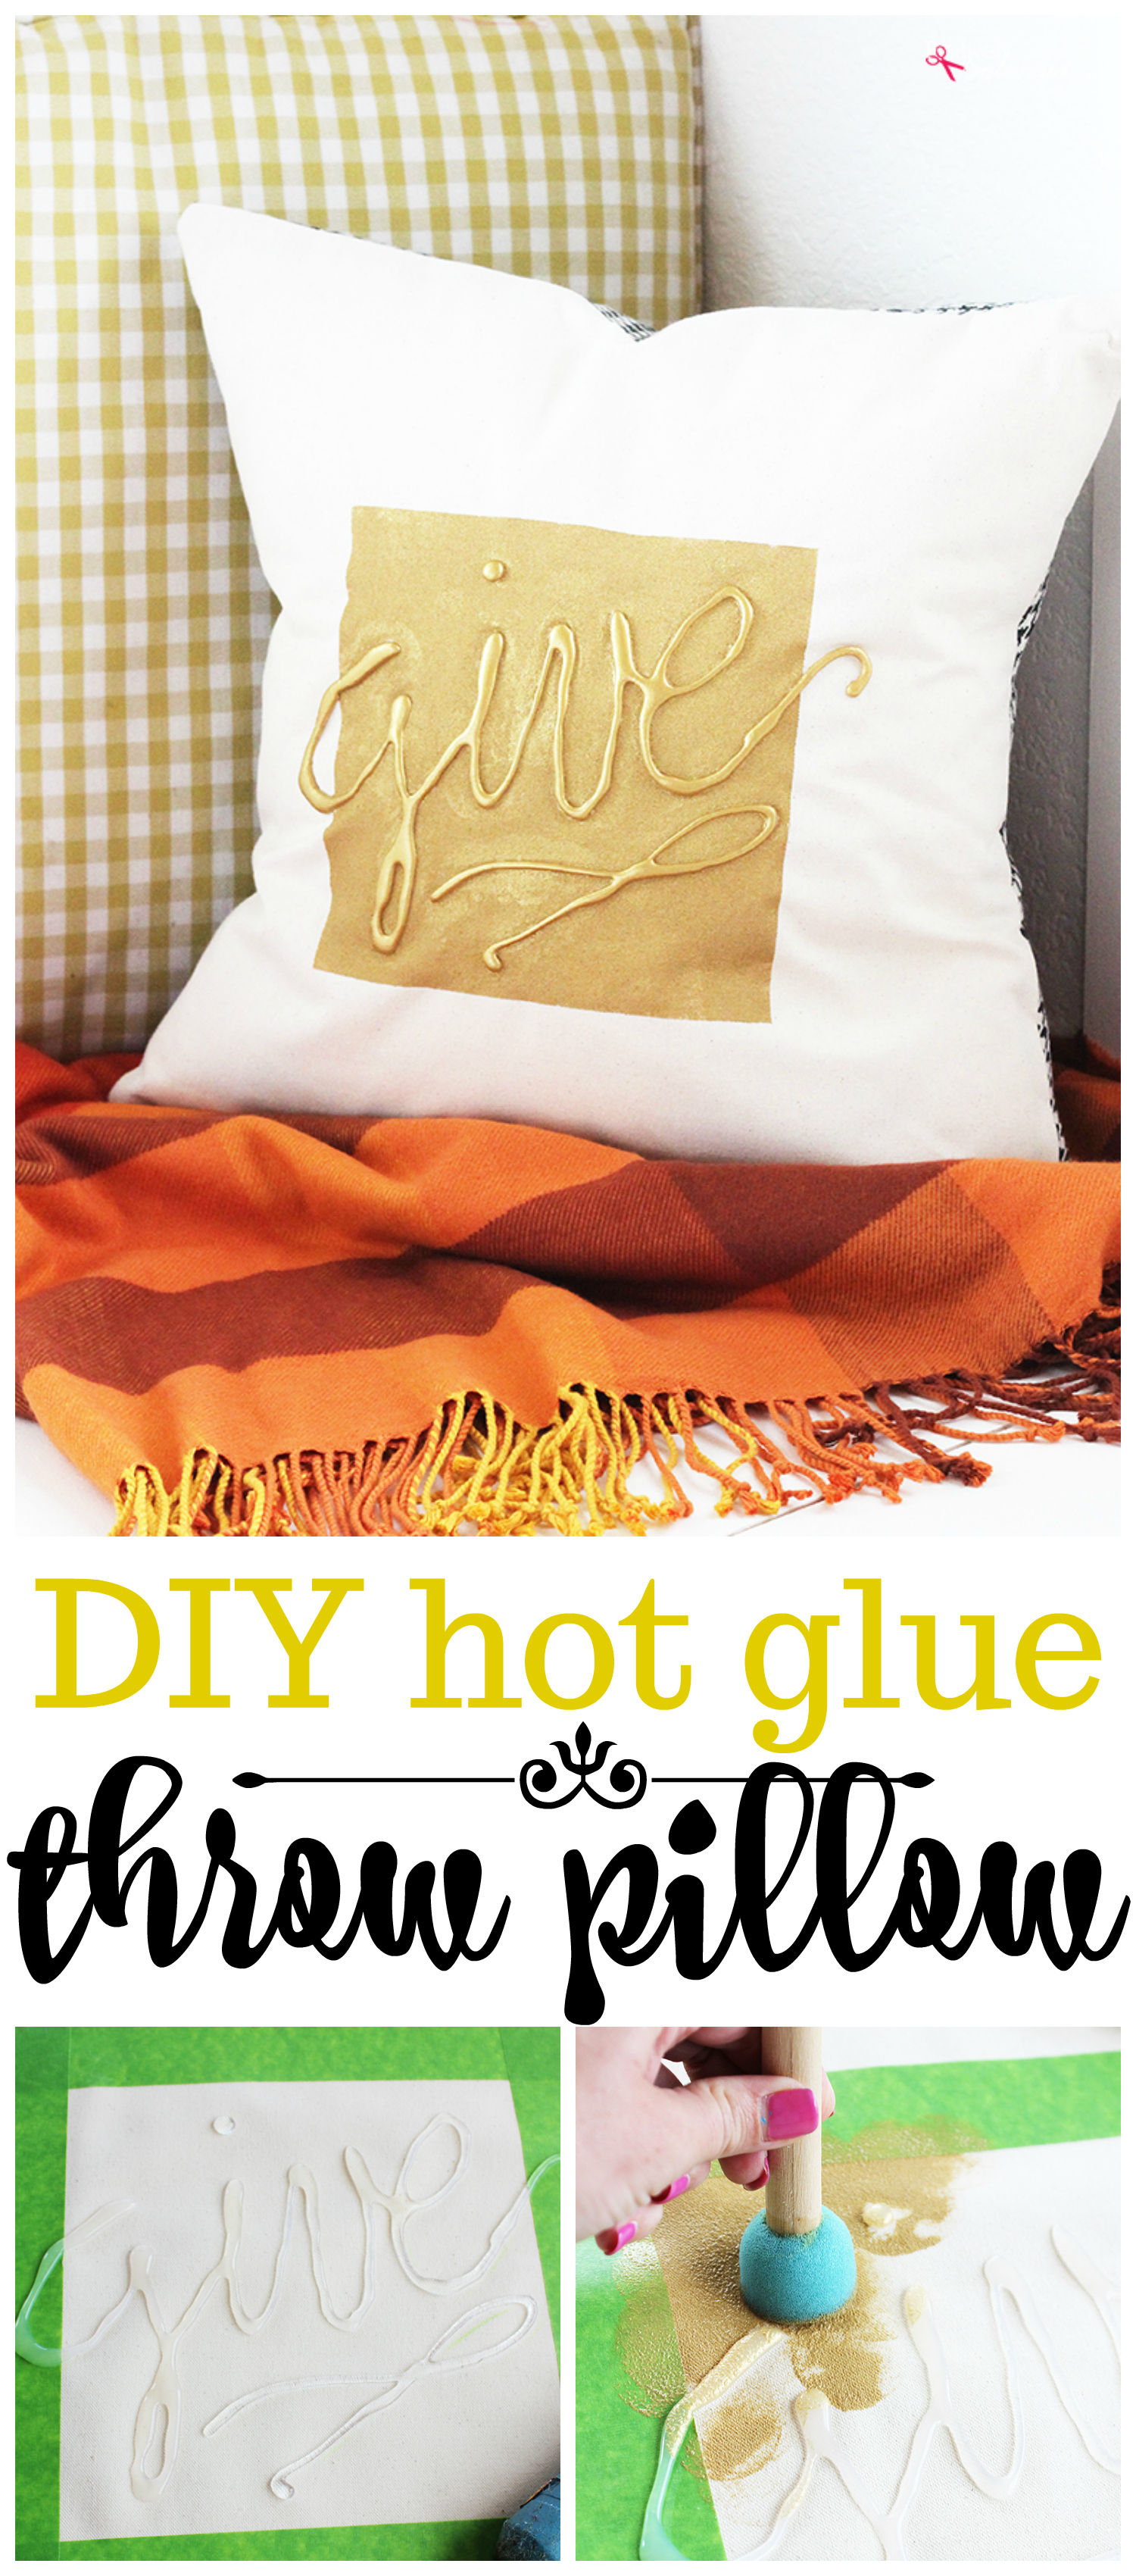
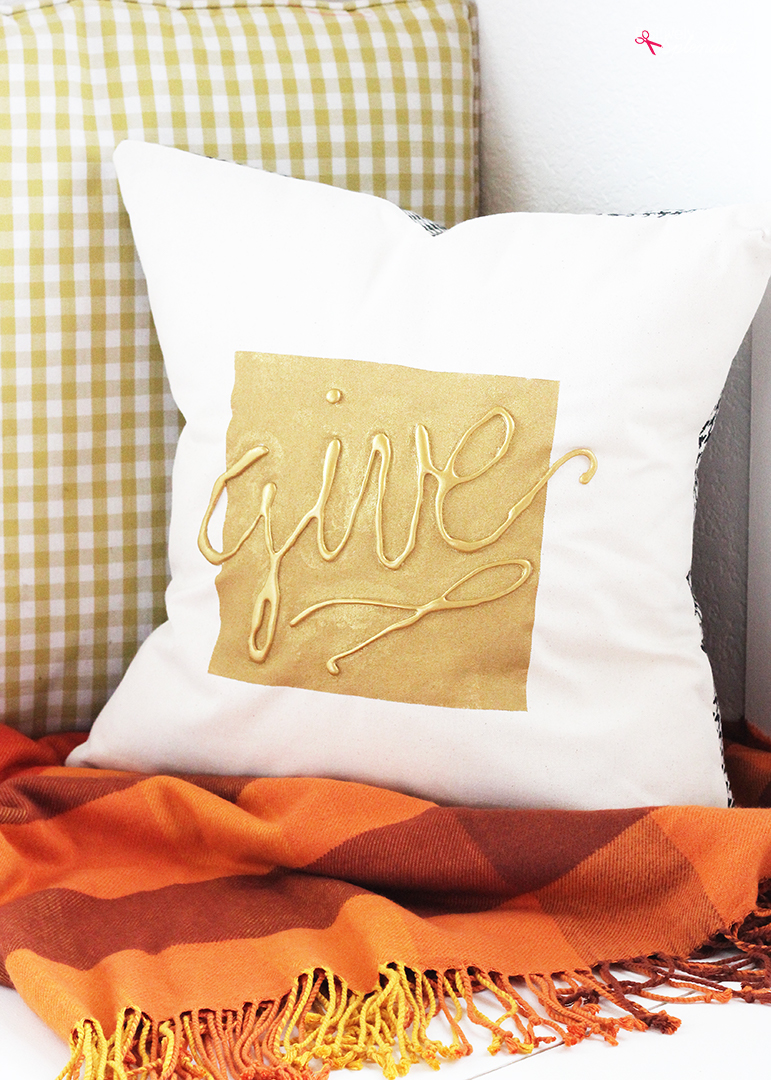
I love making DIY throw pillows to switch and swap out with the seasons. Today, I’m sharing a fun way to use a hot glue gun and some pretty paint to make personalized pillows. This DIY throw pillow idea is so unique and so easy! Let me show you how it’s done.
I’ve partnered with Plaid to bring today’s hot glue embellished DIY throw pillow idea to you. All opinions are entirely my own. This post contains affiliate links.
Hot Glue Embellished DIY Throw Pillow Supplies
- Pillow insert (any size will do)
- Natural canvas fabric
- Painter’s tape
- Fabric pen
- Hot glue gun
- Fabric hot glue sticks
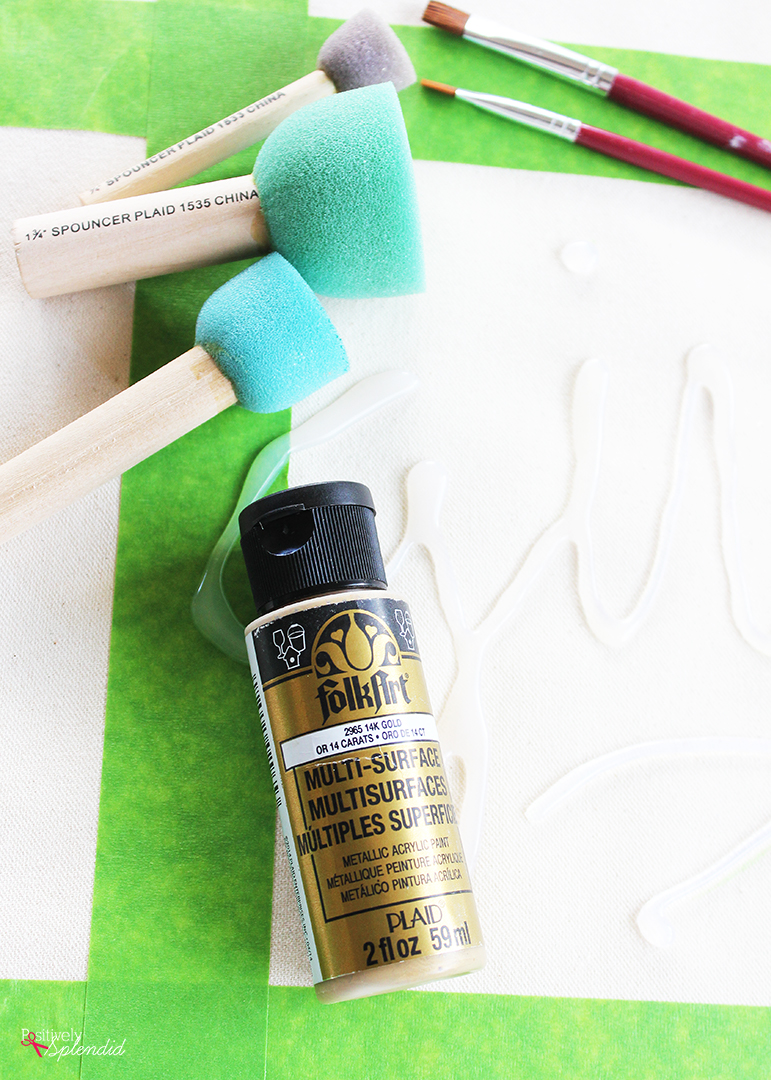
- FolkArt® Multi-Surface Acrylic Paint
- FolkArt Foam Spouncers
- Paint brush
- Basic sewing supplies to finish pillow cover (see a list of my Must-Have Sewing Supplies here)
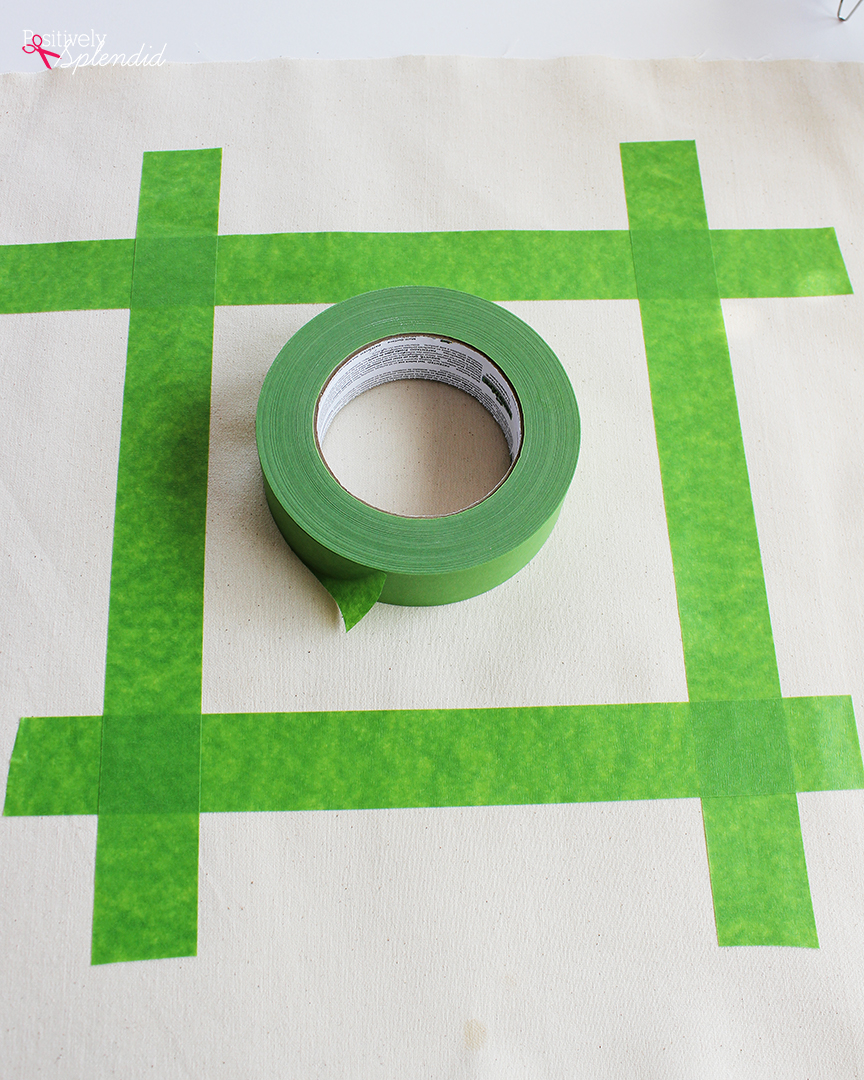
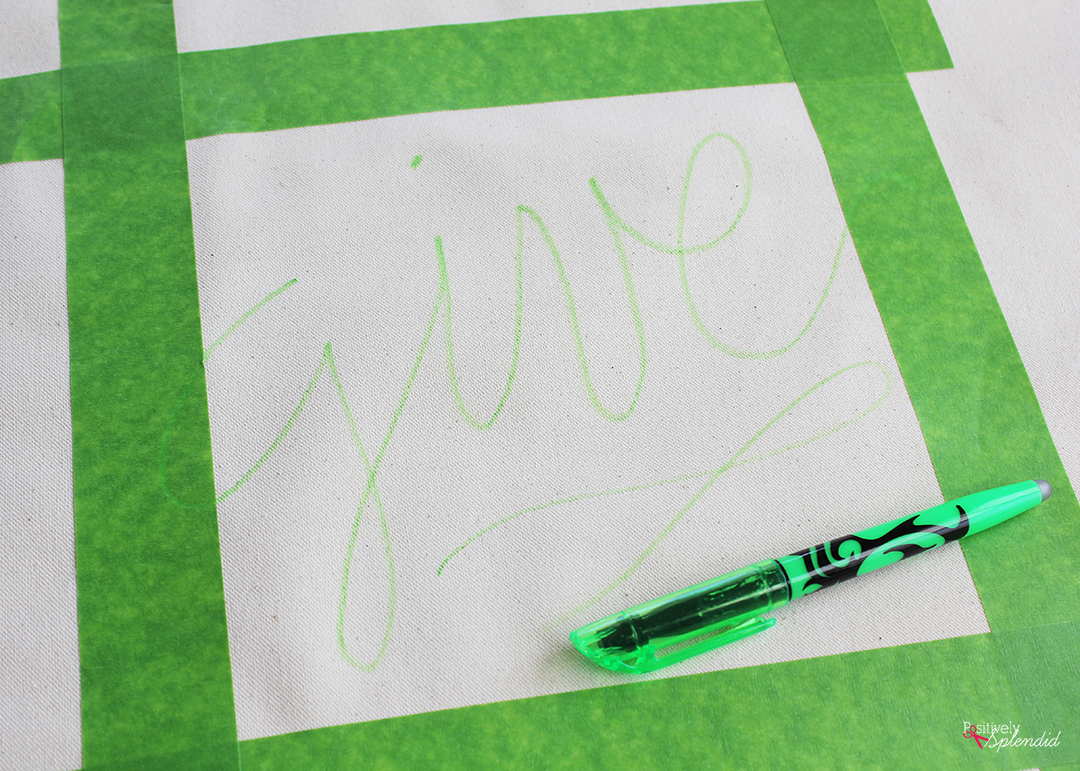
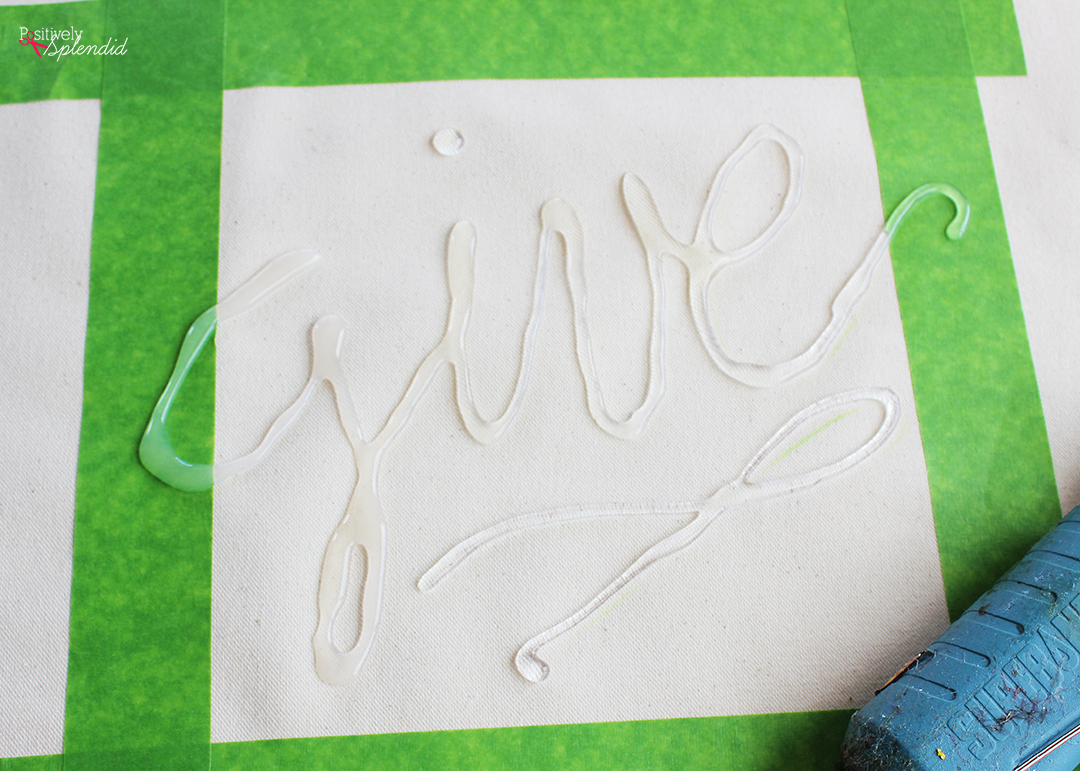
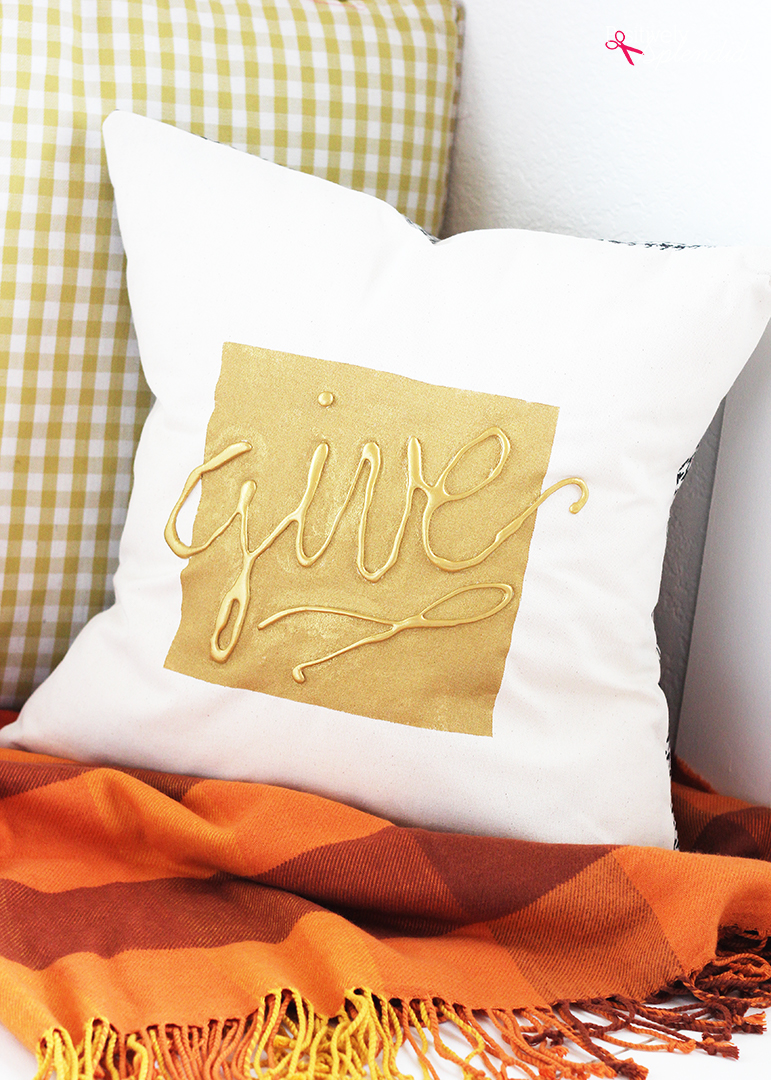
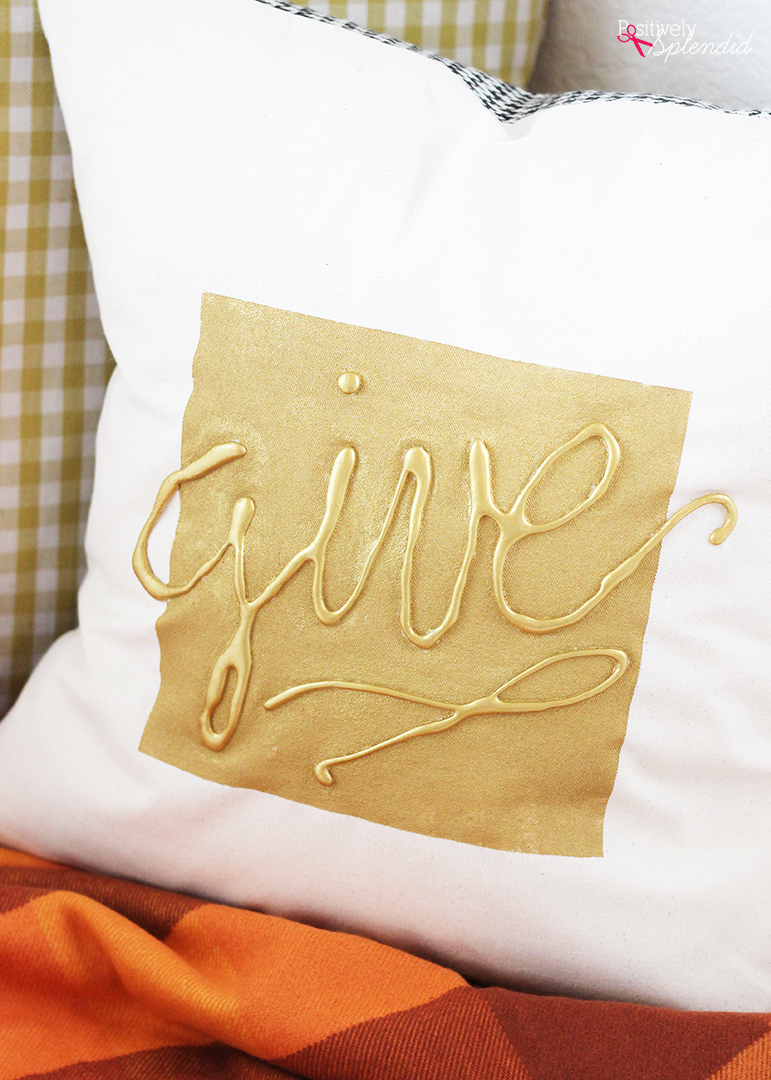
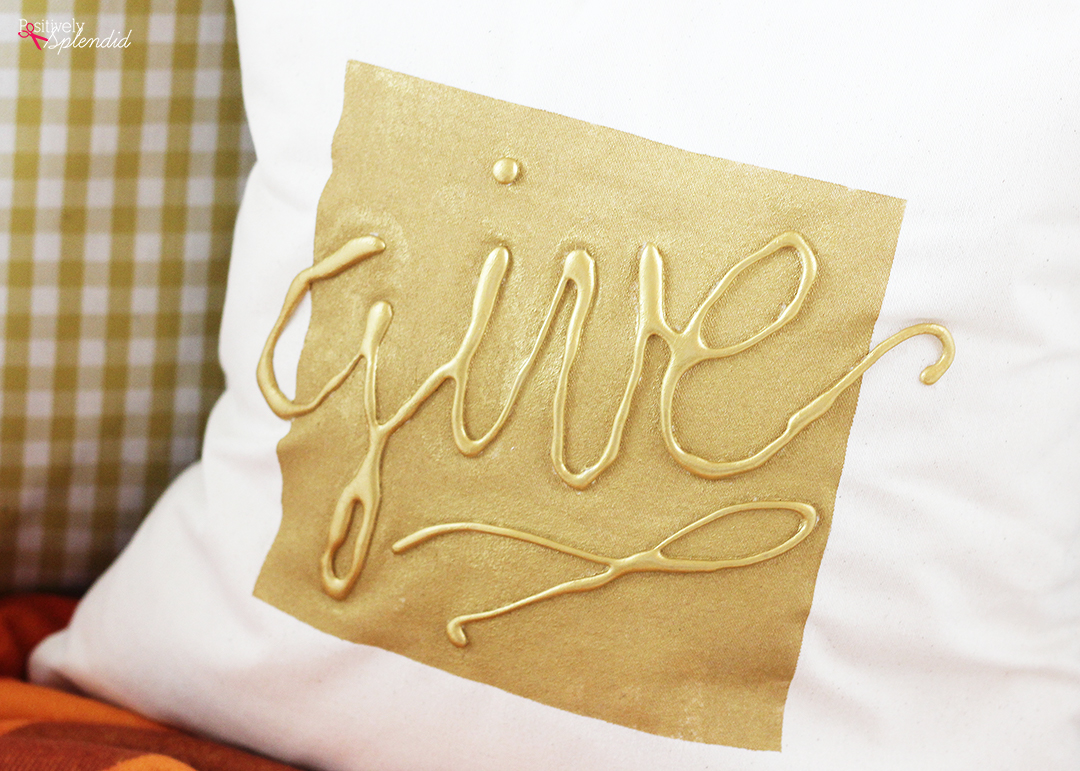
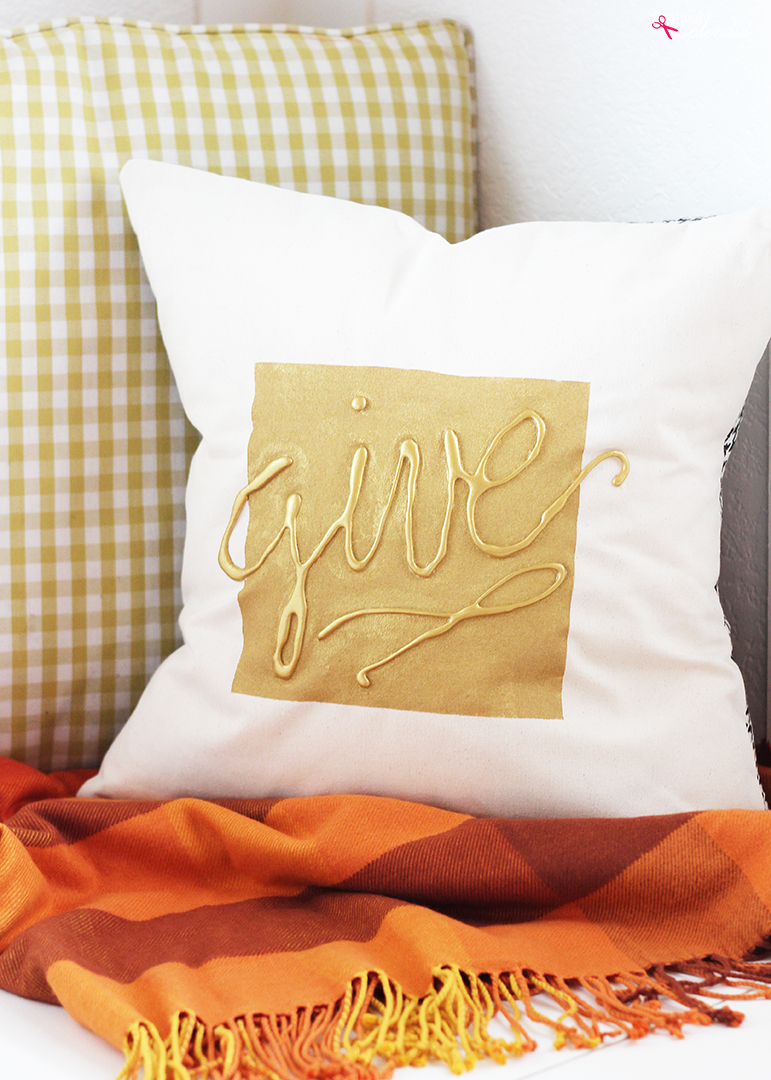
Refer to my Basic Envelope-Back Pillow Cover Tutorial for the dimensions to cut the three fabric pieces for your pillow cover according to the size of your pillow insert. When the three fabric panels are cut, set aside the back panel pieces. Lay the front piece (the square piece) flat on a protected work surface. Create a square border at the center of the piece with the painter’s tape.
Use the fabric marker to write a word by hand inside the taped off border. The word “give” has been my word for the year, so I loved the idea of using it for this project. It is so neat that this is a handmade project that enables you to personalize a finished home decor item with your very own handwriting!
When you are happy with the wording and overall design, use the hot glue gun to trace over the outline. This can be a bit tricky at first, so I recommend practicing on another piece of fabric with a few letters before moving on to the final design. It is really important to use fabric hot glue sticks for this project to ensure that the design is permanently affixed to the fabric.
Don’t worry if some of your lettering overlaps the taped border. This will actually make the finished project look even better!
When the glue is applied, set the project aside until the glue is completely dry and totally cool to the touch, about 30 minutes.
Now it’s time to make this project really pop…with paint!
FolkArt Multi-Surface Paints are truly some of the most versatile paints I’ve ever used. Did you know this paint can be applied to glass, wood, metal, canvas, paper, plastic AND fabric? It is such a great value to get so many great projects from one small but mighty bottle!
For my pillow project, I opted to use the metallic formula of the Multi-Surface paint. The shimmer and shine it gives is so pretty, and since it adheres to so many different surfaces, it is great for covering both the hot glue wording as well as the fabric.
To apply the paint, dab a foam spouncer into the paint and then apply the paint over the design in an up and down motion, really focusing on getting enough paint into all of the nooks and crannies of the wording, and painting over the hot glue design and you work. Apply two layers of paint, allowing the paint to dry for 15 minutes between coats.
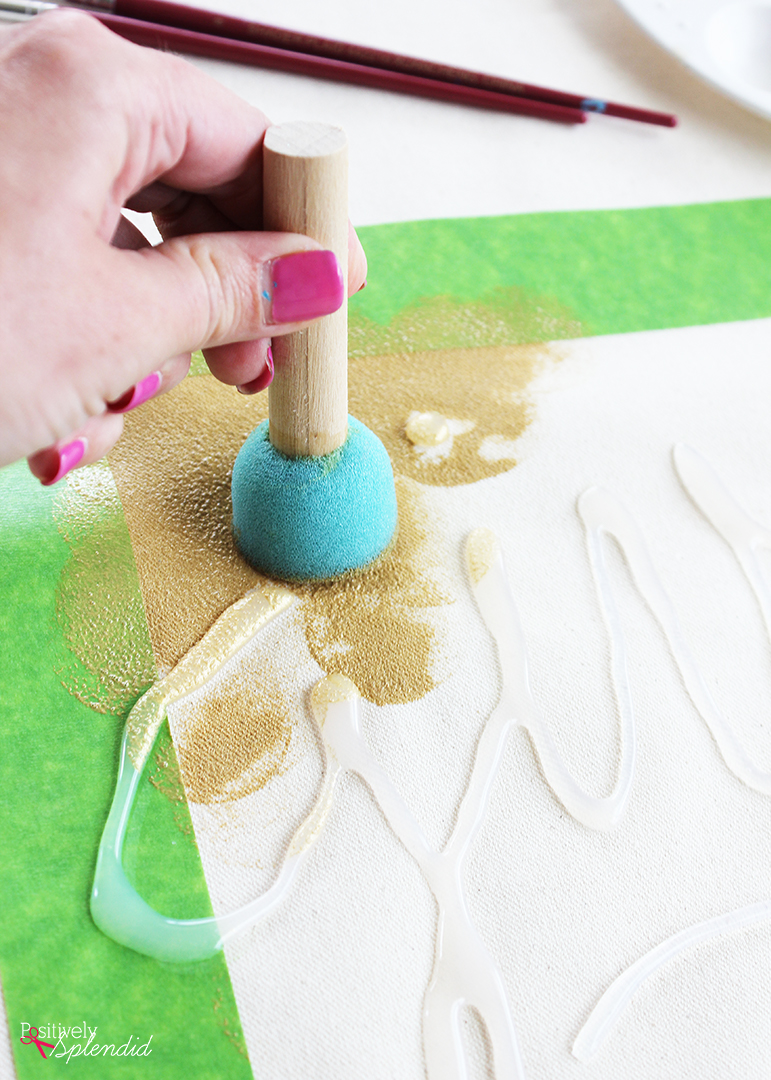
When the paint is evenly applied to the fabric background, use a paintbrush to apply 2-3 coats of paint over the word embellishments, until everything is covered in a nice, even coat of paint. Set the project aside to dry completely, about 1 hour.
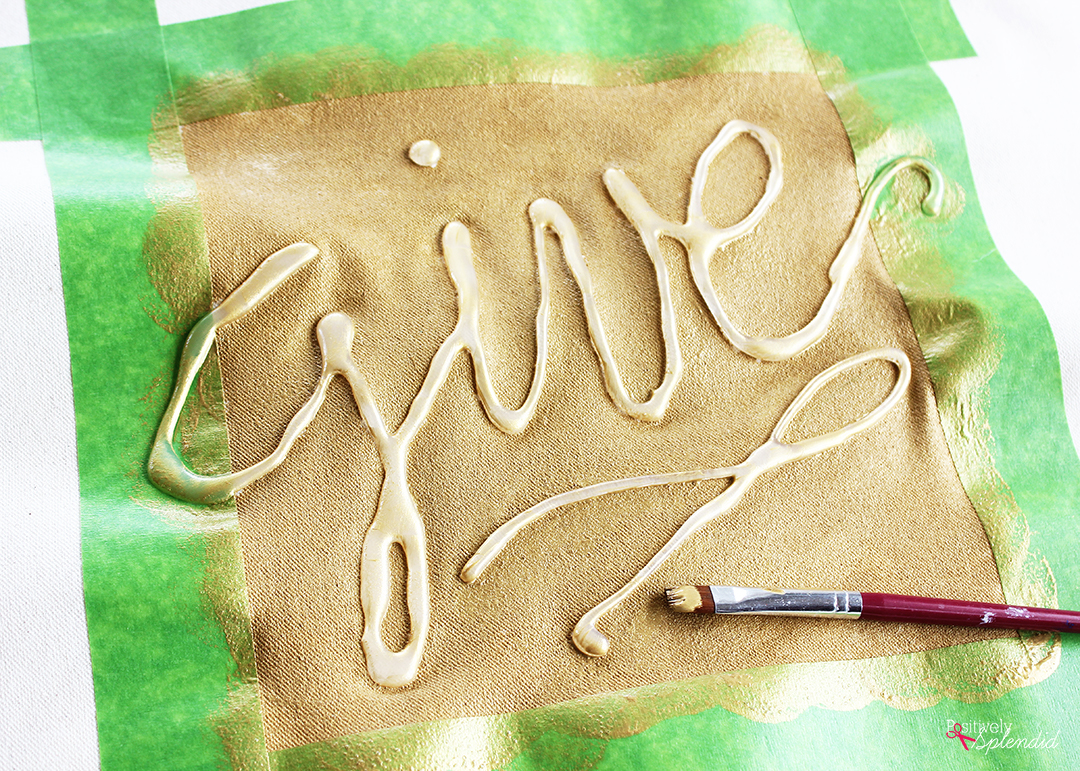
Now, carefully remove the painter’s tape, making sure to work gently around any portions of the lettering that overlap the tape. Use a small dab of hot glue to secure those overlapping sections to the fabric. Finish the pillow cover using the instructions in my Envelope-Back Pillow Cover Tutorial. Slip the cover onto your pillow insert, and you’ve got a pretty personalized pillow to accent any space!
There are so many fun ways you can change up this DIY throw pillow project! Use a favorite word like I have here, or personalize it with a monogram, name, or even a hand-doodled picture.
Find even more great inspiration by following Plaid on Facebook, Pinterest and Instagram!
Having grown up in a home brimming with sewing notions and paintbrushes, Amy has a deep love for all things creative. On any given day, you’ll find her knee-deep in her latest creative endeavor, with projects ranging from sewing and crafts to home decor and kid-friendly ideas. Amy believes that everyone, regardless of skill level or experience, possesses the ability to create something beautiful, and Positively Splendid was born of her passion for helping others harness their innate creative potential.
I’m making the phone charger station. I cannot get the grommet to stay. I installed the peltex as directed. I appreciate some help.
Does the part of the g lift up from the tape and then you re-adhere it to the fabric?