• Skip to primary navigation
  • Skip to main content
  • Skip to primary sidebar

Positively Splendid {Crafts, Sewing, Recipes and Home Decor}

Handcrafted. Splendidly.

  • Home
  • Blog
  • + Handmade
    • Crafts
      • Craft Gift Ideas
      • Holiday Crafts
      • Home Decor Crafts
      • Kids’ Crafts
      • Paper Crafts
      • Quick and Easy Crafts
      • Wearable Crafts
      • Wreaths
    • Gift Ideas
      • Budget-Friendly Gifts
      • Gift Wrapping
      • Gifts for Dads and Grandpas
      • Gifts for Kids
      • Gifts for Men
      • Gifts for Moms and Grandmas
      • Gifts for Neighbors
      • Gifts for Sports Fans
      • Gifts for Teachers
      • Gifts for Women
      • Quick and Easy Gifts
    • Kid-Friendly Projects
    • Sewing
      • Sewing for Children
      • Sewing for Men
      • Sewing for the Home
      • Sewing for Women
      • Sewing Techniques
      • Sewn Accessories
      • Sewn Gifts
  • + Home & Garden
    • DIY Home Decor Projects
    • Helpful Tips
    • Home Decor Crafts
    • DIY
    • Home Tour
    • Mantels and Tablescapes
    • Organization
    • Outdoor and Garden
  • + Holidays & Seasons
    • Spring
    • St. Patrick’s Day
    • Summer
    • Teacher Appreciation
    • Thanksgiving
    • Valentine’s Day
    • Winter
    • Back to School
    • Christmas
    • Easter
    • Fall
    • Fathers’ Day
    • Graduation
    • Halloween
    • Independence Day
    • Mothers’ Day
    • New Year’s
  • + Printables
  • + Recipes
    • Soups and Stews
    • Appetizers and Salads
    • Breads
    • Desserts
    • Food Crafts
    • Main Dish

How to Make a Pom Pom Baby Mobile {Tutorial}

December 30, 2011 By Amy @ Positively Splendid

FacebookTweetPinYummlyPrint

This project could actually be called something like how to make a baby mobile using as many ideas as possible from Pinterest. Gracious, do I ever love that site. I honestly could never have begun to plan or execute George’s nursery without it!

In changing many, many diapers over the course of the last six years, one thing I’ve found especially helpful to minimize the squirming of little ones is to have a colorful baby mobile hung over the changing table to captivate their interest. The grey color I used for the updated antique dresser in the nursery, which is doubling as the changing table for the space, provided a terrific neutral backdrop for a bright, bold mobile. I found two ideas I loved on Pinterest and combined them to create a DIY baby mobile complete with pom poms and brightly colored birds!

To make a baby mobile of your own, you will need…

Tissue paper in assorted colors
Floral wire
Assorted fabric scraps
Batting
Coordinating thread
1/4″ jump rings
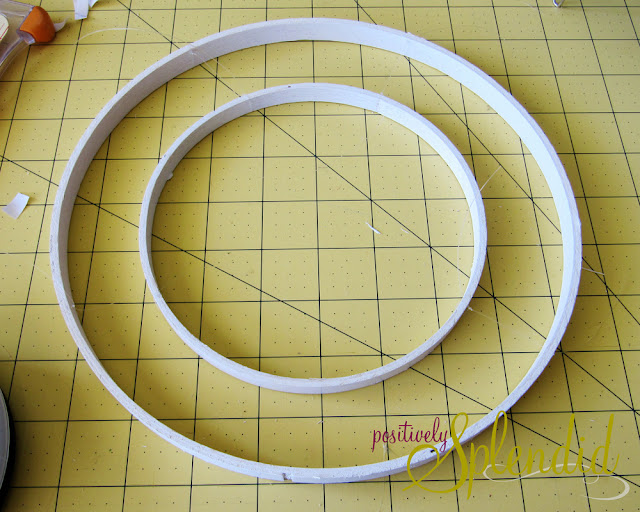
2 embroidery hoops (center pieces only), one large and one small
White spray paint
Pencil
Drill and very small drill bit
Fishing line
Large jump ring, to serve as a hanger
Patterned paper (optional)
Ribbon (optional)

step one. My first source of inspiration from Pinterest was this very famous post from Martha Stewart for how to make tissue paper pom poms. I used this same technique for my Pom Pom Halloween wreath, and also for the lantern mobile display over George’s crib (details on that project soon to come). For this mobile, you will need to make five pom poms using that procedure, using pieces of tissue that are 6″ square. 

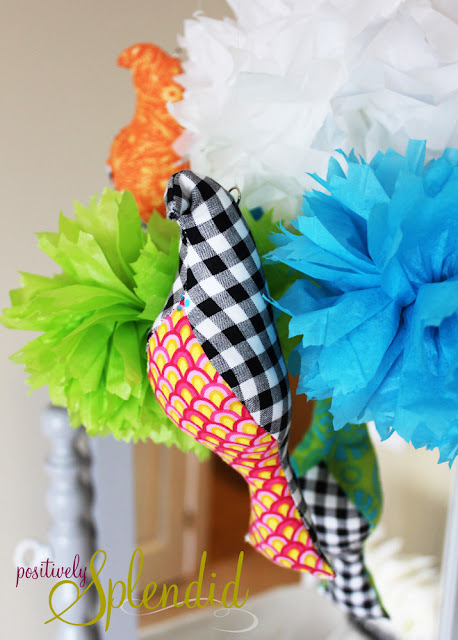
step two. Once your pom poms are made (they come together very quickly) you can move on to making your birds. This amazing bird tutorial and template from Spool, another one of my Pinterest finds, makes constructing them a breeze! I modified their method just slightly, opting to machine sew my birds instead of stitching them by hand. This was a real time-saver! I also enlarged the template by about 10% so that my birds would be just the size I had in mind, but that is completely up to personal preference. You will need to make five birds for your mobile.

Set your completed pom poms and birds aside while you assemble the framework for your mobile.

step three. Spray paint your embroidery hoop centers, and allow them to dry completely. Once they are dry, mark the quarter points on each hoop with a pencil, and use your drill to make small holes in your hoops at each of these marks. Precisely center your smaller embroidery hoop inside of the larger. Matching up the quarter marks you just drilled, thread pieces of fishing line through the corresponding holes on each hoop, and use the line to tie the hoops together. Make sure as you tie that the center embroidery hoop remains precisely centered within the larger, as this will ensure your mobile is balanced.

step four. Now, thread four pieces of fishing line of the same length (this length will vary depending on how low you want your mobile to hang) through the holes on the outer (larger) hoop, and secure with knots. Bring all four of the untied ends together, and thread them through your large jump ring and secure tightly with a knot. (I used a decorative ring from a necklace clasp instead of a jump ring.) Your mobile framework is complete!

Hi, Jack! 

step five. Thread a 1/4″ jump ring through the top of each of your birds, as shown. Thread a long piece of fishing line through each ring, and secure with a knot. With your mobile framework hanging from a high point, tie four of your birds onto the outer embroidery hoop using the fishing line, spacing the birds equally around your mobile and making sure each one hangs the same length from the hoop to keep things nice and balanced. Set the fifth bird aside for now.

step six. Tie long lengths of fishing line around the centers of each of your pom poms. Tie four of the pom poms to the center (smaller) hoop using these pieces, spacing them equally around your mobile and making sure each one hangs the same length from the hoop to keep things balanced. Set the fifth pom pom aside for now.

step seven. Thread two very long lengths of fishing line through the bottom of your jump ring hanger, and secure with a knot. Use these pieces to secure your remaining pom pom and bird to the center of your mobile, so that the pom pom hangs just above the bird. Adjust the heights of these elements as desired until your achieve a look you like.

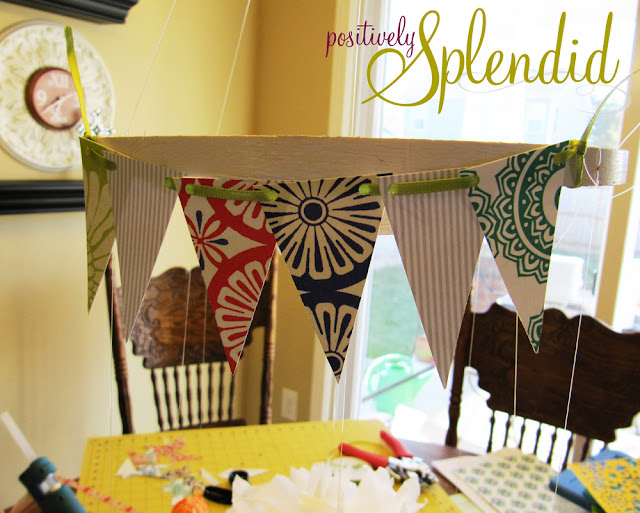
step eight. If desired, make a small paper bunting using patterned paper triangles connected with brightly colored ribbon to accent the top of your mobile.

All finished!

Stand back and admire your happy creation!

Baby’s eye view. 🙂

To hang my mobile, I used a small cup hook screwed directly into the ceiling. 

Project Note:
This could easily be done as a no-sew project by buying premade accents instead of using the birds. I can see paper die cuts, (butterflies, flowers, or even airplanes), beads, and other baubles as being a fun option, too!

Crafting a baby mobile is so much fun, and putting one together really is a straightforward process. There really is nothing sweeter than making a handcrafted piece of artwork for your little one to enjoy!

Photobucket

Linking this to…
Tatertots and Jello

Amy @ Positively Splendid

Having grown up in a home brimming with sewing notions and paintbrushes, Amy has a deep love for all things creative. On any given day, you’ll find her knee-deep in her latest creative endeavor, with projects ranging from sewing and crafts to home decor and kid-friendly ideas. Amy believes that everyone, regardless of skill level or experience, possesses the ability to create something beautiful, and Positively Splendid was born of her passion for helping others harness their innate creative potential.

EVEN MORE GREAT IDEAS JUST FOR YOU!

FacebookTweetPinYummlyPrint

Filed Under: Crafts, DIY, Positively Home & Garden, Tutorials Tagged With: Baby, DIY Baby Mobile, How to Make a Baby Mobile, Nursery, Nursery Decor

Previous Post: « DIY Framed Chalkboard Tutorial
Next Post: Saturday Seven {2011 Favorites} »

Reader Interactions

Comments

  1. tute-bot says

    December 30, 2011 at 4:49 pm

    Gorgeous! Thank you for sharing the tutorial. 🙂

  2. emily says

    December 30, 2011 at 5:11 pm

    Thanks for sharing!! Can’t wait to make something similar.

  3. Laurel says

    December 30, 2011 at 5:17 pm

    That is so cute. I wish I had a baby in a crib still. Absolutely darling.

  4. Allie says

    December 30, 2011 at 6:32 pm

    This is beautiful, Amy! The colors are so great! and the birds are super fun

  5. Amanda @ Serenity Now says

    December 30, 2011 at 6:37 pm

    Pretty! I bet he will love looking up at that. Love how you added the cute pennants…great idea. Isn’t Pinterest the best for ideas?

  6. Ruby Jean says

    December 30, 2011 at 7:03 pm

    Oh I LOVE it… It looks so VERY tropical and as though your somewhere in the Caribbean … 🙂

  7. Michele {The Scrap Shoppe} says

    December 30, 2011 at 7:30 pm

    Absolutely adorable, Amy! And I love the vibrant colors. Certainly the perfect thing to captivate a squirmy little baby! 🙂

  8. Stephanie says

    December 30, 2011 at 8:50 pm

    Love this!! I also love that you did an AMAZING tutorial on it. I think it would work in my daughters room!!

  9. Reannah Elizabeth says

    December 31, 2011 at 1:43 am

    This is ADORABLE!! Thanks so much for sharing! I am loving your cute blog — I just found you via TT&J and am a happy new follower!! 🙂 xo, Reannah @ShapedbyGrace.com

  10. milliemorganmedia says

    December 31, 2011 at 2:23 am

    Gorgeous and Brilliant! Thanks for sharing. I am a new follower. I would appreciate it if you followed me back at http://milliemorganmedia.blogspot.com!

  11. Shirley says

    December 31, 2011 at 7:51 pm

    I love this! I don’t have any babies but I think I may have to make something similiar for our playroom. 🙂 Stopping in from Tatertots & Jello.

Primary Sidebar

PS Search

Search this website

Seasonal Inspiration

Hocus Pocus Wreath
Ghost Plushies
Paper Pumpkins
Fabric Yo-Yo Pumpkins

Copyright © 2023 · Positively Splendid · All Rights Reserved. · Privacy Policy

Privacy & Cookies: This site uses cookies and other tracking technologies to assist with navigation and your ability to provide feedback, analyse your use of our products and services, assist with our promotional and marketing efforts, and provide content from third parties. To find out more, as well as how to remove or block these, see here: Our Cookie/Privacy Policy