• Skip to primary navigation
  • Skip to main content
  • Skip to primary sidebar

Positively Splendid {Crafts, Sewing, Recipes and Home Decor}

Handcrafted. Splendidly.

  • Home
  • Blog
  • + Handmade
    • Crafts
      • Craft Gift Ideas
      • Holiday Crafts
      • Home Decor Crafts
      • Kids’ Crafts
      • Paper Crafts
      • Quick and Easy Crafts
      • Wearable Crafts
      • Wreaths
    • Gift Ideas
      • Budget-Friendly Gifts
      • Gift Wrapping
      • Gifts for Dads and Grandpas
      • Gifts for Kids
      • Gifts for Men
      • Gifts for Moms and Grandmas
      • Gifts for Neighbors
      • Gifts for Sports Fans
      • Gifts for Teachers
      • Gifts for Women
      • Quick and Easy Gifts
    • Kid-Friendly Projects
    • Sewing
      • Sewing for Children
      • Sewing for Men
      • Sewing for the Home
      • Sewing for Women
      • Sewing Techniques
      • Sewn Accessories
      • Sewn Gifts
  • + Home & Garden
    • DIY Home Decor Projects
    • Helpful Tips
    • Home Decor Crafts
    • DIY
    • Home Tour
    • Mantels and Tablescapes
    • Organization
    • Outdoor and Garden
  • + Holidays & Seasons
    • Spring
    • St. Patrick’s Day
    • Summer
    • Teacher Appreciation
    • Thanksgiving
    • Valentine’s Day
    • Winter
    • Back to School
    • Christmas
    • Easter
    • Fall
    • Fathers’ Day
    • Graduation
    • Halloween
    • Independence Day
    • Mothers’ Day
    • New Year’s
  • + Printables
  • + Recipes
    • Soups and Stews
    • Appetizers and Salads
    • Breads
    • Desserts
    • Food Crafts
    • Main Dish

No-Slip Headband Tutorial

July 26, 2012 By Amy @ Positively Splendid

FacebookTweetPinYummlyPrint

Back today with another terrific summertime accessory idea is the immensely talented Megan from The Homes I Have Made! With the sultry summer days here in Tennessee, I need to whip up a few of these beauties. Take it away, Megan!

***

Hello PS Readers! It’s Megan from The Homes I Have Made back again, and I am super excited to be here with my third tutorial! Let’s get right to it!
My family and I just moved to eastern North Carolina, and boy is it hot here! And based on the national news, I am pretty sure it’s hot where you are too! These days, whether unpacking boxes in the garage, going out for a run,  running errands around town, or playing at the park with my toddler, my hair is in a permanent pony tail. The only problem is that my hair is short, fine, and frizzy, which means I seemingly have a constant “halo” of wispies around my face. I am always reaching for headbands to tame those frizzes, but (until  now!), I’ve only had exercise “sweat” bands stay put long enough to do the job; and while functional, they sure aren’t fashionable!  Then recently, I was working on a project that left me with a good supply of leftover Velcro, and I knew it was just the trick for making my headbands stick (ha!).

No Slip Headbands 001

Hey, don’t knock it ’till you try it! These babies don’t move a centimeter all.day.long. And no, they 
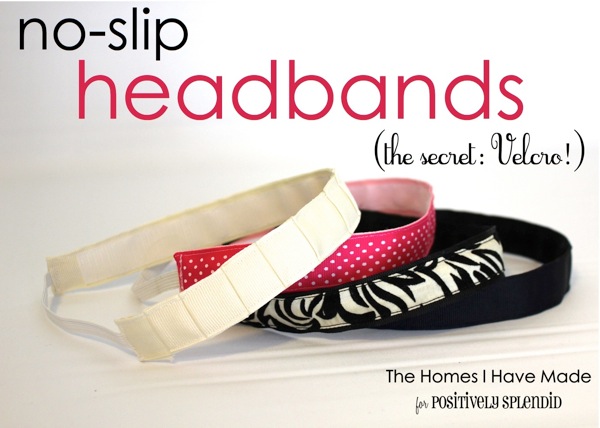
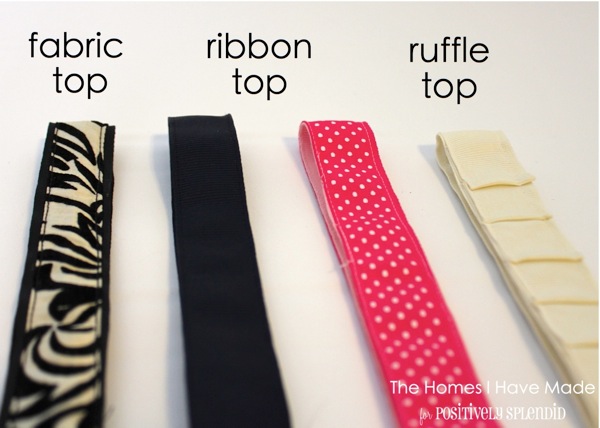
do not pull your hair out when you take them off! What’s even better, they don’t take a lot of supplies, they are super quick to make (about 5-10 minutes), and are a great way to use up ribbon or scraps of fabric! Oh! And the possibilities are endless…here’s just three different ideas I came up with!

No Slip Headbands 002

Let me show you how I made each one!
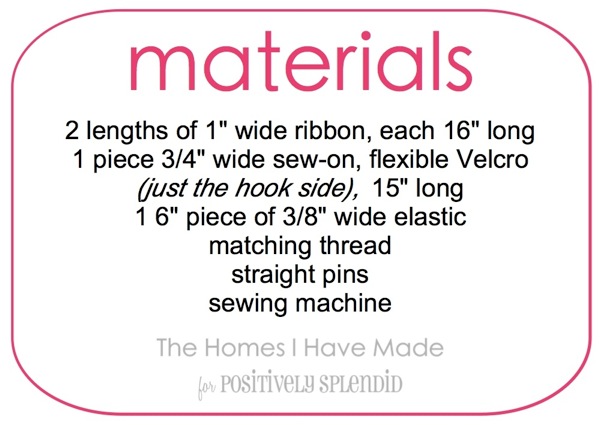
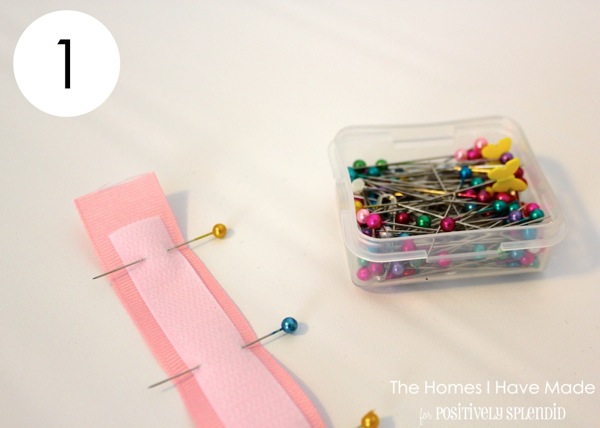
Although slightly different, all three “styles” of headband follow the same construction, just with small variations. To make the “basic” ribbon top model, here is what you will need!

No Slip Headbands 003

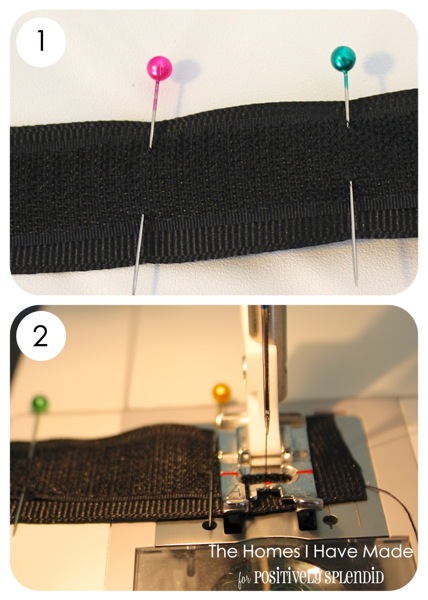
1. Center and pin Velcro to the ribbon. Select which piece of ribbon (if they are different) will be the underside to your headband (the part that touches your head!). Center the Velcro on the RIGHT side of the ribbon (if there is one), and pin it down the length of the ribbon with straight pins. You should have an extra 1/2″ or so of ribbon on each end (beyond the Velcro).

No Slip Headbands 004


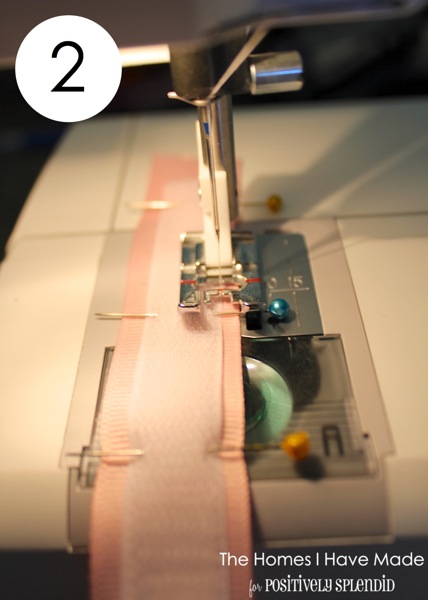
2. Sew Velcro to the ribbon. Starting in one corner (it doesn’t matter which one), sew around all four sides of the Velcro, attaching it securely to the ribbon. Try to sew as close to the edge of the Velcro as you can.

No Slip Headbands 005

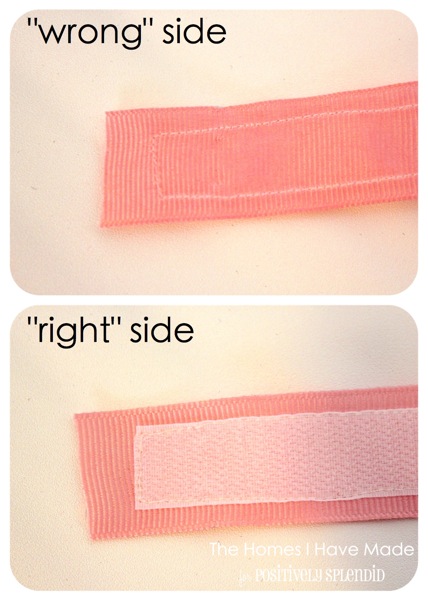
Once you’ve sewn on your Velcro, this is what you’ll end up with. Note what I am calling the “right” side versus the “wrong” side.

No Slip Headbands 006

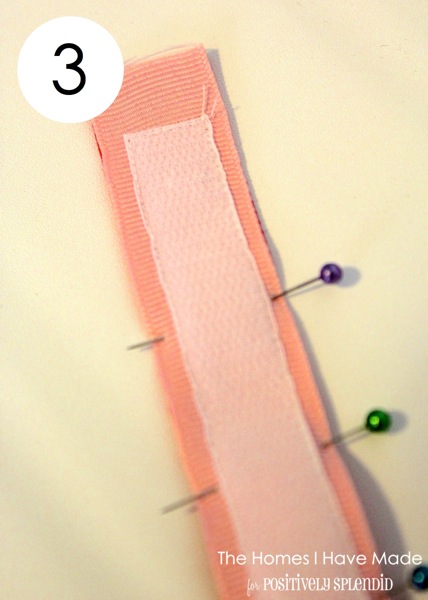
3. Pin the Velcro ribbon to the other length of ribbon. With WRONG sides together, pin the ribbon you just sewed (with the Velcro) to the ribbon you want for the top of your headband (this is the part that will show when you’re wearing it).

No Slip Headbands 007

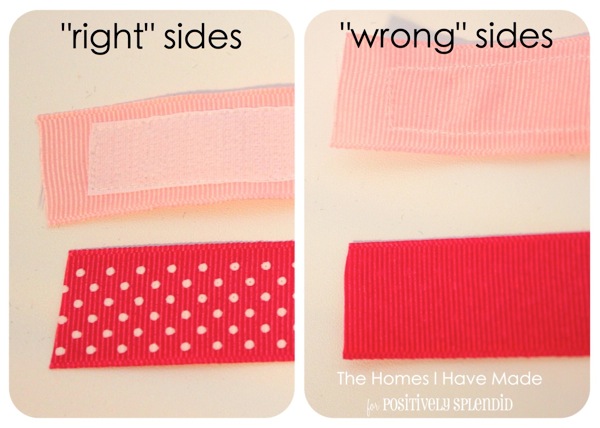
Just to keep all the sides clear, here is what I mean by WRONG sides. Because ribbon already has a finished edge, there is no flipping involved in this project. Therefor, when you pin the two ribbons together, you want your RIGHT sides to be facing outward.

No Slip Headbands 008

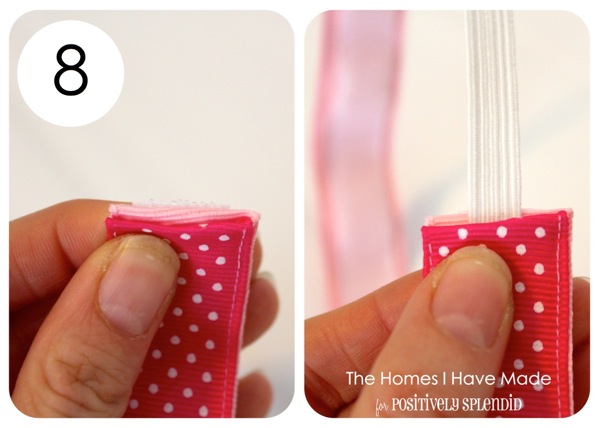
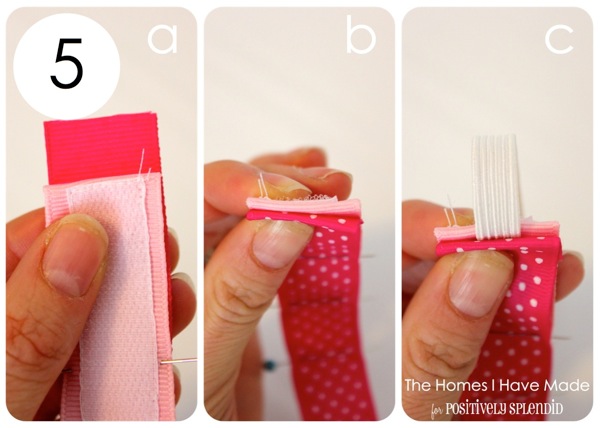
5. Insert the elastic into ONE end of the ribbon. First, only attach the elastic to ONE end of the ribbon. Here is how to do it!
  • a) Fold down the end of the Velcro ribbon toward the center, just to where the Velcro starts.
  • b) Flip the whole thing over, and repeat using the outside ribbon. Essentially, fold the two ends toward each other.
  • c) Insert one end of the elastic about a 1/2″ or so and pin shut.
    No Slip Headbands 009
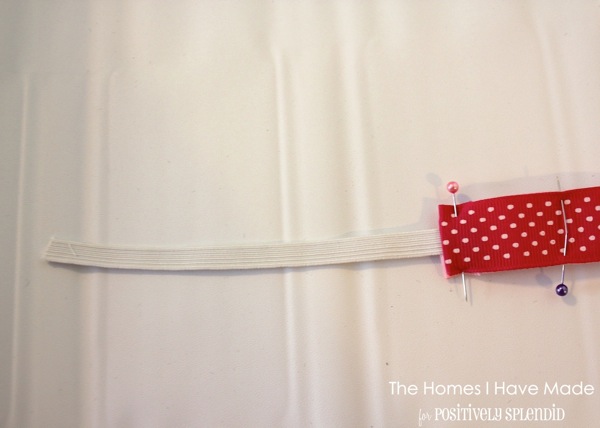
    Again, only insert it into one side (for now!)
    No Slip Headbands 010

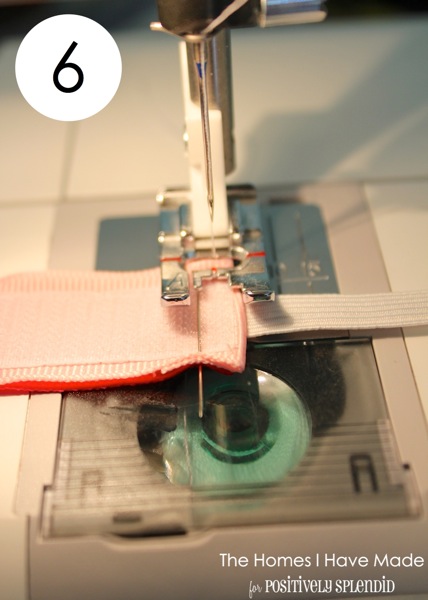
    6. Sew the elastic end. Using a sewing machine, sew the elastic and the ends shut by simply going back and forth 3-4 times (to make it nice and strong).

    No Slip Headbands 011

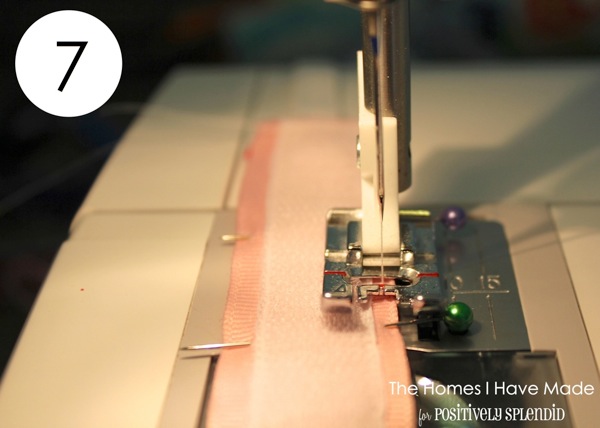
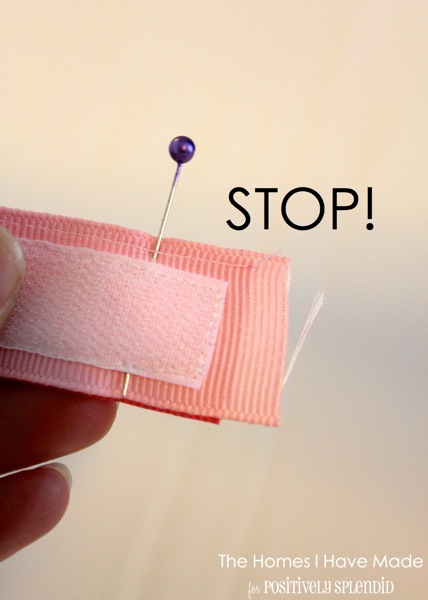
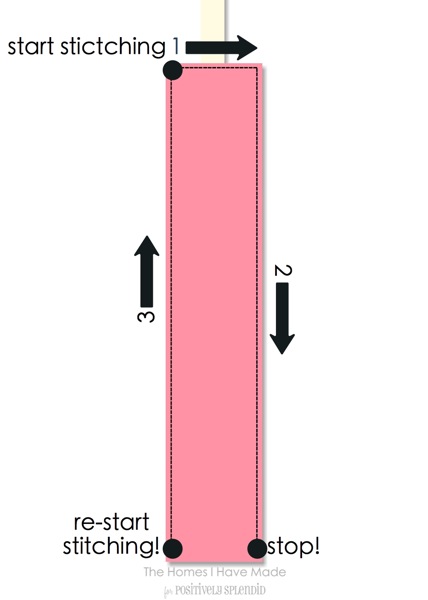
    7. Sew the sides of the ribbons shut. Once the end is shut (and the elastic is firmly sewn in), sew down each side of the headband, attaching the two pieces of ribbon to each other. 

    No Slip Headbands 012
    But be sure to STOP at the end of each side – don’t sew the other opening shut!
    No Slip Headbands 013
    Here is how I recommend sewing your headband:
    No Slip Headbands 014


    8. Insert the elastic to the other end of the headband. Repeating the process you did in step 5, insert the elastic into the other end of the headband. (Make sure your elastic ins’t twisted!)

    No Slip Headbands 015

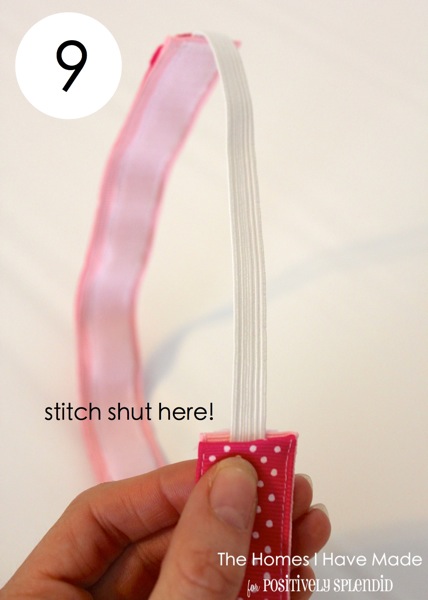
    9. Stich the headband shut. Again going back-and-forth a few times, stitch the headband shut at the other elastic insertion.

    No Slip Headbands 016
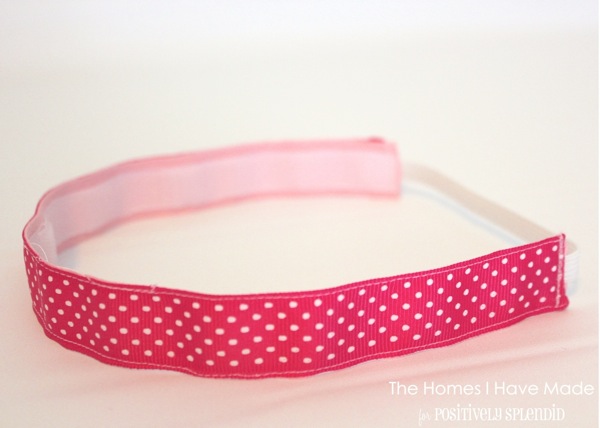
    And you’re all done! Easy, huh?!?
    No Slip Headbands 017

    After making two of these easy ribbon headbands, I really wanted to be able to do the same thing with fabric – just think of the different looks you could make with fabric as an option too! After a failed attempt at the sewing-and-flip-right-side-out approach, I went about it a different way!
    To make the headband with a fabric top, you start the same way!
    1. Center and pin Velcro to the ribbon. 
    2. Sew Velcro to the ribbon. 

    No Slip Headbands 018

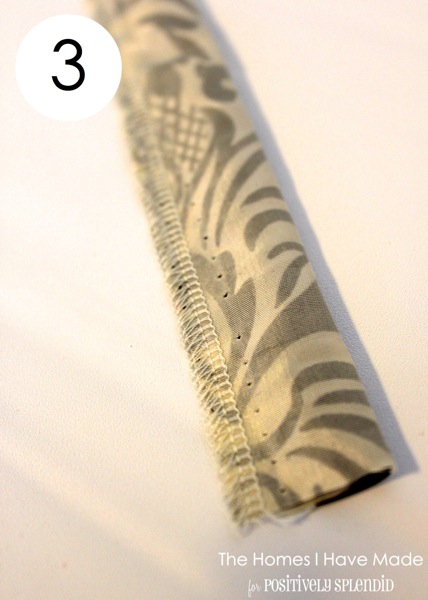
    3. Prepare a fabric strip. Cut a 16″+ length of fabric (or use a scrap like I did!) about 3 inches wide. Fold it in half with RIGHT sides together and sew down the edge. I used my serger to finsih the edge in order to reduce the amount of bulk on the inside of the strip once it was flipped right-side-out.

    No Slip Headbands 019

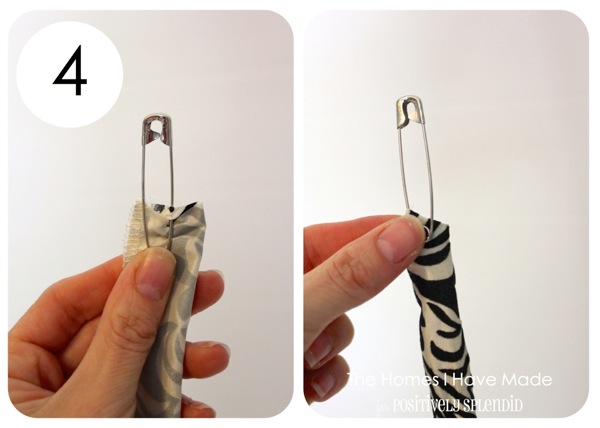
    4. Flip the strip right-side-out. Using a safety pin (or one of those fancy turning tools), flip your fabric strip right-side-out.

    No Slip Headbands 020

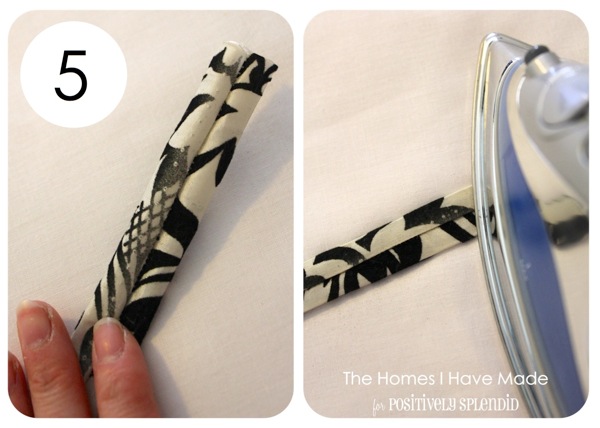
    5. Press the fabric flat. With the seem running down the center of the fabric strip, press the fabric strip flat.

    No Slip Headbands 021

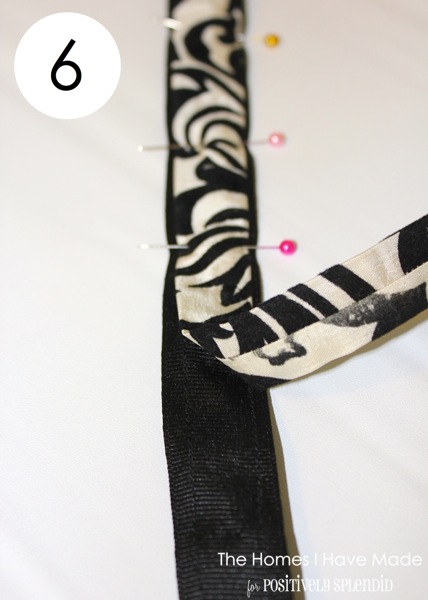
    6. Pin the fabric strip to the ribbon with Velcro. Like before, with WRONG sides together, pin the fabric to the ribbon strip.

    No Slip Headbands 022

    Finish the headband the same way as above.

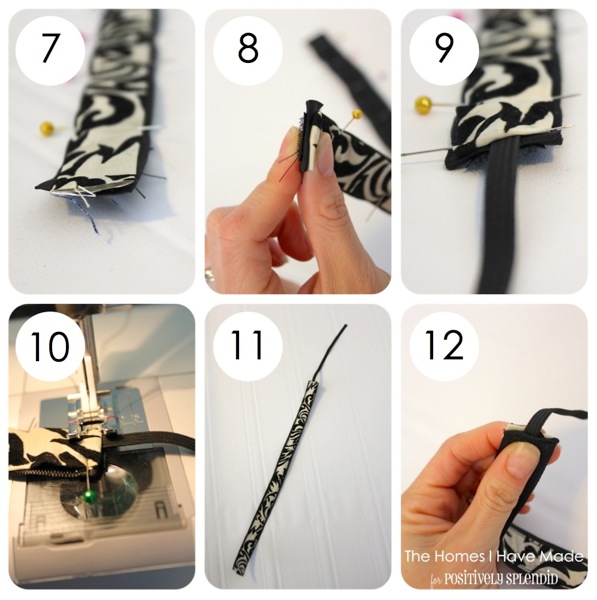
    7. Pin down the length of the ribbon.

    8. Fold the ends of the ribbon inwards.

    9. Insert the elastic into one end.

    10. Sew the elastic in and the end shut.

    11. The elastic and sides should be sewn shut.

    12. Finish by inserting the elastic into the remaining end and sewing shut.

    No Slip Headbands 023
    Love this one – just a little more glamorous!
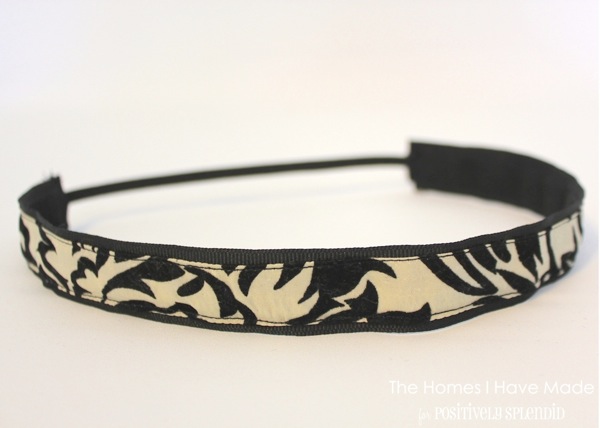
    No Slip Headbands 024

    Last but not least, I added a little “ruffle” to the top of my last headband.

    Again, start the same way:

    1. Center and pin Velcro to the ribbon. 

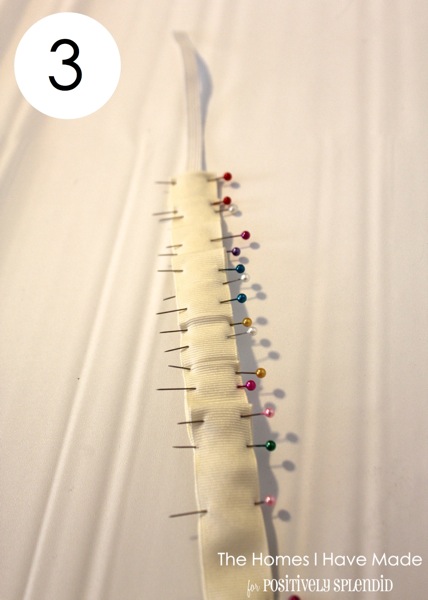
    2. Ruffle the ribbon. Using pins, create 5-6 ruffles/pleats on one end of the ribbon strip.
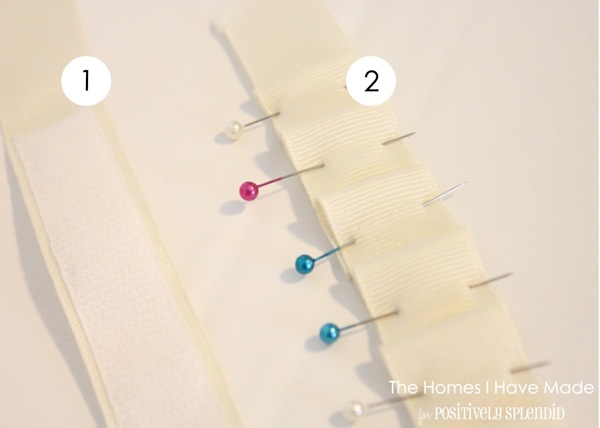
    No Slip Headbands 025

    3. Attach the ruffled ribbon to the Velcro ribbon. No need to baste, just go ahead and use more pins to attach the ruffled ribbon to the Velcro ribbon with WRONG sides together. Finish the rest of the headband as above!

    No Slip Headbands 026

    Here’s the pink ribbon one after a four mile run!
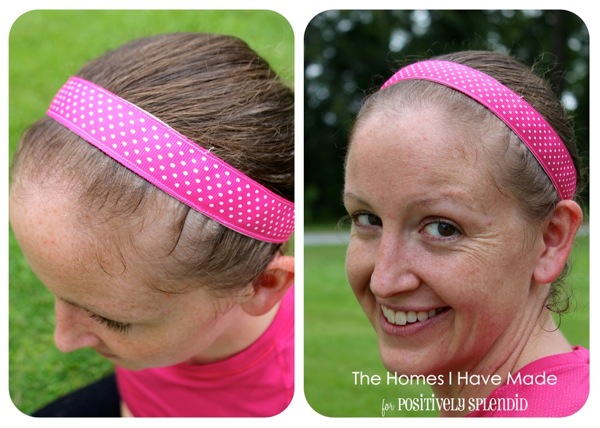
    No Slip Headbands 028
    I am so addicted – I can’t wait to make more!
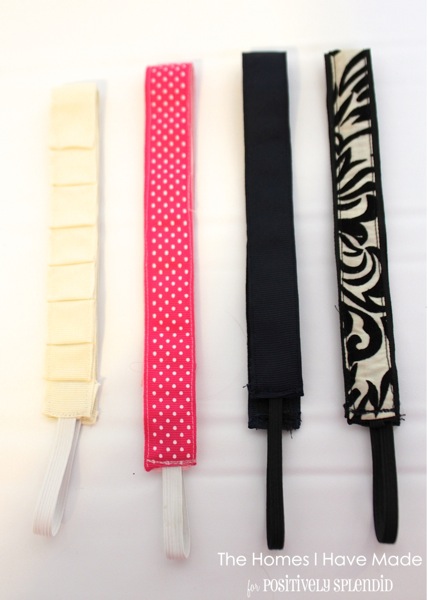
    No Slip Headbands 029

    That’s all I’ve got for you today! There has been some amazing feedback on my previous two projects for PS (the 3D Paper Wall Flowers and my Outdoor Drink Holders), so thanks so much for all the blog love! If you haven’t yet, please come on over to say HI to me at The Homes I Have Made. I am moving into a new house and taking on all sorts of fun projects!
    See you next month!

    signiture 1


    Megan is an exercise and nutrition professional turned stay-at-home mom and DIY blogger with the arrival of her baby boy in April of 2011. Married to a U.S. Marine, she is currently setting up her 5th home in 8 years! You can follow Megan’s decorating and crafting adventures over at The Homes I Have Made (and here on Pinterest and Facebook) and find lots of ideas, tips, and tricks for making any temporary space a cute, cozy and comfortable home!


    Amy @ Positively Splendid
    Amy @ Positively Splendid

    Having grown up in a home brimming with sewing notions and paintbrushes, Amy has a deep love for all things creative. On any given day, you’ll find her knee-deep in her latest creative endeavor, with projects ranging from sewing and crafts to home decor and kid-friendly ideas. Amy believes that everyone, regardless of skill level or experience, possesses the ability to create something beautiful, and Positively Splendid was born of her passion for helping others harness their innate creative potential.

    EVEN MORE GREAT IDEAS JUST FOR YOU!

    FacebookTweetPinYummlyPrint

    Filed Under: Craft Gift Ideas, Crafts, DIY, Quick and Easy Crafts, Sewing, Sewn Accessories, Tutorials Tagged With: Sewn Accessories

    Previous Post: « Sewing Project Planner (Free Printable)
    Next Post: Saturday Seven Party {No. 35} »

    Reader Interactions

    Comments

    1. Country Mouse says

      July 26, 2012 at 1:29 pm

      Great idea!!! Thanks for sharing!
      audrey

    2. Jess says

      July 26, 2012 at 1:30 pm

      This is totally ingenious! I’m constantly losing headbands when I’m running! Definitely making a bunch of these for myself and my marathoner sister in law!

    3. Jessica Kielman says

      July 26, 2012 at 7:02 pm

      These are so cute…a must try!

      Jessica @ Mom 4 Real

    4. Kim says

      July 26, 2012 at 7:57 pm

      These are so darn cute! Love the stay-put feature. Thanks so much for sharing! 🙂
      Kim @ Seabrook Lane

    5. Jessica says

      July 26, 2012 at 8:34 pm

      What size would you consider for a toddler sized headband. My daughter loves headbands but they hurt her behind the ears and these would be perfect!

    6. Sky says

      July 27, 2012 at 4:50 am

      Oooh.. I Love this! Such a great idea that will solve a big frustration in my world! I’ll be whipping these up tomorrow! Thanks so much for sharing 🙂

    7. jadre says

      July 27, 2012 at 10:33 am

      Love this idea. I’m one wich have same problem with headbands. I’ll sure make one for myself.

    8. Dixieglitzie says

      July 27, 2012 at 9:16 pm

      Thanks for the tute and all the step by step pics….I am SUCH the visual learner:)

    9. Love Maisy Lee says

      July 28, 2012 at 10:36 pm

      That is such a great idea, thanks for sharing. Could i ask if the velcro pulls at the hair? I would love to make some for my little niece who is 2.

    10. Becky says

      August 7, 2012 at 12:28 am

      Doh! Velcro! Fantastic. I can retrofit a few I already made. Thanks so much for sharing.

      Welcome to North Carolina!

    11. Jessica @ Sunny Tuesday says

      August 15, 2012 at 3:26 pm

      LOVE this idea, Megan!!

    12. Megan says

      January 18, 2013 at 4:34 am

      I think this could be a great idea for my 5 yr old just started school constantly ends up with headband around forehead or not where it started. She ends up looking ridiculous by the end of day!!!

    13. keri says

      February 11, 2013 at 12:52 pm

      just found your blog via a google search for “sew a headband” – what a great tutorial! i’m going to make one (maybe a few) right now 🙂 your blog is beautiful! i just subscribed to your rss and am heading off to explore more posts right now 🙂

      • Amy @ Positively Splendid says

        February 11, 2013 at 5:09 pm

        Thank you so much, Keri!

    14. Leah says

      March 6, 2013 at 1:53 am

      So I love these. But this would take like a year for me to make. Not 5-10 minutes. I don’t sew. I don’t own a sewing machine. But I would buy these from you. Would u be willing to sell?
      -Leah

      • Amy @ Positively Splendid says

        March 8, 2013 at 4:13 pm

        Hi, Leah! I can pass your information on to Megan and see if she would be willing to make some to sell to you. Thanks so much!

        • Leah says

          May 8, 2013 at 8:40 am

          Any word yet on whether Megan would sell these? Still wanting some, especially with summer around the corner! Thanks! 🙂

    15. Laura says

      March 7, 2013 at 9:50 am

      Thank you for sharing your great idea!!

    16. Dyana says

      March 18, 2013 at 12:35 pm

      Just made one using this tutorial. Great and easy to follow instructions and one of the best headbands I’ve ever had!

      Thanks so much for sharing!!!

    17. Hannah says

      April 27, 2013 at 5:43 pm

      Is this one size fits all?

    18. Candi says

      October 13, 2013 at 7:08 pm

      Just made a head band. Super easy, inexpensive & CUTE!

    Primary Sidebar

    PS Search

    Search this website

    Seasonal Inspiration

    Hocus Pocus Wreath
    Ghost Plushies
    Paper Pumpkins
    Fabric Yo-Yo Pumpkins

    Copyright © 2025 · Positively Splendid · All Rights Reserved. · Privacy Policy

    Privacy & Cookies: This site uses cookies and other tracking technologies to assist with navigation and your ability to provide feedback, analyse your use of our products and services, assist with our promotional and marketing efforts, and provide content from third parties. To find out more, as well as how to remove or block these, see here: Our Cookie/Privacy Policy