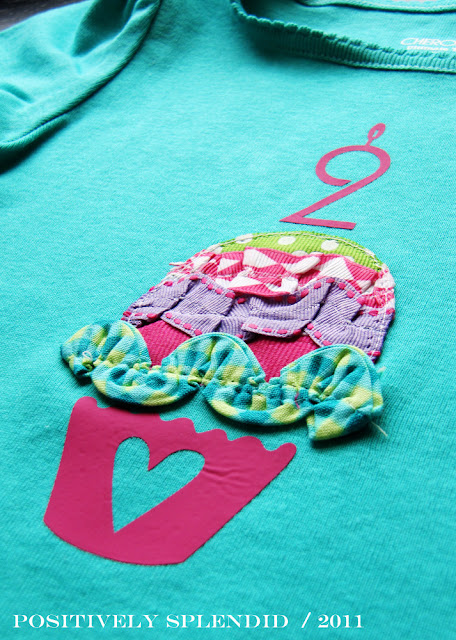
Is there a little girl in your life in need of a sweet little birthday tee to help celebrate her big day? This little tee, a variation on the ruffled applique technique I used in the Ruffled Candy Corn Tee and the Ruffled Easter Egg Tee, might be just what you’re looking for!
For this project, you will need…
One Plain T-Shirt
Cupcake File from the Silhouette Online Store (I used 3_cupcakes_C00366_20509)
Lightweight Fusible Interfacing
Washable Ink Marker
Assorted Ribbons and Trims
Invisible Thread
Basic Sewing Supplies (Machine, Shears, Etc.)
step 1 / Cut out a cupcake liner and birthday candle design with your Silhouette, and discard all of the negative space around and within your images. Note: I created my candle number 2 here using the Silhouette Studio software, but there are also candles available in the online store.
step 2 / Take a small piece of your fusible interfacing, and draw a cupcake top with your washable ink marker, making sure it is proportional to your heat transfer design elements. Line up your trims on top of your sketched shape until your achieve a look you like, making sure all portions of your cupcake top are covered. Stitch these pieces to your piece of interfacing with your invisible thread.
step 3 (optional) / If you want to add an extra touch to your tee, ruffle a couple of pieces of your ribbon before stitching them to your tee. You can do this very simply by using this shortcut ruffling technique. Stitch these ruffled pieces to your interfacing using your invisible thread. Note: When you are finished, no white space should be visible within the boundaries of your cupcake top.
step 4 / Flip your stitched cupcake top piece over, and carefully stitch along the line of the outer perimeter of your shape, as shown. Now, trim as closely as possible around this line of stitching, taking care not to snip through your stitches as you work. If desired, seal the edges of your finished cupcake top with some Fray Check.
step 5 / Stitch the cupcake top to the center of your tee. Iron your cupcake liner and birthday candle heat transfer embellishments above and below your cupcake piece. Tip: Don’t apply too much heat to your heat transfer, or your design will pucker up. I learned this the hard way! If desired, stitch a piece of trim along the bottom edge of your cupcake top piece.
You are finished!

Having grown up in a home brimming with sewing notions and paintbrushes, Amy has a deep love for all things creative. On any given day, you’ll find her knee-deep in her latest creative endeavor, with projects ranging from sewing and crafts to home decor and kid-friendly ideas. Amy believes that everyone, regardless of skill level or experience, possesses the ability to create something beautiful, and Positively Splendid was born of her passion for helping others harness their innate creative potential.


Looks great Amy! What an adorable idea! 🙂
LOVE this! you always hava amazing ideas and tutorials. I know what my daugthers will be wearing at their bdays in August!
Amy
Amy, that is precious!! Love the colors too. 🙂
Too ADORABLE Amy! I LOVE ruffles and all of your ruffle tees!
LOVE IT! what setting do you use on your sewing machine to make those ruffles?
That is so adorable! I love how the ruffles look on it. I’ve used those same shirts for cupcake bday shirts for my Etsy shop but mine are 1-dimensional.
(visiting from Tatertots and Jello)
love this! I think I’ll make one for my girls 1st birthday!
*eeek*! I LOVE it! I love cupcakes, I love babies, and this is just adorable!
This is so sweet, Amy. I love the technique you used for creating the top of the cupcake. Nice tutorial 🙂
Seriously so cute. I featured it on my blog tonight.
Oh, that is SO cute!
Wow this blows my mind away. The fact that you made your own babies clothes is really great.
mens designer clothing online
Thanks so much for posting this! I made one for my daughter, except I used the ruffle tutorial from your Easter Egg shirt instead, and I love how it turned out!!
http://sewmuchcrafting.blogspot.com/2013/03/ruffled-cupcake-shirt.html
JoDee, your shirt turned out adorable! I love it! Thanks for sharing it with me. 🙂
Good information. Lucky me I discovered your blog by chance (stumbleupon).
I have bookmarked it for later!