The Grinch has always been one of our family’s favorite books to read at Christmas. To pay homage to this classic story, I decided to create these adorable Grinch Christmas ornaments! Made out of oven-bake clay and just a few other simple supplies, these DIY Grinch ornaments would be terrific for making with kids. They would also make terrific gifts for special teachers, friends, and anyone else in your life who loves the Grinch, too!
This post contains affiliate links.

More fun Christmas ornaments to make!
What you’ll need to make DIY Grinch Ornaments
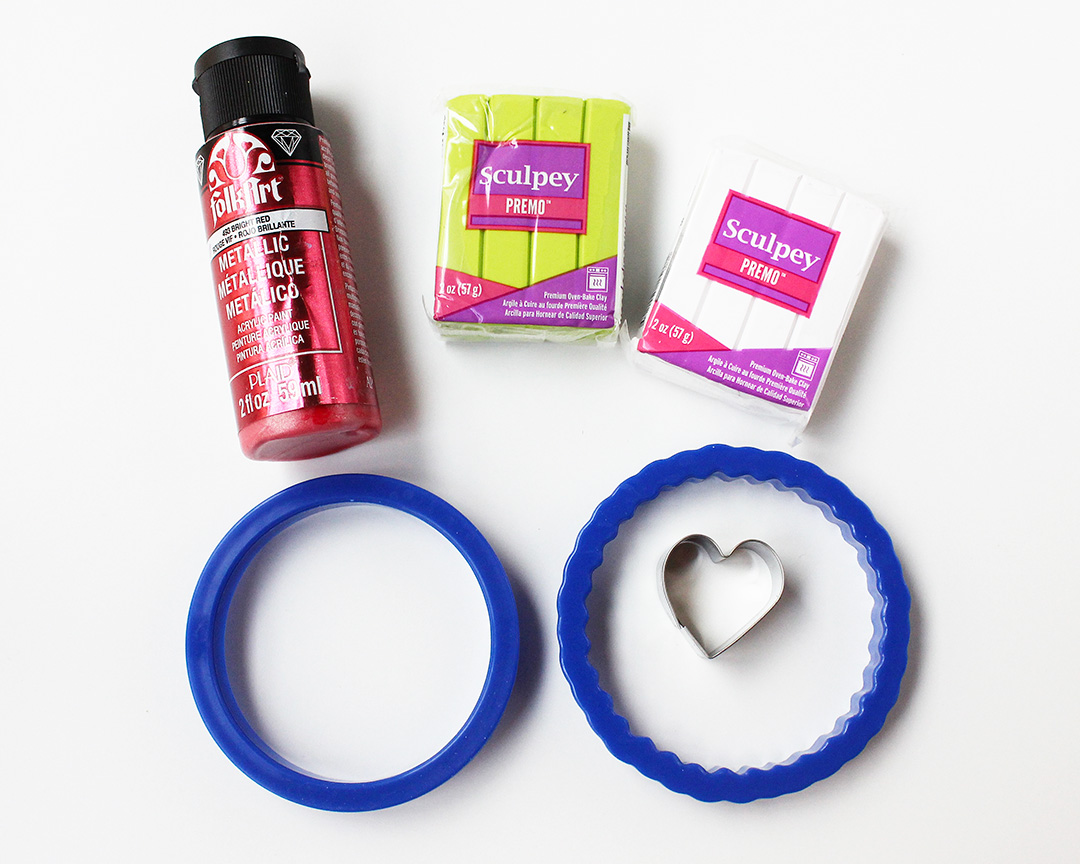
Supplies:
- Oven-Bake Polymer Clay – Lime Green and Red or White
- Acrylic Craft Paint (If using white clay)
- Miniature Santa Hats
- E6000 Adhesive
- Twine or 1/8″ Ribbon
Tools:
- Mini Rolling Pin (I use my pastry roller)
- Small Metal Spatula (I use the spatula from my Cricut tool set)
- Circle Cookie Cutter (Mine measures approximately 3″)
- Small Heart Cookie Cutter (Mine measures approximately 1″ and is part of this set)
- Baking Sheet
- Parchment Paper
- Lollipop Stick or Skewer
- Paintbrush (if using white clay that needs to be painted)
- Scissors
Project Tips
- Use high-quality polymer clay for the best, most durable results. I prefer Sculpey Premo brand. I purchased mine at Michaels, but it can also be found on Amazon.
- If you don’t have green and red clay on hand, you can use white instead. Cut white clay pieces as directed below and paint after baking. I happened to have lime green clay on hand, but not red, so I cut my heart pieces out of white and painted them with metallic red acrylic paint.
- Wash your hands between working with different colors. This will prevent the pigment in the clay that gets on your hands when working with one color from transferring to the other clay when you change colors.
- It’s totally normal for the clay to be stiff straight out of the package. Work it in your hands for a few minutes to allow the warmth to soften the clay and make it easier for rolling and cutting.
- Line baking sheets with parchment paper. This will prevent the pieces from sticking, and it will also prevent anything that might be on the pan from staining/discoloring the clay.
- Forget to poke a hole before baking? No worries. Use a drill and a very small drill bit to make a hole at the top of the circle after the piece has cooled completely.
- It’s okay to use other types of clay for this project. If making these ornaments for a group (i.e., with students in a classroom), you can use air-dry clay, or even painted salt dough. The end result will be a little bit different than mine, but just as cute!
- Why do I use E6000 here and not, say, hot glue? The E6000 dries to a completely clear finish and is formulated to adhere strongly to multiple surfaces, including fabric and polymer clay. Hot glue bonds poorly to polymer clay, and the high temperature would scorch the Santa hats. If you don’t have E6000 on hand, Gorilla Glue would work, too.

Grinch Ornament Instructions
A printable PDF version of these instructions is available below.
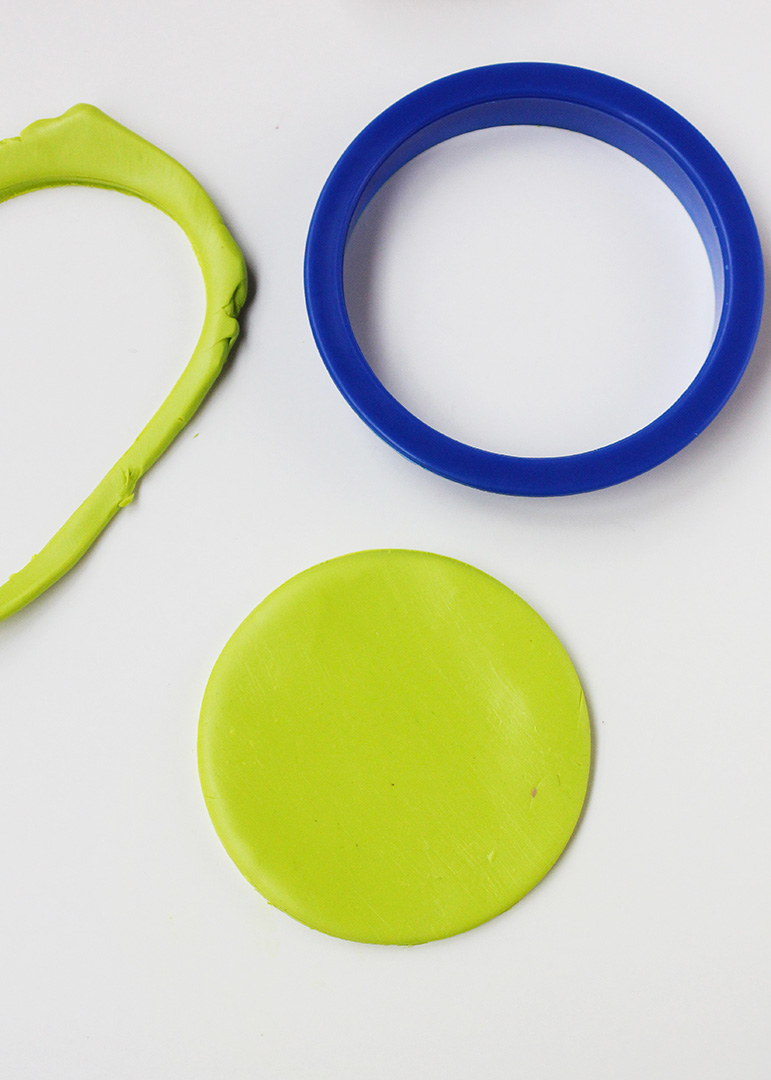
Step 1: Roll and Cut
Roll the lime green clay to about 1/8″ thickness using the mini rolling pin. Cut a circle shape from the clay with the round cookie cutter. Use the metal spatula to transfer the piece to the parchment-lined baking sheet. Next, roll out the red clay and cut a heart, and place it on the baking sheet with the circle.
Note: As I mentioned above in the Project Tips section, you can use white clay instead of colored clay. You’ll just have to paint the pieces after baking.
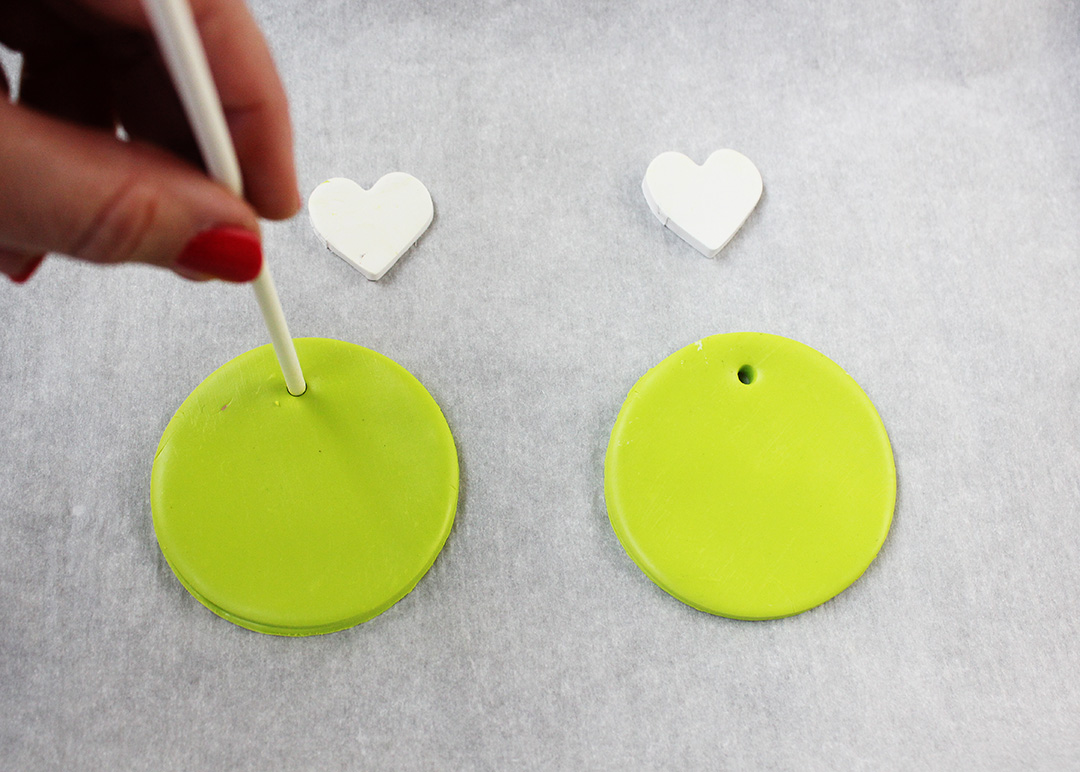
Step 2: Poke Holes and Bake
Poke a hole at the top of each circle piece. A lollipop stick or skewer works great for this, but you can also use the handle end of a paintbrush or anything else that makes a hole the right size for hanging. Place the baking sheet with the prepared pieces into an oven preheated to 275 degrees and bake for 20 minutes. Remove from the oven and allow the pieces to cool completely.
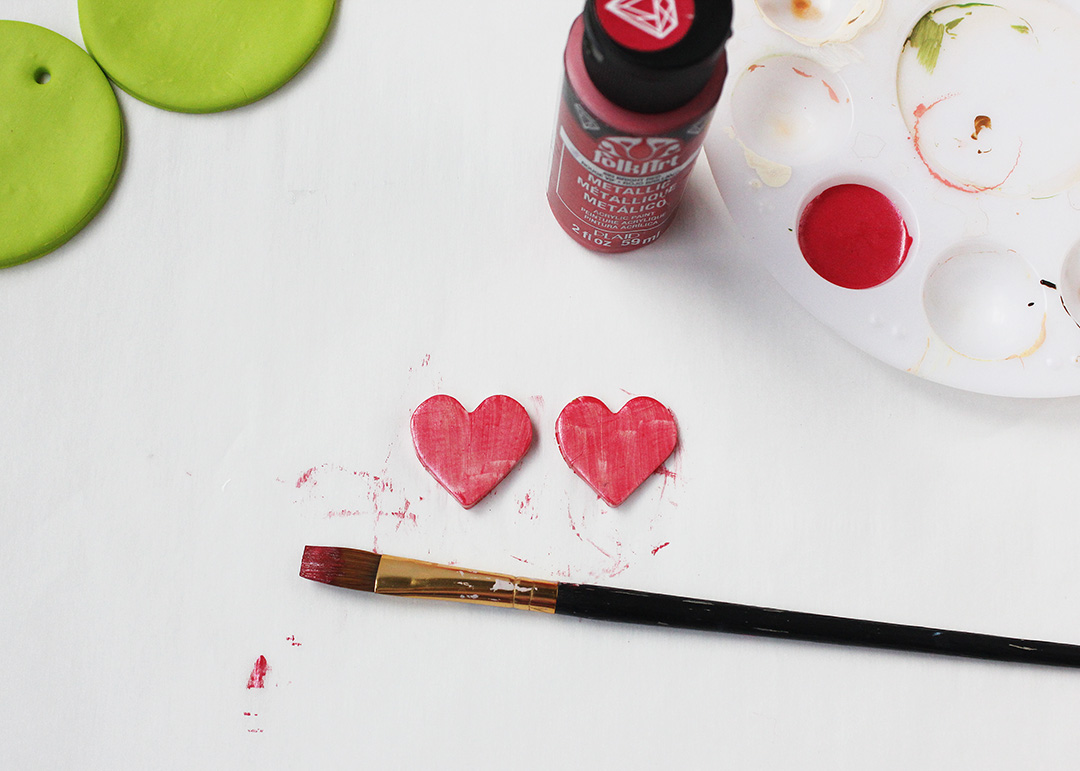
Step 3: Paint (optional)
If using white clay, apply 2-3 even coats of acrylic paint to the pieces. Set them aside to dry completely.
Step 4: Assemble and Add a Hanger
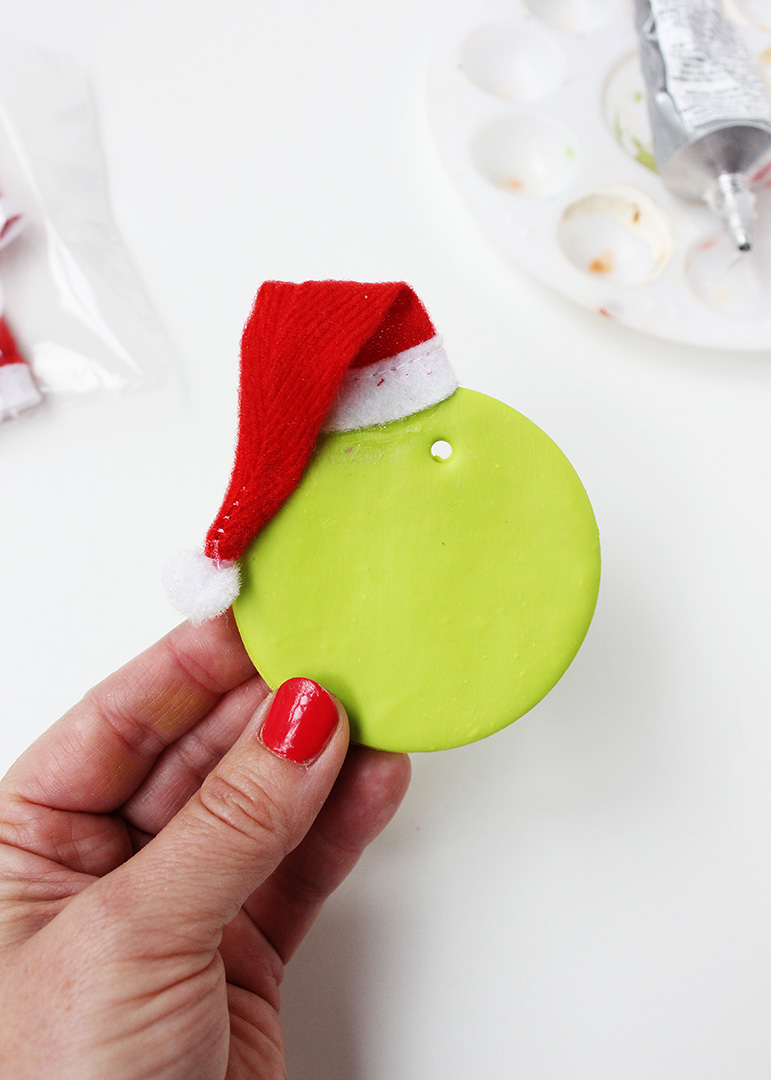
Use the E6000 to attach a mini Santa hat at an angle on the top left side of the circle piece. Anchor the base of the hat first, and then fold the tip of the hat down, using a small dab of glue to secure it in place.
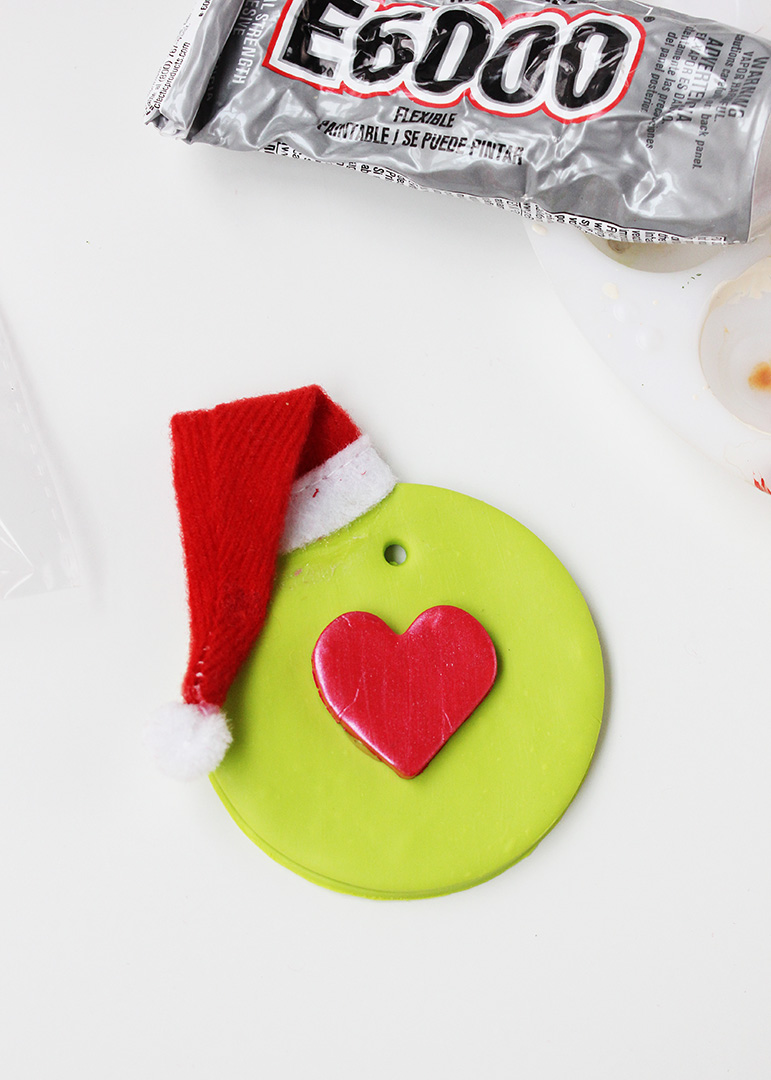
Now, attach the heart piece to the center of the circle with the E6000.
Cut a piece of twine or ribbon that is approximately 8 inches long, and thread it through the top hole to create a hanger for your ornament.
Your DIY Grinch ornament is ready to hang on your tree!
I think even the Grinch would agree that these are absolutely adorable!


DIY Grinch Ornaments
Equipment
- Mini Rolling Pin
- Small Metal Spatula
- Circle Cookie Cutter (Mine measures approximately 3")
- Small Heart Cookie Cutter (Mine measures approximately 1")
- Baking Sheet
- Parchment paper
- Lollipop Stick or Skewer
- Paintbrush If using white clay that needs to be painted
- Scissors
Materials
- Oven-Bake Clay Lime Green and Red or White
- Acrylic Paint If using white clay
- Miniature Santa Hats
- E6000 Adhesive
- Twine or Ribbon
Instructions
- Roll the lime green clay to about 1/8" thickness using the mini rolling pin. Cut a circle shape from the clay with the round cookie cutter. Use the metal spatula to transfer the piece to the parchment-lined baking sheet. Next, roll out the red clay and cut a heart, and place it on the baking sheet with the circle. Note: You can use white clay instead of colored clay. You'll just have to paint the pieces after baking.
- Poke a hole at the top of each circle piece. A lollipop stick or skewer works great for this, but you can also use the handle end of a paintbrush or anything else that makes a hole the right size for hanging.
- Place the baking sheet with the prepared pieces into an oven preheated to 275 degrees and bake for 20 minutes. Remove from the oven and allow the pieces to cool completely.
- If using white clay, apply 2-3 even coats of acrylic paint to the pieces. Set them aside to dry completely.
- Use the E6000 to attach a mini Santa hat at an angle on the top left side of the circle piece. Anchor the base of the hat first, and then fold the tip of the hat down, using a small dab of adhesive to secure it in place.
- Now, attach the heart piece to the center of the circle with the E6000.
- Cut a piece of twine or ribbon that is approximately 8 inches long, and thread it through the top hole to create a hanger for your ornament.
Having grown up in a home brimming with sewing notions and paintbrushes, Amy has a deep love for all things creative. On any given day, you’ll find her knee-deep in her latest creative endeavor, with projects ranging from sewing and crafts to home decor and kid-friendly ideas. Amy believes that everyone, regardless of skill level or experience, possesses the ability to create something beautiful, and Positively Splendid was born of her passion for helping others harness their innate creative potential.