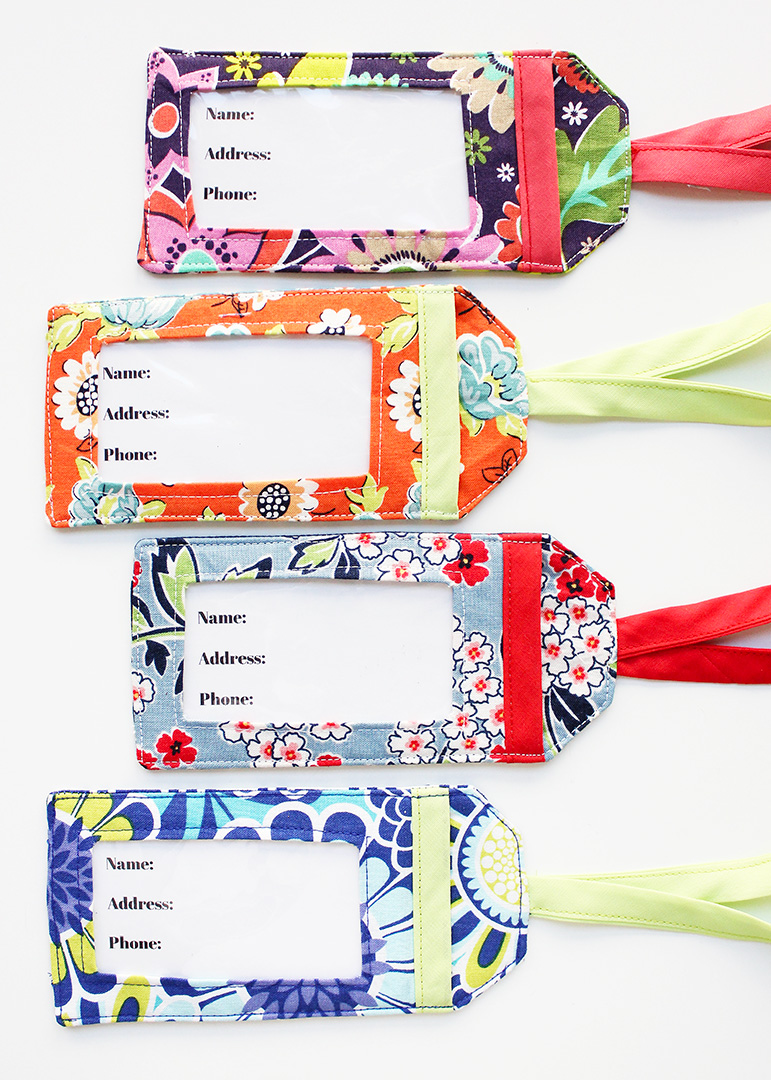
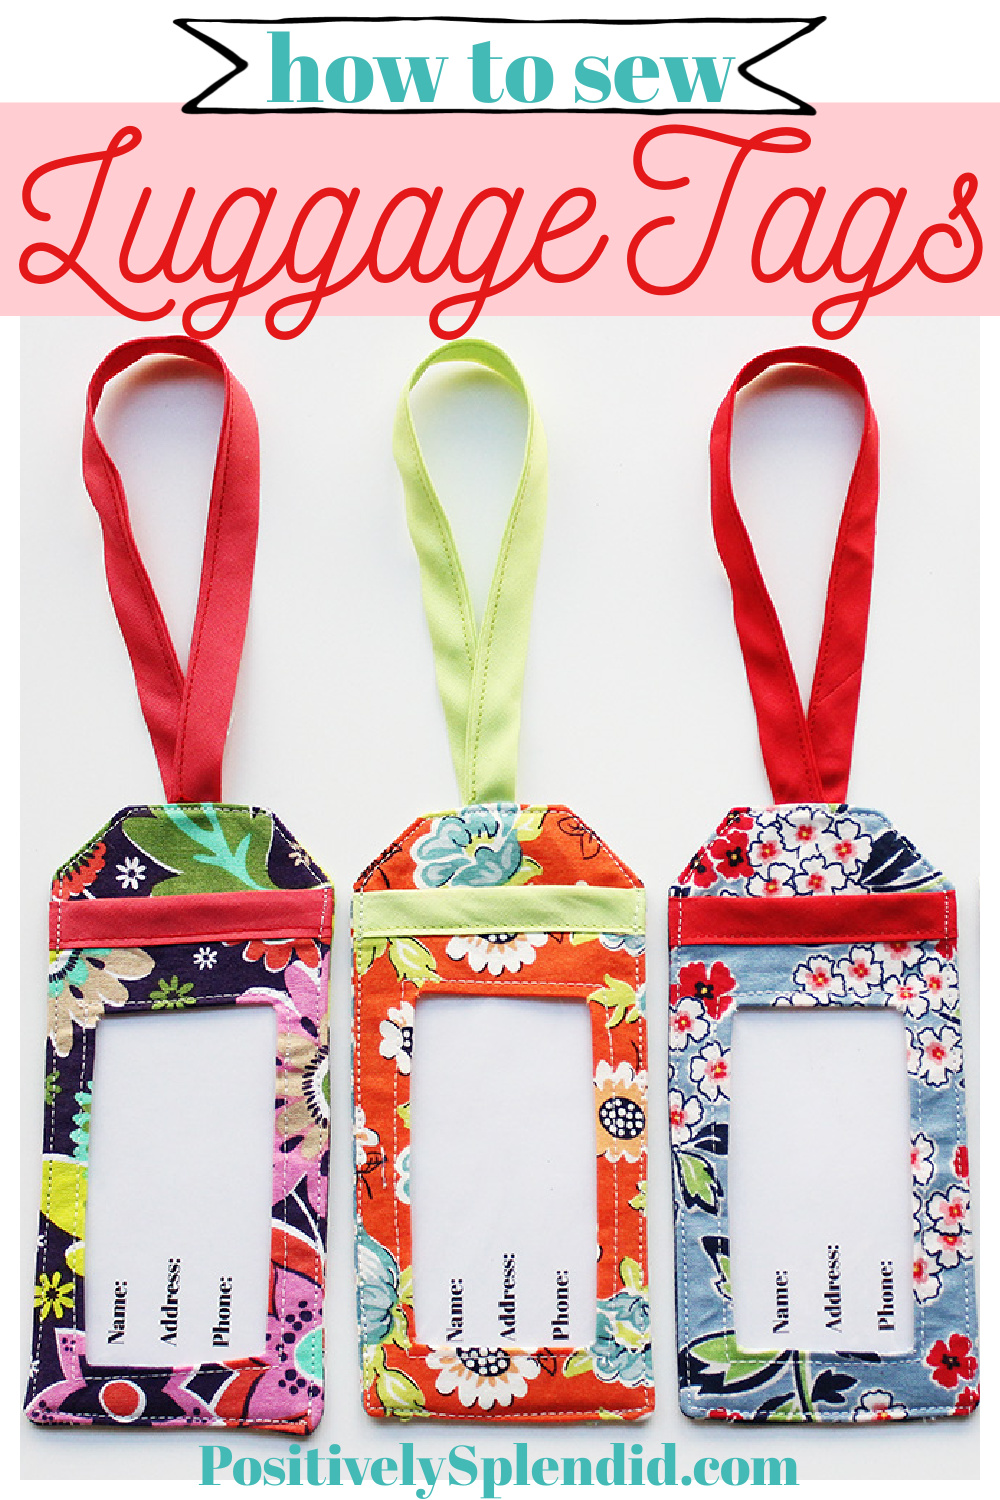
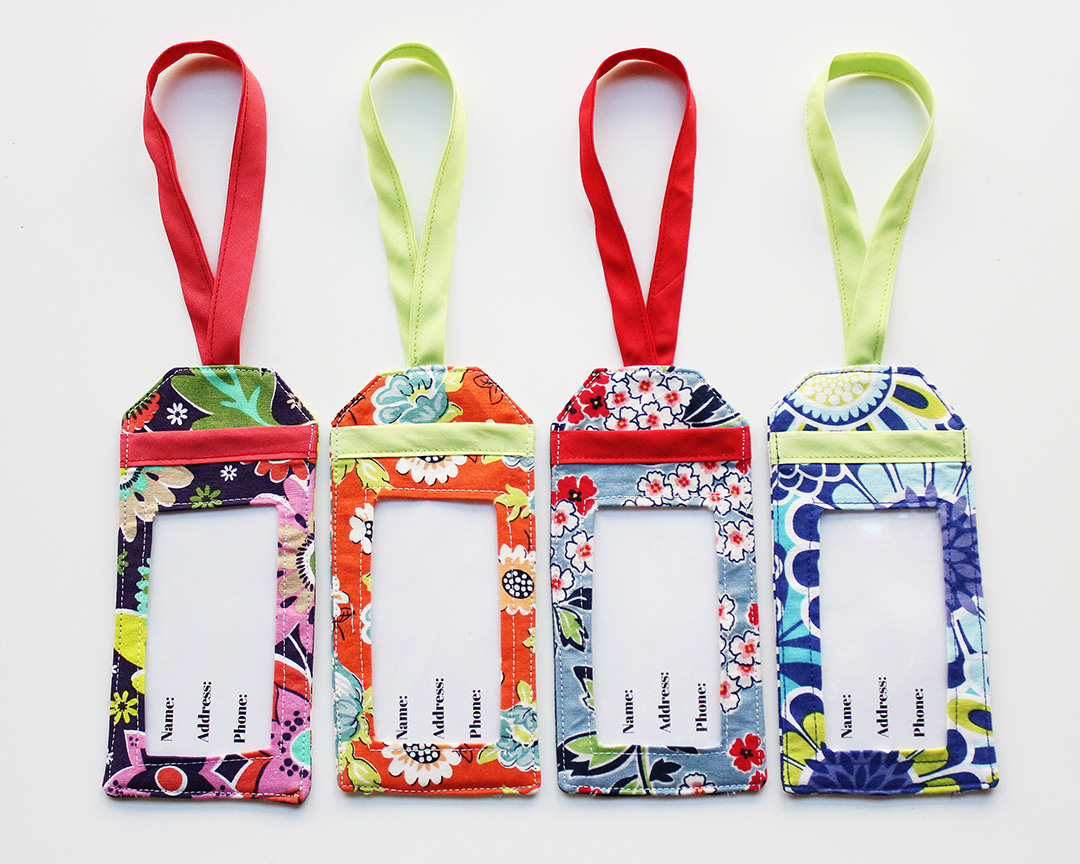
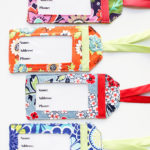
Few things are worse than losing luggage while traveling! Although you can’t entirely eliminate that risk when flying, you can make some DIY tags with my free luggage tag pattern to ensure you’re doing all you can to locate your luggage if it doesn’t arrive when you do. When you make luggage tags with bright, fun fabrics, they can also help you identify your luggage from the rest of the heap in the baggage claim area. If you’ve got traveling in your future (or if you want to make a nice gift for a jet-setter in your life), keep reading for my free luggage tag pattern. You’ll also want to download the printable information tags (available below) to slip into your luggage tags once they’re finished!
This post contains affiliate links. Thanks for your support!
This luggage tag pattern is a fantastic way to use scraps of fabric from your stash. And if you’re interested in even more scrap sewing projects, I’ve got you covered!
-
Quick and Easy Fabric Coasters
-
Easy Scrunchie Pattern
-
DIY Portable First Aid Kit
-
Zipper Pencil Pouch
To sew a luggage tag with this free luggage tag pattern, you will need…
Supplies:
-
Luggage Tag Pattern PDF (click link for free download)
- Fabric scraps or fat quarters
- Medium-weight fusible interfacing (Pellon 931TD)
- Clear vinyl (2 gauge)
- Extra wide double fold bias tape (1/2″)
- Coordinating thread
Equipment:
- Sewing machine
- Sewing shears
- Iron
- Point turning tool
- Other essential sewing tools (see my recommendations here)
Luggage Tag Pattern Instructions
(Note: A printable version of these instructions is available below)
Make Your Cuts
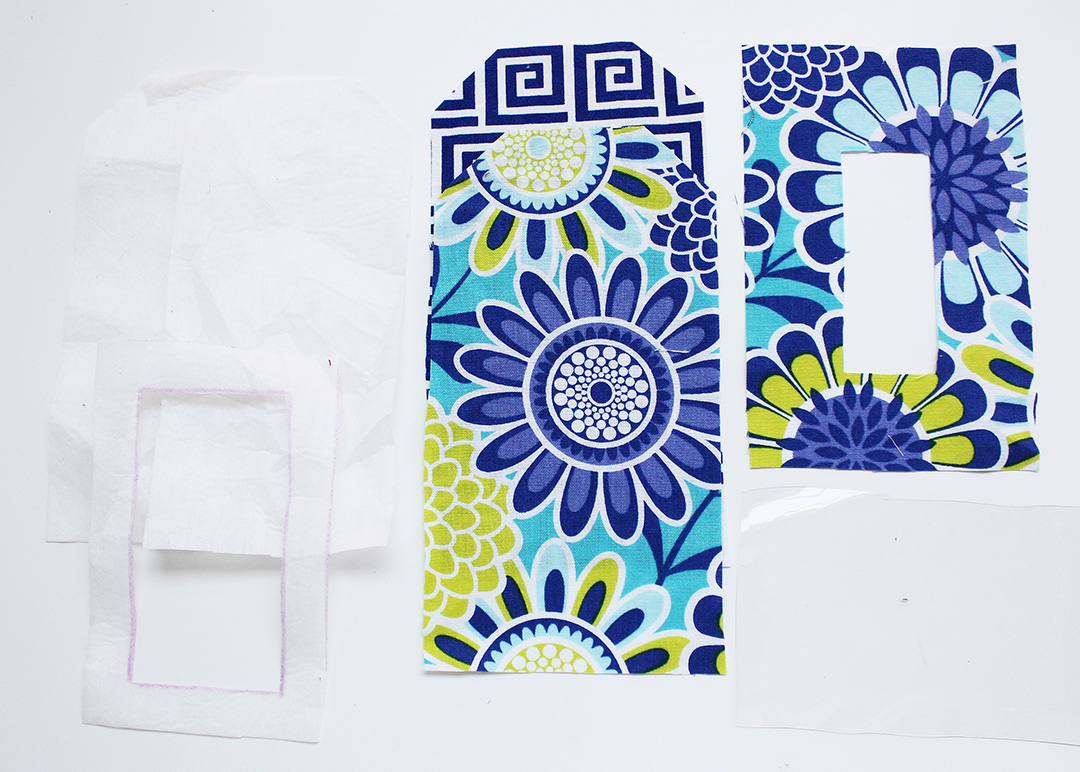
Download the luggage tag pattern. Print and cut out each of the pattern pieces.
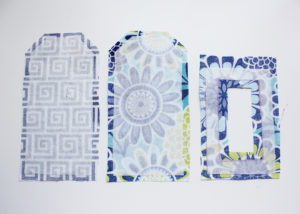
For each luggage tag, cut the following:
- 2 body pieces (can use the same fabric for front and back, or mix and match different fabrics)
- 1 pocket piece (Create a small notch on the top center of the pocket piece where indicated on the pattern piece)
- 2 body interfacing pieces
- 1 pocket interfacing piece
- 1 vinyl piece for the tag window
- 1 4.5″ piece of bias tape
- 1 12″ piece of bias tape
Prepare Pieces for Sewing
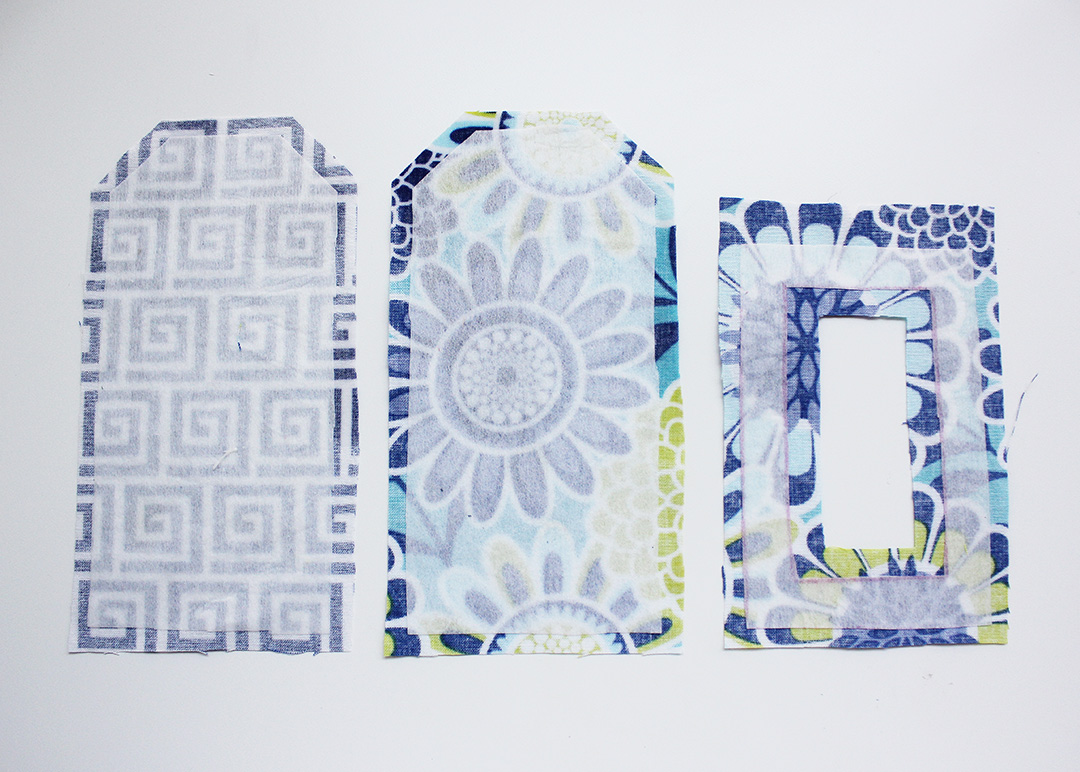
Place the body pieces face down on your ironing board. Center the body interfacing pieces onto the wrong side of the body pieces. Carefully flip over the pieces, making sure the interfacing remains in place, so that the right side of the body piece is facing up. Press on the fabric to fuse the interfacing pieces to the fabric, using a dry iron for 10-15 seconds.
Fuse the pocket interfacing piece to the pocket piece using the same steps detailed above.
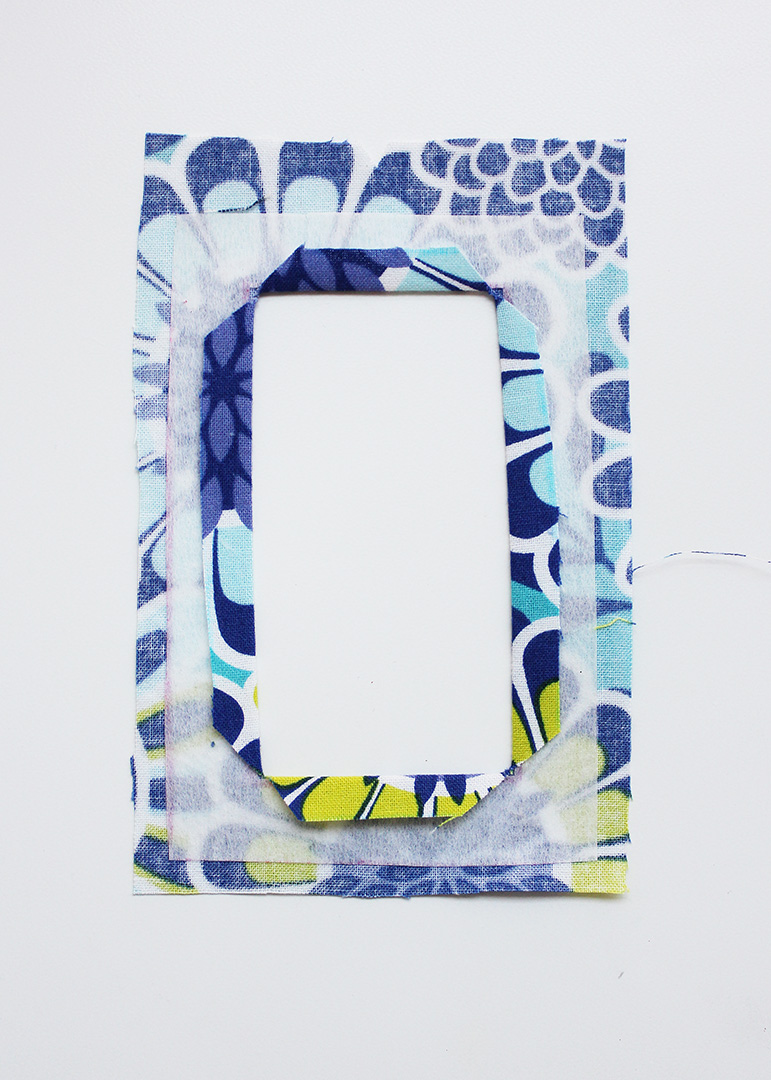
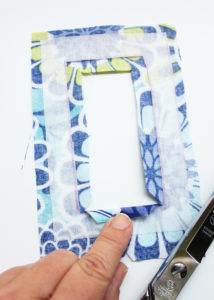
Carefully snip each of the four corners on the inside of the pocket piece window, cutting the fabric just to where it meets up with the interfacing, as shown.

Fold the pocket window edges toward the back side of the piece and press firmly into place.
Assemble the Luggage Tag Pocket and Strap
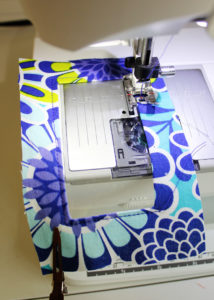
Center the vinyl piece over the pocket window on the back side of the piece. Use sewing clips (or hair clips) to secure the vinyl in place. On the front side of the piece, top stitch 1/8″ around the outside edge of the window to finish the window edge and secure the vinyl to the piece.
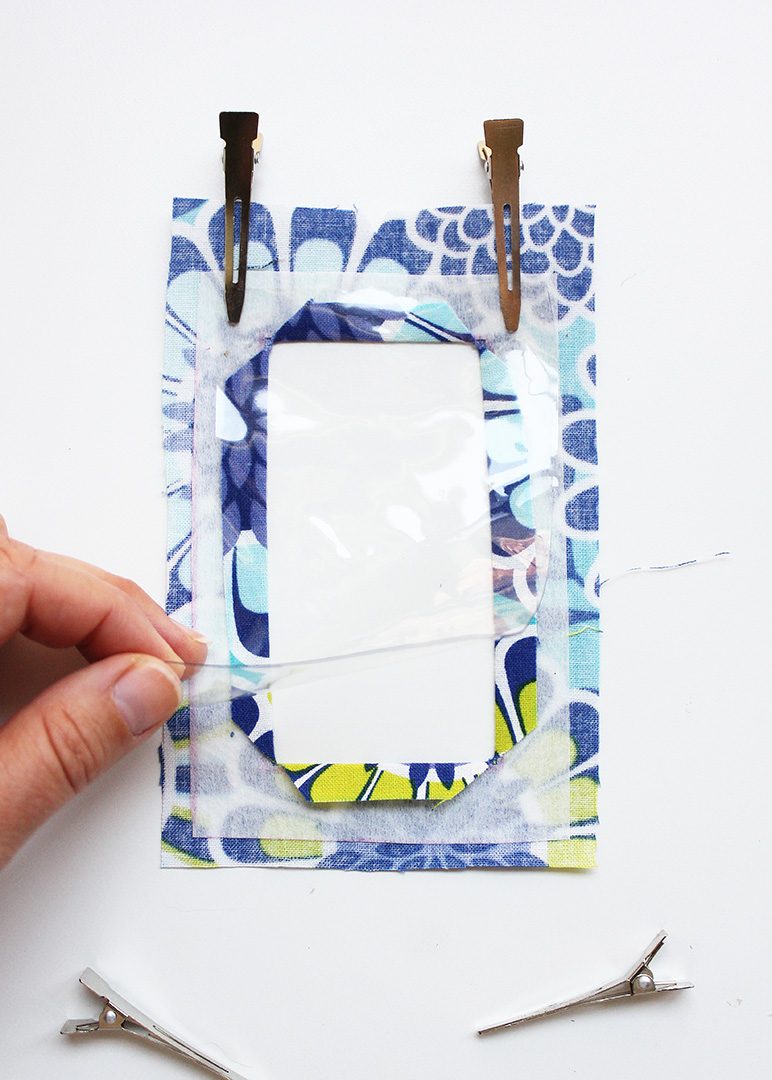
Center the 4.5″ section of bias tape along the notched edge of the pocket piece so that the wider edge of the bias tape is on the wrong side of the pocket. (A small amount of the bias tape will overlap on either side.) Use sewing clips (or hair clips) to anchor the bias tape in place. With the pocket piece right side up, stitch along the open edge of the bias tape to secure it to the pocket. Trim away the excess bias tape on either side, and set the pocket aside.
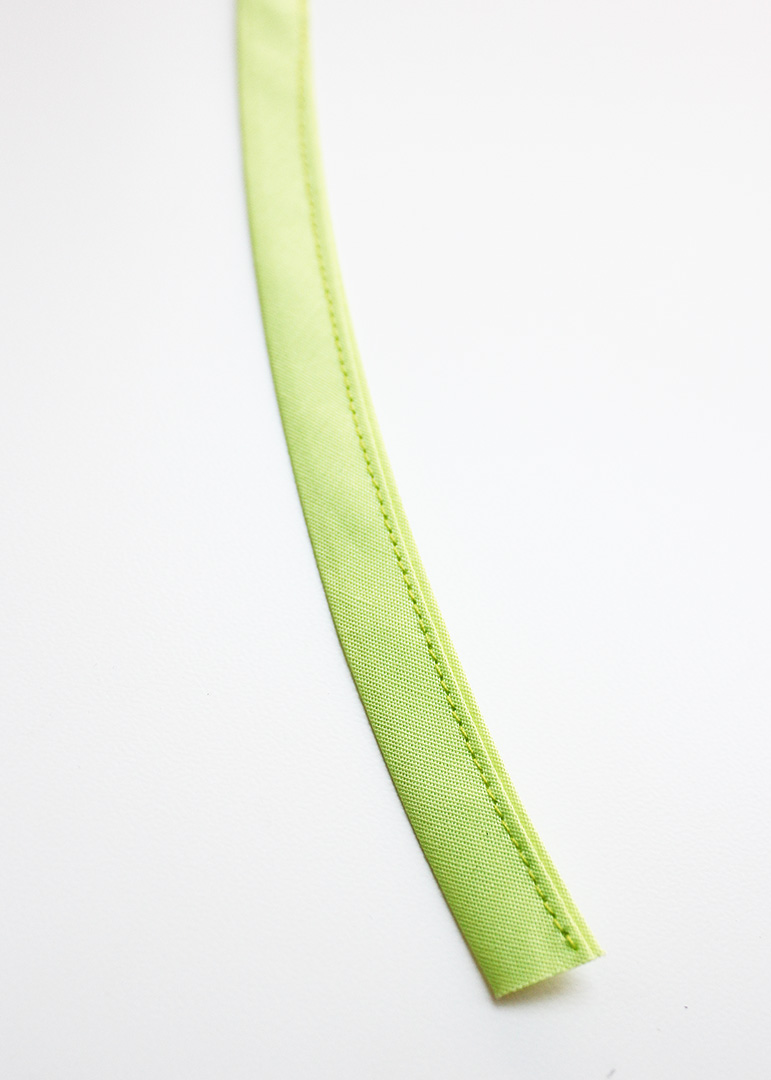
With the wider edge of the 12″ bias tape facing down, stitch on the open edge of the tape to form a strap.
(Note: A printable version of these instructions is available below)
Assemble and Sew the Luggage Tag
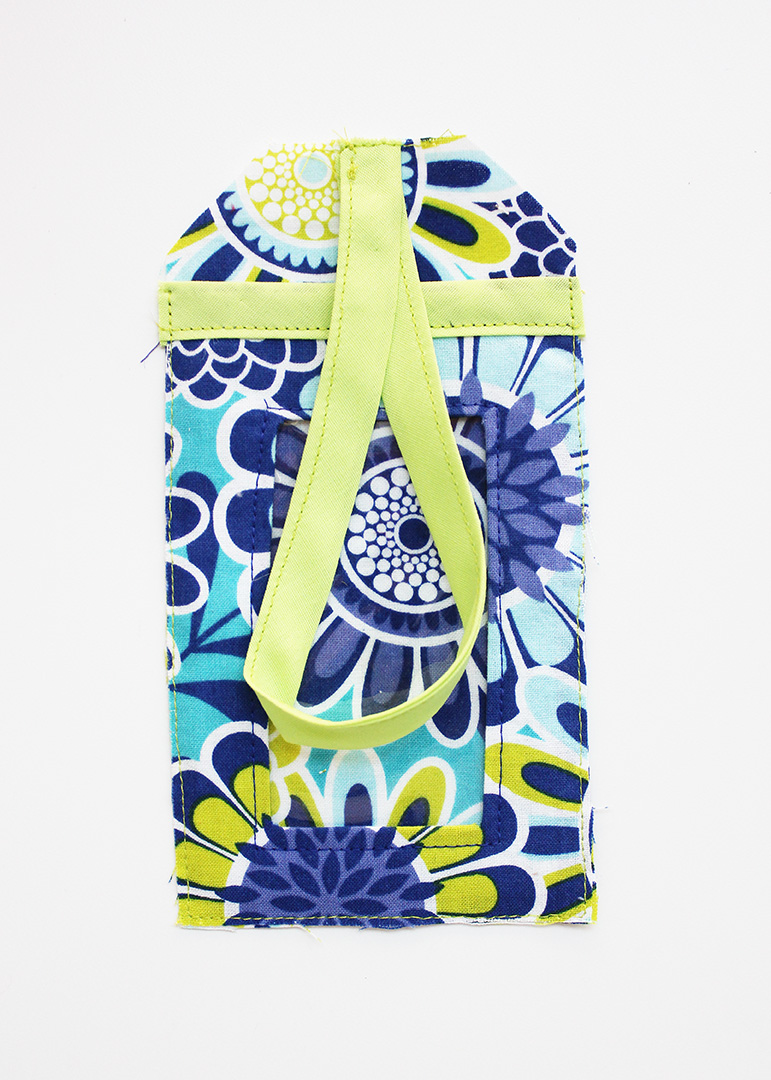
Place the front body piece facing up on your work surface. Align the pocket piece on the front body piece, so that the wrong side of the pocket piece is facing the right side of the body piece and the lower corners of each piece are precisely aligned. Pin. Baste 1/8″ around the outer edge of the pocket to secure it to the body piece. Remove pins.
Center the strap piece along the top edge of the right side of the front body piece, so that the ends of the strap overlap the edge of the front body piece by about 1/2″. Pin. Baste 1/8″ from the edge of the front body piece to anchor the strap into place. Remove pins.
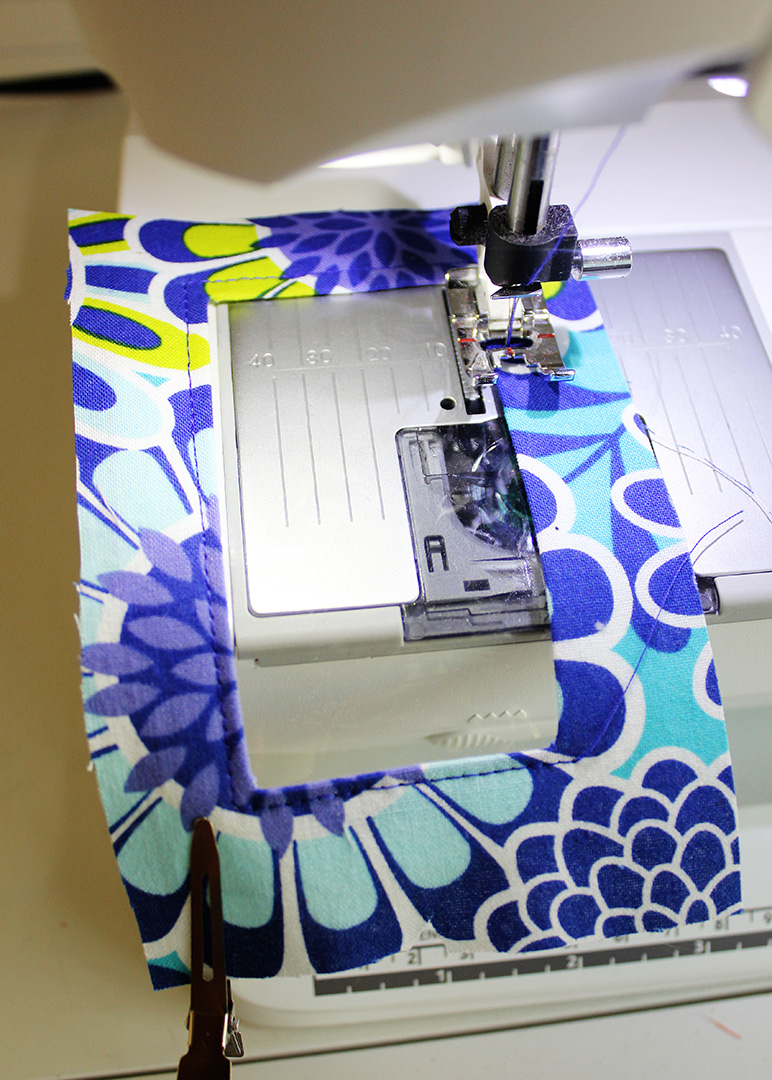
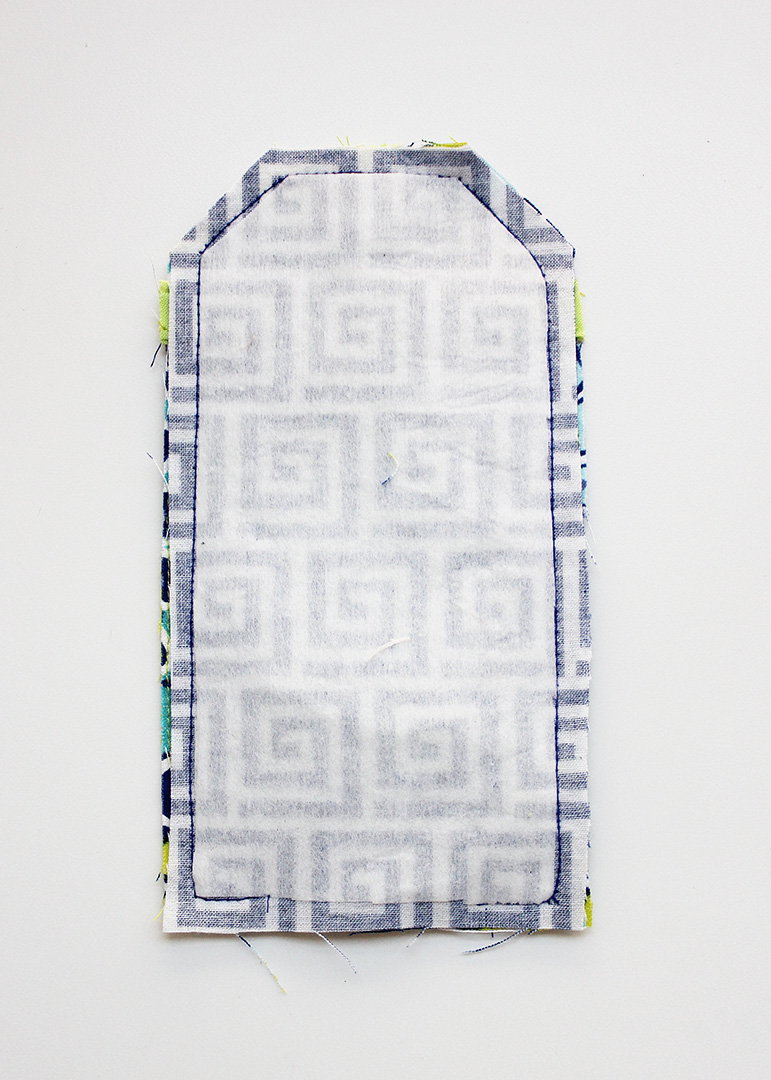
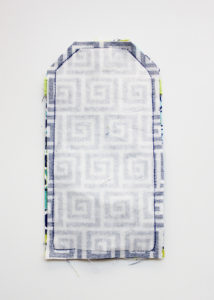
Align the back body piece on top of the assembled front/pocket, so that the right sides of the front/pocket piece and the back piece are facing. Make sure the strap piece is out of the way before pinning all layers together. Use 1/4” seam allowance to stitch around the pinned pieces, leaving a 2” opening along the bottom edge of the luggage tag for turning, as shown.
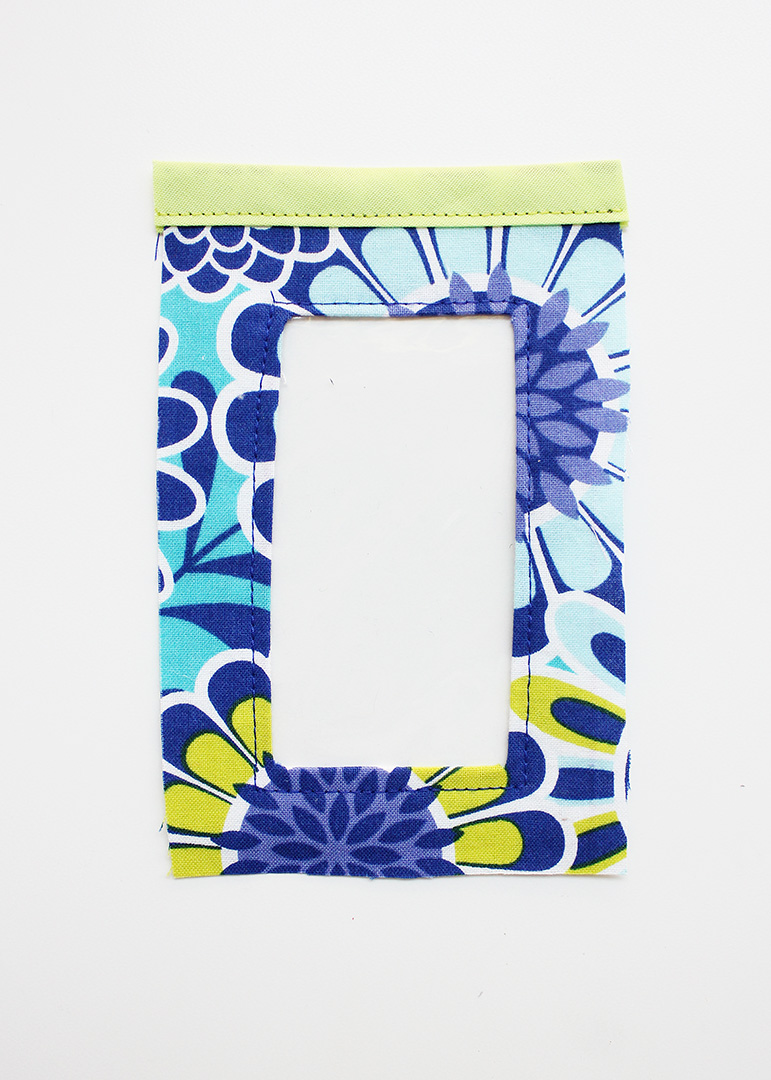
Clip the corners of the luggage tag, and turn right side out through the bottom opening, gently using the strap to help as you pull. Use the point turning tool to thoroughly turn each of the corners. Fold the unstitched seam edges inside the opening. Press. Top stitch 1/8″ around the entire perimeter of the tag, closing the bottom opening as you sew.
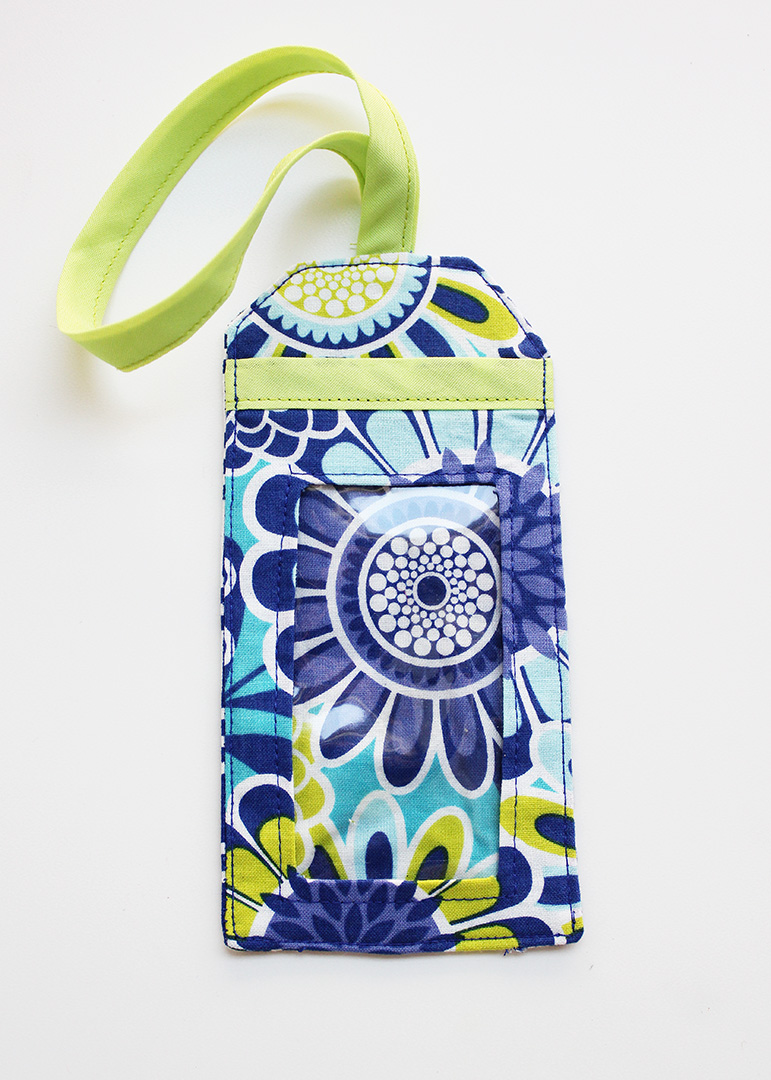
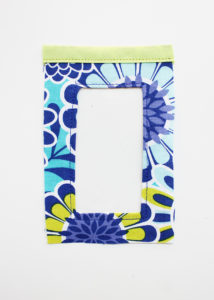
Your DIY luggage tag is complete!
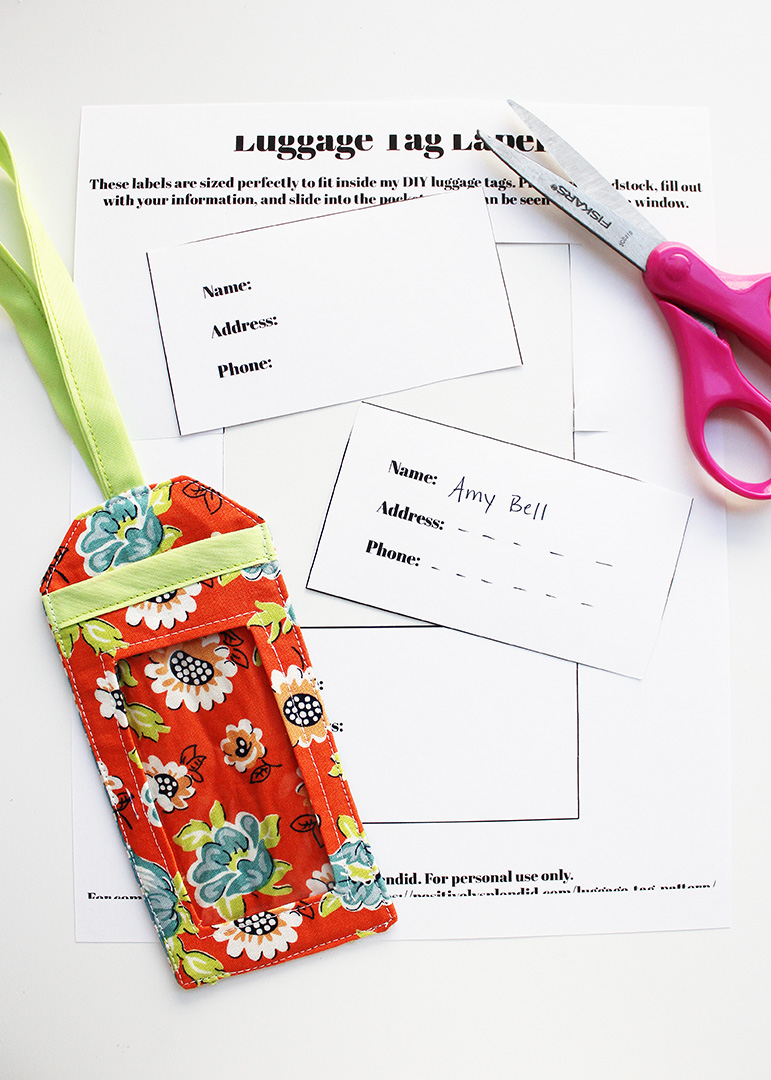
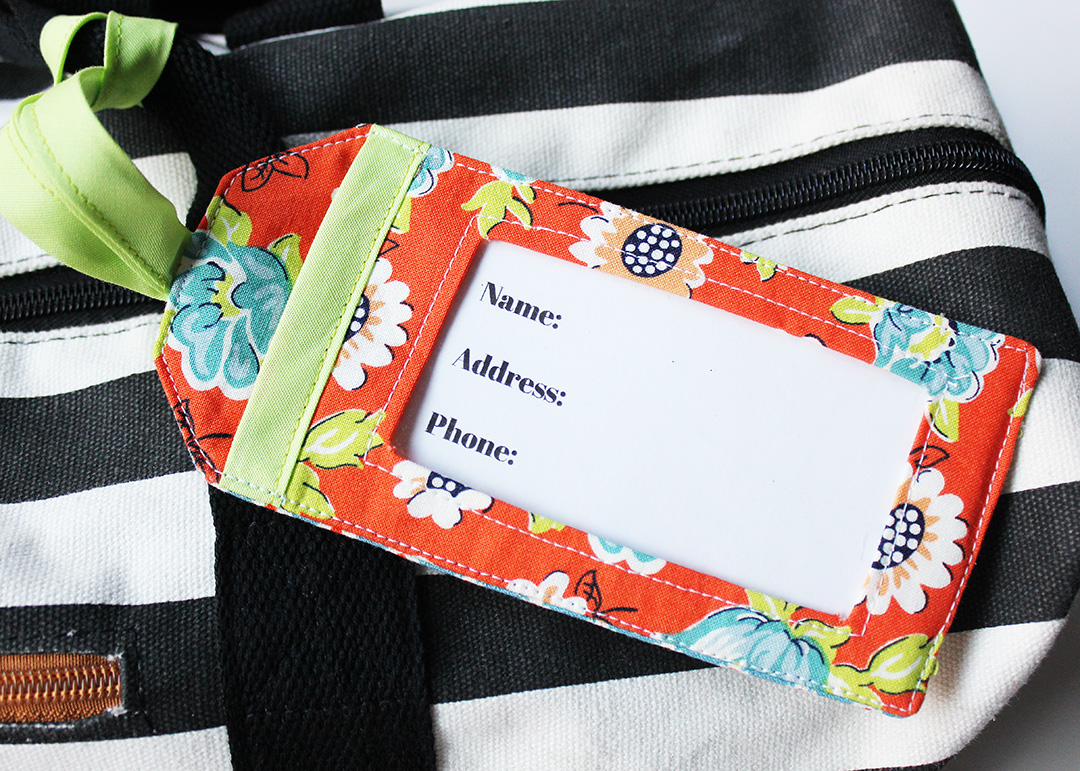
This luggage tag pattern is the perfect size for holding a business card, or you can print off and fill out my printable luggage tag labels to slip into the pocket of your luggage tag.
(Note: A printable version of these instructions is available below)
Luggage Tag Pattern Tips
What types of fabric are best for this pattern? Scraps of quilting cotton are great for sewing luggage tags, and fat quarters are a great option, too. I don’t recommend using heavier fabrics like home decor fabrics for this project, since the bulk can make turning the project right side out more challenging.
Where can I find interfacing for this project? Interfacing is usually found near the utility fabrics in fabric stores.
Can I use lightweight or heavyweight interfacing instead of medium weight if that’s what I have on hand? Lightweight interfacing can be substituted, but keep in mind that your finished luggage tag will be less sturdy and won’t hold up to travel wear and tear as well. I do not recommend using interfacing heavier than a medium weight, since turning the project right side out is challenging with that additional bulk.
Is there a way to personalize the luggage tags? Yes! Add embroidery or iron-on vinyl designs to the back body piece before ironing on the interfacing in the first step. Names and monograms are great design options.
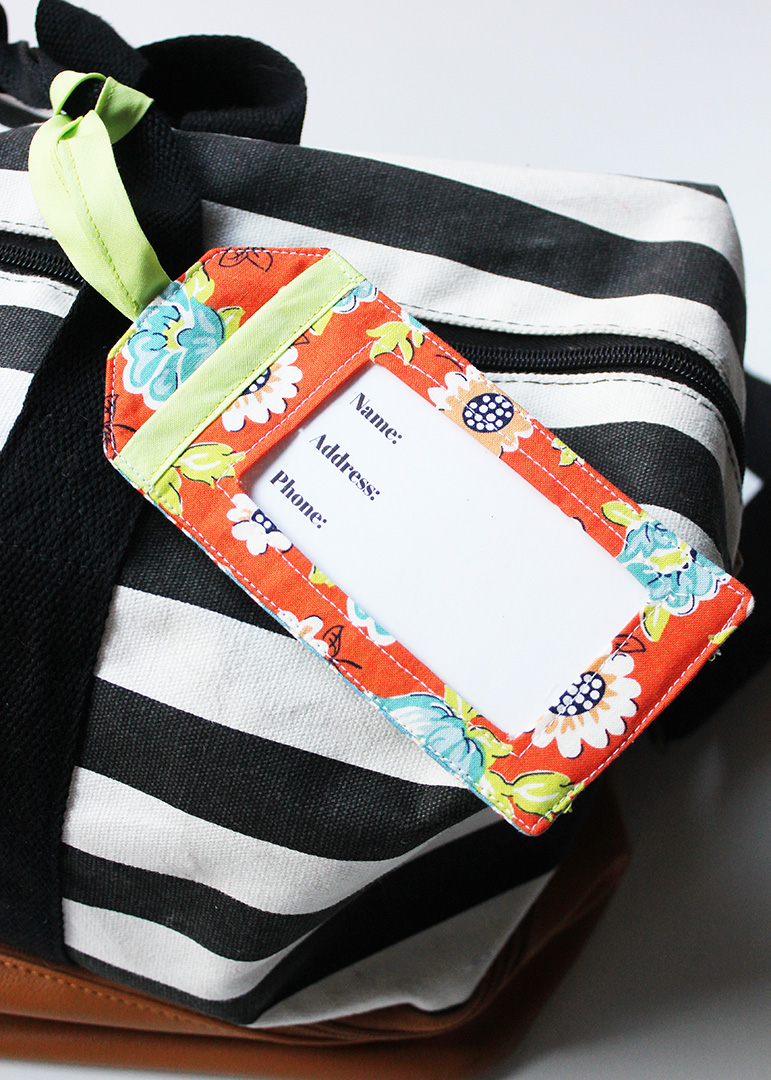
How do I attach the finished luggage tag to my bag or suitcase? Secure the luggage tags around the handle of your bag with a slip knot, as seen below. Easy peasy!
Download and print this luggage tag tutorial for handy reference as you sew!
Luggage Tag Pattern
Equipment
- Sewing Machine
- Sewing Shears
- Iron
- Point Turning Tool
- Other essential sewing tools (refer to my recommended tools linked in the blog post)
Materials
- Luggage Tag Pattern PDF click link in blog post for free download
- Fabric scraps or fat quarters
- Medium-weight fusible interfacing Pellon 931TD
- Clear vinyl 2 gauge
- Extra wide double fold bias tape 1/2"
- Coordinating thread
Instructions
- Download the luggage tag pattern. Print and cut out each of the pattern pieces.
- For each luggage tag, cut the following: 2 body pieces (can use the same fabric for front and back, or mix and match different fabrics), 1 pocket piece (create a small notch on the top center of the pocket piece where indicated on the pattern piece), 2 body interfacing pieces, 1 pocket interfacing piece, 1 vinyl piece for the tag window, (1) 4.5" piece of bias tape, (1) 12" piece of bias tape

- Place the body pieces face down on your ironing board. Center the body interfacing pieces onto the wrong side of the body pieces. Carefully flip over the pieces, making sure the interfacing remains in place, so that the right side of the body piece is facing up. Press on the fabric to fuse the interfacing pieces to the fabric, using a dry iron for 10-15 seconds. Fuse the pocket interfacing piece to the pocket piece using the same method.
- Carefully snip each of the four corners on the inside of the pocket piece window, cutting the fabric just to where it meets up with the interfacing, as shown. Fold the pocket window edges toward the back side of the piece and press firmly into place.
- Center the vinyl piece over the pocket window on the back side of the piece. Use sewing clips (or hair clips) to secure the vinyl in place. On the front side of the piece, top stitch 1/8" around the outside edge of the window to finish the window edge and secure the vinyl to the piece.
- Center the 4.5" section of bias tape along the notched edge of the pocket piece so that the wider edge of the bias tape is on the wrong side of the pocket. (A small amount of the bias tape will overlap on either side.) Use sewing clips (or hair clips) to anchor the bias tape in place. With the pocket piece right side up, stitch along the open edge of the bias tape to secure it to the pocket. Trim away the excess bias tape on either side, and set the pocket aside.
- With the wider edge of the 12" bias tape facing down, stitch on the open edge of the tape to form a strap.

- Place the front body piece facing up on your work surface. Align the pocket piece on the front body piece, so that the wrong side of the pocket piece is facing the right side of the body piece and the lower corners of each piece are precisely aligned. Pin. Baste stitch 1/8" from the outer edge of the pocket to secure it to the body piece. Remove pins. Center the strap piece along the top edge of the right side of the front body piece, so that the ends of the strap overlap the edge of the front body piece by about 1/2". Pin. Baste 1/8" from the edge of the front body piece to anchor the strap into place. Remove pins.

- Align the back body piece on top of the assembled front/pocket, so that the right sides of the front/pocket piece and the back piece are facing. Make sure the strap piece is out of the way before pinning all layers together. Use 1/4” seam allowance to stitch around the pinned pieces, leaving a 2” opening along the bottom edge of the luggage tag for turning, as shown.
- Clip the corners of the luggage tag, and turn right side out through the bottom opening, gently using the strap to help as you pull. Use the point turning tool to thoroughly turn each of the corners. Fold the unstitched seam edges inside the opening. Press. Top stitch 1/8" around the entire perimeter of the tag, closing the bottom opening as you sew.

Having grown up in a home brimming with sewing notions and paintbrushes, Amy has a deep love for all things creative. On any given day, you’ll find her knee-deep in her latest creative endeavor, with projects ranging from sewing and crafts to home decor and kid-friendly ideas. Amy believes that everyone, regardless of skill level or experience, possesses the ability to create something beautiful, and Positively Splendid was born of her passion for helping others harness their innate creative potential.